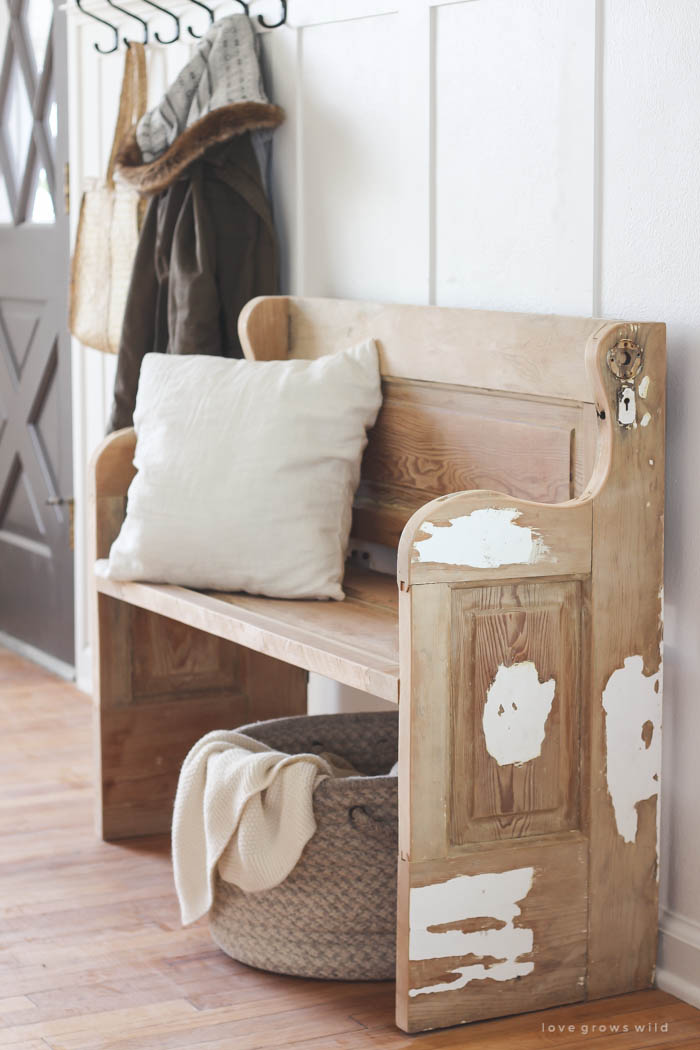
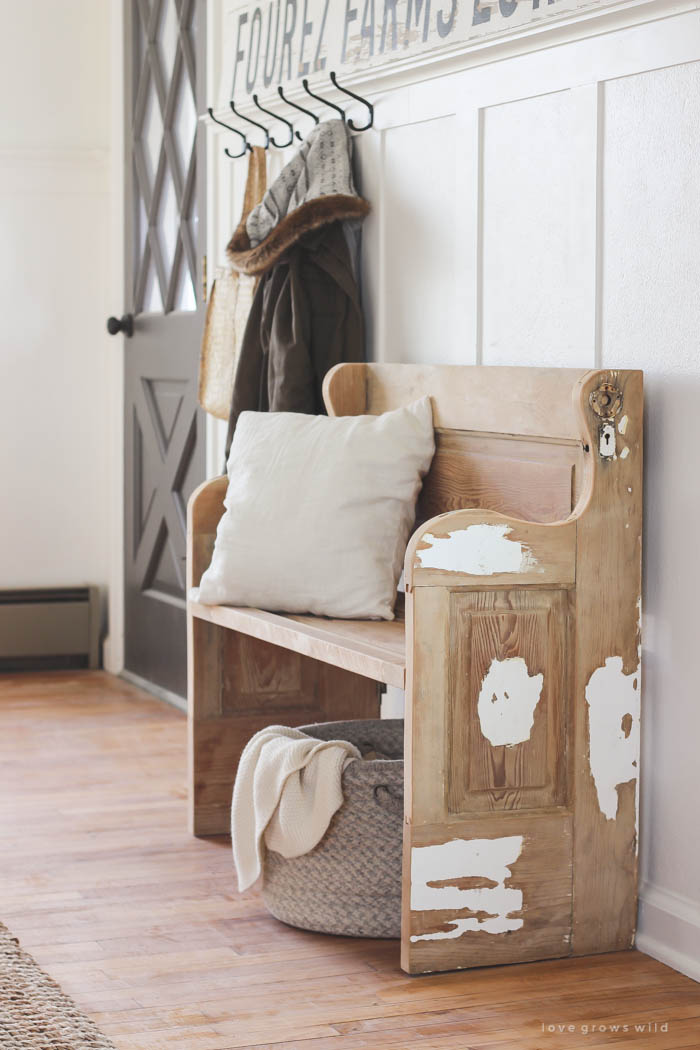
Do you remember this old door that’s been hanging out in my office? Yeah, that crooked one without much of a purpose? Well, it just got a pretty big makeover, and now not only is it functional… REALLY functional actually, but it is also the most beautiful piece of furniture I have ever laid my eyes on! Take a look at the new bench we have in our entryway:
It’s not often that I get THIS excited over a project, but this bench has completely stolen my heart. I was sitting in my office late one afternoon, typing away on a blog post, and somehow the idea hit me… I wonder if I could cut the door up into pieces and turn it into some kind of bench? I have been on the hunt for an old, antique church pew for our entryway for awhile now and have had little to no luck finding one even close to my price range. Maybe, just maybe, I could make this door into the church pew bench I’ve been looking for.
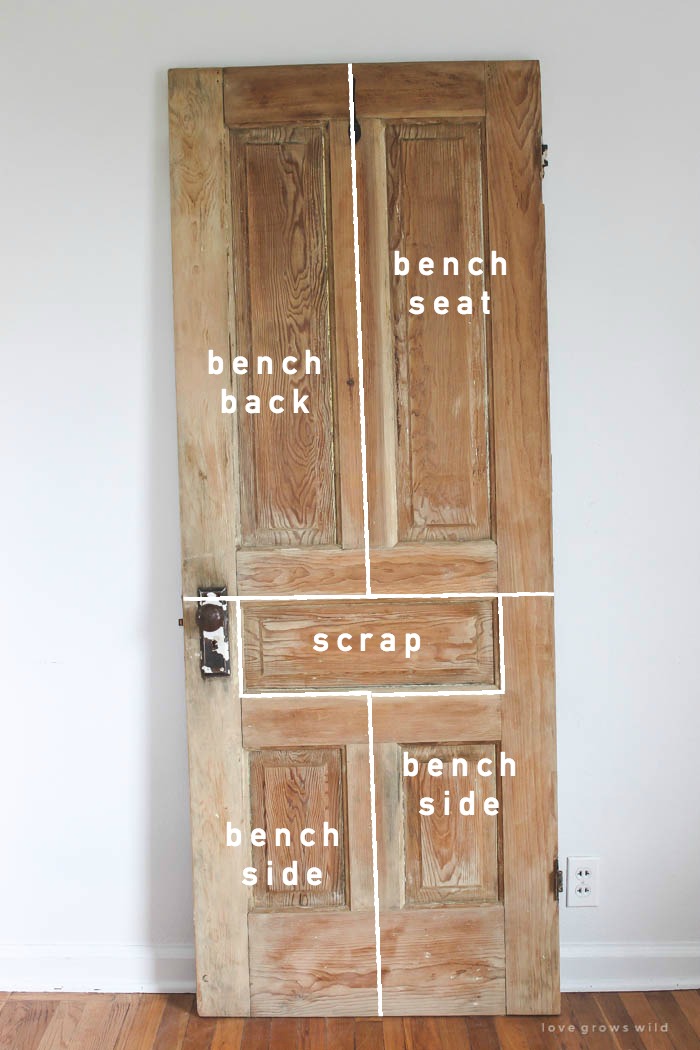
I started by removing the door knob (which was quite a task with rusted hardware) and cutting the door into sections using my circular saw. I used the recessed panels on the door as a guides:
I split the top of the door down the middle to create a back and seat for the bench.
Then I cut the bottom of the door in half to create the sides of the bench, cutting around the small panel in the middle of the door.
Note: Some of the links in this post are affiliate links, which allows me to make a small commission from your purchase, but your purchase price stays the same. Thank you for helping support our blog!
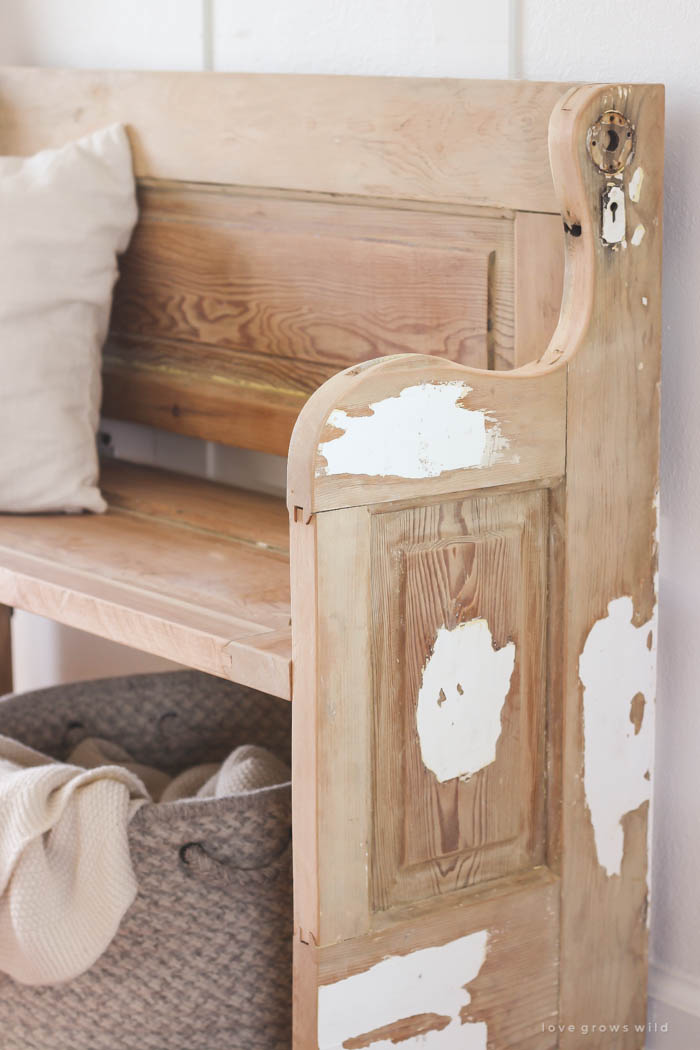
Once all the pieces were cut apart, I sanded down all the rough edges and rounded the corners a bit. At this point, it was almost 10:00 at night, and I was standing outside in our freezing cold breezeway working on the bench. Power tools and cold, nearly-numb fingers are not something I like to mix very often. I was just going to leave the top of the bench side pieces with square edges so I could head inside and warm up quicker, but Jeremy thought they would look so much better with a little curved detail. He grabbed a pencil and sketched out the curves, then cut them with a jigsaw. They turned out beautiful and gave the bench that church pew look I was going for. He earned a whole lot of brownie points from this girl on that cold, late night.
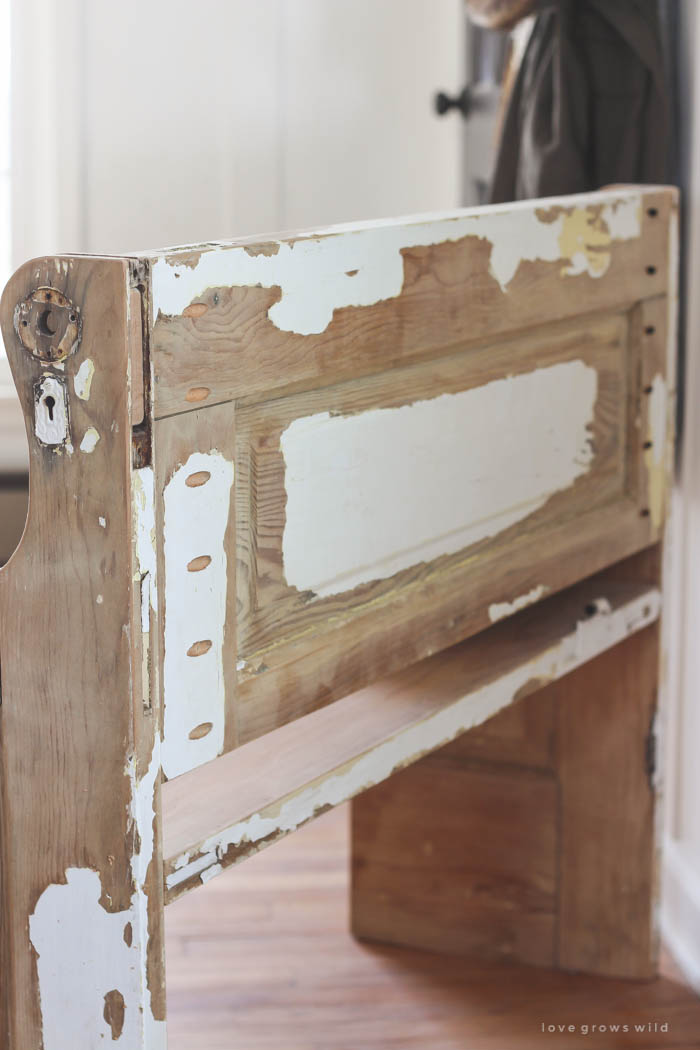
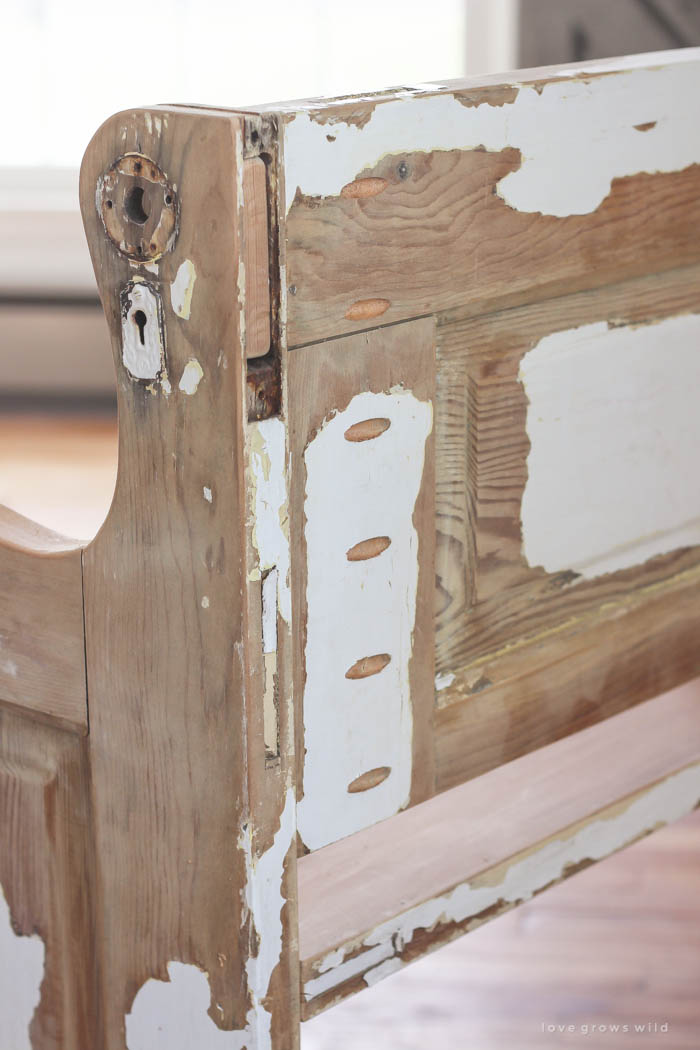
To assemble the bench, I attached the back piece to the sides using 6 Kreg Jig pocket holes and screws on either side. If you’ve never used a Kreg Jig before and like to do little furniture building projects like this, I HIGHLY recommend you pick one up. I’ve used mine over and over again since I first purchased it for our farmhouse coffee table!
To finish the bench, I attached the seat piece to the sides in the same manner as I did the back, using 6 pocket holes and screws underneath the seat on either side. This was actually a really quick and simple build, and by using the pocket holes, you don’t see any of the screws because they are hidden on the back side and underneath the bench seat.
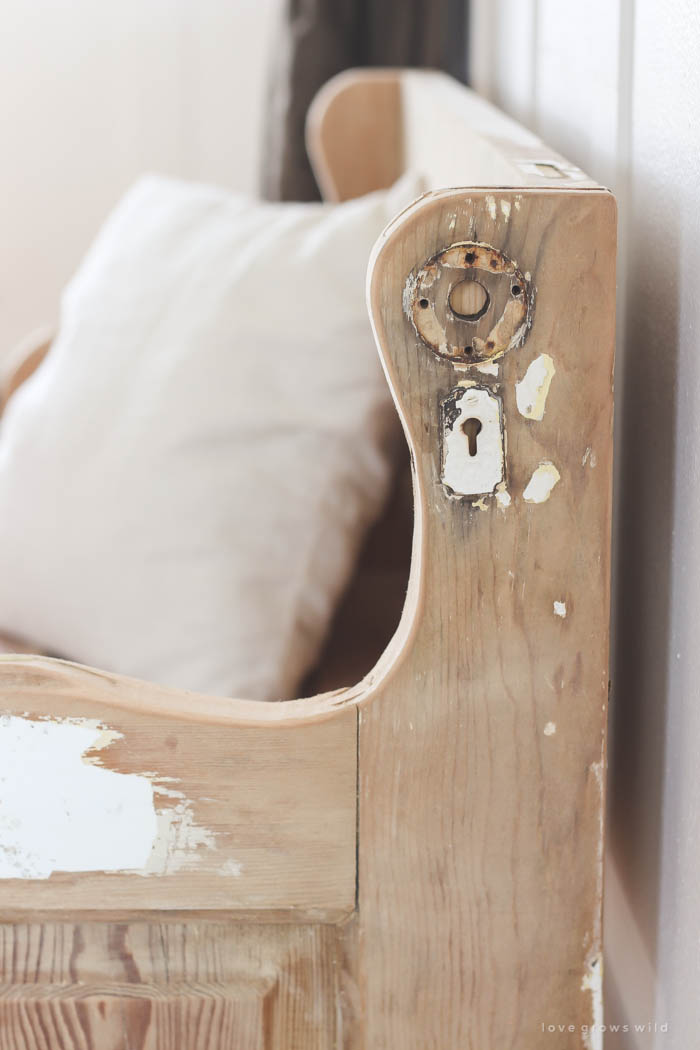
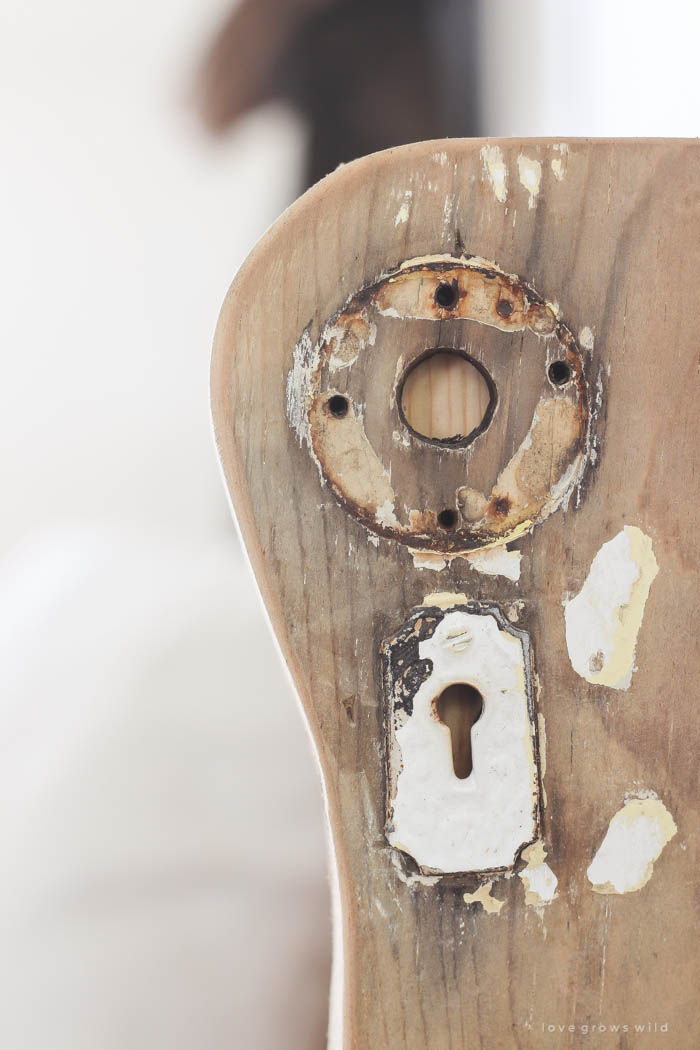
I had previously sanded all the paint off one side of the door, but the other side still had some white paint left. You all know I’m a big lover of chippy white paint, so I decided to leave the paint exposed on the outside. I think it just adds to the character of the piece. But my FAVORITE detail of the entire project is the old keyhole and doorknob hole that we were able to keep on one of the side pieces. It makes my antique, reclaimed, DIY heart extremely happy.
I’ve been making some pretty big changes in the dining room since all the Christmas decor came down a few weeks ago, and it feels so much more open and organized in here now. I’ll show you guys more of our progress in a blog post next week!
It was pretty hilarious taking these photos of the bench yesterday… we’re currently in the middle of a major kitchen renovation right on the other side of my dining room wall (details on the kitchen coming soon too!), so I have drywall and plaster dust EVERYWHERE right now. Literally 2″ of dust on every. single. surface. I mopped up the floor around the bench at least twice, if not three times, but I have a feeling it’s just going to be awhile before this house is dust-free again. The joys of home renovation, right? It actually doesn’t bother me too much because I know at the end of all this, we’ll have an amazing new kitchen to enjoy.
But until then, I’ll just enjoy my beautiful, new/old bench.
So what do you guys think of our FIRST project of 2016? I thought I’d start the year off with a bang, and it’s going to be pretty hard to top this guy. Next time you spot an old door at an antique store, be sure to snatch it up!
More projects from our farmhouse:
LET’S KEEP IN TOUCH!
Subscribe to Blog | Browse my Shop | Follow on Facebook | Follow on Twitter
Follow on Google+ | Follow on Pinterest | Follow on Instagram




Oh wow, Liz – what a gorgeous use of the door! Before I read that you had been looking for an old church pew I was thinking it had a church bench look. So, well done! Really, really nice.
This turned out great! I love the new/old charm feel it has!
That’s awesome. Great job!
I love it! It’s perfect that you were able to keep the keyhole!
The bench turned out soooo amazing!! I absolutely love it. It’s so unique. Something you obviously would never find!
I have also been on a serious hunt for an old bench to put in front of our bed with no luck (unless I want to spend and arm and a leg!). Never thought of making one out of a door! Brilliant. Might have to steal/borrow this idea!
It looks gorgeous!!! A very good idea I’d never thought myself about to remodel a shabby door into a bench piece.. By the the way the door itself looked beautiful in your office corner, too. I guess the best ideas came late at night for new projects or any resolutions 🙂
Love your creativity! This bench is beautiful. Just wondering if you could please share the dimensions of the finished product?! Great work!
Awe, thank you Jennifer! Mine is about 45″ L x 35″ H x 15″ D.
Absolutely love your bench and all the details. Amazing.
LOVE it.
I love this project! You make it look so easy. I have passed by doors hundreds of times because I just didn’t know what to do with them. I think next time I will grab them up & give this a try!
This bench was just meant to be. I swear, it is to die for. Rarely do I see a DIY project that stops my heart. I appreciate them, like them and even make one now and then. But this. This stops my heart. I think I feel jealous! I really do! In case you can’t tell, I absolutely- unequivocally- in no uncertain terms think this is as good as it gets. I love each and every detail. And, you have the ONLY one. Geez.
If you’re anything like me, you won’t be able to top your opener to this year. The bench is the best! I love doors and re-purpose them into everything, but this wins the prize!! You are amazingly talented and creative. Your love translates into every single thing you touch, and I admire you greatly. I’m building an addition/classroom onto my house with a 4′ x 6′ entry and will imitate this gorgeous bench (flattery, right)–made to my specifications–inexpensively (I have a garage full of old wonderful doors) and perfect in that space! You ARE just the inspiration I needed on this cold day in January!! I so look forward to your posts. Thank you.
I have a bedroom door that I foresee being made into a project very similar to this one! Thank you, Lisa – for the idea and the directions. Continued success as you renovate your way through 2016!
Oh my goodness; love it!
LOVE IT, wish I was as talented as you guys are, looks great!
I love your new,old bench and I love the curved arms also. Keep up thegreat posts, I look forward to each and every one.
BEAUTIFUL and GENIUS! Now I want an old door! My first 2016 project is cleaning and organizing bedroom closet. Half done today.
Best repurpose I’ve seen in a long time. Well done!
II love what you did with the door!
Simply gorgeous!
You did a beautiful job on the bench! The door knob and handle markings really add to it’s charm. Looking forward to seeing all of your recent changes, especially your kitchen!
Beautiful job! I love it!
It’s unbelievable! It looks weathered but not dirty to where people wouldn’t want to sit on it to change their shoes. It looks like the perfect entryway bench size too! Great idea!
Just amazing!! I’d have never thought to do this. I’m simply wowed!!! Excellent job!!!
What a great bench!
Well done! I’ve been wanting an old bench but not willing to pay the price for one. Thank you for providing a solution!
I always love your projects, & this one is an absolute stunner. & I am so envious of your skills with power tools!!
I love faux aged wood and this door looks brilliant.
So in love with this Liz!! I’ve got a door that would be perfect for this!! Thank you for the inspiration!! ?
Heather @onehorselane
Fantastic Liz! I am loving your blog, so genuine!
Bloody love it!! Such a brilliant up cycling project.
Wow! What a beautiful transformation. I’ve been wanting a pretty high back bench like this for my dining room table. Thanks for the idea!
This is SO clever! I’m just not this creative! I wish! Pinning this!
Absolutely beautiful, well done! 🙂
How much is the old door bench worth?
That’s a good question, Dan! I don’t plan to sell mine, so I haven’t priced it out, but I know pieces like this can sell for quite a bit.
Well, thank you Liz. I have an old door, I thought I would turn it into a recliner.
Thanks for sharing your experiences. I’m doing some research on painting. I have an old coffee table and I want to paint it. Now I have some idea to do that.
Good wood will make the room more luxurious
I have 2 old doors I got for 25.00,to go in my bathroom unfortunately for me,they were too wide ,wasn’t sure what to do with them,now I know what my sister is getting for Christmas. Thanks for your creative ideal,you need to sell them.Donna
I’ve hadb an old dor from my grandma’s house sitting for over3 years just waiting for this brilliant idea! I totally made it last weekend…THANKS for the idea. I absolutely love it!! Wish I ciuld send you a pic.
Thank you for your inspiration. We just completed doing the same thing to our old front door and it turned out amazing.