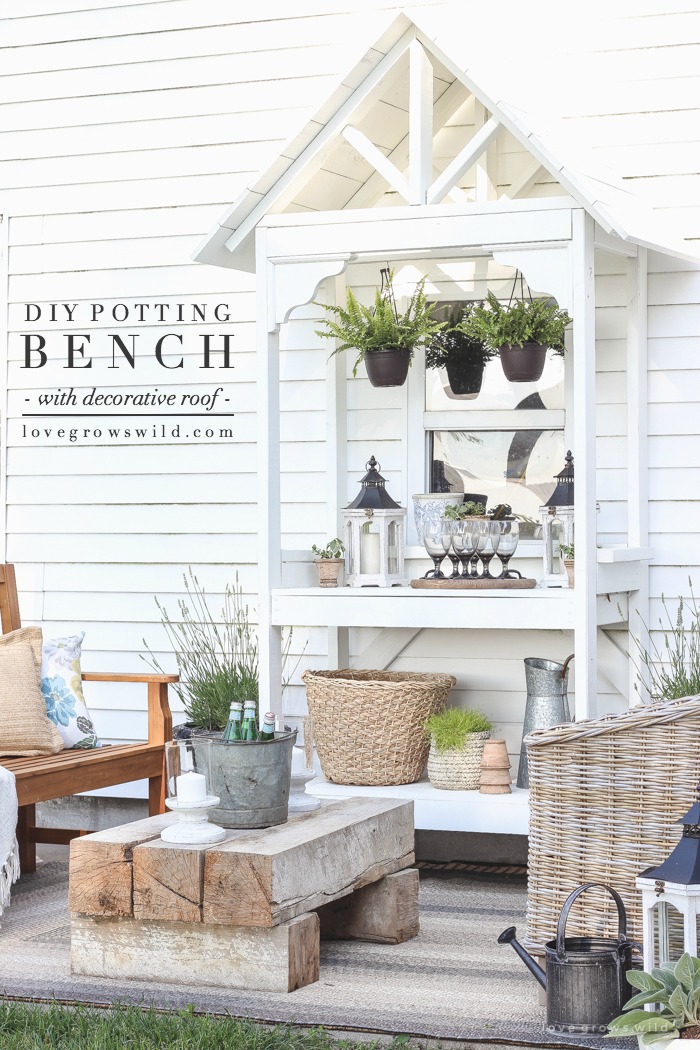
A few months ago, I never imagined our tiny, barren patio would be a place I would actually enjoy. With a little bit of elbow grease, a few DIY projects, and some new patio furniture, we completely transformed this space, and it is hardly recognizable now! (You can see the before and after here!)
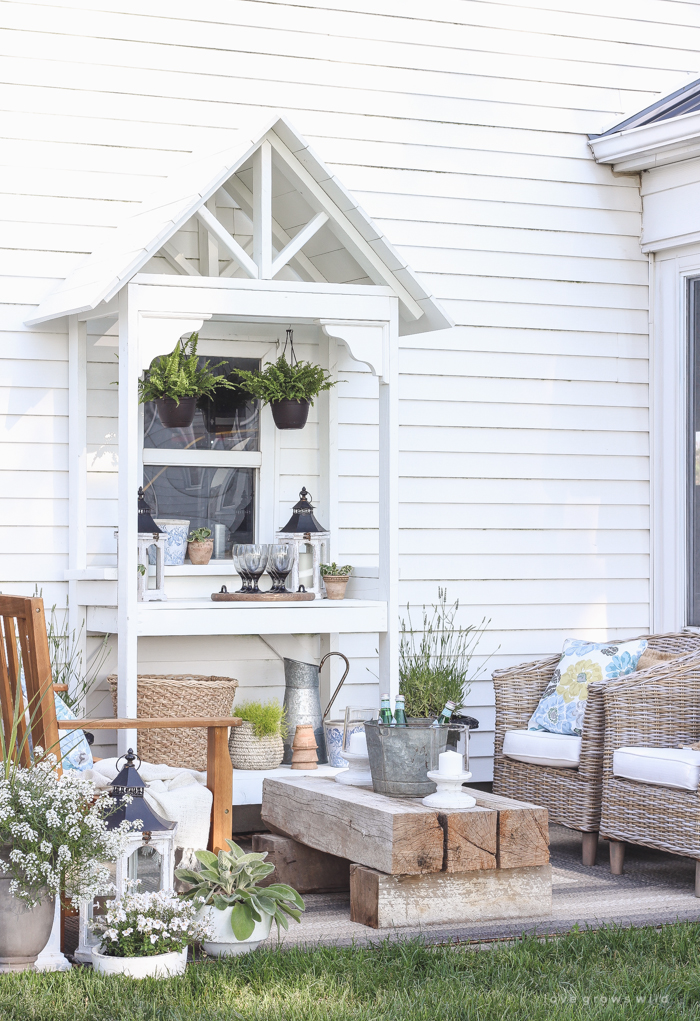
We entertain friends out here in the evenings, relax in our cozy chairs while the kids run around the yard, and soak up the sunshine surrounded by my growing garden of potted plants and flowers. This patio might be one of my favorite makeovers to date! And one of the big reasons this makeover is at the top of my list is because of the huge, beautiful, and super versatile piece of furniture we built that became the focal point of the whole patio…
… this DIY Potting Bench!
Note: Some of the links in this post are affiliate links, which allows me to make a small commission from your purchase, but your purchase price stays the same. Thank you for helping support our blog!
When I first started planning the design for the patio, I knew I wanted plenty of seating and room for plants and flowers, but I also wanted some kind of storage display where I could keep gardening tools, extra pots, and decorative things. Having somewhere to serve food and drinks when we have company over would be a bonus too!
I spent a few days doodling furniture designs and had all kinds of ideas involving shelves and corbels and a roof and extra decorative trim and… the list went on and on. I started with the basic design of Ana White’s potting bench (found here) and built it up from there. The entire piece is built with treated lumber so it will withstand the elements, and it even though it is a pretty large piece, it came together really quickly. To give you an idea of the difficulty level, I built the entire base by myself, up until it was time to add the roof. Jeremy stepped in at that point, since I needed some extra height to be able to reach the top of the potting bench.
I recommend pre-drilling all your holes to avoid splitting the wood and also using a water-resistant wood glue to make the potting bench strong and sturdy.
Cut List:
Potting Bench
4 – 2 x 4 cut to 80″ (legs)
4 – 2 x 4 cut to 22″ (bottom side aprons)
14 – 1 x 4 cut to 39″ (bottom front aprons and shelf boards)
2 – 1 x 4 cut to 24″ – both ends cut on 45º angle (cross supports)
6 – 2 x 4 cut to 16 1/4″ (top side aprons and side shelves)
4 – 2 x 4 cut to 39″ (top front apron, center support and back shelf)
Roof
4 – 2 x 4 cut to 36″ – one end cut on 45º angle (roof sides)
2 – 2 x 4 cut to 42″ – both ends cut on 45º angle (roof bottom)
14 – 1 x 6 cut to 28″ (roof boards)
remaining roof pieces will be cut as you build (2 x 4 and 2 x 3 are needed)
Supplies:
tape measure
pencil
miter saw
drill
wood glue (for exterior use)
2″ exterior deck screws
2 1/2″ exterior deck screws
2 corbels
Instructions:
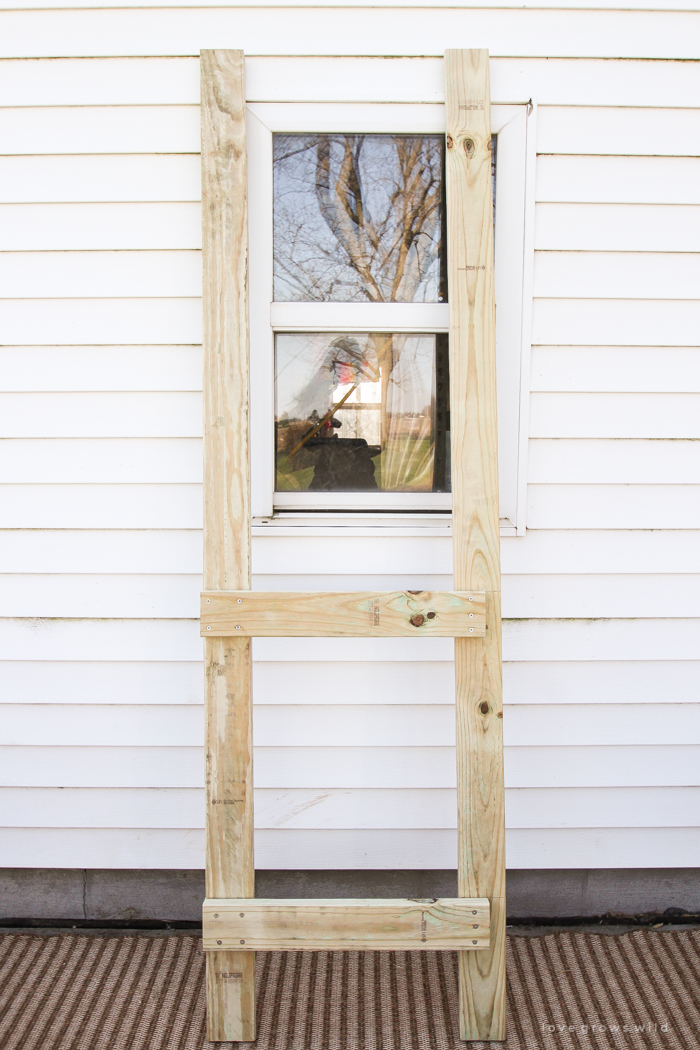
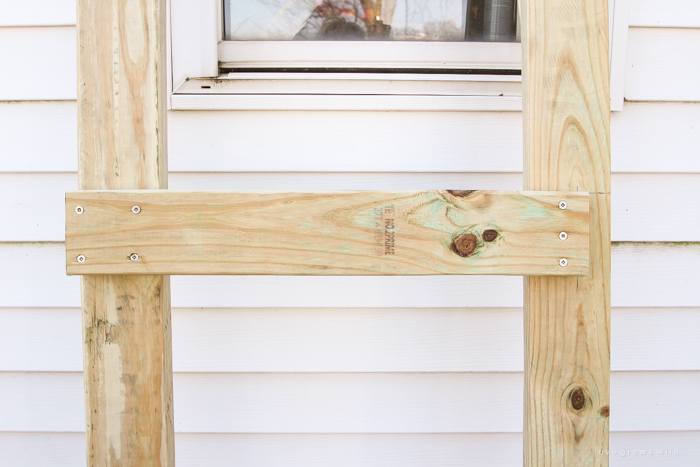
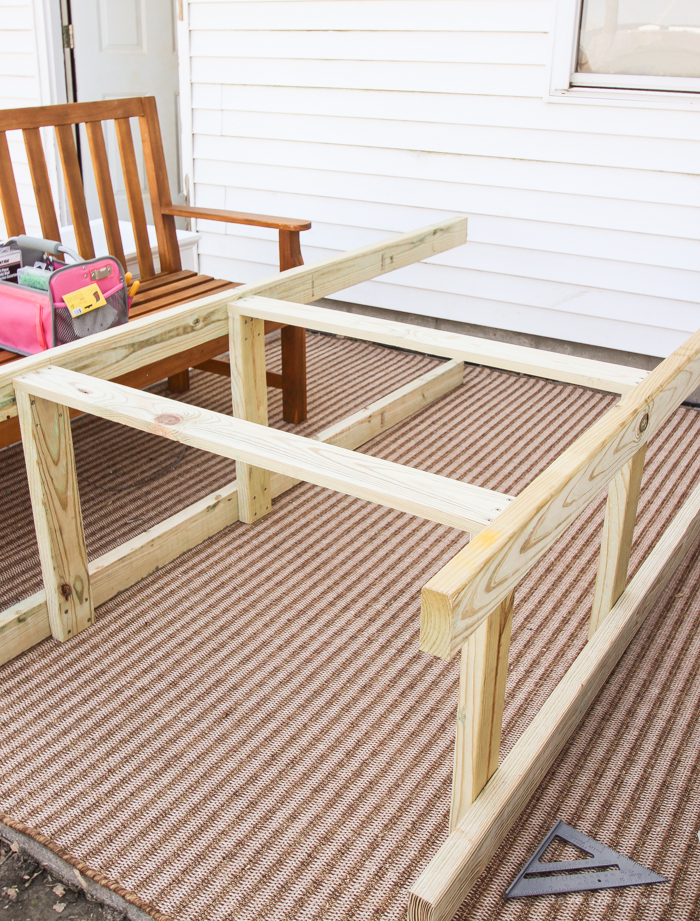
Mark one of the legs at 11 1/4″ and 35 1/4″ up from the bottom of the board. This will be a back leg. Attach two of the 22″ bottom side aprons to the back leg using 2 1/2″ screws, lining up the top of the aprons with the marks you made.
Then mark a second leg at 11 1/4″ and 35 1/4″ up from the bottom and also at 1 1/2″ in from the front edge. This will be a front leg. Attach the other end of the bottom side aprons to the front leg, matching the edges up with the marks you made.
Repeat this step with the remaining legs and bottom side aprons to build the opposite side of the potting bench.
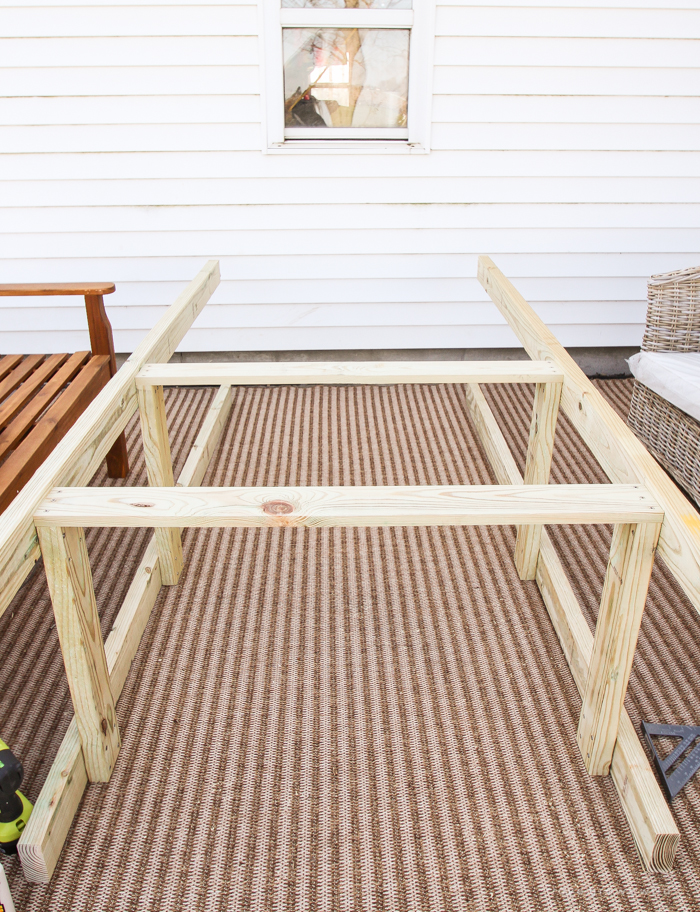
Attach the 39″ bottom front aprons to the bottom side aprons using 2″ screws.
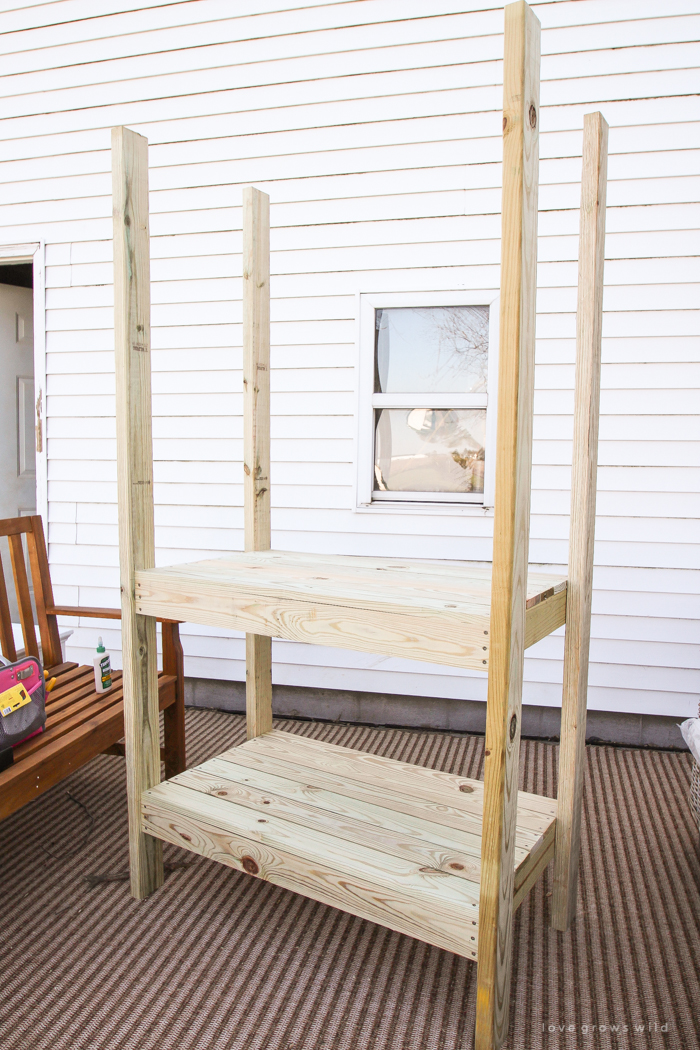
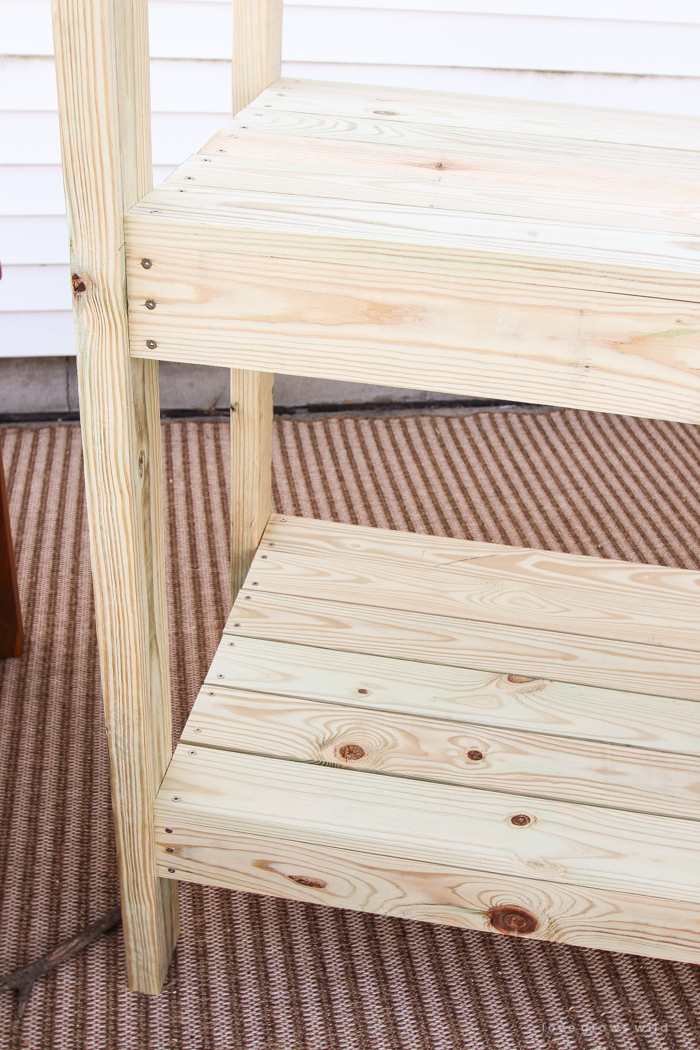
Carefully stand the potting bench up and set six 39″ shelf boards resting on the upper and lower side aprons. There will be a small gap between each board, which will allow water to drain off the potting bench easily. Attach the shelf boards to the side aprons using 2″ screws.
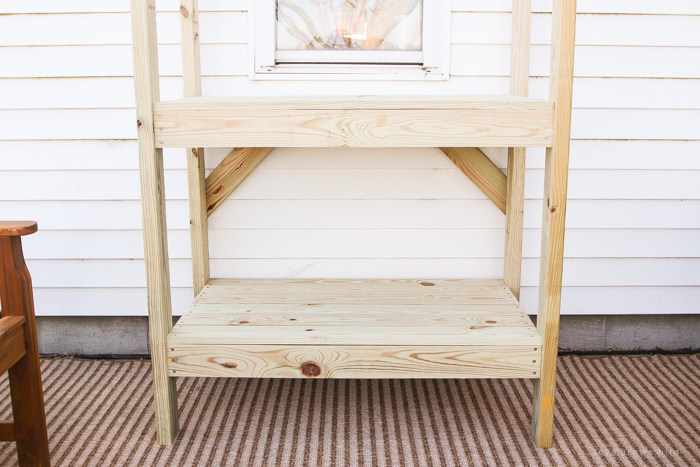
Attach the 24″ cross support pieces (with both ends cut on a 45º angle) to the back legs and back shelf board using 2″ screws.
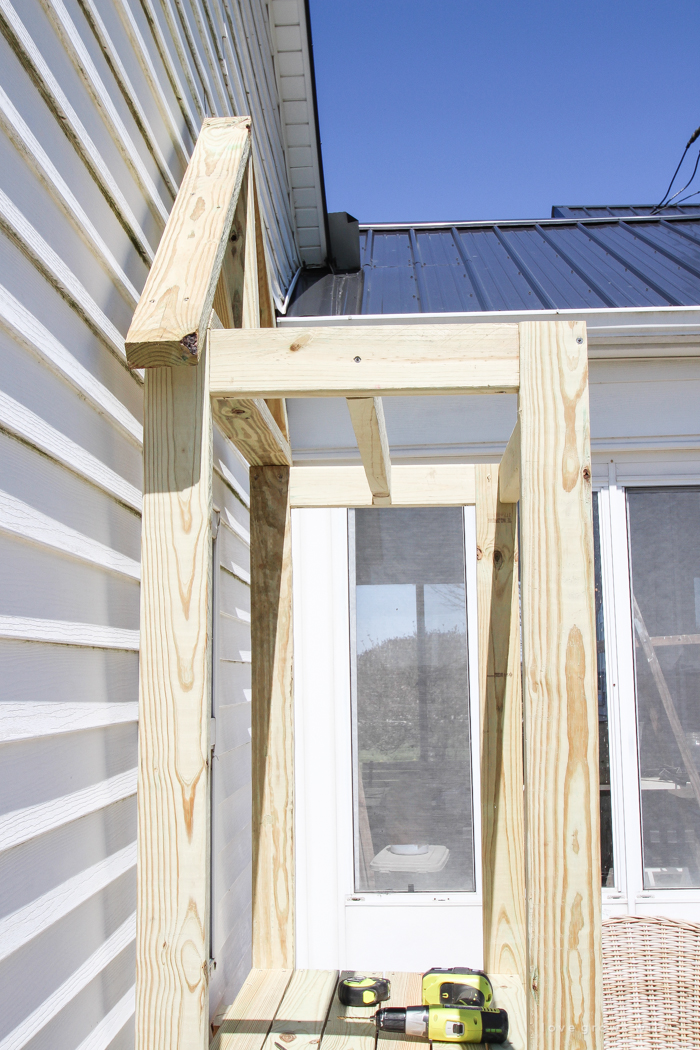
On the top of the potting bench, attach the 16 1/4″ top side aprons to the front and back legs using 2 1/2″ screws.
We were making a lot of the design up as we went along, so some of these steps can be simplified from what you see in the photos. These top side aprons could be attached in the first step when you are building the sides of the potting bench. Since we added them after the base of the potting bench was built, we just toenailed the screws into the legs. You can also use a Kreg Jig to make pocket holes as guides.
Attach the 39″ top front apron to the front legs using 2 1/2″ screws. Then attach the 39″ center support to the top side aprons.
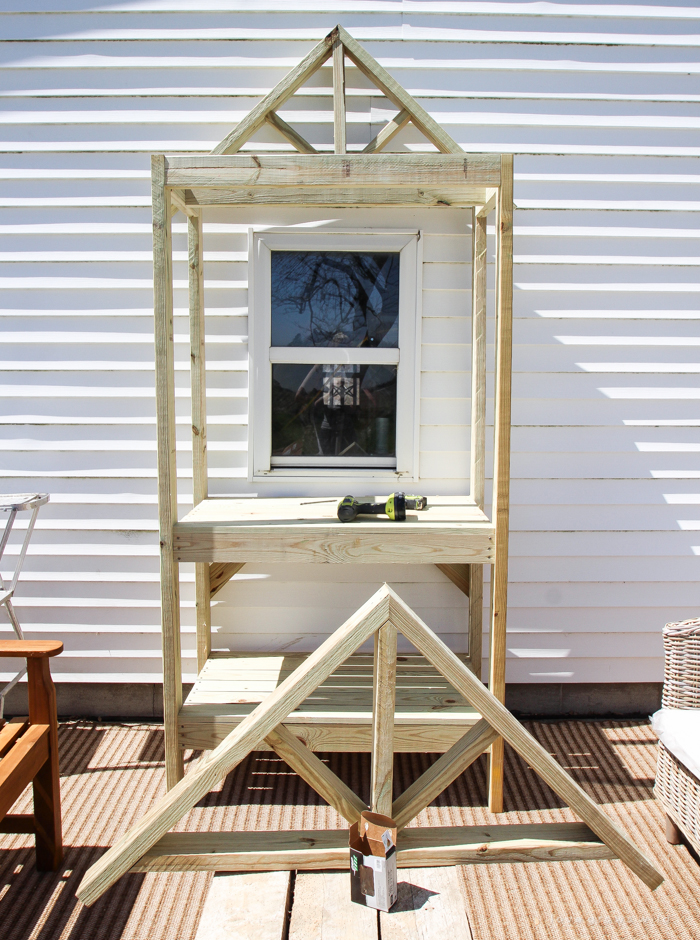
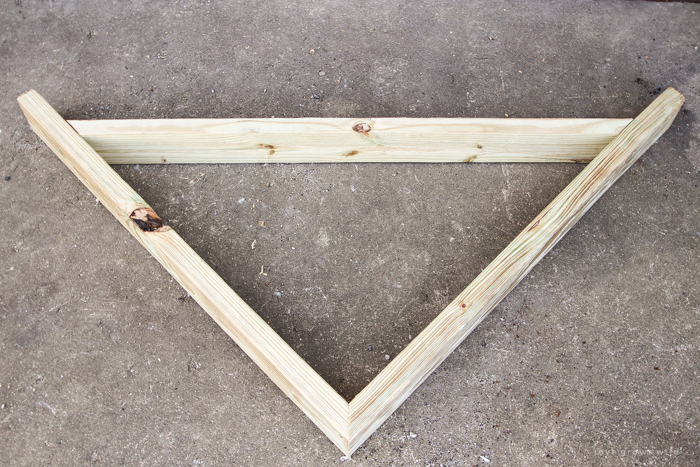
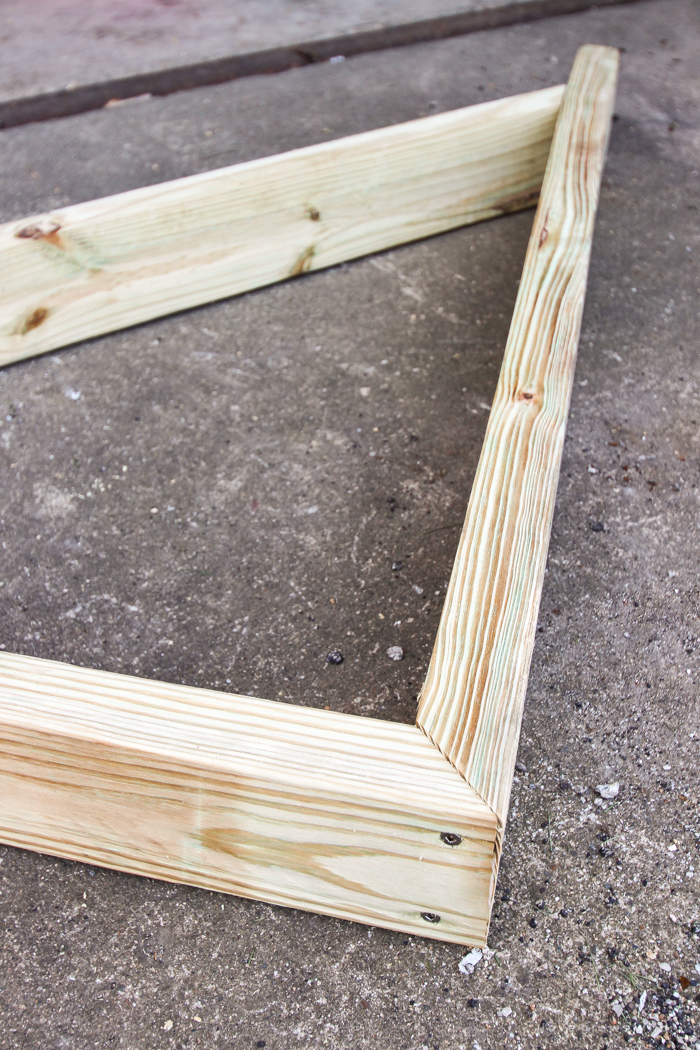
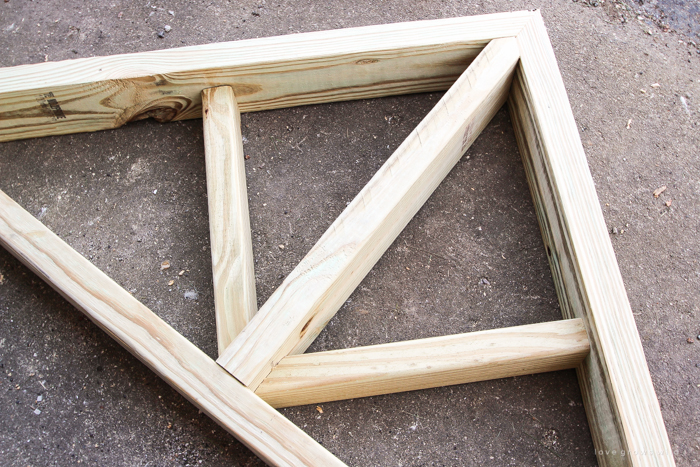
When building the roof, I highly recommend you measure and cut as you go, especially for the inner pieces. This will ensure that you get a tight fit with all the angled measurements. To begin, attach two of the 36″ roof sides with the mitered ends together using 2″ screws.
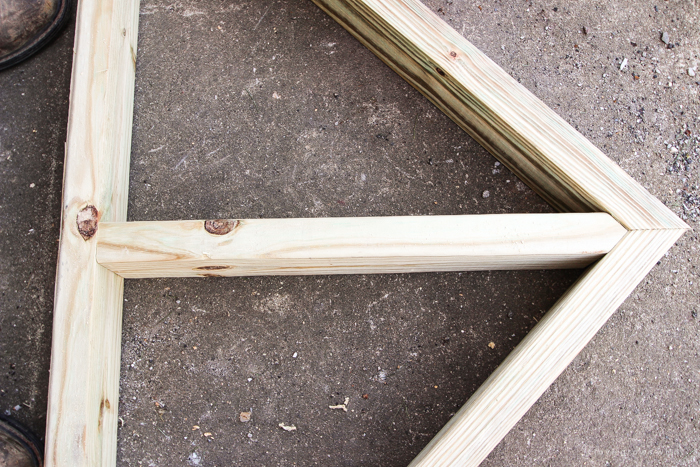
Then attach the 42″ roof bottom to the roof sides about 4 1/2″ in from the bottom using 2 1/2″ screws.
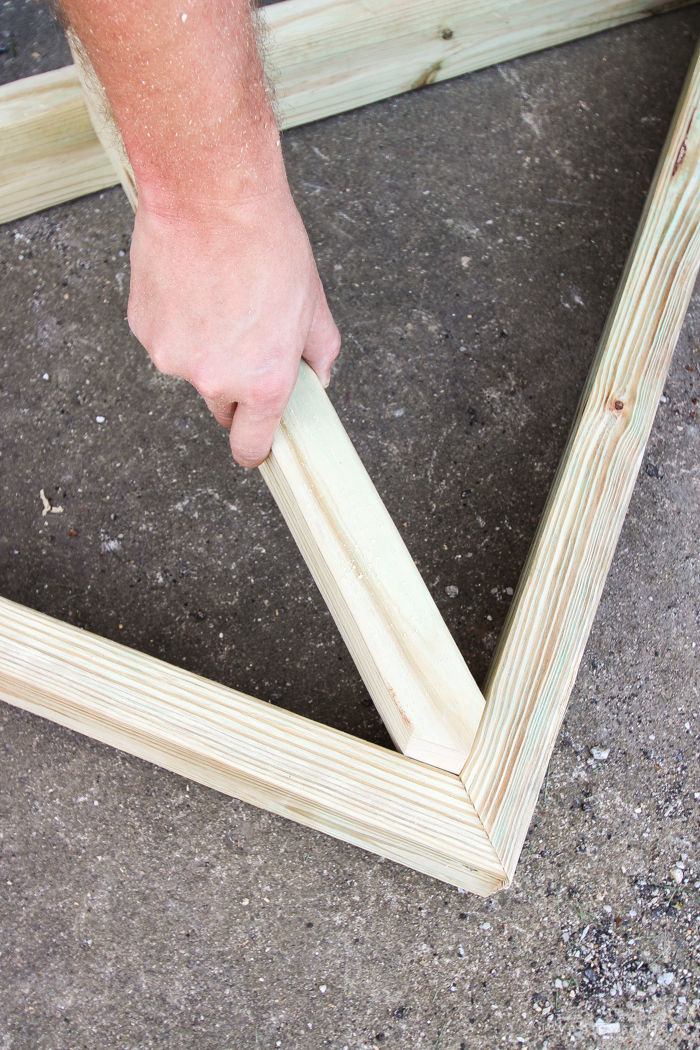
Cut one end of a 2 x 4 on 45º angles to create a point in the center. Set the point inside the pitch of the roof and mark the length you need to fit the 2 x 4 inside the roof bottom. Cut the 2 x 4 on your mark and attach inside the roof using 2 1/2″ screws from the roof bottom. (Ours measured 20″ from tip to end)
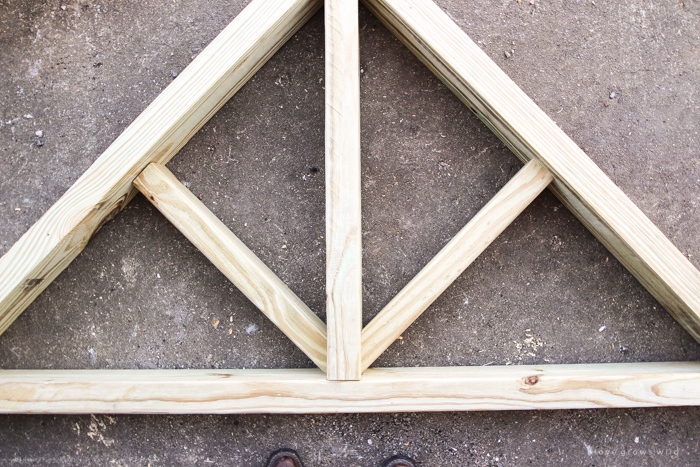
Now cut a 2 x 3 with a 45º angle on one end. Set the angled edge on the center 2 x 4 you just added and mark where the 2 x 3 meets the roof side. Cut the 2 x 3 on your mark and attach with 2 1/2″ screws through the roof side. (Ours measured 13 1/2″ from edge to edge)
Repeat with a second 2 x 3 on the other side. We chose to use a 2 x 3 for these pieces to create some depth and dimension in the roof details, but you could also just use a 2 x 4 to cut down on needing multiple board sizes. If you want to replicate what we did, just line the 2 x 3 pieces up with the back of the roof edge to create the inset look.
Then build a second roof support starting with the roof sides and roof bottom, as you did before.
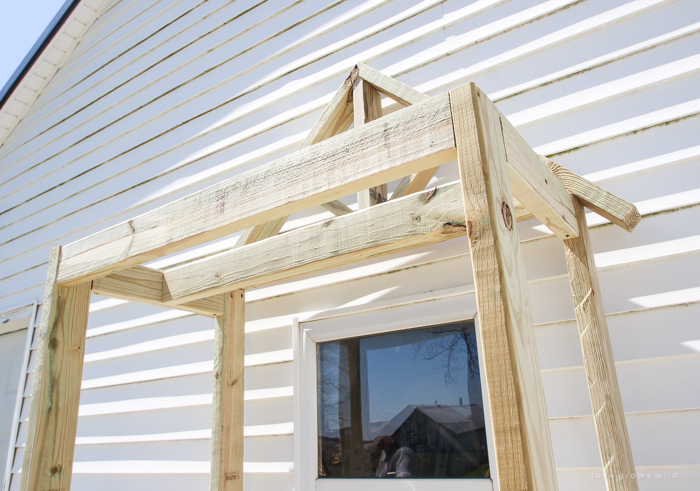
Set the roof supports on top of the potting bench legs and secure with 2 1/2″ screws toenailed through the legs into the roof bottoms.
Starting at the center of the roof and working your way down, attach seven 28″ roof boards on either side of the roof using 2″ screws.
Then add the 16 1/4″ side shelves between the front and back legs sitting just above the upper shelf. One board sits vertically between the legs (toenailed into the legs with 2 1/2″ screws), and one board sits horizontal (screwed in from the top with 2 1/2″ screws).
Add the 39″ back shelf between the back legs in the same manner as the side shelves.
Finally, add the corbels to the front of the potting bench between the front legs and top front apron. Your potting bench is done!
Since this is such a massive piece with many different angles, I decided to use my paint sprayer to paint the potting bench. I bought this Wagner sprayer a few years ago when refinishing my office hutch, and it has become one of my favorite DIY tools. It comes with a fine finish sprayer that is able to get a really smooth finish on furniture, and I’ve been really happy with it! Since this piece of furniture will be living outdoors, I used Dutch Boy Dura Weather MaxBond paint in the color Swan White in a satin finish (purchased at Menard’s). I did one coat of primer first (Zinsser Bulls Eye 1-2-3 Plus Primer) and two coats of the Dutch Boy Swan White.
I will note that this potting bench is big, tall, and pretty heavy once it is all built, so plan ahead about where you want to build and paint this piece! Jeremy and I very carefully loaded our potting bench into the back of the Gator (a.k.a John Deere farm utility vehicle) and drove it over to our big barn where I wanted to paint it. This is probably not something you want to carry around long distances!
Even though this is one of the biggest furniture builds I’ve done and has quite a few steps, it actually was a pretty simple, straightforward build that could easily be completed in a day. It does help to have two people, especially once you start on the roof, and having a paint sprayer is a big time saver too!
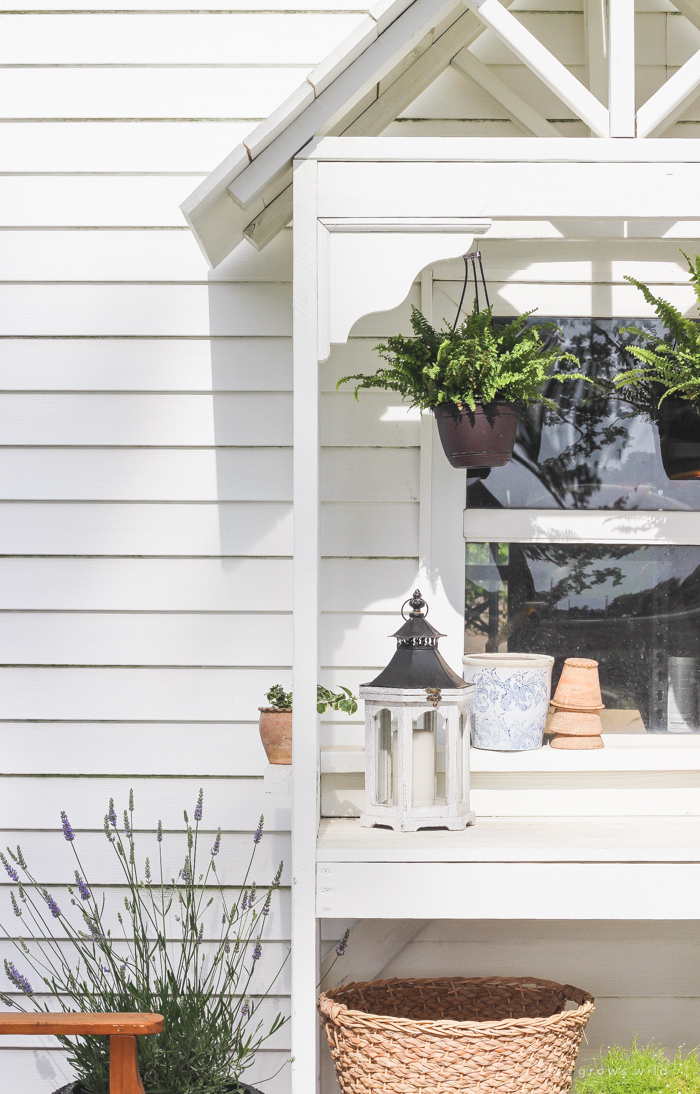
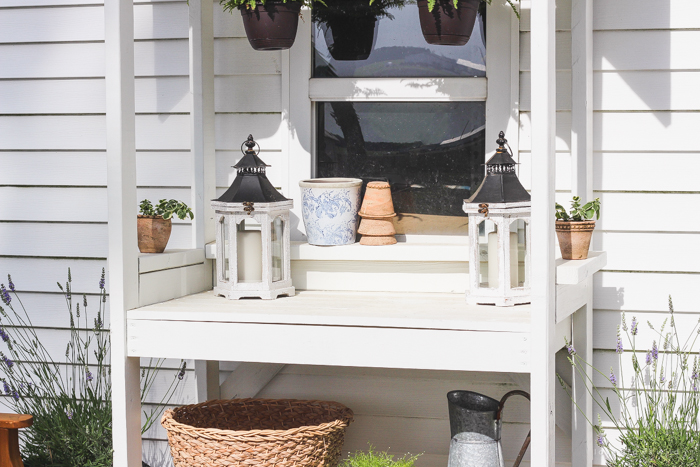
There are no adequate words to describe how much I love this potting bench Jeremy and I built together. It’s always special when he and I can work on projects as a team, but the end result of this collaboration turned out to be pretty spectacular! A potting bench is a potting bench, but this one is all about the details…
the gorgeous farmhouse-style roof…
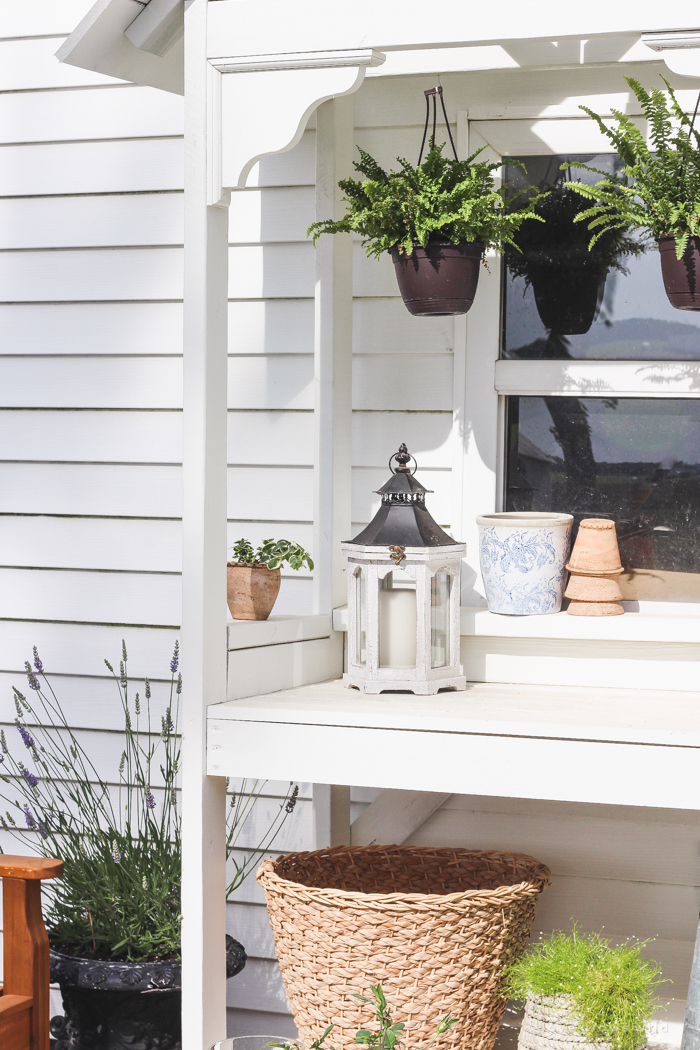
the corbels that add a touch of cottage…
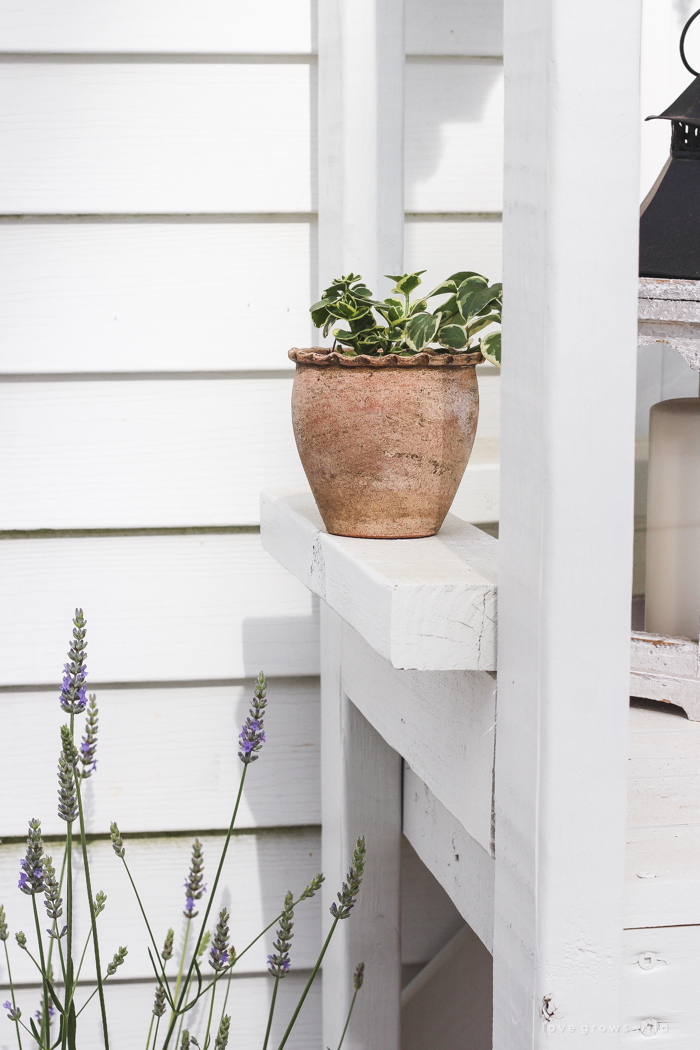
the extra shelves for storage…
the center beam to hang baskets or lanterns from…
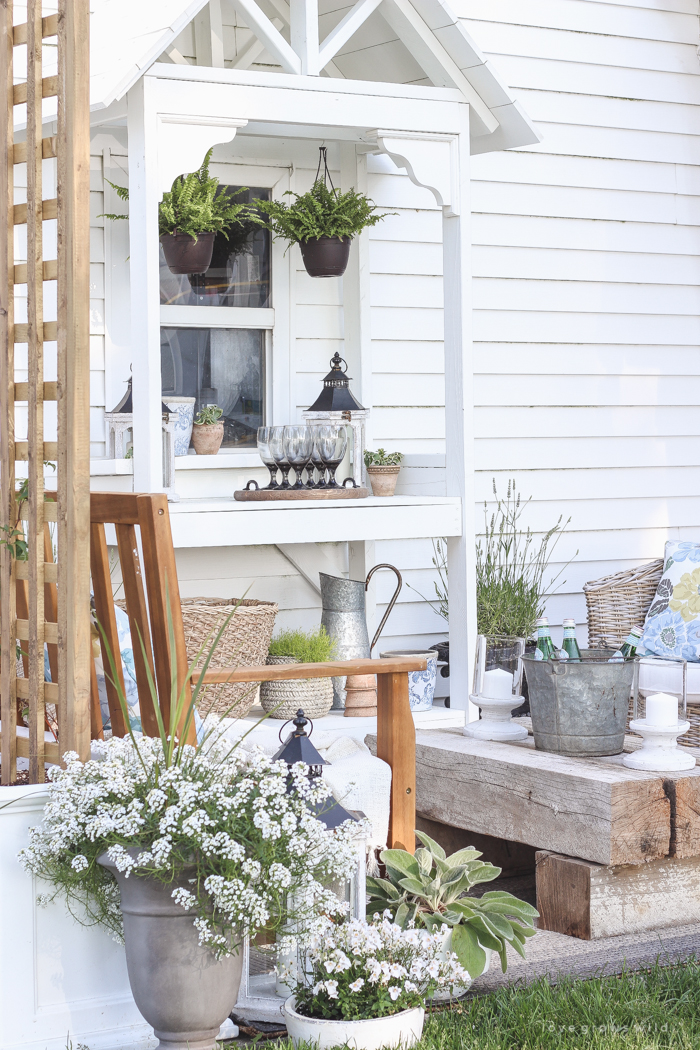
This is the perfect focal point I envisioned for our patio!
Right now I am mostly using the potting bench to display plants and flowers, but when we do entertain guests, it is great for setting up a bar area and serving appetizers. I love how versatile it is!
So what do you think of our new potting bench, guys? I’d love to hear your feedback, so please leave me a comment below! Thank you so much for visiting, sweet friends!
Sources
wood bench – Joss and Main
floral pillow – tutorial + fabric from Joann
neutral pillow – Target
wicker chairs – Joss and Main
trellis planters – tutorial
lanterns – Joss and Main
candleholders – Joss and Main
small clay pots – Joss and Main
braided pot – Joss and Main
metal watering jug – Joss and Main
fringe throw blanket – Joss and Main
rug – At Home
Find More Outdoor Ideas Here:
Summer Patio Makeover
Front Porch Makeover
DIY Trellis Planter
Outdoor Table Setting on the Farm
Antique Ladder Shelving
Easy Outdoor Bench
Little White Barn Spring Decor
LET’S KEEP IN TOUCH!
Subscribe to Blog | Follow on Instagram
Follow on Pinterest | Follow on Facebook




Oh I have been waiting for this, Liz! This is the sweetest potting bench I’ve ever seen. Thanks for the tutorial! Definitely pinning this 🙂
Love it!
I absolutely LOVE this piece Liz!! The roof not only looks amazing but is so practical for keeping the items inside from getting totally soaked during a rain storm.
Well that is adorable!
It turned out so well! I am hoping to build a potting bench/serving area this summer, and this has definitely inspired me. Thanks for sharing all of the details 🙂
Oh my this looks amazing. I have been looking to make a potting bench this year. I think this one is a bit too big for our space but so gorgeous! Love the whole patio area.
oh my gosh … your potting bench is amazing !! Great job and I hope you and Jeremy had fun putting it all together.