• Home
  • MEET LIZ
  • contact
  • Blog
  • E-DESIGN SERVICE

Love Grows Wild

  • Home
  • Liz Fourez Interiors
  • Our Home
    • bathroom
    • dining room
    • entryway
    • exterior
    • kids bedroom
    • kitchen
    • living room
    • master bedroom
    • office
    • playroom
  • Project Gallery
    • diy decor
    • decorating advice + inspiration
    • furniture makeover
    • woodworking
    • crafts
  • Seasonal
    • spring
    • summer
    • fall
    • winter
  • Recipes
    • appetizers/snacks
    • beverages
    • breakfast
    • dessert
    • meal ideas
    • side dishes
  • SHOP
    • My Book
    • Shop LGW Style
    • love grows wild market
Decorating and Home, Our Home, Seasonal, Tutorials

DIY Trellis Planter

May 13, 2016

Pin
Share
Tweet
Email
Print
A boring, bare patio turned into a gorgeous outdoor entertaining area! See the incredible before and after of this beautiful patio makeover!

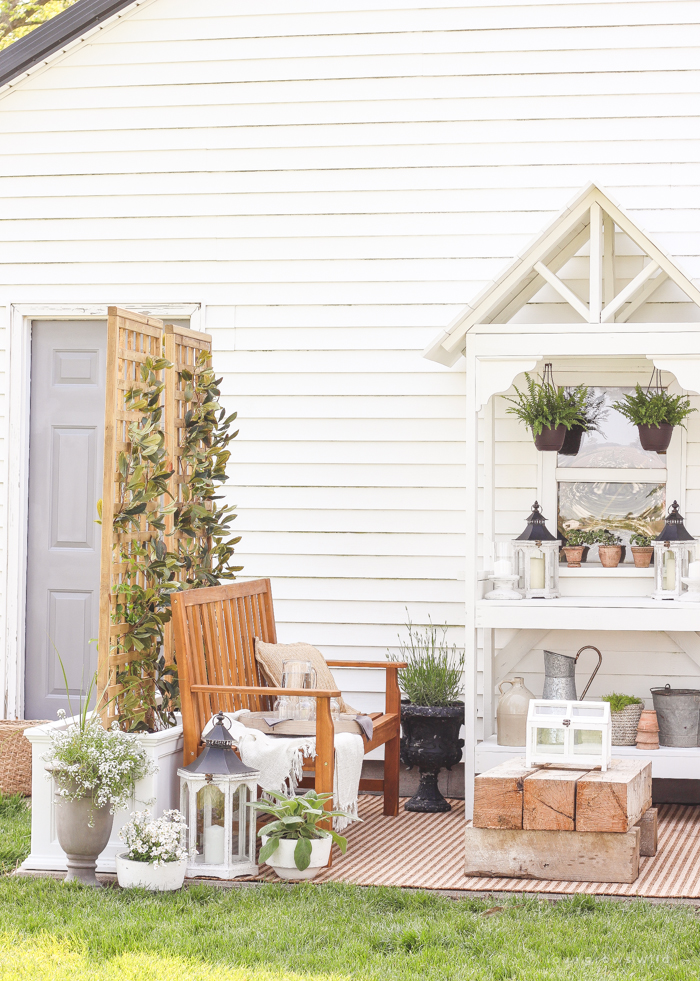
As promised in our Summer Patio Makeover I shared earlier this week, I am going to show you how I made these DIY Trellis Planters today! These are perfect for adding a little bit of privacy to your deck, garden, or patio, and this is a great project for beginners to try too!

Learn how to make this gorgeous DIY Trellis Planter for your garden or patio! Perfect for adding a little privacy and a great project for beginners!

Learn how to make this gorgeous DIY Trellis Planter for your garden or patio! Perfect for adding a little privacy and a great project for beginners!

Before we get started, I want to say thank you so much for all your sweet comments on our patio makeover. They mean the world to me, and I hope you feel inspired to tackle your own outdoor spaces now too! And yes, I will have a tutorial coming up soon for the white potting bench we built!

When I first got asked to participate in this patio makeover tour, I thought, “oh boy… how am I going to make this work?”

For the last few years, our patio has been a catch-all for random outdoor furniture, the kids’ toys, and other miscellaneous junk. Jeremy and I have plans for building a deck on the back of the house hopefully soon, so I have never really given much thought to doing anything with our patio. It’s quite small and just to the left of the patio sits a big fenced-in area for our dogs that isn’t exactly very pretty to look at. So what’s a girl to do?

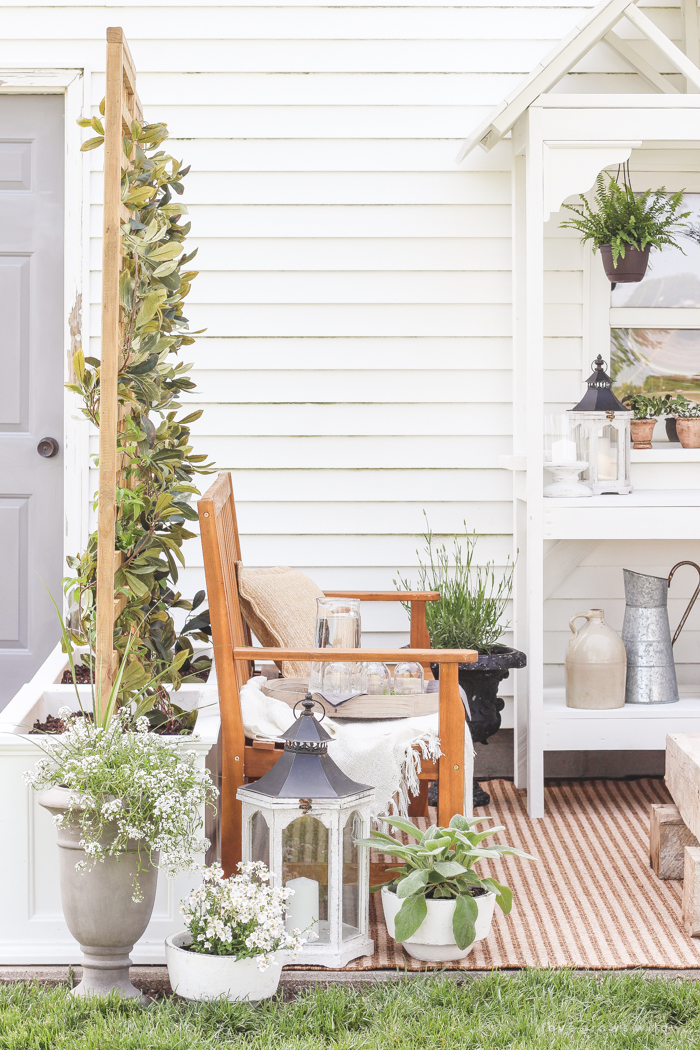
Well, I can’t move the dog pen, but I CAN hide it a bit! I came up with an idea to install tall sections of trellis along the left side of the patio, creating a privacy wall. Once I get some vines growing up the trellis, the dog pen won’t be as visible when we’re sitting out here, and it will also help create a cozy atmosphere on the patio.

Note: Some of the links in this post are affiliate links, which allows me to make a small commission from your purchase, but your purchase price stays the same. Thank you for helping support our blog!

Here are the supplies needed:

2-foot x 6-foot trellis panel
2 x 2 pressure-treated lumber
circular saw
tape measure
wood glue
brad nail gun
2″ brad nails
wood stain
paint brush
large rectangular planter (I used this one from Joss and Main)

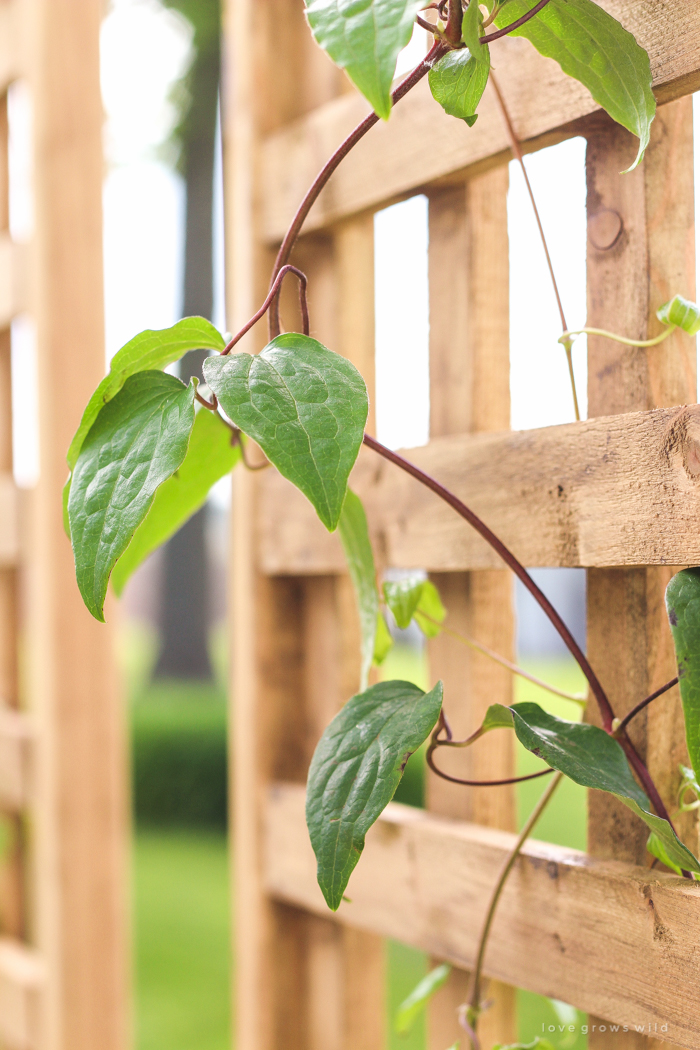
As far as the trellis/lattice goes, I found a few different types at my home improvement store. Some are thinner, some are thicker, some are pressure-treated, some have square openings, and some have diamond openings. I went with the squares because they felt more farmhouse to me, and I also bought the “heavy-duty” thicker trellis.

I decided to add a frame around the trellis with 2 x 2 boards to give the trellis a more substantial, finished look and also to make it a bit sturdier. To do so, I measured the length of the trellis (6 feet, in this case) and cut two 2 x 2’s to that length. I applied a small bead of wood glue along the 2 x 2’s and attached them to the sides of the trellis with brad nails. Then I measured the width of the trellis, which was 27-inches including the side 2 x 2’s, and cut one piece of 2 x 2 to that length. Again, I applied wood glue along the edge, set the 2 x 2 on top of the trellis (it should be sitting flush with the trellis and 2 x 2 ends), and attached the piece with brad nails. Since the bottom will be inside the planter, I didn’t worry about adding a piece on bottom. I repeated the process to build a second framed trellis so we would have two on our patio.

Learn how to make this gorgeous trellis planter for your garden or patio! Perfect for adding a little privacy and a great project for beginners!

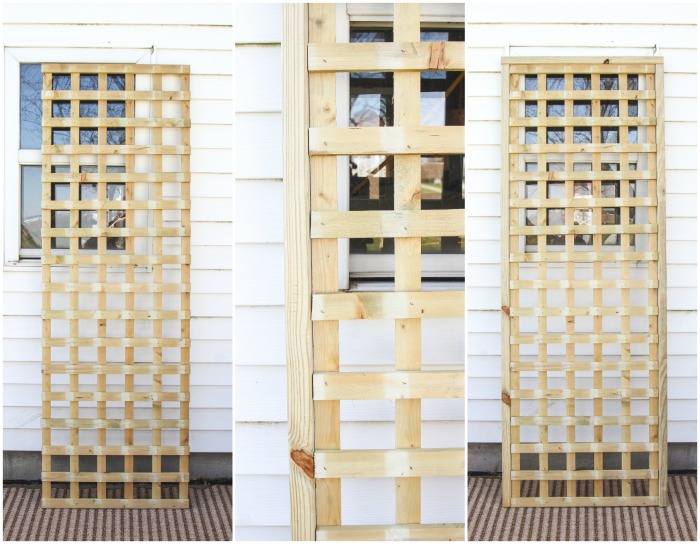
Adding the 2 x 2 frame is optional, but I definitely like the look it adds to the trellis! Once the framed trellis was finished, I stained the entire piece using a mixture of leftover stains I had on hand, but I would say it is closest to Minwax’s Early American or Weathered Oak.

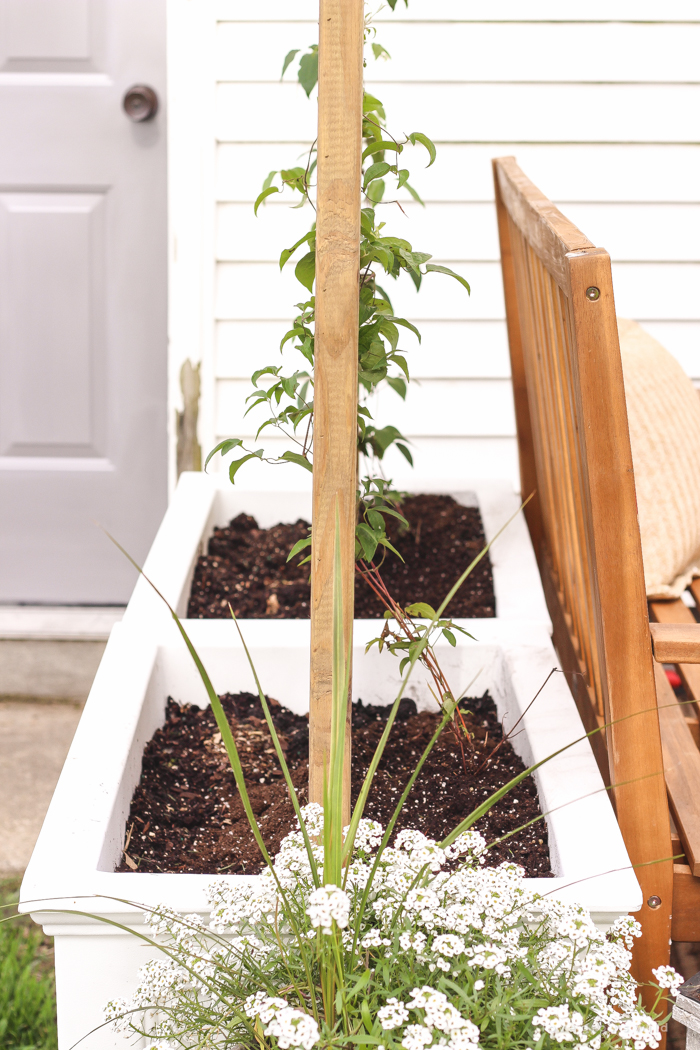
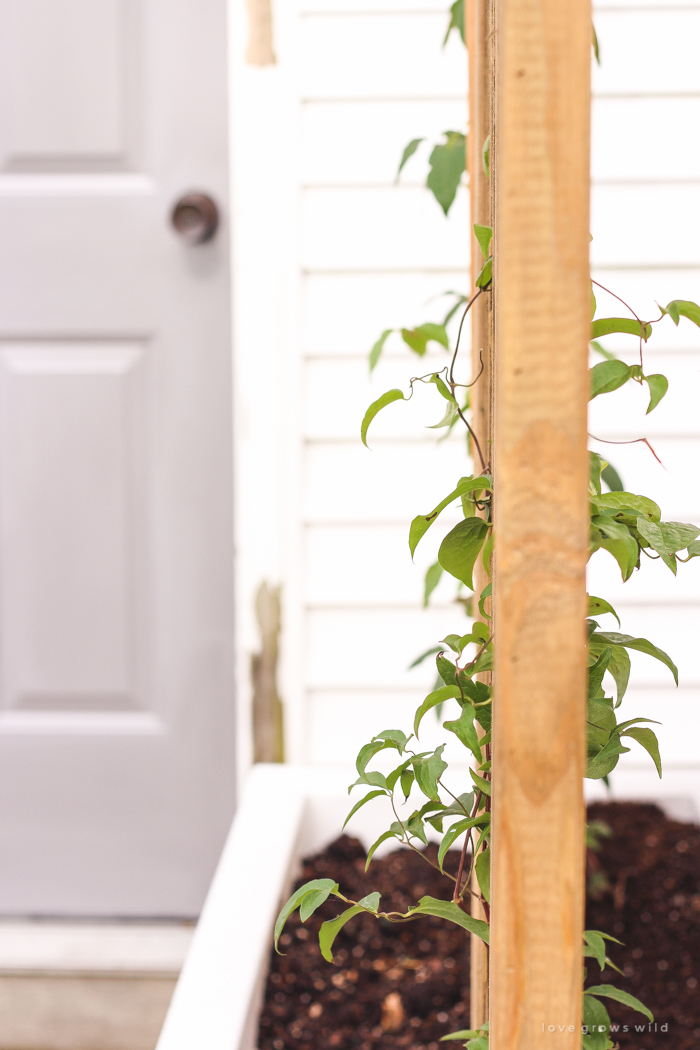
Once the stained wood was completely dry, I put the planters together. Getting the trellis to stay upright involved a little bit of trial and error, but we ended up using some large rocks and a few pieces of extra lumber to hold them in place. First, I filled the bottom of the planters with a little bit of potting soil to create a base. Then I set the trellis in the center of the planter and stacked large rocks on both sides to help hold it in place while I finished filling the planter up with soil. I was hoping the rocks alone would hold the trellis, but once the wind started blowing, I could tell that it needed some extra support. Jeremy measured and cut pieces of scrap wood to fit between the planter wall and the trellis frame and wedged them in tightly on each side. With the rocks at the bottom of the planter and the wood at the top, the trellis is staying in place beautifully now. I just added another layer of soil to hide the wood braces and headed to the garden center to pick out some plants!

Learn how to make this gorgeous trellis planter for your garden or patio! Perfect for adding a little privacy and a great project for beginners!

Learn how to make this gorgeous trellis planter for your garden or patio! Perfect for adding a little privacy and a great project for beginners!

Learn how to make this gorgeous trellis planter for your garden or patio! Perfect for adding a little privacy and a great project for beginners!

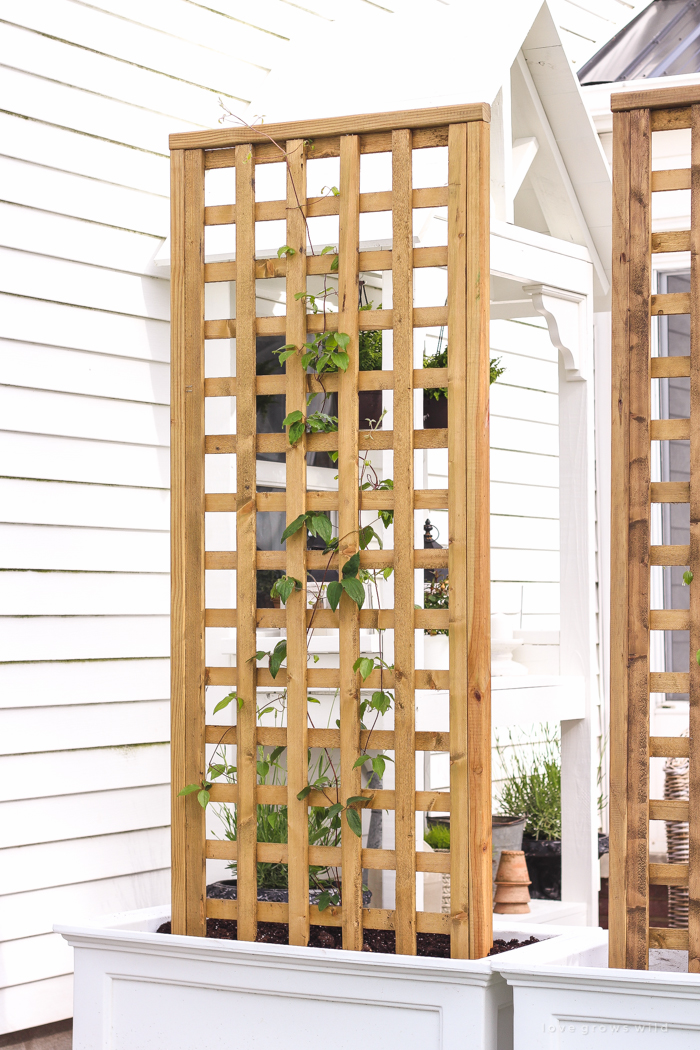
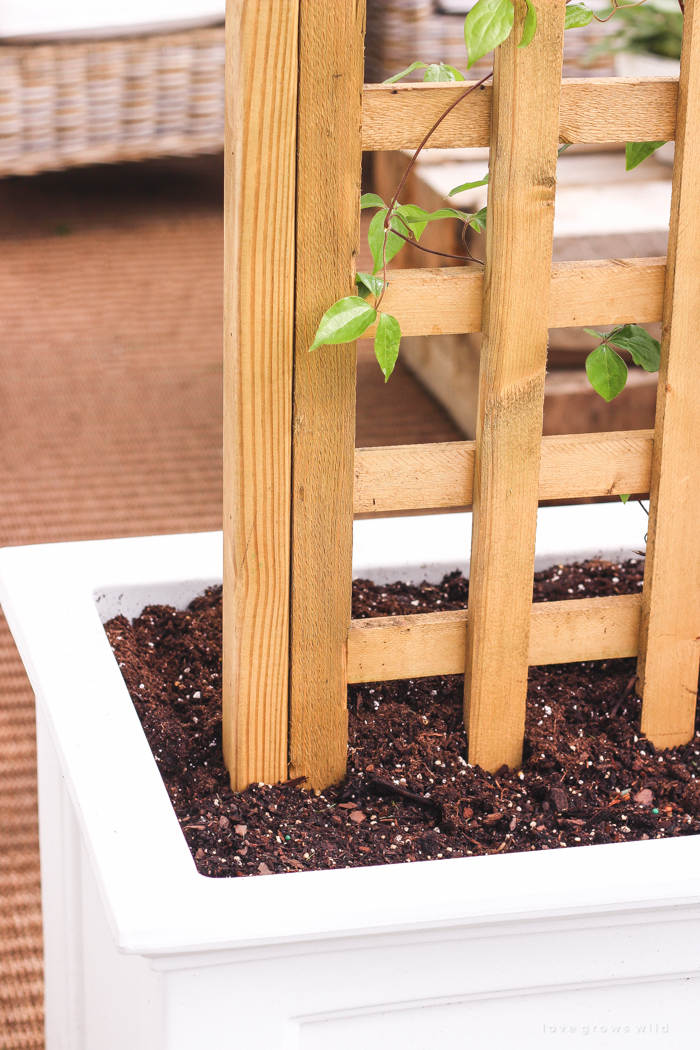
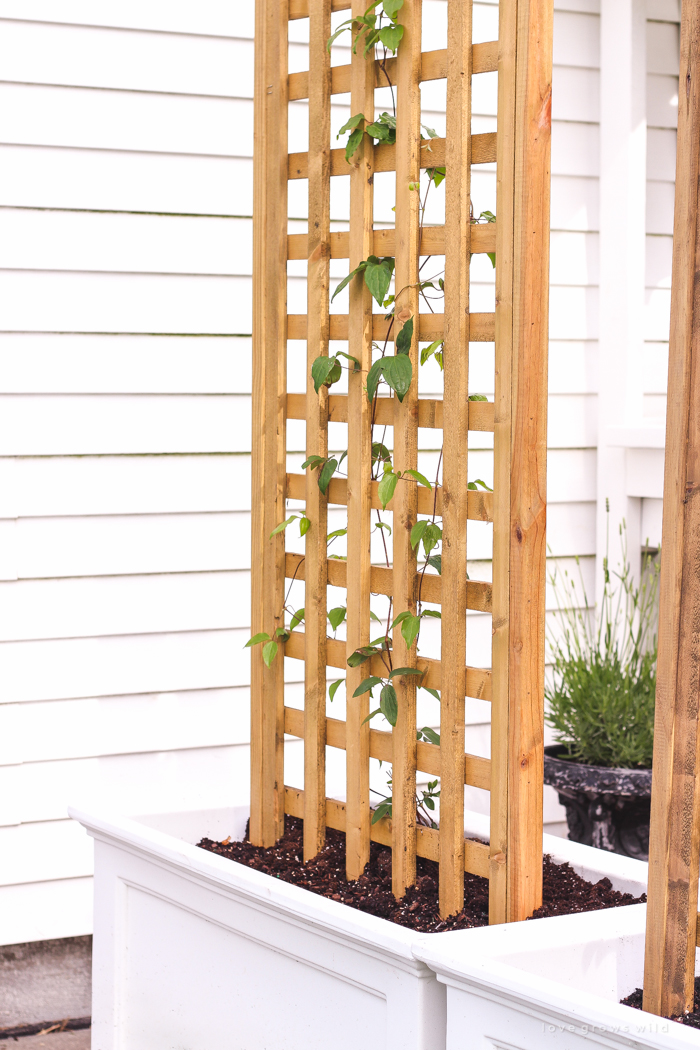
Now I am the first person to admit that I don’t have much of a green thumb, but after some research I decided to try growing clematis on the trellis. I picked up two plants and planted one in each planter. They are supposed to spread out quite a bit, so I didn’t want to overcrowd the trellis (plus, they aren’t exactly cheap plants), but I hope they grow and fill in quickly!

Learn how to make this gorgeous trellis planter for your garden or patio! Perfect for adding a little privacy and a great project for beginners!

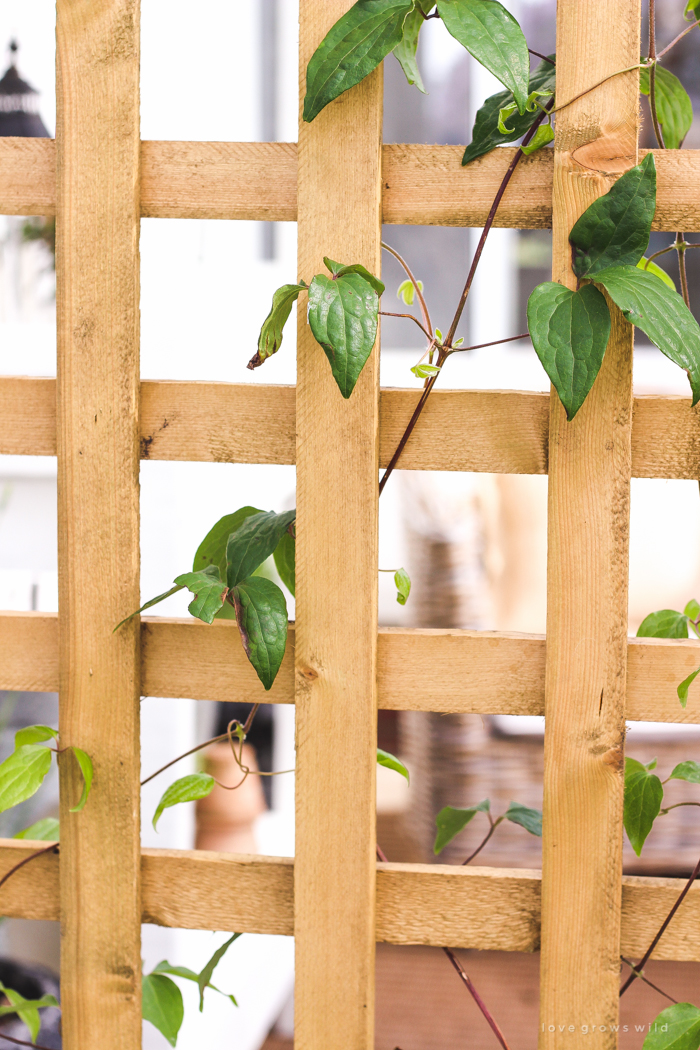
You may remember from my patio reveal post that I added faux greenery on the trellis just for the photos to give you an idea of what it might look like once the trellis is all filled in. Can you imagine this big wall of trellis all filled up with green vines and big, blooming white flowers? I can’t wait to see how it grows this summer!

Learn how to make this gorgeous trellis planter for your garden or patio! Perfect for adding a little privacy and a great project for beginners!

So far I think we’re off to a good start…

Learn how to make this gorgeous trellis planter for your garden or patio! Perfect for adding a little privacy and a great project for beginners!

Learn how to make this gorgeous trellis planter for your garden or patio! Perfect for adding a little privacy and a great project for beginners!

Learn how to make this gorgeous trellis planter for your garden or patio! Perfect for adding a little privacy and a great project for beginners!

Learn how to make this gorgeous trellis planter for your garden or patio! Perfect for adding a little privacy and a great project for beginners!

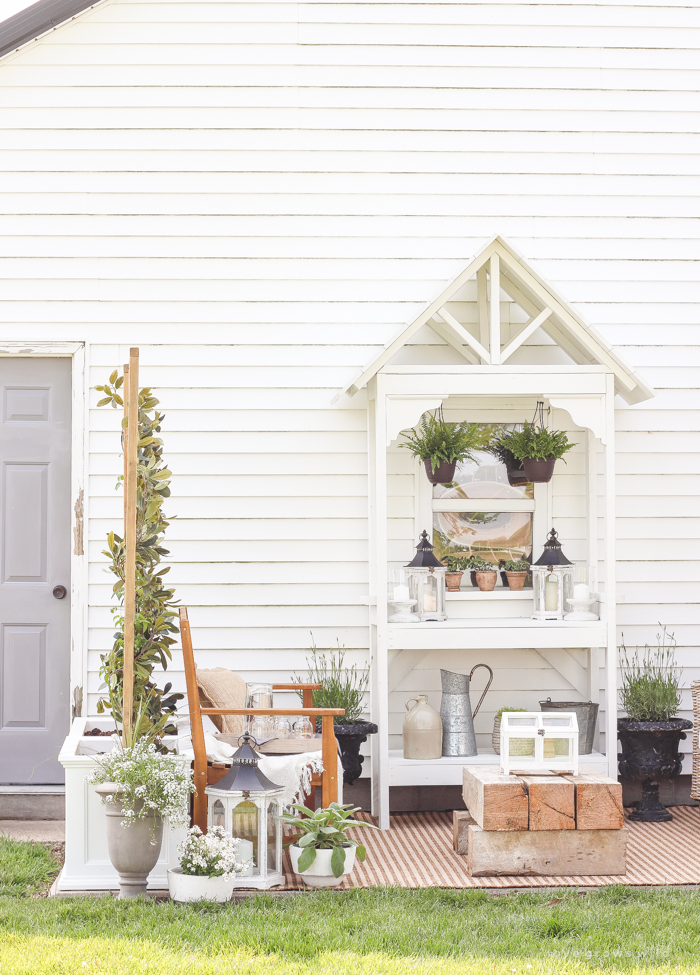
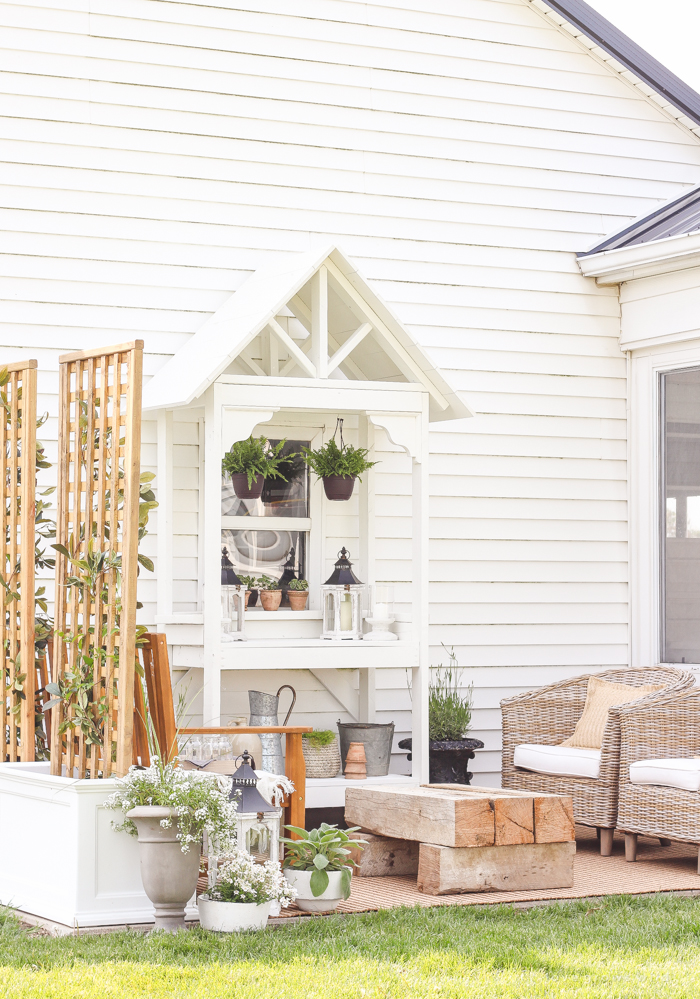
I just love how the trellis created a beautiful wall/divider on our patio, and makes it feel like such a cozy, intimate, and inviting space now.

Learn how to make this gorgeous trellis planter for your garden or patio! Perfect for adding a little privacy and a great project for beginners!

I hope you enjoyed this fun and simple tutorial from our patio makeover! I’ll be sharing the potting bench tutorial soon, so keep an eye out for that! Thanks for visiting the farmhouse today!

Find more outdoor projects here:

Summer Patio Makeover
DIY Potting Bench with Decorative Roof
Little White Barn Spring Decor

Front Porch Makeover
Antique Ladder Shelving
Easy DIY Outdoor Bench

xoxo Liz

Patio Sources:

striped outdoor rug – Target

wood bench – Joss and Main

wicker chairs – Joss and Main

outdoor pillows – Target

white potting bench – tutorial

large white rectangular planters – Joss and Main

barn beam coffee table – tutorial coming soon!

gray concrete urns – At Home

white and metal lanterns – Joss and Main

white and glass candleholders – Joss and Main

small clay pots – Joss and Main

gray braided pot – Joss and Main

metal watering jug – Joss and Main

fringe throw blanket – Joss and Main

round wood tray – Joss and Main


LET’S KEEP IN TOUCH!

Subscribe to Blog | Browse my Shop | Follow on Facebook | Follow on Twitter
Follow on Google+ | Follow on Pinterest | Follow on Instagram

Pin
Share
Tweet
Email
Print
DIY Decor Exterior Spring Woodworking
by Liz Fourez 
5 Comments

About Liz Fourez

View all posts by Liz Fourez

Related Posts

  • Home blogger and interior decorator Liz Fourez shares her favorite finds for outdoor furniture and decorBest Outdoor Furniture and Decor from Target
  • Home blogger and interior decorator Liz Fourez shows how easy it is to add lighting to any bookcase for a sophisticated and elegant look!Living Room Bookcase Lighting
  • Interior decorator and home blogger Liz Fourez shares how to make these beautiful winter planters for the holidays with fresh or faux greens!Christmas Front Porch & a Winter Planter Tutorial
  • Home blogger and interior decorator Liz Fourez shares her simple, but beautiful fall front porchFall Front Porch
PREVIOUS: Summer Patio Makeover
NEXT: Kitchen Makeover – Appliances

Comments

  1. Christine says: May 14, 2016 at 8:48 am

    Great tutorial! I’ve been wanting a screen to shield me from the neighbors. They aren’t into “nice views” like I am when sitting outside.

    Couple of tips about clematis – 1. Always water at the base, not the plant. Cleamtis likes their roots to stay cool. So it may want some moss or really low ground cover on top of the dirt. 2 – The first year you may only see a couple of flowers. But the second and third year is when it will really show it’s true beauty. So don’t be surprised if this year you only see one flower. It doesn’t mean you did anything wrong. 🙂

    Reply
    • Liz Fourez says: May 24, 2016 at 10:17 pm

      Thank you SO much for the clematis tips, Christine!! I am definitely still honing my gardening skills, and I really hope the clematis survives its first summer with me! 🙂

      Reply
      • Hester says: December 15, 2016 at 4:02 pm

        I don’t even know what to say, this made things so much eaiser!

        Reply
  2. Rhoni T says: May 16, 2016 at 5:41 am

    As much as I like your trellis, I am in love your white potting bench with a roof!! How adorable is that?? If I was to make one, I’d have to make two, I could see my Mom wanting one just like this. Can’t wait to see your tutorial.

    Reply
  3. Mary says: May 19, 2016 at 5:19 am

    have visited some of the other patio makeovers, but yours is by far my favourite, the one I’m going to use as inspiration for my own garden makeover this summer 🙂

    Reply

Leave Your Comments Cancel reply

Your email address will not be published. Required fields are marked *

W E L C O M E

W E L C O M E

Welcome, sweet friends! My name is Liz, and I started Love Grows Wild in 2012 with a passion for interior design and homemaking and a dream to help others create a home they love.
Here you’ll find simple project tutorials, holiday and entertaining ideas, and my journey renovating a 1940’s farmhouse that I live in with my two boys and French bulldog.
Read more about Liz >>

LET’S CONNECT

FOLLOW ALONG

POPULAR POSTS

RECIPES

TUTORIALS

Categories

Recent Posts

  • Blogger Liz Fourez shares her One Pot Lasagna recipe, a quick and easy weeknight meal that is sure to become a dinner staple in your kitchen.
    Easy One Pot Lasagna
    Recipes
  • the hair, makeup & beauty supplies blogger & designer Liz Fourez can't live without!
    10 Things I’m Loving Lately
    Style + Beauty
  • Home blogger and interior decorator Liz Fourez shares her favorite finds for outdoor furniture and decor
    Best Outdoor Furniture and Decor from Target
    Decorating and Home, Seasonal, Tutorials
  • Home blogger and interior decorator Liz Fourez shares her home office that features antique furniture as the perfect storage pieces for her business.
    Office Updates for my Interior Decorating Business
    Decorating and Home, Our Home
  • Home blogger and interior decorator Liz Fourez shares a shopping haul from Tuesday Morning and shows ideas for styling her favorite finds.
    Tuesday Morning Shopping Haul
    Decorating and Home

Liz Fourez started Love Grows Wild in 2012 with a passion for interior design and homemaking and a dream to help others create a home they love.  From simple project tutorials, to holiday and entertaining ideas, to her journey renovating a 1940’s farmhouse, Liz demonstrates how to create a beautiful and inviting home with a handmade touch. She turned her signature cozy, neutral style into a best-selling book in 2016 and continues to inspire readers with her captivating photography and easy decorating ideas. Read more about Liz > > > >

  • contact
  • MEET LIZ
  • advertise
  • privacy policy/disclosure
  • Blog
One Pot Lasagna. A quick & easy dinner recipe that One Pot Lasagna. A quick & easy dinner recipe that the whole family will love!

This dish has all the goodness of a classic lasagna, but with a much more simple cooking method. Instead of making separate layers and baking the lasagna in the oven, I add everything to a large pan and cook it right on the stove… meat, noodles, sauce, and all! The cheeses go in right at the end to give that creamy finish to the dish, and the whole meal is ready in under 30 minutes. I like to add a salad and some garlic bread to go with it!

Be sure to read my notes in the recipe for easy swaps to make this dish on the lighter side!

Recipe at: https://lovegrowswild.com/2021/04/easy-one-pot-lasagna/
It’s been a minute since I’ve posted any new r It’s been a minute since I’ve posted any new recipes I’ve been loving, and I know you’re mostly here for the decorating advice. ☺️ But I love to cook and want to share anything that can make your home life a little easier and more enjoyable. So let’s talk about this delicious Easy One Pot Lasagna!

This dish has all the goodness of a classic lasagna, but with a much more simple cooking method. Instead of making separate layers and baking the lasagna in the oven, I add everything to a large pan and cook it right on the stove… meat, noodles, sauce, and all! The cheeses go in right at the end to give that creamy finish to the dish, and the whole meal is ready in under 30 minutes. I like to add a salad and some garlic bread to go with it!

Be sure to read my notes in the recipe for easy swaps to make this dish on the lighter side!

EASY ONE POT LASAGNA
link in my profile:

https://lovegrowswild.com/2021/04/easy-one-pot-lasagna/
“Hey Alexa, add clean the deck cushions to my ca “Hey Alexa, add clean the deck cushions to my calendar this week...”

Just kidding, I don’t even have an Alexa. 😂 But I DO have a tutorial on my blog showing a really good method for cleaning all your outdoor cushions & pillows to keep them looking brand new!

Go check it out, and be sure to save & pin this post for easy reference next year! 
• link in my profile

https://lovegrowswild.com/2020/04/how-to-clean-your-outdoor-cushions-pillows/
It’s hard to believe how this kitchen looked jus It’s hard to believe how this kitchen looked just five years ago (swipe to see)

Taking out an old chimney to make room for a pantry cabinet and opening up the wall between the living room & kitchen were two of the biggest changes we made, and I’m so glad I committed to making those projects happen... despite concerns from my contractor that this would limit the space for a massive tv in the living room. 🤦🏼‍♀️

Classic case of a man’s design priorities vs. a woman’s. 😂 Tell me one thing in your home that you and your partner don’t agree on! This should be entertaining. 🤣

See full details of the kitchen makeover here: link in my profile

https://lovegrowswild.com/kitchen-makeover-series/
Did you have a good Easter weekend? The weather wa Did you have a good Easter weekend? The weather was absolutely perfect yesterday, and it has me so excited for sunny days planting flowers and evenings relaxing on the deck. But first, I have some projects in the boys’ bedrooms to finish up! 

Alright Monday... let’s do this. 🙌🏻

Speaking of outdoor projects, want to know the best way to paint your wicker furniture?

link in my profile:
https://lovegrowswild.com/2019/06/how-to-paint-wicker/
Happy Easter from our family to yours! My peeps an Happy Easter from our family to yours! My peeps and I are about to go enjoy some sunshine and an Easter egg hunt, and Momma better get at least one Reese’s egg or bunny. 🐰 

H A P P Y  E A S T E R !

link in my profile: https://lovegrowswild.com/2018/03/spring-tablescape/
S E E M O R E F O L L O W O N I N S T A G R A M

Copyright © 2021 · Prima Donna theme by Georgia Lou Studios

COPYRIGHT © 2017 · DESIGN + BRAND: BLISS AND TELL BRANDING COMPANY