• Home
  • MEET LIZ
  • contact
  • Blog
  • E-DESIGN SERVICE

Love Grows Wild

  • Home
  • Liz Fourez Interiors
  • Our Home
    • bathroom
    • dining room
    • entryway
    • exterior
    • kids bedroom
    • kitchen
    • living room
    • master bedroom
    • office
    • playroom
  • Project Gallery
    • diy decor
    • decorating advice + inspiration
    • furniture makeover
    • woodworking
    • crafts
  • Seasonal
    • spring
    • summer
    • fall
    • winter
  • Recipes
    • appetizers/snacks
    • beverages
    • breakfast
    • dessert
    • meal ideas
    • side dishes
  • SHOP
    • My Book
    • Shop LGW Style
    • love grows wild market
Decorating and Home, Tutorials

Envelope Pillow Cover Tutorial

April 10, 2015

Pin
Share
Tweet
Email
Print
Learn how to make inexpensive pillow covers from a drop cloth! Adds instant comfort and coziness to any room. Details at LoveGrowsWild.com

With all the changes we’ve made in our living room recently, I was dying to get some new pillows on our couches. I wanted something that would be casual and cozy, because let’s face it… 99% of the time my kids have all the pillows thrown on the floor anyway, so nothing frilly or fancy was going to work in here. I looked into a couple different fabric options, but ended up going with the least expensive thing I could find… drop cloth!

Those canvas drop cloths you find at the hardware store for painting are PERFECT for creating neutral, casual pillows, and they are so darn cheap, you could afford to make hundreds of pillows if you wanted. They come in different sizes, but the one I bought was 9’x12′ and cost me barely $15. That’s a lot of fabric to work with! I definitely recommend running the drop cloth through the washer and dryer once before you do anything with it. This will soften up the canvas and get rid of any wrinkles or stiffness.

Learn how to make inexpensive pillow covers from a drop cloth! Adds instant comfort and coziness to any room. Details at LoveGrowsWild.com

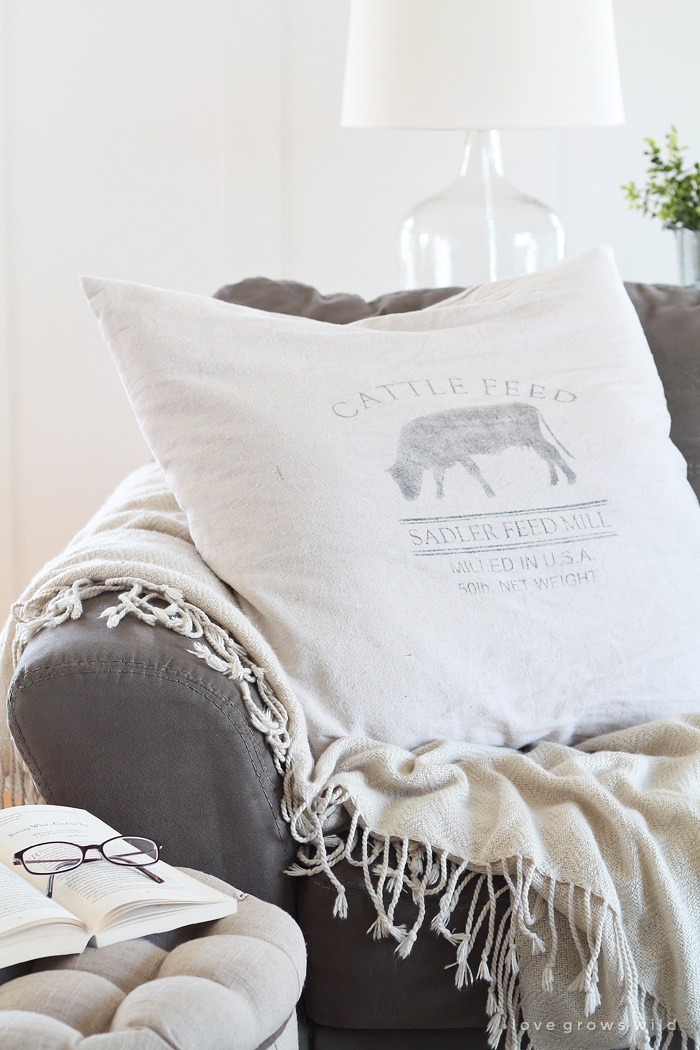
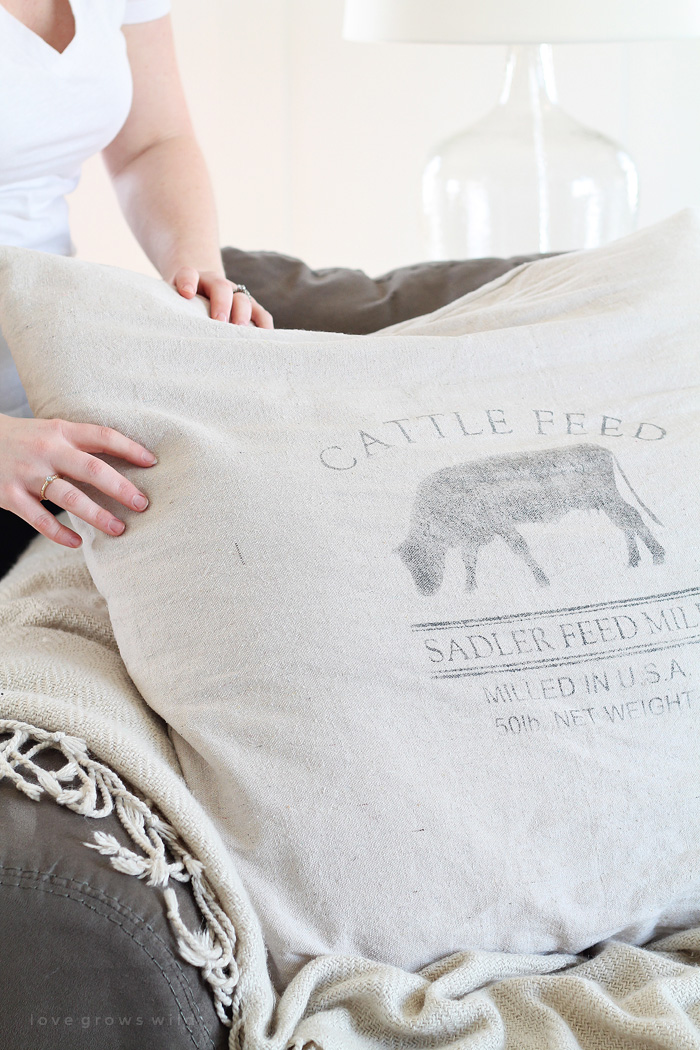
I’ve spent A LOT of time pinning pillows ideas over the last few months and happened to stumble across a reproduction feed sack that totally stole my heart. Did you know that when I met Jeremy he actually owned and operated a livestock feed mill? We spent our days making feed for cows, pigs, goats, chickens, and any other farm animal you could think of. Jeremy was out in the mill doing all the heavy lifting, I was in the office doing the bookwork, and our boys (who were just babies at the time) were crawling around the store on bags of dog food and batting their eyelashes at all the customers. Wyatt was just a week old when I came back to work, and we had a playpen set up in the office where he could nap. It seemed crazy and stressful at the time… working side-by-side with your spouse everyday with a baby and toddler under your feet… but I look back on it all now and realize how sweet of a time that really was.

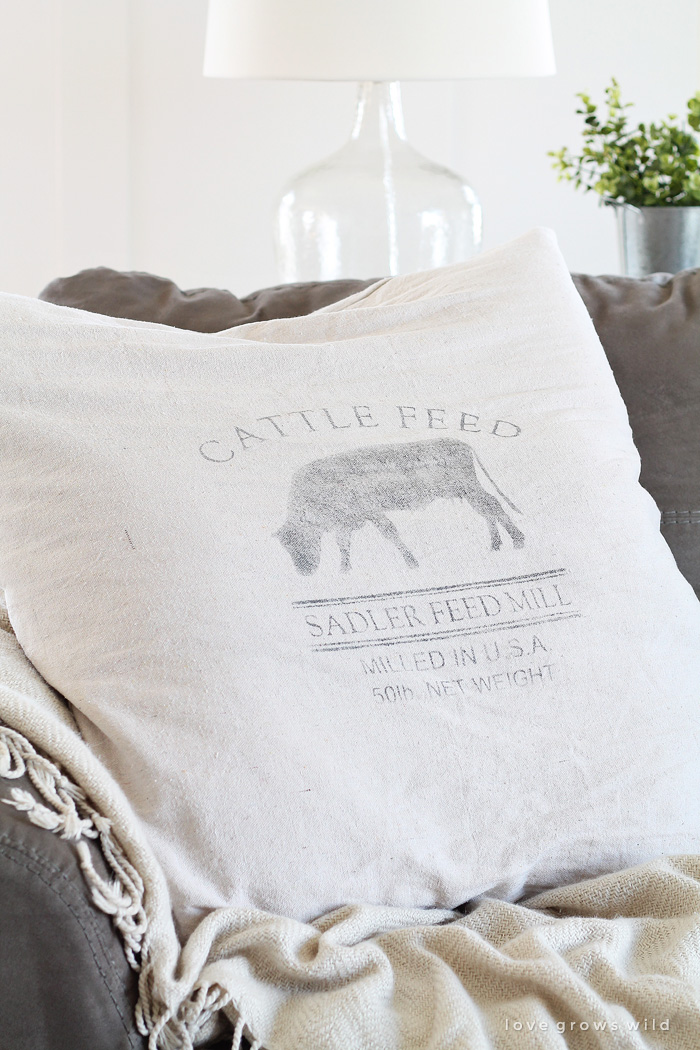
So when I saw that feed sack idea, I knew it would be absolutely perfect for our little farmhouse. I even used our old feed mill’s name on the pillow! I made some super easy envelope pillow covers, created the feed sack design using my Silhouette Cameo, and painted the design onto my pillow cover with some heavily watered-down paint. I didn’t want the design to be too bold, so watering down the paint gave it that old, timeworn look I was going for. If you don’t have a Silhouette, you can certainly recreate a version of this using stencils or stamps.

Learn how to make inexpensive pillow covers from a drop cloth! Adds instant comfort and coziness to any room. Details at LoveGrowsWild.com

I make my own pillow covers vs. buying new probably 9 times out of 10, so I wanted to show you guys a quick tutorial on how to make them. Even if you don’t have mad sewing skills, these are actually really easy!

Step One:

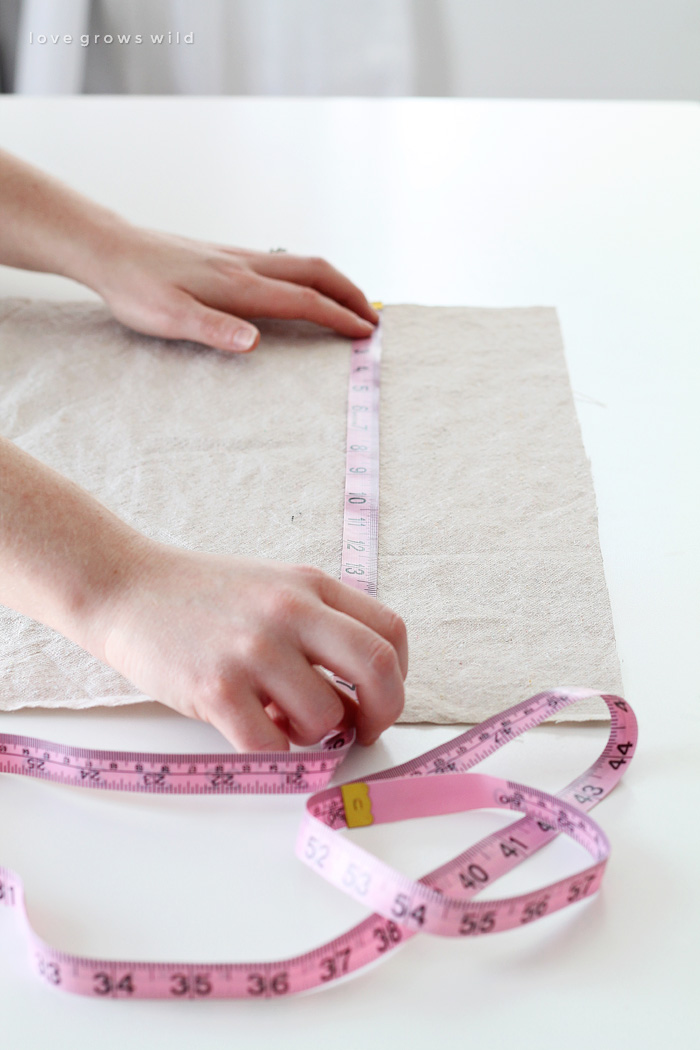
Measure the pillow form you’ll be using. (Mine was 17″ x 17″)
Add 1″ for a seam allowance. (18″ x 18″)

Step Two:

Cut a piece of fabric to that measurement. (18″ x 18″) This will be the front of your pillow.

Step Three:

Cut another piece of fabric the same width as your front, but add 4″ to the height. (18″ x 22″)
Now cut it in half widthwise. (Each piece is now 18″ x 11″) These are the back pieces of your pillow.
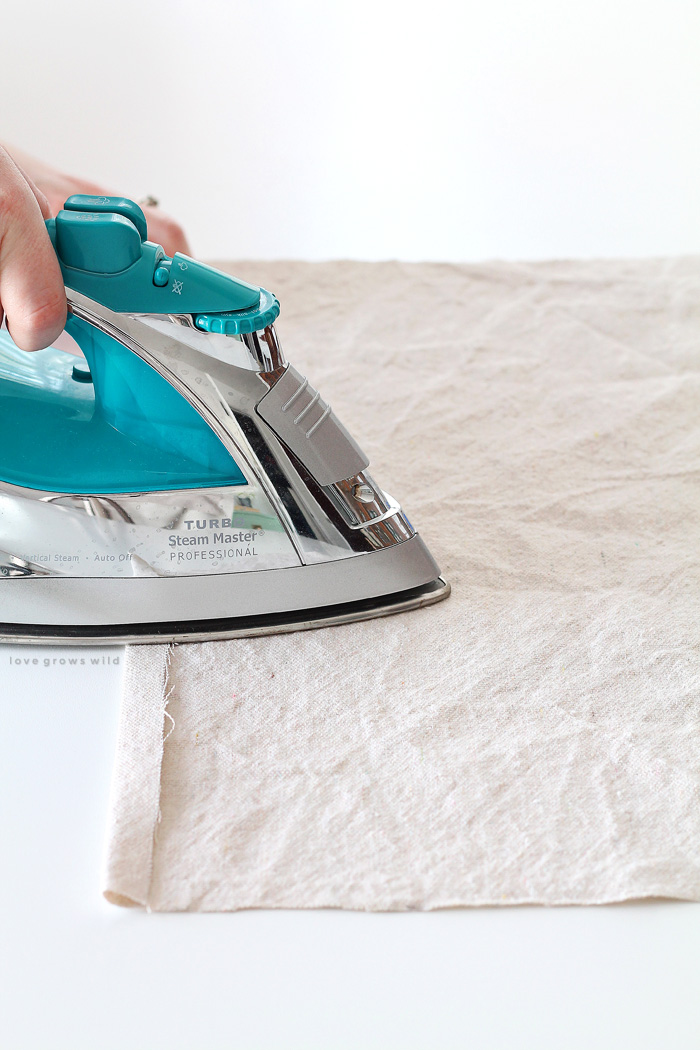
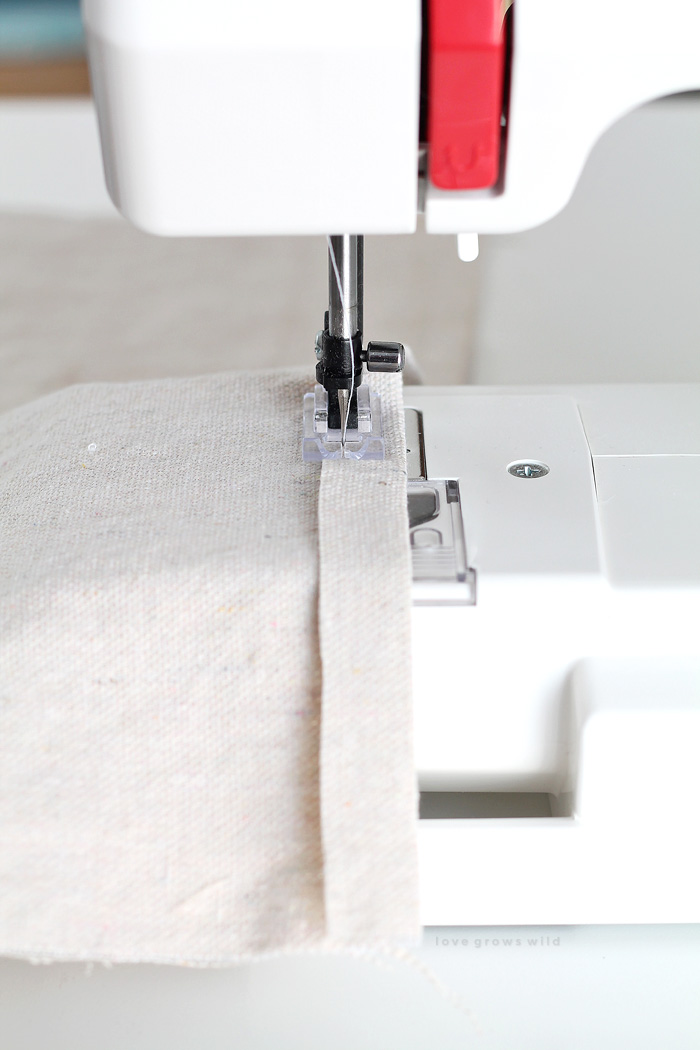
Learn how to make your own envelope pillow covers to save money and add tons of style to your space!  Details at LoveGrowsWild.com

Step Four:

Make a fold on one long edge of each back piece towards the back of the fabric, press with an iron, then stitch the hem.
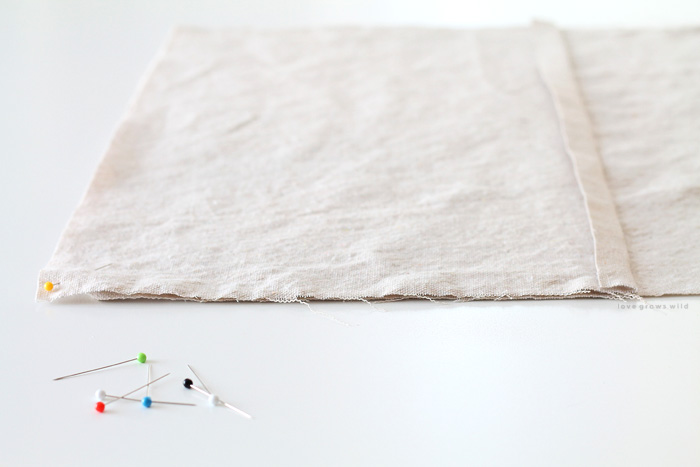
Learn how to make your own envelope pillow covers to save money and add tons of style to your space!  Details at LoveGrowsWild.com

Learn how to make your own envelope pillow covers to save money and add tons of style to your space!  Details at LoveGrowsWild.com

Step Five:

Lay your front piece of fabric face up. Then place both back pieces on top, facing down, with the hemmed edges overlapping in the center. Pin the fabric pieces together along the edges and sew all four sides of the pillow cover.
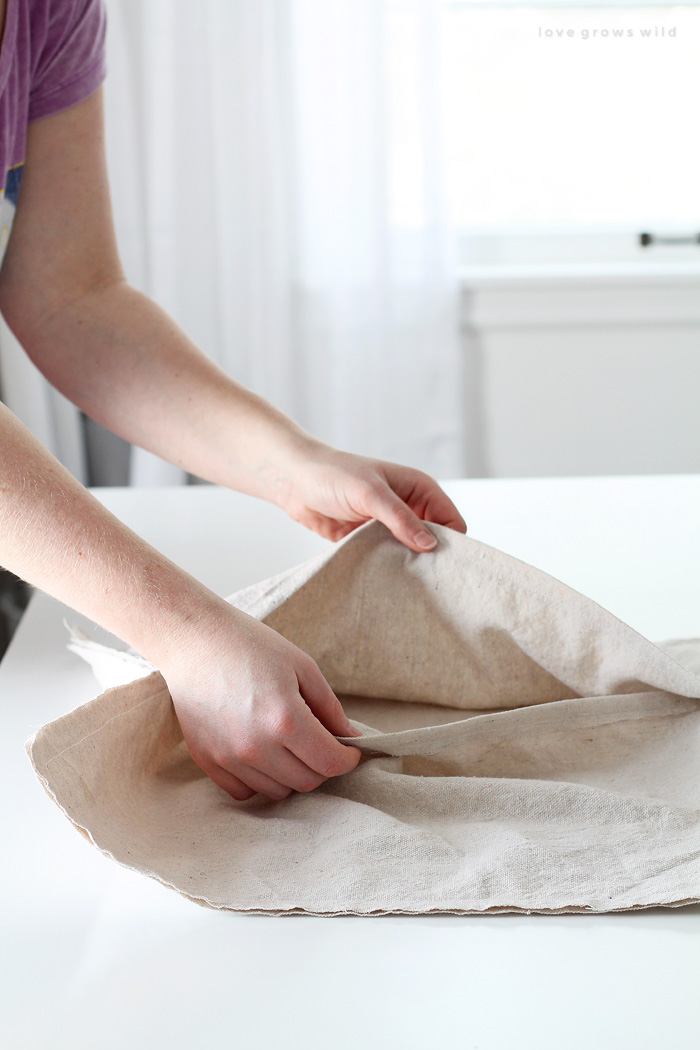
Learn how to make your own envelope pillow covers to save money and add tons of style to your space!  Details at LoveGrowsWild.com

Step Six:

Open up the back pieces and turn the pillow cover right side out.
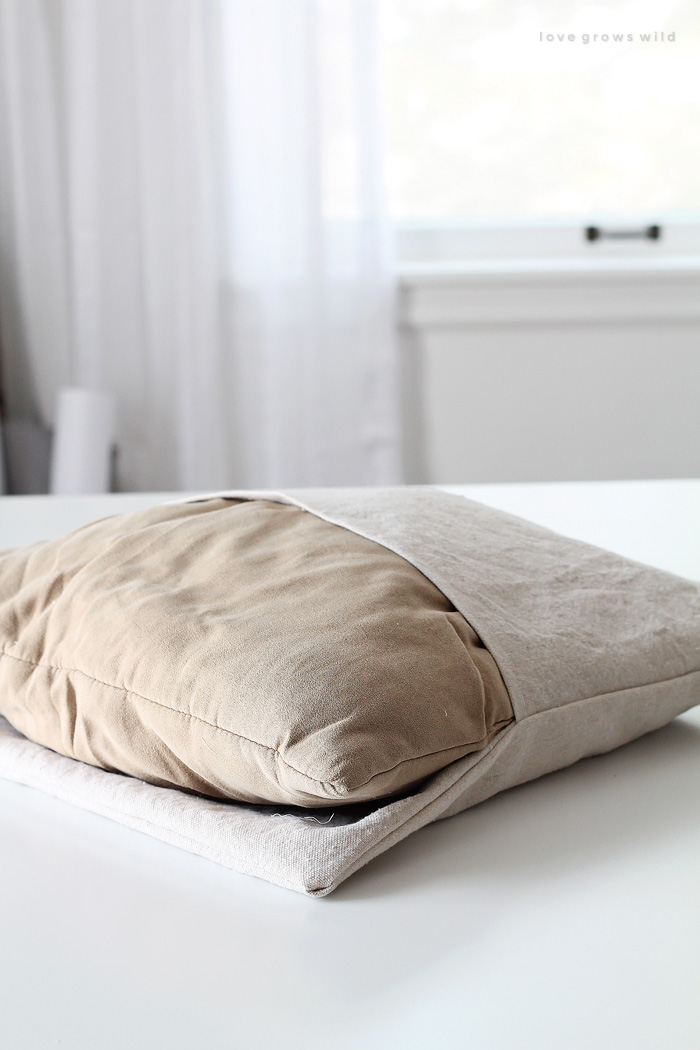
Learn how to make your own envelope pillow covers to save money and add tons of style to your space!  Details at LoveGrowsWild.com

Learn how to make your own envelope pillow covers to save money and add tons of style to your space!  Details at LoveGrowsWild.com

Step Seven:

Add a pillow form!

Learn how to make your own envelope pillow covers to save money and add tons of style to your space!  Details at LoveGrowsWild.com

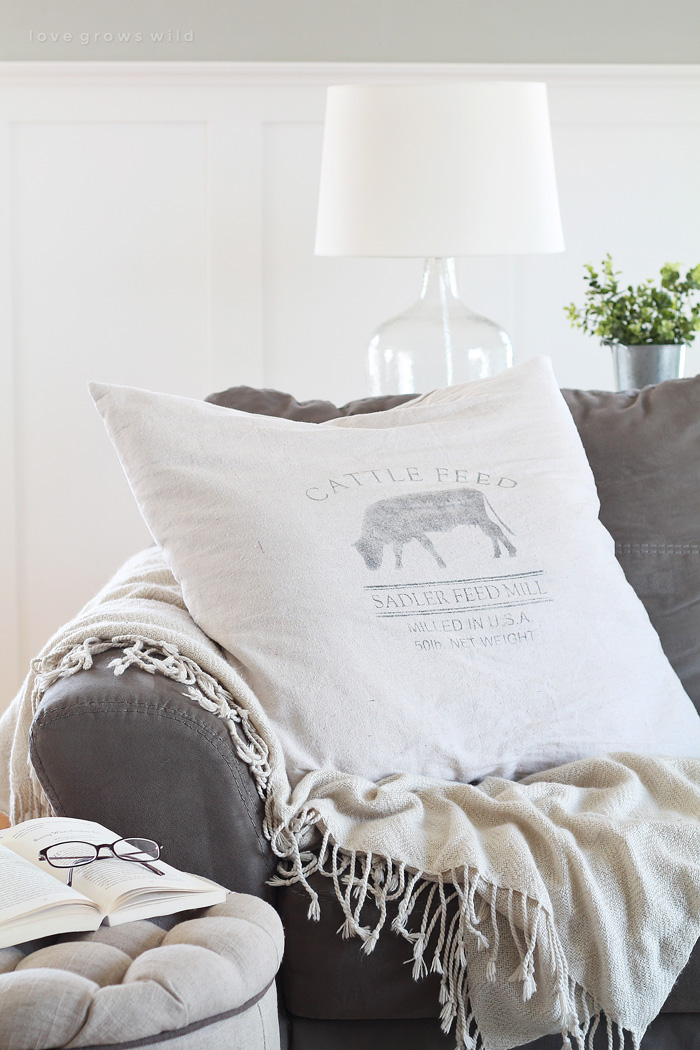
I am SUPER pleased with how these turned out. I was able to make a whole bunch of new pillow covers for our living room, using the pillow forms I already had, for just $15. #winning!

But the thing I love most about these pillows is the sweet nod to our family’s beginning with this vintage feed sack design. Very farmhouse, very rustic, and very very US!

Learn how to make inexpensive pillow covers from a drop cloth! Adds instant comfort and coziness to any room. Details at LoveGrowsWild.com

Tell me what you think! Leave a comment below and share your thoughts on our new feed sack pillows… I can’t wait to hear your feedback!


Are you making this project? I’d LOVE to see it! Post a photo of your creation on Instagram and use the hashtag #MyLGWProject. It may just get featured!

Learn how to make inexpensive pillow covers from a drop cloth! Adds instant comfort and coziness to any room. Details at LoveGrowsWild.com

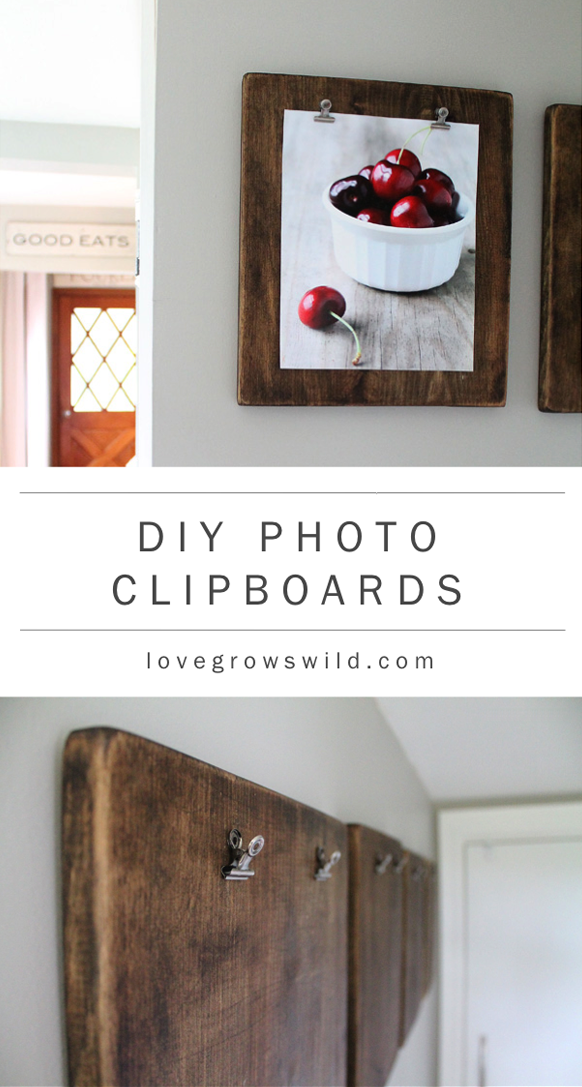
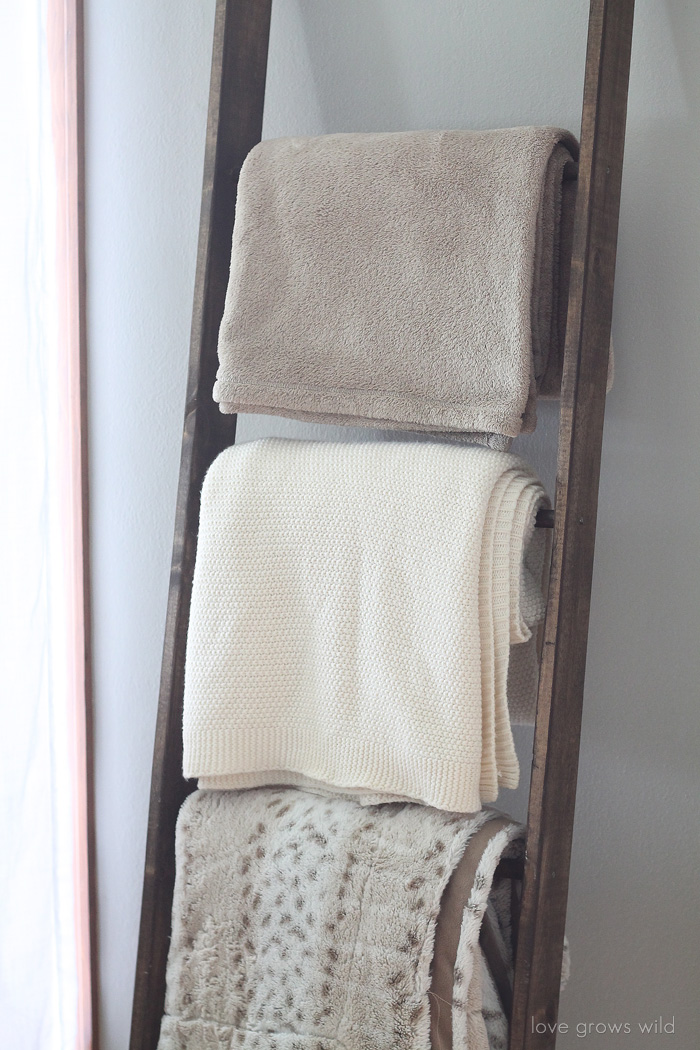
Feeling inspired? Check out these ideas:

DIY Photo Clipboards

DIY Photo Clipboards

Learn how to make a DIY Blanket Ladder! | LoveGrowsWild.com

DIY Blanket Ladder

The EASY way to get the paint-dipped look! These stylish baskets are perfect for storing blankets, magazines, toys, and more. Get the details at LoveGrowsWild.com

Paint Dipped Basket

DIY Rustic Industrial Chalkboard

Rustic Industrial Chalkboard


LET’S KEEP IN TOUCH!

Subscribe to Blog | Browse my Shop | Follow on Facebook | Follow on Twitter
Follow on Google+ | Follow on Pinterest | Follow on Instagram

Pin
Share
Tweet
Email
Print
DIY Decor
by Liz Fourez 
18 Comments

About Liz Fourez

View all posts by Liz Fourez

Related Posts

  • Home blogger and interior decorator Liz Fourez shows how easy it is to add lighting to any bookcase for a sophisticated and elegant look!Living Room Bookcase Lighting
  • Interior decorator and home blogger Liz Fourez shares how to make these beautiful winter planters for the holidays with fresh or faux greens!Christmas Front Porch & a Winter Planter Tutorial
  • Decorating tip: Frame a scrap piece of fabric for a simple and inexpensive piece of artwork. Home + lifestyle blogger Liz Fourez shares her advice for the best fabric options to use.Fabric: A Simple Idea for Inexpensive Framed Wall Art
  • Learn how to make beautiful floral-inspired artwork on a budget with this simple Paper Mache Pressed Flower tutorialPaper Mache Pressed Flower Art
PREVIOUS: The Inspiration Gallery
NEXT: One Pot Mexican Chicken and Couscous

Comments

  1. LZ [email protected] The Summery Umbrella says: April 10, 2015 at 3:42 pm

    Wow! This is so easy and the overall result is gorgeous! I own a Silhouette Cameo, and go figure, I never once thought to use it with fabric. Once again, that little machine is a miracle worker. 🙂

    Reply
  2. Kathleen says: April 11, 2015 at 10:48 am

    Great tutorial! Thanks!

    Reply
  3. Beverly says: April 12, 2015 at 2:37 pm

    Love your grain sack pillow. I have some old grain sacks that I need to make pillows out of. I always make envelop pillow covers. My grand daughter wanted to learn to sew and make her Daddy a pillow. I told her we would be making an envelop pillow. We made it and when she gave it to him, she said, “this is an envelop pillow. If your hands get cold you can put them in here to keep them warm. lol! You have to love kids – she is 7.
    Bev

    Reply
    • Liz Fourez says: April 12, 2015 at 9:56 pm

      So, so sweet! 🙂

      Reply
  4. Mimi says: April 12, 2015 at 6:51 pm

    Hi Liz. My first visit and I like what I see! These look awesome and using drop cloths is genius, I tell you! Love your work. Mimi xxx

    Reply
  5. Bessie says: April 13, 2015 at 9:21 am

    I love this way of making a pillow. Sometimes I use a decorative stitch to sew the seam down on the turn under part instead of just a straight stitch, this way if the pillow happens to get turned with the back showing ( my great grand kids playing ) it looks great on both sides.

    Reply
  6. Linda J says: April 13, 2015 at 10:15 am

    Well, of course they are just great! Thanks for the detailed instructions. It’s already pinned.

    Reply
  7. Trudi says: April 13, 2015 at 12:13 pm

    Thanks for such a clear, easy to follow tutorial. Looking forward to trying this!

    Reply
  8. windi turner| ms pedagogy says: April 14, 2015 at 3:43 pm

    Simple tutorial with great directions. Did you stamp the print?

    Reply
    • Liz Fourez says: April 16, 2015 at 9:31 am

      I made a stencil using my Silhouette Cameo and used a paint brush and watered down paint to fill in the design. A stamp would work well too though!

      Reply
  9. Kristi says: April 15, 2015 at 9:23 pm

    Super cute Liz! It’s crazy to think about the boys being that little, running around the feed mill. Time flies when you’re having fun 🙂

    Reply
    • Liz Fourez says: April 16, 2015 at 9:29 am

      Seriously, where did time go??

      Reply
  10. [email protected] Crafty says: April 17, 2015 at 11:09 am

    Gorgeous as always Liz! How do you get so much beautiful light in your room? Jealous! Thanks for linking up at The Handmade Hangout!

    Reply
  11. Bowmeister67 says: April 17, 2015 at 11:20 am

    What material did you use to make your stencil?

    Reply
    • Liz Fourez says: April 17, 2015 at 2:20 pm

      I cut the design on adhesive vinyl for the stencil.

      Reply
  12. Bronwyn says: April 27, 2016 at 8:28 pm

    Did you use regular paint or fabric paint for the image?

    Reply
    • Liz Fourez says: May 10, 2016 at 2:43 pm

      Yes, fabric paint would be best to use! I like to keep a small bottle of fabric paint medium on hand. That way, I can just mix up a little bit of the medium with my desired paint color instead of buying each specific fabric paint color I want to use. I hope this helps!

      Reply
  13. Kirsten Joy says: July 12, 2016 at 2:49 pm

    I love these! I tried to make one, however, and my image “bled” every time. (I tried the process several times on a drop cloth scrap. I tried different consistencies of watered down pain, but I couldn’t get that light/worn look without the paint bleeding and running out of the stencil.) I did not use fabric paint…I used latex. Do you think thats my problem? Would love to get this to work…thanks!

    Reply

Leave Your Comments Cancel reply

Your email address will not be published. Required fields are marked *

W E L C O M E

W E L C O M E

Welcome, sweet friends! My name is Liz, and I started Love Grows Wild in 2012 with a passion for interior design and homemaking and a dream to help others create a home they love.
Here you’ll find simple project tutorials, holiday and entertaining ideas, and my journey renovating a 1940’s farmhouse that I live in with my two boys and French bulldog.
Read more about Liz >>

LET’S CONNECT

FOLLOW ALONG

POPULAR POSTS

RECIPES

TUTORIALS

Categories

Recent Posts

  • Interior decorator and home blogger Liz Fourez reveals a moody, modern bedroom makeover for her teenage son!
    Teenage Boy Bedroom Makeover Reveal
    Decorating and Home, Our Home
  • Interior decorator and blogger Liz Fourez shares the beginning stages and plans for her teenage son's bedroom makeover
    Teenage Boy Bedroom Makeover Plans
    Decorating and Home, Our Home
  • Blogger Liz Fourez shares her One Pot Lasagna recipe, a quick and easy weeknight meal that is sure to become a dinner staple in your kitchen.
    Easy One Pot Lasagna
    Recipes
  • the hair, makeup & beauty supplies blogger & designer Liz Fourez can't live without!
    10 Things I’m Loving Lately
    Style + Beauty
  • Home blogger and interior decorator Liz Fourez shares her favorite finds for outdoor furniture and decor
    Best Outdoor Furniture and Decor from Target
    Decorating and Home, Seasonal, Tutorials

Liz Fourez started Love Grows Wild in 2012 with a passion for interior design and homemaking and a dream to help others create a home they love.  From simple project tutorials, to holiday and entertaining ideas, to her journey renovating a 1940’s farmhouse, Liz demonstrates how to create a beautiful and inviting home with a handmade touch. She turned her signature cozy, neutral style into a best-selling book in 2016 and continues to inspire readers with her captivating photography and easy decorating ideas. Read more about Liz > > > >

  • contact
  • MEET LIZ
  • advertise
  • privacy policy/disclosure
  • Blog
Behind the scenes of my son’s bedroom makeover. Behind the scenes of my son’s bedroom makeover. The other day my youngest son and I were talking about jobs, and he made a comment that has made me think a lot the last few days. He said that I’m lucky because I basically just “play on my phone” all day. 

In all honesty the comment initially made me angry, defensive, and hurt. It felt like nearly a decade of building a business, actually an entire brand, from the ground up was reduced to nothing in an instant. I want nothing more than my children to be proud of their Mom, and I suddenly questioned what life really looks like through their eyes. 

But after sitting quietly with my emotions, this is what I realized: Yes, he might think my job is “easy”, but here is what is also true...

He’s never had to see his mother struggle to pay bills, put food on the table, or keep a roof over his head. He’s never had to sit at home alone because his mom was working a second, third, or fourth job to stay afloat. He’s never heard me complain about going to work each day because I get to do something I’m truly passionate about. He rarely sees the long hours, late nights, and daily frustrations because I schedule a lot of my “work day” while he is spending time at his dad’s so I can spent my time with him fully present. By the way... I use the term “work day” loosely because anyone who has ever ran their own business knows the entrepreneur life is 24/7 and then some. 

The fact that he doesn’t see the stress, the tears, and the worry... means I must be doing something right. And hopefully one day he’ll chase after his own dreams because Mom showed him that the life he grew up in was a beautiful one. 🤍
R E V E A L D A Y ! This makeover pushed me in al R E V E A L  D A Y ! This makeover pushed me in all the best ways. I created a space for my son that is SO him and was able to really stretch myself outside of my design comfort zone. I did the entire project very affordably, utilizing pieces I already had and shopping on a minimal budget for anything new. Figuring out the best layout in a room with multiple windows and doors all crammed into a tiny space was challenging to say the least, but I made it happen. I really wanted to feature the dark, moody style my son likes while still making the room feel cozy and inviting. And I think it all came together perfectly…

Let me show you around his new moody modern bedroom on the blog today! Swipe to see the original inspiration for the space, progress photo, and what the room looked like several years ago when my man child was still a little boy. 😢

I absolutely love how this space turned out and can’t wait to hear what you think in the comments! Click the link in my profile to see the full reveal!

https://lovegrowswild.com/2021/05/teenage-boy-bedroom-makeover-reveal/
I promise, you are not alone. I mentioned this in I promise, you are not alone.

I mentioned this in stories, and it seemed to really resonate with so many that I thought it was worth sharing here as well. This weekend is a work weekend for me. I’ve been a single mom for several years now, and when the boys aren’t here I focus on pushing through projects and time on the computer so that when they ARE here, I can give my attention and time to them. The truth is...

You never get used to not having your babies 24/7, but you can choose to use that time wisely. Whether that’s working a little extra, tackling a project to keep yourself busy, or simply taking some time to care for yourself. As moms, how often do we really do that? I’m at my best when I feel balanced and fulfilled mentally, physically, creatively and spiritually, and I’ve actually come to realize that I’m probably a better mother now for the QUALITY of time I have with my children, not the quantity. It comes down to this...

Splitting my time with them will always be hard. BUT I can choose to look at the glass half full or half empty, and I choose to make the most of this life I get to live. So today I’m photographing Alec’s bedroom reveal, painting some furniture to sell at my shop, and starting to plan for my next big project! And tomorrow when the boys come home, we’ll have our tradition of Sunday Supper and ice cream, and I’ll squeeze their guts and be grateful for this weekend. Which mindset will you choose?

O F F I C E  D E T A I L S | link in my profile

https://lovegrowswild.com/2021/03/office-updates-for-my-interior-decorating-business/
A really fun project is happening in our house rig A really fun project is happening in our house right now, and I am so excited to show you what I have planned for my teenage son’s bedroom makeover!

Now that he’s almost done with his freshman year of high school, Alec really wanted a more grown up space that reflects his style, and I am so excited to be working on this with him. It’s definitely more dark, masculine and moody than the rest of the house, and it’s been such a fun opportunity for me to try something different and create a space that is - perfectly - him.

Lots of black.
More of a modern style.
Still very clean and simple.
And all done on a VERY affordable budget!

Swipe to see the progress we’ve made so far, and click the link in my profile to read all the full details! 

https://lovegrowswild.com/2021/04/teenage-boy-bedroom-makeover-plans/
Who else is guilty of starting a project and movin Who else is guilty of starting a project and moving on to the next before *actually* finishing the first? 🙋🏼‍♀️

I see it happen with my design clients often, and after all the work you’ve already put into a room, a project, a renovation... you DESERVE to see it completed! I know it’s tempting to jump into the next exciting thing, especially when you get stuck or get into the tedious, mundane tasks like filling nail holes or touch-up paint. But I challenge you to take a day, a week, whatever you need to wrap up all the little unfinished projects so you can finally cross them off your list! I promise you will feel so much better knowing you saw them through to the end and can just enjoy them now, instead of feeling like you’re never-ending to-do list just keeps getting longer and longer. You got this! 🙌🏻

Note: this was mostly written as a reminder to myself I need to finish my son’s bedroom makeover before starting on projects in mine... homeboy’s room is looking pretty darn amazing, and it’s making me want to update this space so badly! One thing at a time, Liz. 

MASTER BEDROOM SOURCES:
link in my profile

https://lovegrowswild.com/2020/09/new-in-the-master-bedroom-rug-curtains-bedding/
You know that book about the horrible no good, ver You know that book about the horrible no good, very bad day? That was yesterday over here. 😂 I won’t go through the list of terrible bad things that ended with needing a generator at almost 11 pm, only to have power restored approximately 5 minutes after finally getting said generator... 🤦🏼‍♀️

because things always could have been worse & after a good night of sleep, my attitude for this new day is much better. I have a Spring Market to prepare for at @lovegrowswildmarket this weekend, some fun projects coming up next week, and I have POWER today so I can accomplish all the things. Life is good!

Tell me I’m not the only one who occasionally has one of those “I couldn’t make this up if I tried” horrible no good very bad days... 

Here’s something helpful 😂: 
The Best Way to Hang Curtains

https://lovegrowswild.com/2021/02/the-best-way-to-hang-curtains/
S E E M O R E F O L L O W O N I N S T A G R A M

Copyright © 2021 · Prima Donna theme by Georgia Lou Studios

COPYRIGHT © 2017 · DESIGN + BRAND: BLISS AND TELL BRANDING COMPANY