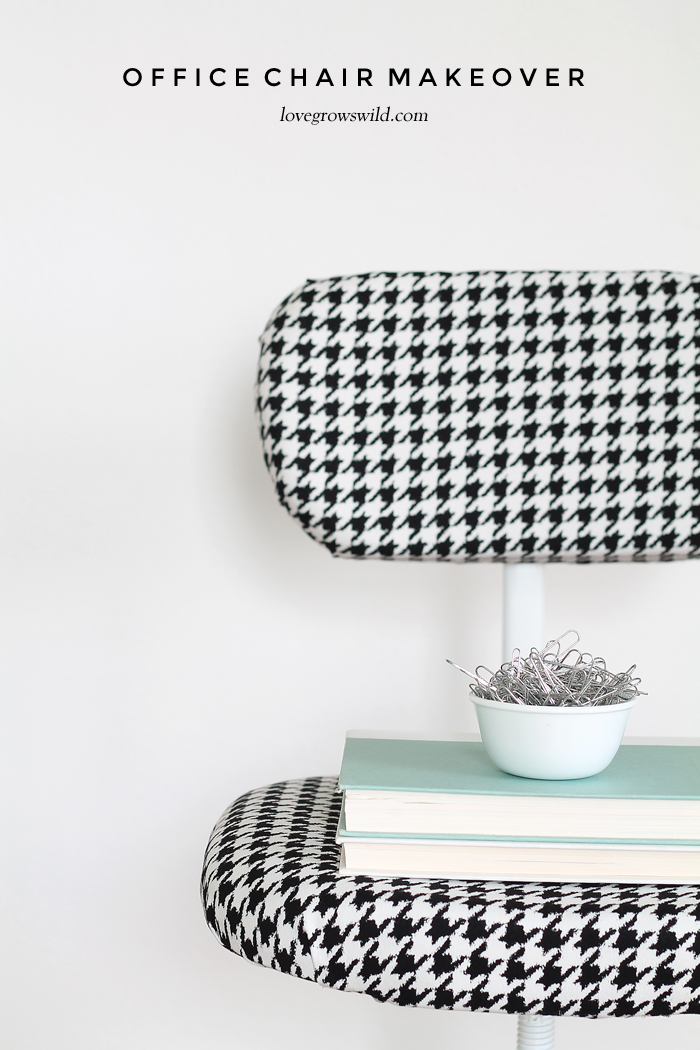
You have no idea how happy I am to finally be sharing some projects from the office makeover! I feel like I’ve been hiding in my office painting my life away for weeks, and finally getting some photos up for you guys to see feels like a reason to celebrate. Let’s pop open some champagne!
Oh wait, not before I show you the newest addition to my office…
Yes, I finally have a proper office chair to sit and write these blog posts instead of whatever random stool or dining room chair happens to be closest! Now if only my freshly-painted desk was finished drying and ready to be used… more on that colorful makeover coming next week!
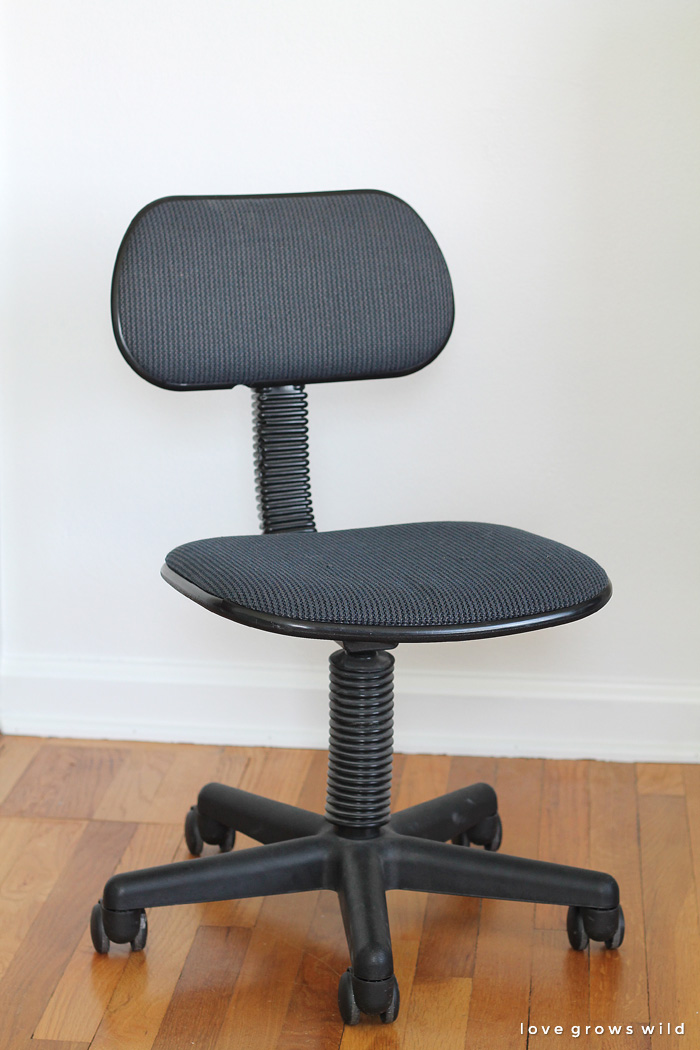
So this office chair was a thrift store find for just $5.99. I had been searching around for a chair that would fit the space well… not too big, but very comfortable for all the long hours and late nights I spend at my computer. This blogging gig can be rough some days! Here’s how the chair looked when I brought it home:
Pretty much your typical office chair that you could find at just about any thrift store. I know I see them quite often when I’m shopping around. It was dirty and dated, but I knew that with a little bit of spray paint and some fabric, it could be amazing. And so our epic little makeover began…
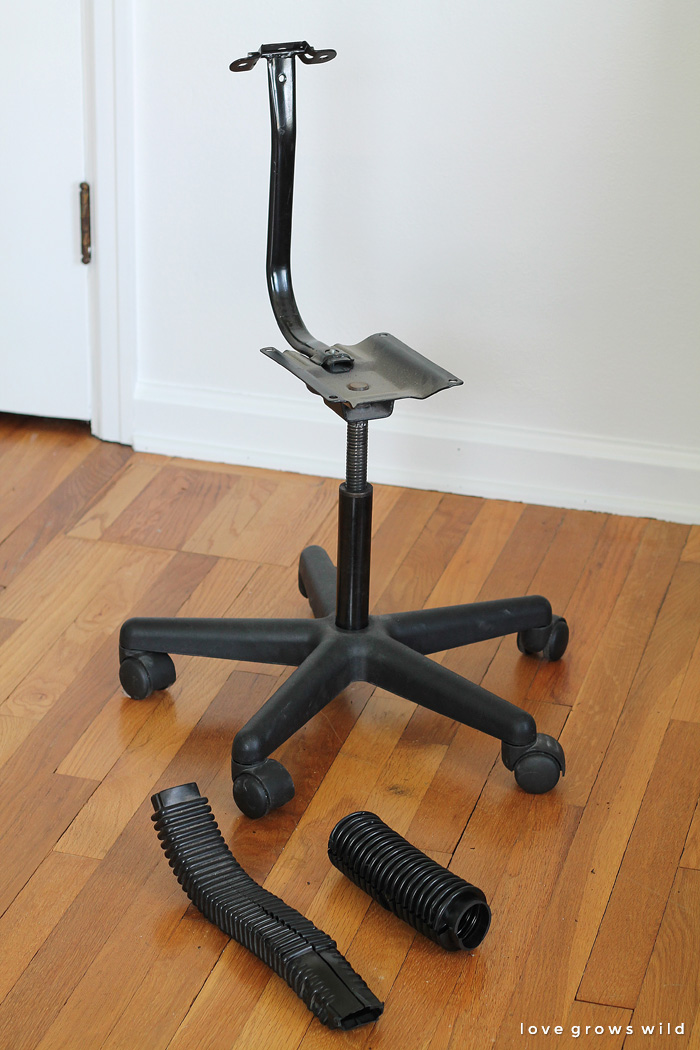
I first removed all the screws from the bottom and back of the chair and pulled off the seat and back rest. I hated the way the plastic ribbed pieces looked on the chair, so I cut them off (very carefully) with a box cutter. Much better!
The base of the chair was covered in dust, hair, and who knows what else, so I gave it a really good scrub-down with some hot bleach water and set it outside to dry. To coordinate with my newly-painted white office, I picked up 2 cans of Rust-Oleum Universal Spray Paint in glossy white. It does cost a little bit more than other paints, but this formula is a paint and primer in one and will cover any surface, which is exactly what I need for my plastic and metal chair base.
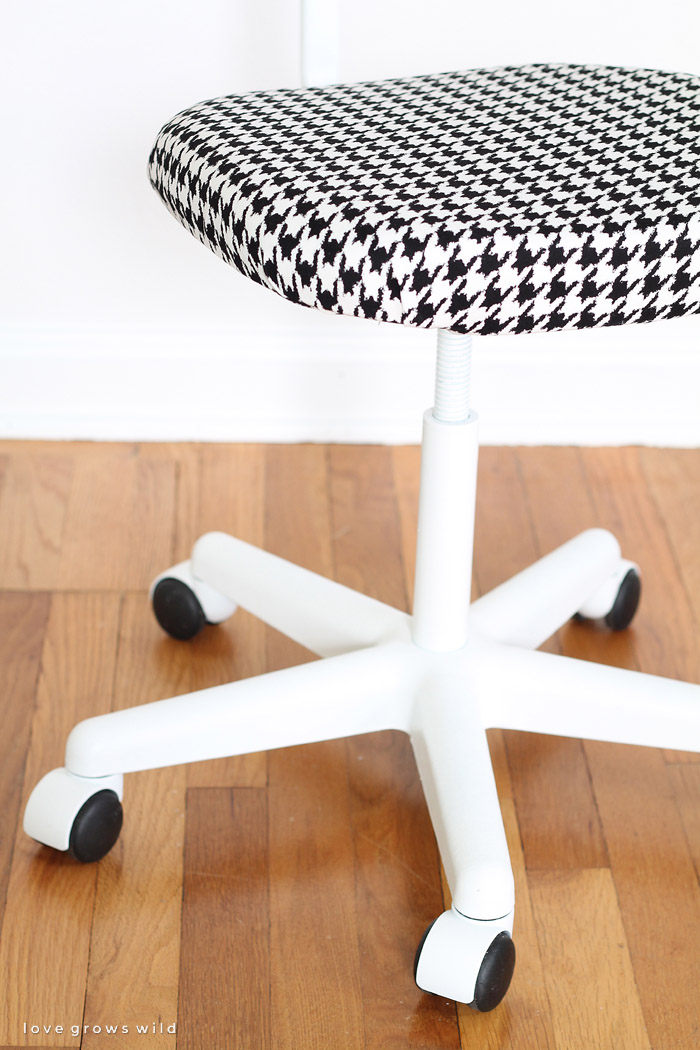
After debating what to do with the wheels, I decided to tape them off and leave them black. I figured after a few weeks of rolling around in my office, the paint would most likely chip off anyway, and I actually really like how the black wheels turned out against the white chair base. I just covered the wheels with painter’s tape and sprayed the chair in several thin coats until the all the black was covered in white.
While the paint was drying, I tackled re-covering the seat and back rest.
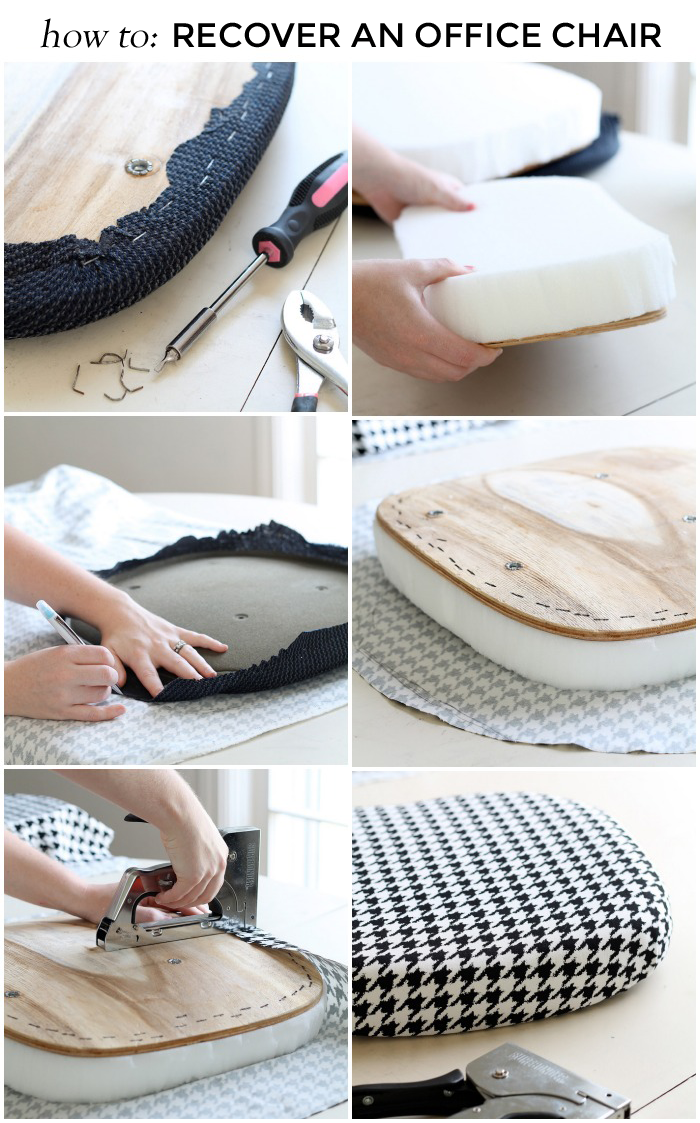
The seat and back rest had a plastic piece attached underneath that was pretty easy to pry off. Once those were gone, I had access to the staples that held the fabric on. I removed all the staples from the fabric using a small flat head screwdriver and a pair of pliers. This took a little bit of sweat and muscle because these staples were in there good, but they eventually all came out by prying the staples up with the screwdriver, and pulling them out with the pliers. P.S. don’t be like me and stab yourself with a screwdriver. It hurts, man.
Next, I used the old fabric and padding from the chair to create a template. I wanted a really thick, comfy padding on the chair, so I picked up some 2″ foam pads from the store and a gorgeous hounds tooth fabric. I cut the foam pad to the exact size of my back rest and seat and added about 3″ extra to the size of my fabric to cover up that extra-large and luscious foam padding. I have no idea what the proper way to cut through foam is, but I’ve found a sharp serrated bread knife from the kitchen works pretty darn well. * This would be the point where my husband walks into the room and shakes his head after watching me rip apart foam with our nice kitchen knives. Sorry husband. Thank you for loving me despite all my crazy.
Then I wrapped my pretty black and white fabric around the foam pad and seat and stapled the fabric in place on the underside of the seat.
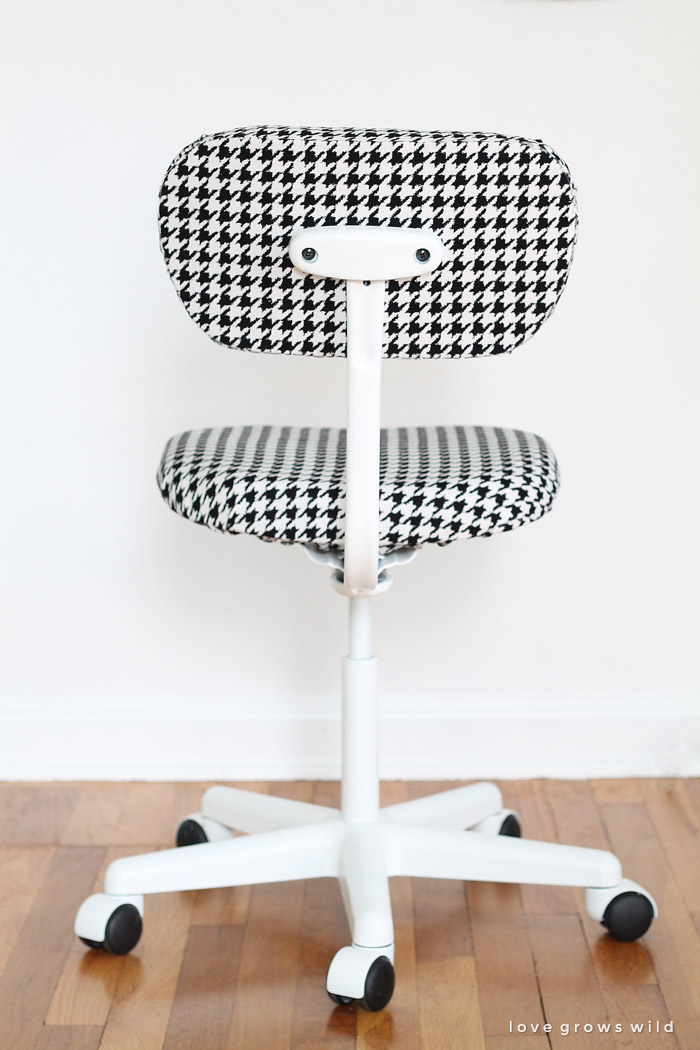
– Side note: Removing those plastic pieces in the beginning made this makeover a little tricky. I knew that the seat would be easy to do because no one would see the exposed staples underneath the chair. But the back rest was a little more tricky. I ended up wrapping the back rest completely in fabric, with foam padding on the front, and used hot glue to secure the fabric instead of staples. It was the easiest solution I could come up with. I’ll keep you updated in case I decide to make any changes to this part!
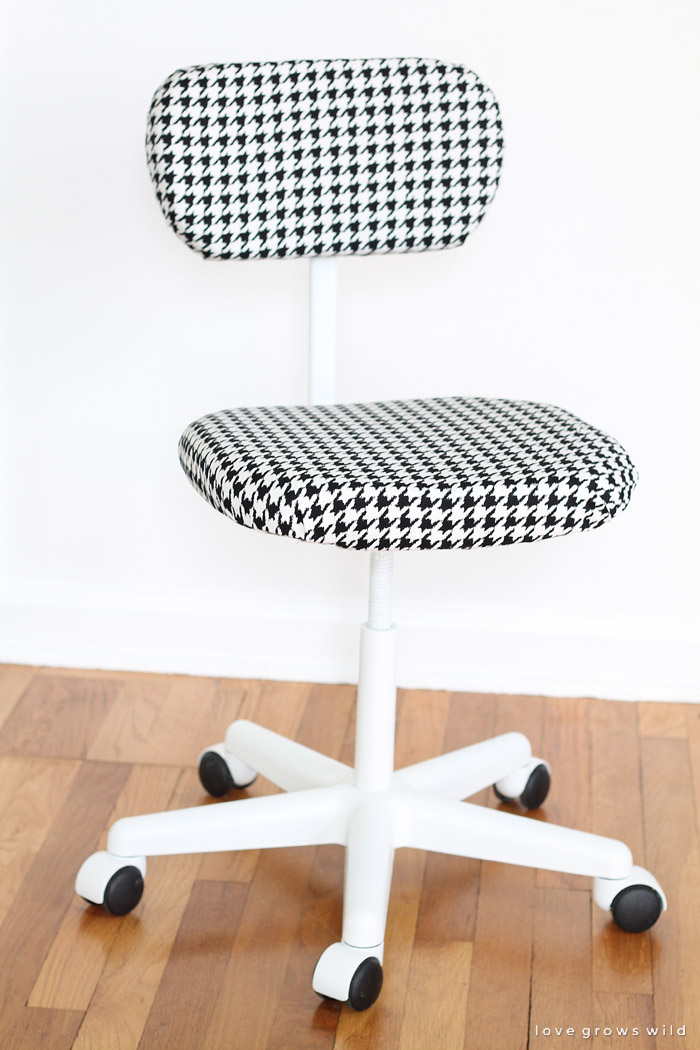
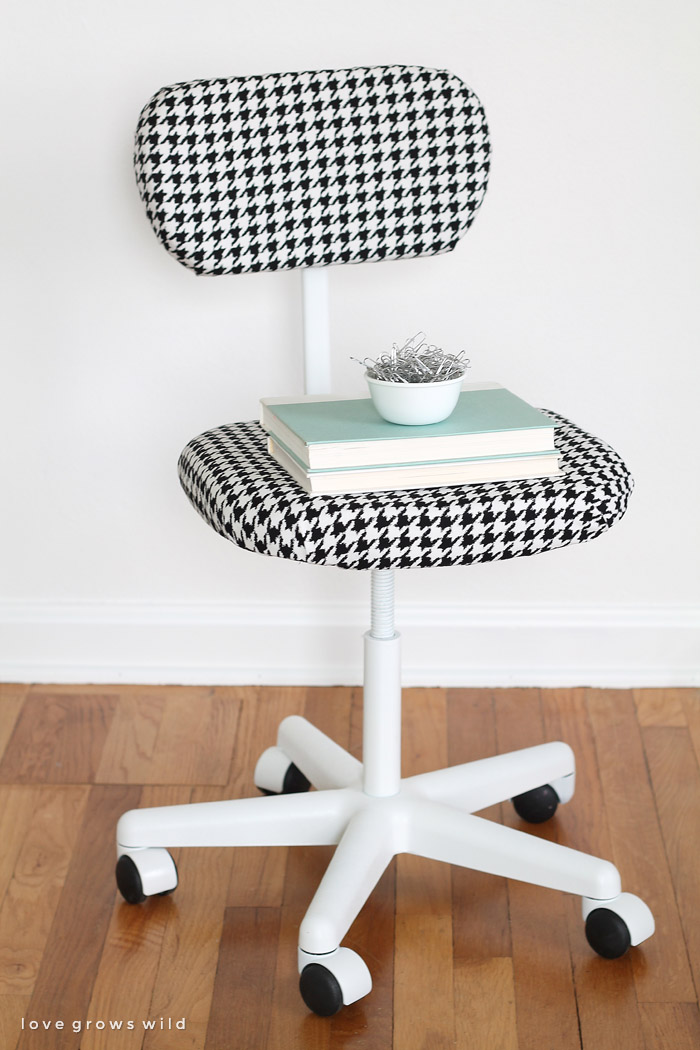
Friends, meet my new, beautiful office chair…
What a difference, right?
Shortly after my husband shook his head at me for misusing our kitchen knives, he asked, “Why go through all this trouble for an old, $5 dollar chair?”
Good question. As I was pouring sweat from prying up about 100 staples and covered in tiny bits of foam, I started to wonder the same thing. Why on Earth would I go through all this just to save a sad, little thrift store chair that I don’t even like?
It took me all night to answer this question, but once it came to me, I felt like all the stars aligned and I had a renewed sense of purpose and direction in life. I do it because I love it. I do it because I can. I could walk into any store and spend way more money than I have in my bank account on some fancy designer chair that I will probably love for the next year or two before I decide I want something different. But instead, I’ve taught myself, with many, many mistakes and errors in between, how to do it on my own. How to fix things. How to build things. Paint things. Sew things. How to take something that no one else wanted and turn it into something amazing. Sure it takes time. Sure it takes effort. Sure it makes me want to cry my eyes out at times when I split a board or sew the wrong sides of a pillow together. (true story) But at the end of the day, I look around my house and see me. Not something straight out of a catalog or the work of a fancy designer… but me.
So was it worth all that effort for an old, $5 chair? Oh yeah, baby.
I cannot wait to get my desk all finished up so I can show you how they look together. I don’t want to jinx myself, but I think it’s going to be magical! Stay tuned for more office updates coming next week!
TELL ME: What do YOU think of the makeover? Would you tackle a thrift store chair makeover like this?
Like what you see? Subscribe to Love Grows Wild so you’ll never miss a post!
Follow along on Pinterest, Google+, Instagram, and Facebook for more fun!
Want to see more project ideas?
LET’S KEEP IN TOUCH!
Subscribe to Blog | Browse my Shop | Follow on Facebook | Follow on Twitter
Follow on Google+ | Follow on Pinterest | Follow on Instagram




Totally worth it – it looks awesome! I’m the same way – I will make things on my own instead of buying because I like doing it. And not only that, you’ve created something unique! LOVE the houndstooth! I’ve been wanting to change the zebra fabric on my window seat, but couldn’t figure out what pattern to use until now – thanks for the inspiration!
Thank you so much, Chrissy! I’m pretty obsessed with houndstooth right now… I just love it! Bet it would look fantastic on your window seat. So glad you could stop by!
What a great idea… umm totally doing this in my ugly office 🙂 xx
Haha, my office is right there with yours right now! You’ll have to let me know how yours turns out! Thanks so much for stopping by, Megan. 🙂
great upcycle!
Thanks, girl!! Much prettier (and MUCH more comfortable) to blog in! 😉
Great Job! This is one of the best office chair makeovers. Spraying the chair white makes the fabric really pop and the chair hardware fade away. Can you share a little more info on how you got the chair back so neat? Thanks
Thank you, Julia! I really like the way the chair base fades into the background too… that fabric deserves to have the spotlight! The chair back was a little tricky without the original plastic pieces I had covering the back. I basically added one piece of fabric to the front, covering the foam padding I added, and hot glued it to the wood on the back. Then I took a second piece of fabric and covered the back, using hot glue to attach the fabric right along the edge of the wood. I used sharp scissors to cut the fabric right along the edge of the chair, which did leave it as a raw end, but I think it looks pretty clean for now. I’d like to figure out a good way to cover up that raw edge somehow, but for now, this works. I hope this explains it a little better! Let me know if you have any more questions. 🙂
Liz, couldn’t you use a piece of black piping along the edge? I suspect hot glue would work quite nicely.
Love your design ideas. And yes, not only do I intend to paint a drop cloth, my home office desk chair is shaking out of fright right now!
jeane
Lol! Thanks, Jeane!!
Hi Liz! Pretty amazing your office chair!! I love it!!! Besides, in order not to get any remarks from your husband, try cutting the foam with an electric knife (I bought one at second hand that works great!). Thanks for posting all these amazing diy ideas.
Thank you, Analia! I have heard of using an electric knife before… I’ll have to shop around some thrift stores for one! Great tip!
When you go into Joanne’s fabrics and crafts, I’ve seen them using an electric carving knife to cut the foam pieces for customers. I’m sure it might be a special one, probably a little more powerful than the normal household carving knife but I may be wrong.
What a super job you did on this chair; I’m not a lover of houndstooth anything but it sure does look sharp on this project. Question for you. were the rollers/wheels removable? I was wondering how you could spray the frame of the chair without getting any of the rollers/wheels? Thanks for sharing this project with us and for all the inspiration. My office chair seat has sunk in..from my weight and long hours of sitting in it so for the past year, I always sit on a bedpillow on top of the chair seat. I don’t see how anybody can sit in an office chair without arms on the chair itself. I’d be afraid of falling off the seat or out of the chair.
Thanks for the tip on using an electric carving knife, Betty! Great idea! And no, the wheels were not removable on my chair, so I just covered them up with painter’s tape before spraying. Sounds like you deserve a new office chair soon! 🙂
I LOVE this. Permission to use a photo or two on our blog with links back and credit of course? Email me if so 🙂
Hi Abbey! You can absolutely share this on your blog! Thank you so much for asking, and I’m thrilled that you like the project! Your fabrics always make me swoon. 🙂
Lovely! I’ve never thought of reupholster an office chair!
Me either until I spotted that $5 chair in the thrift store! I knew I could make it pretty somehow! Thanks so much for stopping by, Jessica!
Love.the.chair! So plan to do the one in my home office… I always wondered what was under that horrible ribbed back that I.HATE.TO.DUST!
Thank you! (instead of a white frame… I’m thinking bright Red! Whoohoo!
That was EXACTLY my thought! Who wants to dust that ugly plastic piece all the time? Much better without them! And I think red would be FABULOUS!
Once again you inspire me to do more of my ideas. Awesome job with your office chair. I just finished my computer desk, I am one of those people who likes all of the mess out of sight. It was tricky in that it was laminated, done in red, white and some of the orginal cherry like finish, it now looks so good with my gray walls.
Your desk sounds beautiful! Thank you so much for your sweet compliments!
Very nice. I have also recovered office chairs in the past. I have one old faithful that I can’t bear to part with because it is so comfortable, so I use it till it gets shabby and then recover it. Love it anew every time. Here’s the trick I stole from an upholsterer for doing the chair back. Make a double welting (looks like two weltings next to one another, but it’s actually just one piece of fabric around two pieces of cord). Stitch-in-the-ditch to attach the welting to the cover piece that you will put on the back of the chairback. Then staple in the ditch to attach it. It actually works very well, looks professional, and is really easy to do. And a bonus is that it gives a little extra security to the seat back by using extra staples.
I have never tried repainting my chair, as you did, but your success is very impressive, and I’m eyeing Rustoleum’s bright blue paint for my next makeover. See what a monster you have created?!! Keep up the good work!
Thanks for the upholstery tip! I might have to try that! Your bright blue paint project sounds like it will be a fun one… keep me posted! Thanks for stopping by. 🙂
Such a smart fix!
One of my daughter’s roommates has a basic desk chair like that and would love the retro print you picked – I’ll make sure to share the link with her.
Awesome! Thank you Cecile!
Now I’m going to be on the look-out for one of these chairs!
Yes! I see them all the time now in thrift stores!
The chair makeover is amazing!!, love the fabric, and how you were able to bring a new life onto the thrifty chair. Sometimes people don`t understand why I do this or do that, and my answer always is ….is not the same.!!
I totally understand! Thanks so much for your sweet compliments!
What a great idea. I am moving into my 1st apartment for university very soon and was wondering how i could repurpose the office chair I already have and this is a perfect how to.
I’m so glad this could help you, Anne! Good luck at university!
I just love, love, LOVE the desk and chair! A little frugal tip I’d like to share…I like to get men’s suit jackets from the thrift store. You can usually find some unusual patterns and fabrics there. And I use them to recover chairs! My kids’ chairs at their desks have been recovered like that and I really like them!
Wow, I love that tip, Julie! Thanks so much for sharing!
Totally great idea! Our local thrift stores always have LOADS of men’s suits that are hugely out of style. If you spray the fabric with Scotchgard, it should be easy to keep clean too.
Great tips, Dea! Love it!
I just managed to reupholster the arm of my office chair. It was shredding nastily after a disappointing one year in residence, so I’m feeling triumphant. But an entire chair! I’m in awe. Also wondering how you got the staples to go in. My artist’s grade staple wouldn’t deliver and I had to use the glue gun for everything.
Hey Cheryl! Doesn’t it feel great tackling a project like that? Awesome job! I have a basic staple gun that I purchased from the hardware store, and it goes through just about anything I ask it to.
Thanks! I guess I’ll go shopping, because I’m eyeing another chair…
🙂
I love this chair so much!!!!! Great job.
Thank you so much, Carmody!!
Not to mention two other great reasons for your project: kept the chair from a landfill (thereby helping Mama Earth) but also your purchase benefited a thrift shop. Kudos not only for sharing your endeavor but also.for the well-written instructions.
Very true! Thanks Anne!
I loved this update! It was simple but looks really professional! Great choice with the houndstooth and white combo.
Thank you so much, Shelly! I just adore that houndstooth!
I love this!!! Thanks for sharing at Monday Funday. I’m sharing this on Twitter!
Thank you so much, Katie! 🙂
So cute!
Thank you, Jonni!!
Liz, I am so happy to find your site. I am already planning on redoing my teenager’s desk chair. What a great tutorial. You are very talented. Thanks for sharing your talents with others.
How fun! I bet your teenager is going to love it! Thanks so much for stopping by, Donna, and have fun with the makeover! 🙂
Oh, sweet memories! I had this exact blue chair!! It was in my classroom at school for years and years, and I finally gave it to my MIL when I left teaching to be a SAHM. Now I want the chair back! It’s darling!!
I think we’ve ALL had a chair similar to this at some point in our lives… lol! Thank so much for stopping by, Brandi!
I can’t believe a post about a office chair makeover could inspire me so much haha. A nice reminder for myself to start making again instead of buying things. Thank you for sharing <3
You have inspired me to take a chance and and recover my office chair. I have found that the old grey covering needs a change.
I love what you did with yours and the idea of recycling and and achieving a new look without throwing away a good chair is great. We are buying and throwing away too much nowadays! Also you end up with a wonderful product that is yours only and personal. Your house doesn’t end up looking like the page from a catalog or magazine. It has your own personal touch and warmth.
By the way, I use an old electric serrated knife that I’ve owned for about thirty years. I used it for meat a few time but then used it for sponge and foam and I have made wonderful toys, games, shapes and cushion padding. It’s so easy to use and control.
Well, enjoy your new chair and I will follow your news in your newsletters. Thank you for sharing.
You are so right, Margot! Anytime I can find a way to re-purpose something, I’m a happy camper. It’s much more special than buying something straight off a shelf! Welcome to Love Grows Wild, friend! 🙂
Love the chair and your reasons for tackling such projects.
My beautiful sewing studio in the garden is spoilt by an old office chair. Now I know what to do!
Thanks for sharing.
Pat
It looks great! I agree that we do these crazy things just because we enjoy it and it makes everything be a little bit of us! I have a desk chair to recover too (actually several!), but right now the cat has taken it over, so it will have to wait!
I love the chair! Lenny and I are getting ready to redo one of our bedrooms into a home office and I’m already thinking about finding just the right chair that I make “mine.” Love it!!
Well done and perfectly said. That is how I live and sometimes ask myself “why?” Then I find myself tackling another project. Tell your husband that a serrated knife, frequently an electric one is an accepted tool for cutting foam. I keep a old electric in my workroom.
Yes! I will definitely be doing this now. I’ve been needing an office chair for a while now, but you practically have to sell you soul for one that actually looks pretty. This is such a great idea. I was wondering how you got rid of the ribbing on the back. Genius. Now I’m going to buy a $5 chair and do the same thing. Thank you for such an easy and inspiring DIY!
I love this! How much material did you use? My daughters is exact as yours.