
Can we just pause for a moment to celebrate this exciting occasion… It’s my first pallet project!! Yes, it’s true… years after the world discovered the rustic, salvaged beauty of old wood pallets and their incredible use for DIY fanatics like myself, I have finally jumped on board and embraced this awesome trend. Better late than never, right?
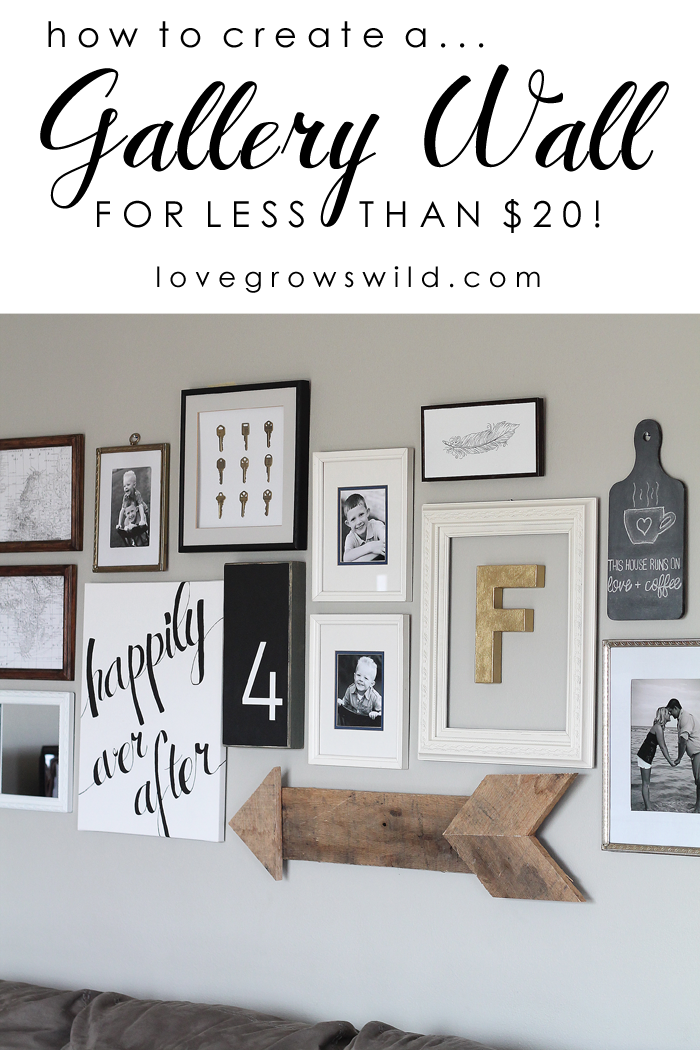
So today’s project is a small part of a much bigger project I recently shared, my living room gallery wall! If you haven’t checked that post out yet, I highly recommend you go see how it all came together! I am SO smitten with this gorgeous new display in my living room. I’ve been getting so many sweet comments from readers (you guys are the best!), and when I asked what the first piece you wanted to see a tutorial for was, this wood pallet arrow definitely got the most votes! You spoke, I listened, and here we go, folks! A tutorial for creating an awesome, rustic Wood Pallet Arrow!
![]()
Before we get started, I want to give a big shout-out to the best little sister in the whole world for dragging this pallet along on a 6 hour car trip to visit me for my birthday. Spending time with her PLUS a fun pallet to play with = the best birthday ever. You rock, sis. You totally get me.
Another brief shout-out goes to my husband, who receives a suspicious text from his overzealous wife at 8 am asking if we own a reciprocating saw, and replies with “It’s in the garage next to the back door. Don’t cut your fingers off.” Thank you for sharing your tools with me and caring for the safety of my extremities. I knew you were a keeper.
Supplies:
wood pallet
miter saw
wood glue
clamps
screws
drill
sawtooth hangers
The first thing you’ll need to do is break down your pallet. I tried prying the boards apart as I’ve seen in some tutorials, but mine wouldn’t budge. I learned real quick how to use our reciprocating saw and separated the boards by carefully cutting right through the nails. It made this process go SO much quicker. I only needed 2 boards for this project, so I still have some left over to save for a rainy day. If you don’t have a pallet or easy access to one, you could certainly purchase wood boards from the hardware store as well.
Once I had the pallet boards I needed, I cut them into these 4 pieces with a miter saw: the tip, the body, and the two tail pieces.
![]()
I’ll do my best to describe the cut dimensions, but feel free to ask if you have any questions. The labeled photos below should help.
For the long body piece, I cut a 5 1/4″ wide pallet board to 24″ long.
For the tip or point of the arrow, I cut a 5 1/4″ wide board to 8 1/2″ long and formed the point with two 40° cuts toward the center.
![]()
For the tail, I cut a 5 1/4″ board on a 45° angle to 7 1/2″ x 5 3/4″. Then I duplicated that for the other side of the tail.
![]()
To assemble the arrow, I used wood glue to attach the two tail pieces together and the point of the arrow to one end of the body. I used some handy dandy clamps to hold the pieces together while they dried.
![]()
You’ll see in the photo above that I first wanted to have the tip of the arrow flush with the body. It didn’t seem very sturdy, so I ended up attaching it over the body piece instead of flush so I could secure it with a few screws from the back. Once the tail pieces were dry, I attached them to the other end of the arrow body with wood glue and clamped those pieces in place to dry. I drilled a few small screws into the tail end also to help hold everything in place. Then I added two sawtooth hangers (because of the arrow’s length) to the back and hung it on my gallery wall! What do you think? Not too bad for my first pallet project, right?
![]()
You could certainly paint or stain the arrow, but I just love the rugged, natural look with all the gorgeous imperfections of pallet wood. The wood grain, the weathered texture, the stains and dents… it was just too beautiful to cover up.
![]()
It’s amazing to me how adding this one simple natural element to the gallery wall totally brought it to life. With all the straight, clean lines of the black and white picture frames, an imperfect, aged, beaten-up pallet wood arrow added the perfect balance my gallery wall needed.
![]()
And although you can’t see it in the picture above, when I put together all the pieces of this gallery wall puzzle, the wood arrow happened to be pointing from the picture of my husband and I on our honeymoon to the “happily ever after” canvas art I created. That was a pretty awesome coincidence, if you ask me. 🙂
So there it is! The next time you spy a pallet somewhere, be sure to snag it so you can make one of these gorgeous wood pallet arrows! Thanks for hanging out with me today!
To see all the project tutorials from our living room gallery wall, click the links below:
Living Room Gallery Wall
Fabric-Covered Frame Mats
DIY Canvas Script Art
Key Specimen Art
Like what you see? Subscribe to Love Grows Wild so you’ll never miss a post!
Follow along on Pinterest, Google+, Instagram, and Facebook for more fun!
More DIY home decor projects:
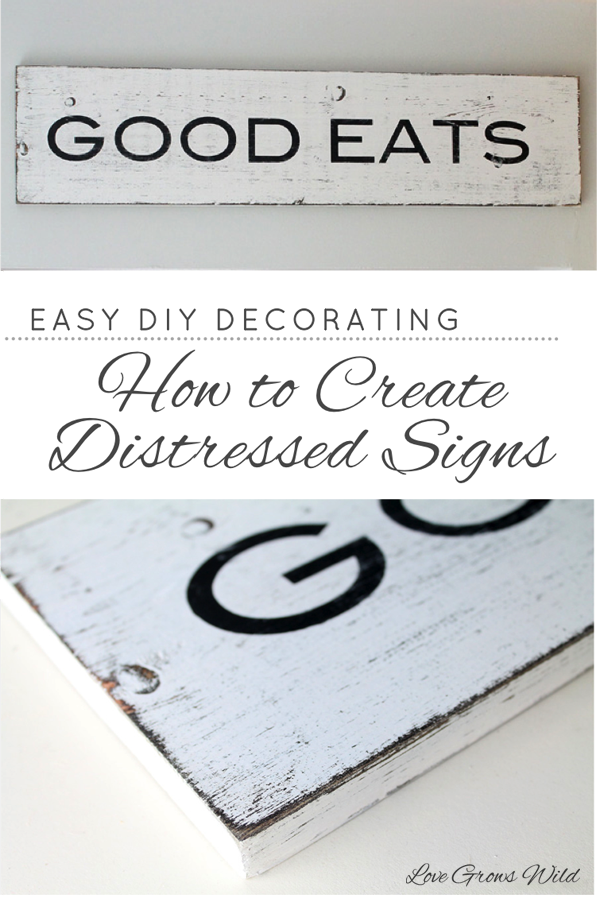
Easy Distressed Signs Tutorial
LET’S KEEP IN TOUCH!
Subscribe to Blog | Browse my Shop | Follow on Facebook | Follow on Twitter
Follow on Google+ | Follow on Pinterest | Follow on Instagram

I am loving your pallet arrow, awesome. Love the rusticity with other items on wall. Great layout.
I’ve gotta print that out so hubs can make me one or so. How many ways can you alter look of an arrow? We have lots of pallets that have seasoned over winter in back yard.They get that kinda greyish look? Love ’em that way. Your arrow look so great on the wall. Great job for first time pallet worker.
I won’t be doing cutting on my arrows, due to less than great eyesight I’ve been banned from using saws. I do a mean sanding tho. After I print out how to on the arrow I’m going to peruse other projects below on this post. Happy Spring
Thank you, JaneEllen! It sounds like you have quite a stack of pallets in your back yard ready to be played with! You just can’t beat that natural, weathered gray look. I’m so glad you enjoyed the project, and have fun creating!
What a fun first pallet project! I love it, and I agree…the rugged natural look is perfect for it! And how did I miss your bday???? 🙁 We need another coffee date to celebrate for sure!!!
Birthdays aren’t nearly as fun to celebrate as you get older! But I’ll take a coffee date with my favorite curly-haired friend any day. 🙂 And thanks for the love on my first pallet project! You know I love playing with my tools!
Liz, your gallery wall is PERFECTION and the wood arrow is one my favorite pieces. Thanks for the awesome tutorial! Pinning and sharing!
Thank you, thank you!! I’m so glad you like the tutorial, Tasha! I don’t think you could ever pick a favorite child, but this pallet arrow has to be my favorite thing I’ve made! Thanks for sharing, girl!
LOVE this! Such a cool, rustic addition to the gallery wall (all of which looks fabulous!) Pinning to share. 🙂
Thanks so much for sharing, Dawn!!
I love so much about all of these pictures! Thanks for sharing the arrow tutorial! I can’t wait to try it!
I also love the Happily Ever After art! Did you make it, too?
I’m so glad I stopped by! So many ideas flowing now!
Amber
I’m so glad you love it, Amber!! I bet this arrow would look gorgeous in your house too! And yes, I did make the Happily Ever After Sign… tutorial coming in the next few weeks! 🙂
Thank you so much for sharing this! I definitely want to make one for my home. <3 it! 🙂
You are SO very welcome, Emily! You’ll love this fun project! Thanks for stopping by. 🙂
You’re very welcome, sis! Looks good 🙂
Thanks sissy pants! 🙂 I still have some boards to use up too!
Your gallery wall is one of the cutest I’ve ever seen! So in love with it all. I can see why you are smitten.
You are the sweetest, Dominique! Thank you so much!! 🙂
Love Love Love the arrow! Super Cute!
We would love for you to come and link up with us at Your Designs This Time, Mondays 8:00amEST.
http://elizabethjoandesigns.com/2014/04/desings-time-no-5
Emily @ elizabethjoandesigns.com
Thank you!!
Hey Girl! It’s Deonna from the Child at Heart blog. I was just stopping by to say hello! I saw this a few days ago and loved the arrow and now I can make my own 🙂 Pinning! I am doing a great spring necklace giveaway and would love for you to come by and enter to win 🙂 Have a joyful week!
http://www.thechildatheartblog.com/2014/04/spring-statement-necklaces-from.html
Hi Deonna! Thanks so much for the pin! 🙂
I love this idea – must nag the hubby to collect me some pallets 🙂 And I love that gallery wall – thanks so much for sharing 🙂
He’ll get used to the project nagging… mine did! 😉 I’m so glad you love my gallery wall!
Your gallery wall looks absolutely amazing, Liz! Pinning:-)
Thanks for the pin, Aniko! I’m thrilled that you like my little pallet project! 🙂
I think your next project with those extra boards should be a race medal holder… Something like that super cute necklace holder you made me (hint hint) 😉
I love how subtle you are. 😉
WOW! Love this arrow – I’ve also done a similar arrow but mine was a tiny bit bigger and made from old fence boards. And your sister is pretty awesome for picking up that pallet – the wood is actually quite beautiful!
Old fence boards would make a gorgeous arrow, I bet! And yeah, I definitely owe my sister big time. She’s pretty awesome. 🙂 Thanks for stopping by, Meagan!
I absolutely love this. Another one of your projects I’ll be tackling soon, thanks!! xx
http://thethingssheseesblog.blogspot.com
You’re so very welcome, Megan! This arrow project is one of my favorites!
I loved the pallet arrow so that I had my hubs whip me one up in a jiffy. Thanks for the instructions! I’ve been wanting one for a while!
That’s awesome, Chrystal! What a great hubby you have!
I love it! What is the color of the wall paint? Thanks!
Woodlawn Colonial Gray by Valspar… thanks, Kristy! 🙂
I LOVE the simplicity and elegance of this arrow! I gave this project a shout out on my Twitter today, @Estimake 🙂