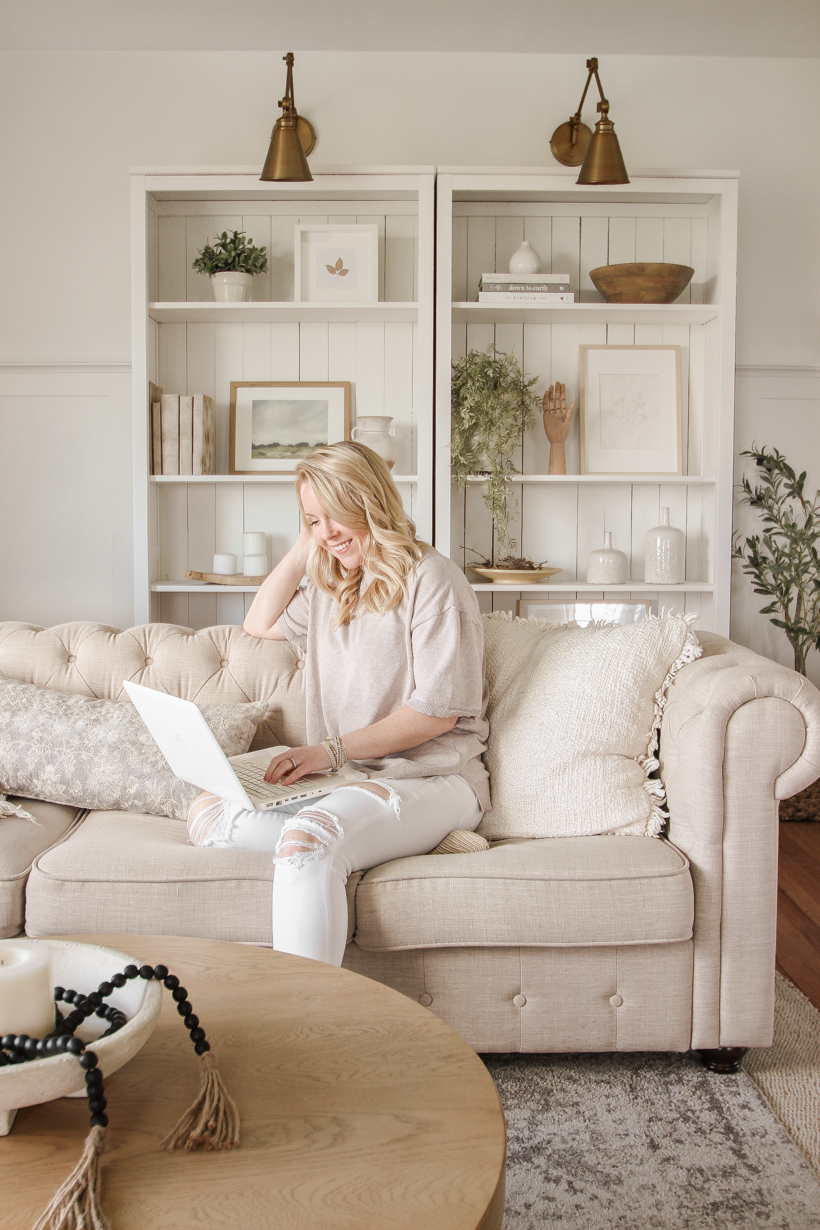
I’ve had a lot of requests lately to share how I make my design boards, like the one I created for my son’s bedroom makeover a few weeks ago, and today I’m breaking it all down for you! A well-curated mood board is one of the most helpful tools in a designer’s tool belt, but I personally think it’s something any homeowner can and should do when decorating.
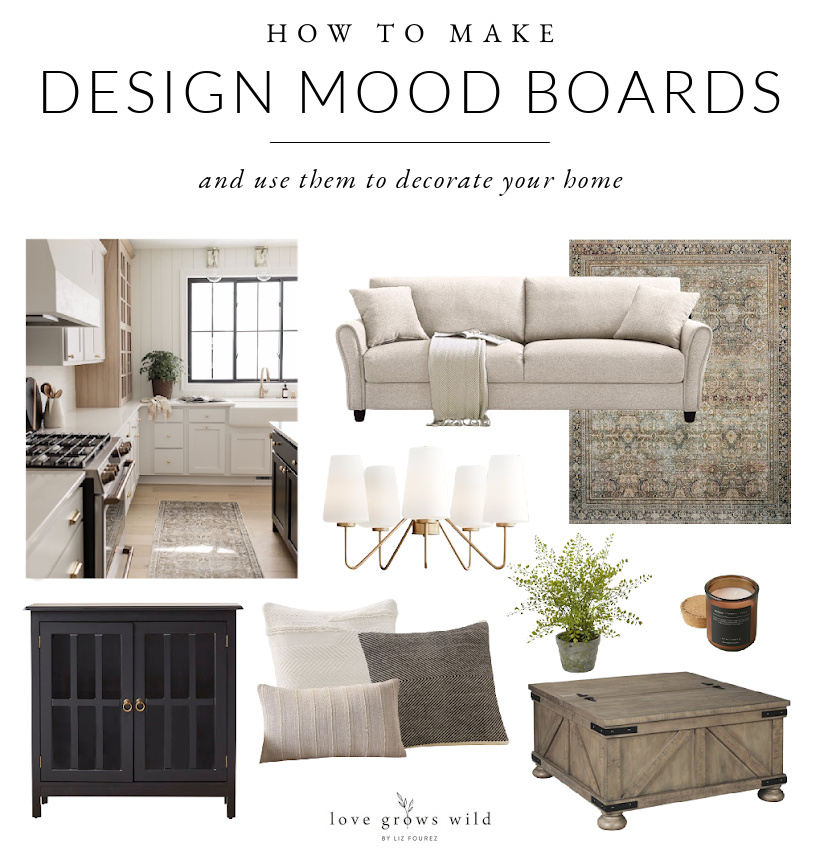
In today’s post, I’ll be going over exactly what a mood board is, when and why you should make one, and how to do it well! You’ll also get to see a beautiful living room design I created for this post using inspiration from a kitchen photo I found on Instagram. Let’s dive right in to how to make design mood boards and use them to decorate your home!
What is a mood board?
A mood board is simply a visual representation of ideas for a project. A collection of images, colors, textures and products arranged together to evoke a particular style or concept.
Why create a mood board?
Mood boards are used by designers as a tool to organize the overall style, color palette, and vibe for a specific room or space. It gives you the opportunity to visualize all the pieces of a design together before the project begins, saving you potential time and money down the road for mistakes you’re not happy with. A mood board can help you narrow down paint color options, furniture and rug selections, decor items, lighting, hardware, and so much more, which will make the design process much more simple, streamlined, and enjoyable! And if you decide to work with a designer or even recruit a friend to help you, having a mood board to show them your vision will be very beneficial.
How to make a mood board:
First, you’ll need to gather images for your mood board. Look for photos of spaces that have the same color/style you are going for and furniture/accessories accessories you think would work well in the room. Save the images in a folder on your computer or to your desktop for easy access by right clicking on the image.
TIP: If you’re unable to save a photo for any reason (many websites protect their images), you can always take a screenshot (shift, command, 4 on Mac).
BONUS TIP: I recommend also pinning your images on a Pinterest board in case you want to go back to that product or website later on in the project.
There are a variety of places you can create a mood board such as PicMonkey, Canva, or even Microsoft Word. I prefer to use PicMonkey myself and have used it for years to make social media graphics, design boards, and more.
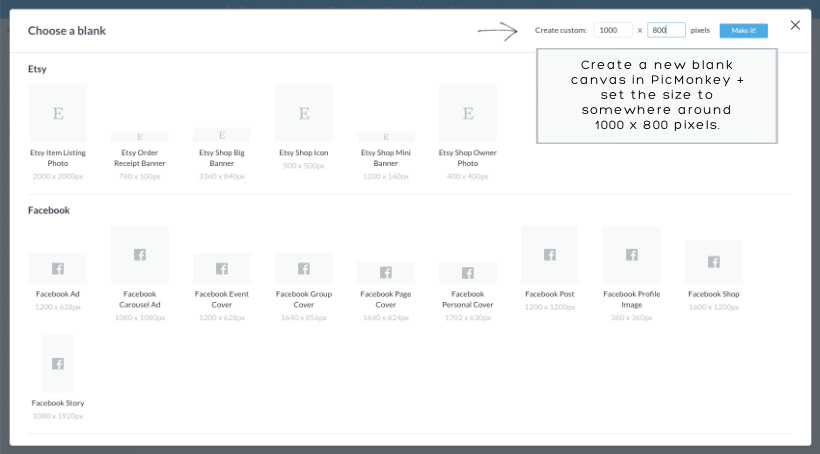
On the PicMonkey home screen, you are going to click Create New – Blank Canvas. It will give you a variety of size options to choose from, but I always create a custom size somewhere around 1000 x 800.
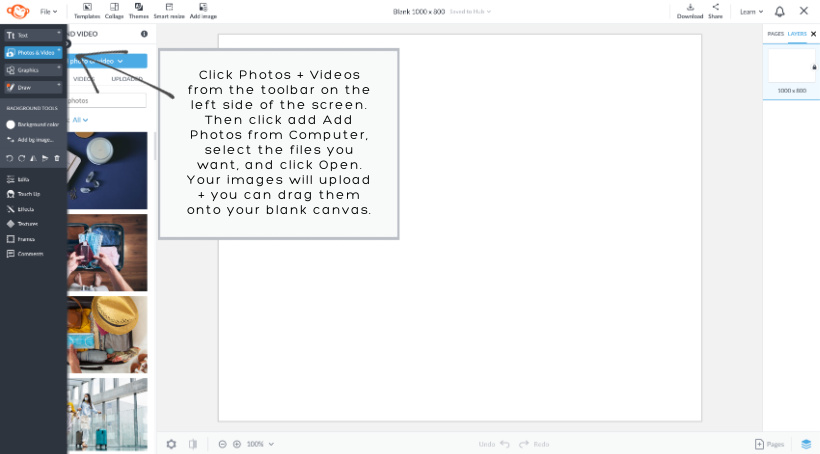
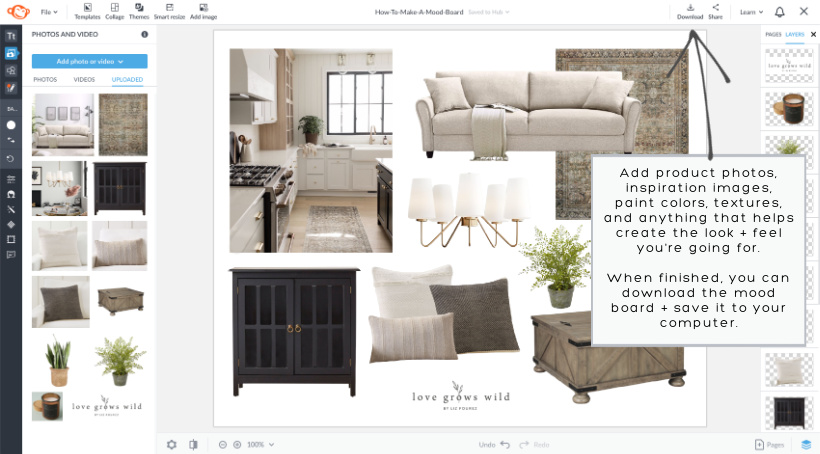
To add your saved images to the canvas, click Photos + Videos from the toolbar on the left side of the screen. Then click Add Photos from Computer, select the files you want, and click Open. You image will upload, and you can then drag it onto the blank canvas.
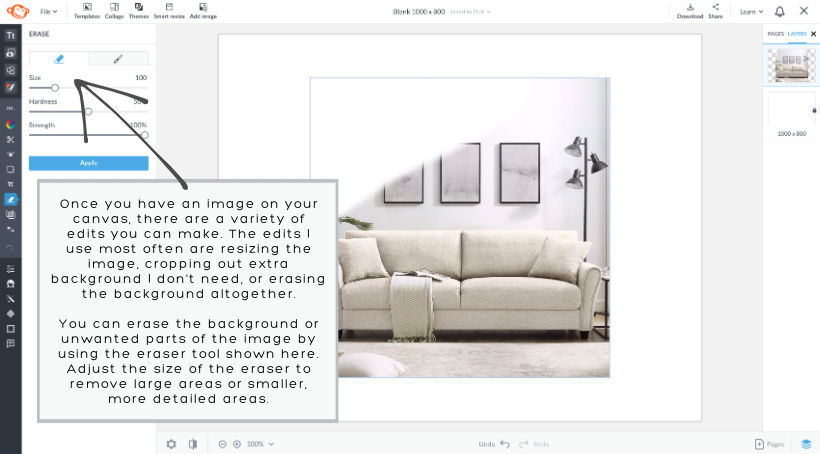
Once you have an image on your canvas, there are a variety of edits you can make. The edits I use most often are resizing the image, cropping out extra background I don’t need, or erasing the background entirely.
You can erase the background or unwanted parts of the image by using the eraser tool shown above. Adjust the size of the eraser to remove large areas or smaller, more detailed areas.
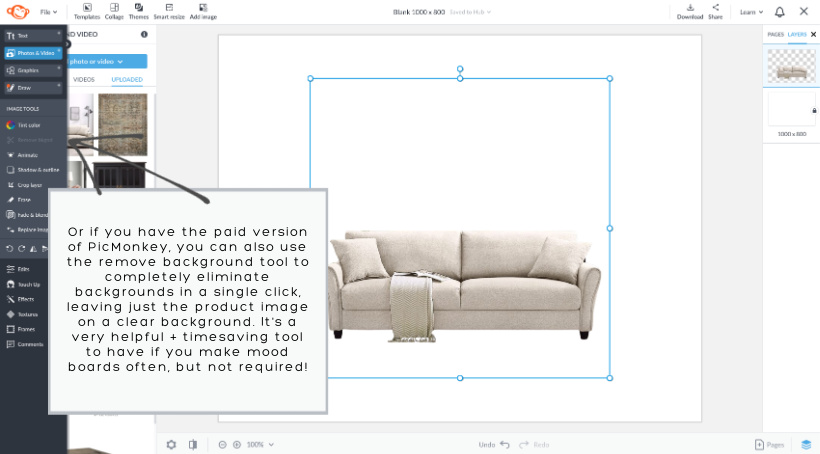
The majority of PicMonkey you are able to use completely free, but it does have a few paid features that can come in handy. If you pay for the upgraded features, you can use the Remove Background tool to completely eliminate backgrounds in a single click, leaving just the product image on a clear background. It’s a very helpful and time saving tool to have if you make mood boards often, but the paid features are certainly not required!
Add as few or as many images as you like to your mood board until you feel like it accurately represents the direction you want to go with your design. If you create a PicMonkey account, you can save your mood board to what they call a “hub” and go back to make changes and edits whenever you want. Once you are completely satisfied with the design, download the mood board and save it to your computer and phone for easy reference as you shop and put the room together!
Mood Board Tips:
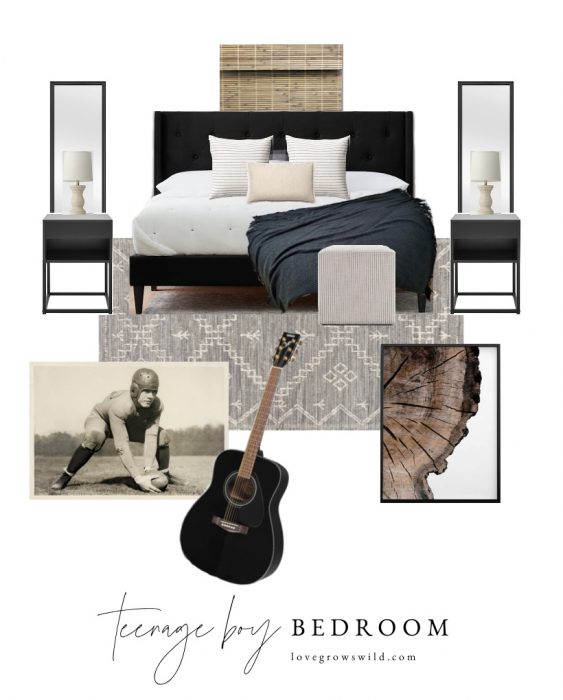
- If you want to take your visuals a step further, you can arrange the images in your mood board as they will be laid out in your space, almost like a floor plan. Use the layers toolbar on the right side of the screen to layer images on top of each other, such as a sofa on top of an area rug. Below is an image of the mood board I created for my son’s bedroom makeover, which displays this example.
- When looking for images to save, search for products on a simple or white background, which will make putting together your mood board much easier and more visually appealing. Busy backgrounds can distract from the overall design you’re trying to achieve.
- Ideas for what to add to your mood board:
- important pieces of furniture such as beds, sofas, or dining tables and chairs
- rugs
- artwork
- pillows, bedding, throw blankets
- window treatments
- light fixtures, lamps
- inspiration photos
- color palette – gather colors from your mood board and add a row of circles or squares in those colors. This helps your eye quickly identify the desired colors for the room!
- If you don’t feel like messing with any special software to create a mood board from scratch, you can always make a Pinterest board dedicated specifically to the project you’re working on and gather inspiration photos and products there. Or try an app on your phone or tablet like Morpholio Board.
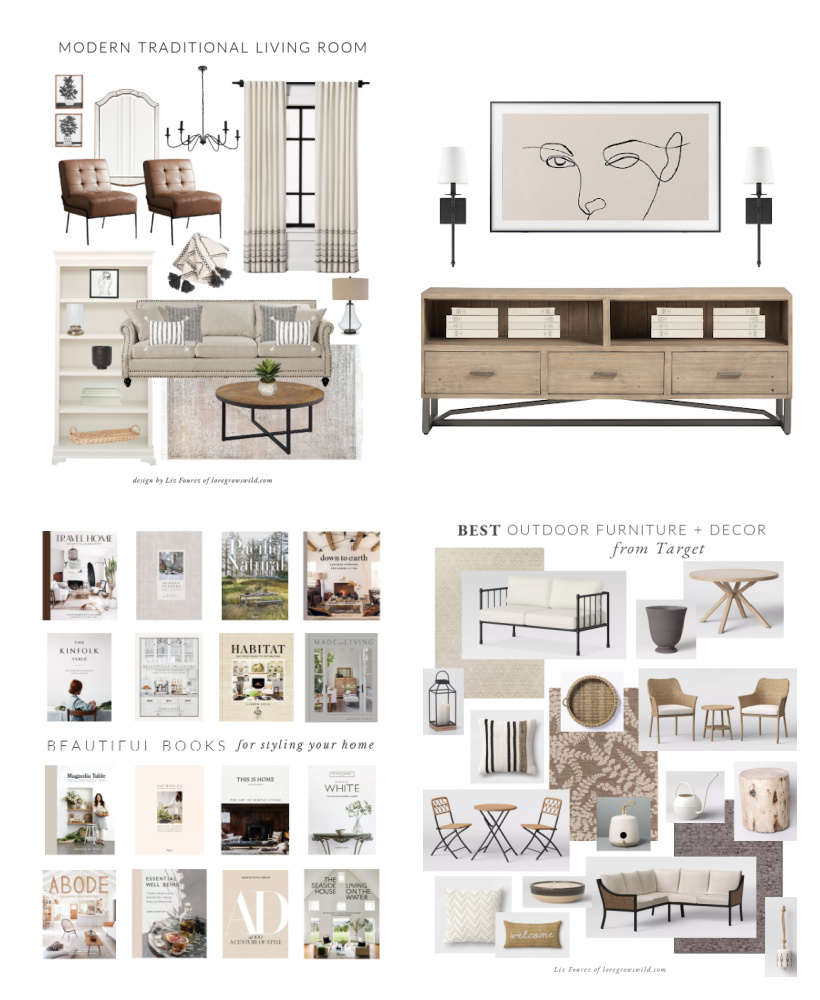
Other mood boards I’ve done:
Modern Traditional Living Room Design
Best Outdoor Furniture and Decor From Target
Beautiful Books for Styling Your Home
Designing Around a TV
– Shop the Post –
– Sources –
kitchen inspiration photo | area rug | sofa
chandelier | black cabinet | cream pillow
black pillow | tan pillow | coffee table
faux potted plant | apothecary candle
Note: As always, I sincerely appreciate you shopping through the links I share, which allows me to make a small commission from your purchase while your purchase price stays the same. When you use my affiliate links, I’m better able to create content for this blog as well as support my family, and I thank you from the bottom of my heart for supporting what I do!



I love this tip, and can’t wait to try it for my under construction dining room! Thanks for sharing!
This is so timely for me as I just started a mood board on Pinterest for my bathroom. Thank you for sharing.