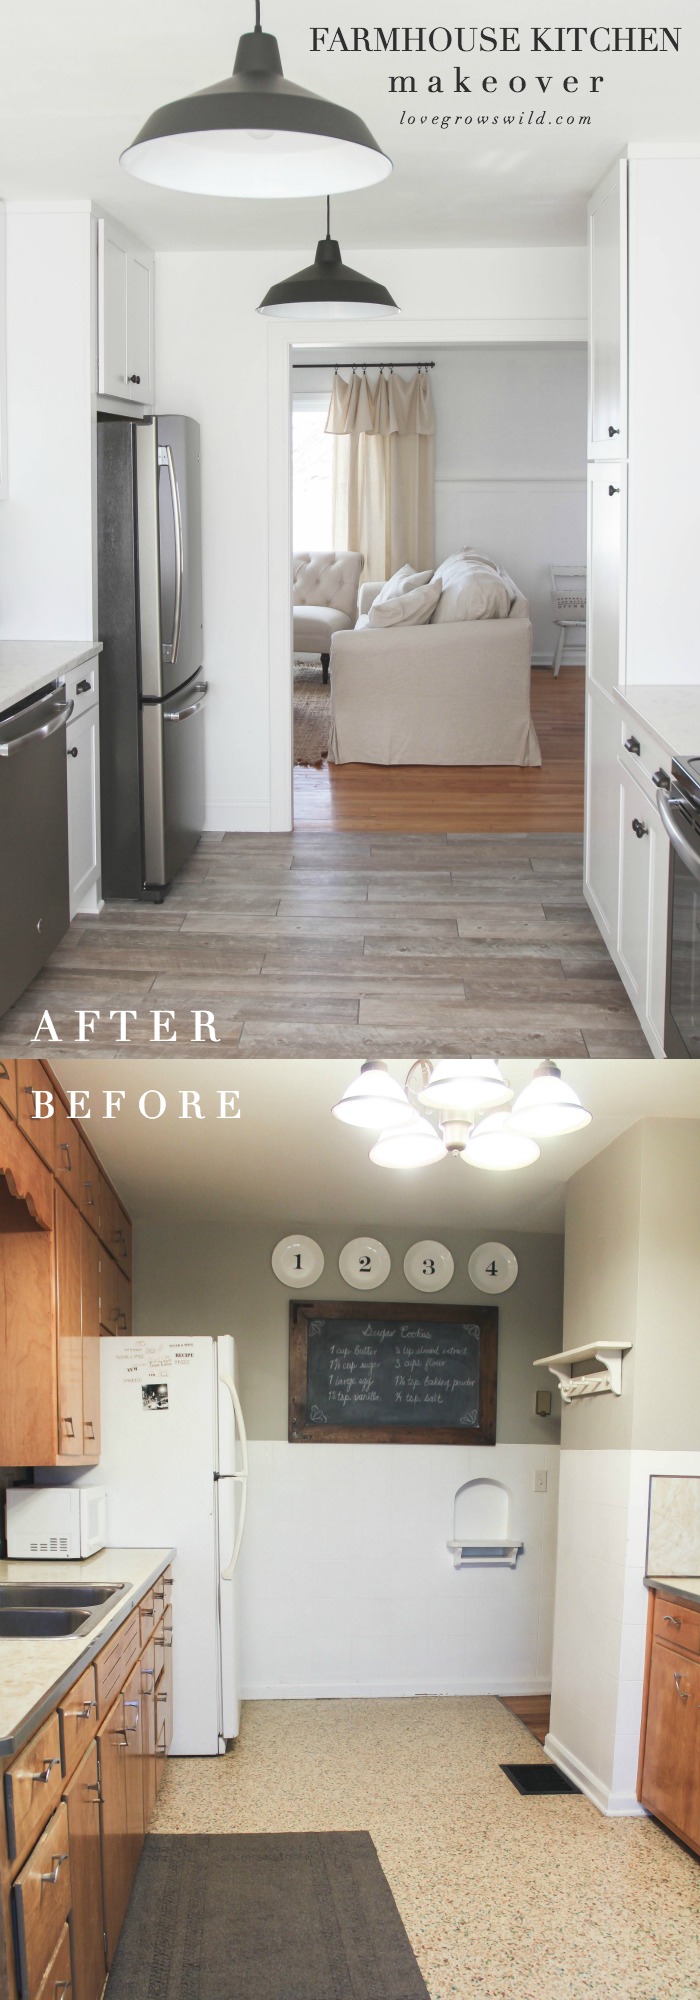
Our little farmhouse kitchen got a BIG makeover! This week I’m talking about the demolition of our old kitchen, the new layout, and ways we opened up the space… you can catch up on the rest of the kitchen makeover series here!
First of all, let me just say a big, heartfelt thank you for all the sweet comments I received from you guys on our kitchen makeover reveal post last week! I read through each and every one of them and couldn’t help but get a little teary eyed at the amount of love and support we received. Now that you’ve seen what our kitchen looked like BEFORE the renovation, I’m sure you want to see how we got to the AFTER, right? As Chip Gaines would say… it’s DEMO DAY!
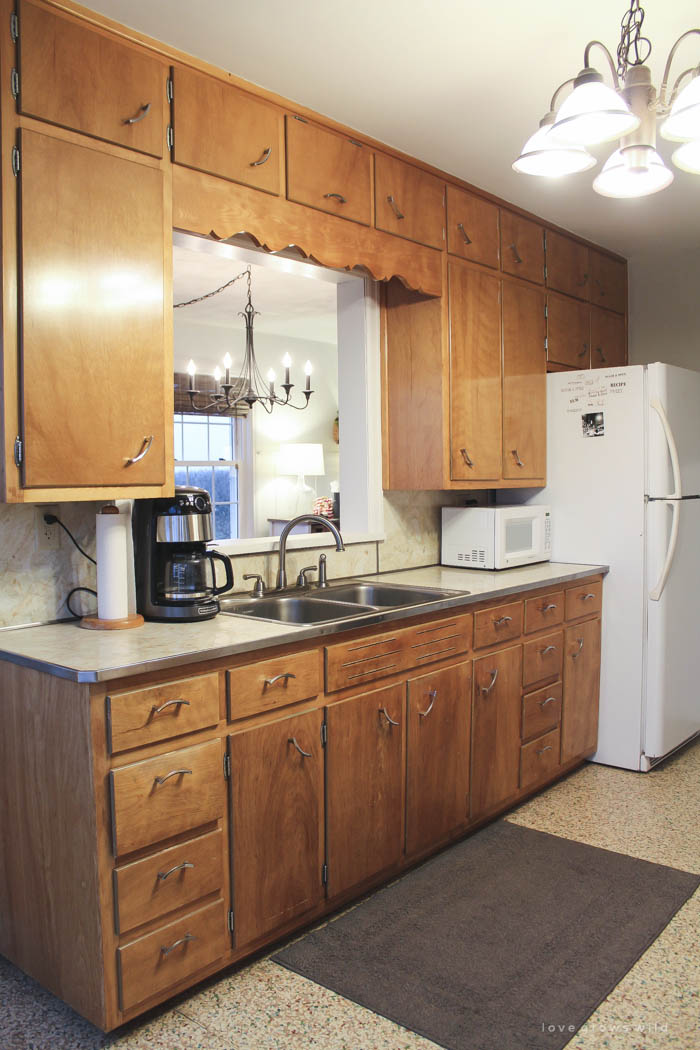
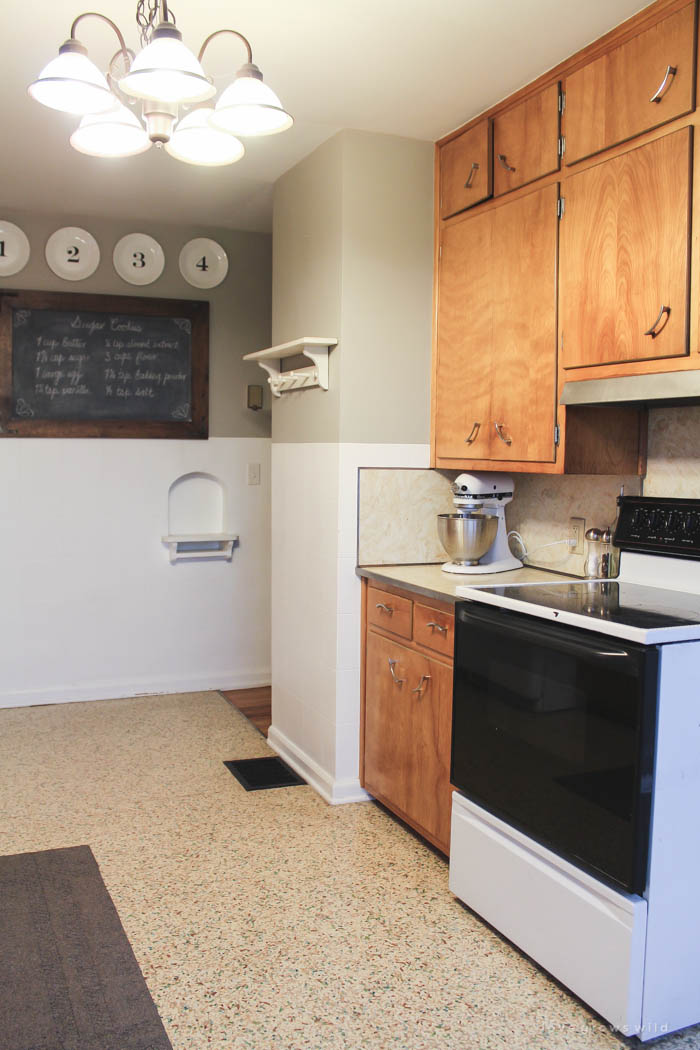
Here’s a little reminder of what the kitchen looked like just a few short hours before the contractor showed up with his demolition crew:
Ew, right?
Last October we connected with our contractor, RHK Contracting, through Lowe’s, and I feel BEYOND blessed to have found such an amazing company to work with. We’ve all heard the typical horror stories about contractors, but from the moment I met Heath when he came out to do a measurement on our kitchen, I knew I found one of the most honest, hardworking and high-quality ones out there. If you plan on living through a home renovation, especially a kitchen, I cannot stress enough how important it is to love the contractor you’re working with!
If there is one piece of advice I could give to anyone considering a renovation, it’s this: Treat your contractor like GOLD. Yes, you are hiring them to do a service for you (and most likely a very expensive one), but the better you treat them, the easier your life will be and the better your project will turn out in return. Our home is nearly 70 years old, so it was inevitable that we were going to run into complications, some bigger than others. Our electrical was a mess, the cabinet above our refrigerator was ordered wrong, and the structure of our kitchen was no where close to being level. But instead of getting frustrated when things weren’t going as planned and taking it out on our contractor, I asked what I could do to help. Jeremy and I ran to the hardware store a few times when they needed something, and I bought them donuts and baked them cookies. We laughed with them a ton, and the boys loved coming home from school each day to see what they were up to. All of this made a month-long, messy renovation MUCH easier to live through. Heath and the guys went the extra mile for us so many times from switching around their schedule to accommodate my blog deadlines, to redoing the tile transition in our bathroom, to many more little things.
Moral of the story… find a good contractor and be good to them! P.S. If you’re in the Northern part of Indiana (near Kokomo) and need a contractor, give RHK Contracting a call!
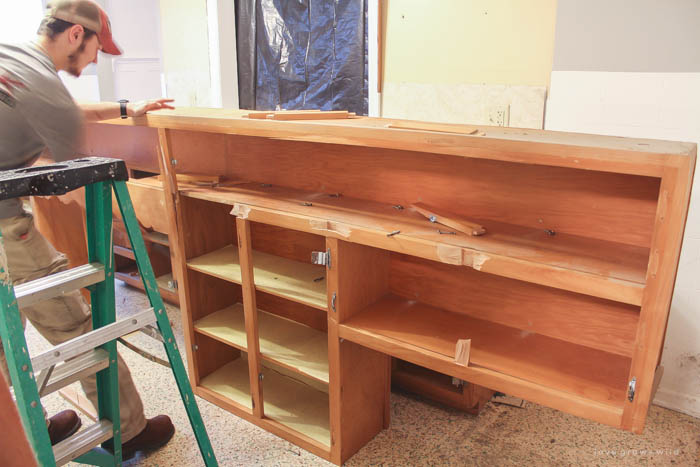
On Day 1, these guys didn’t mess around…
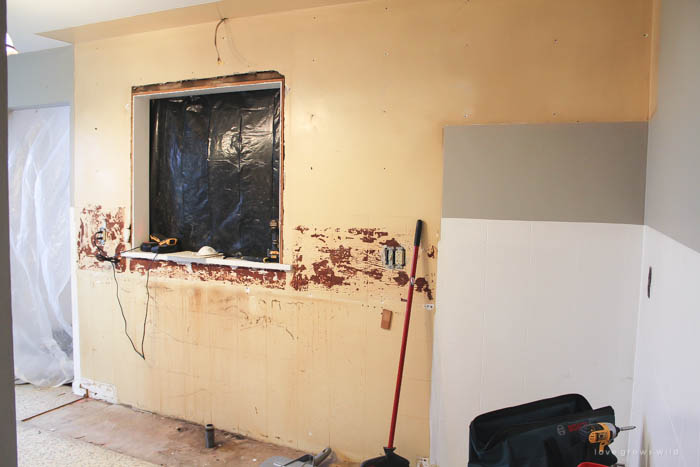
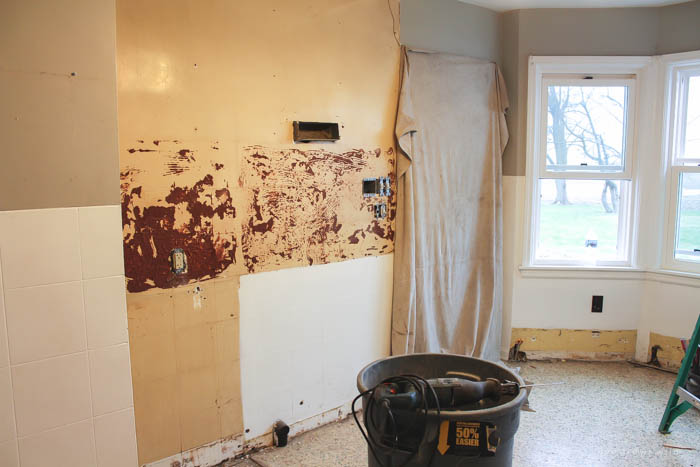
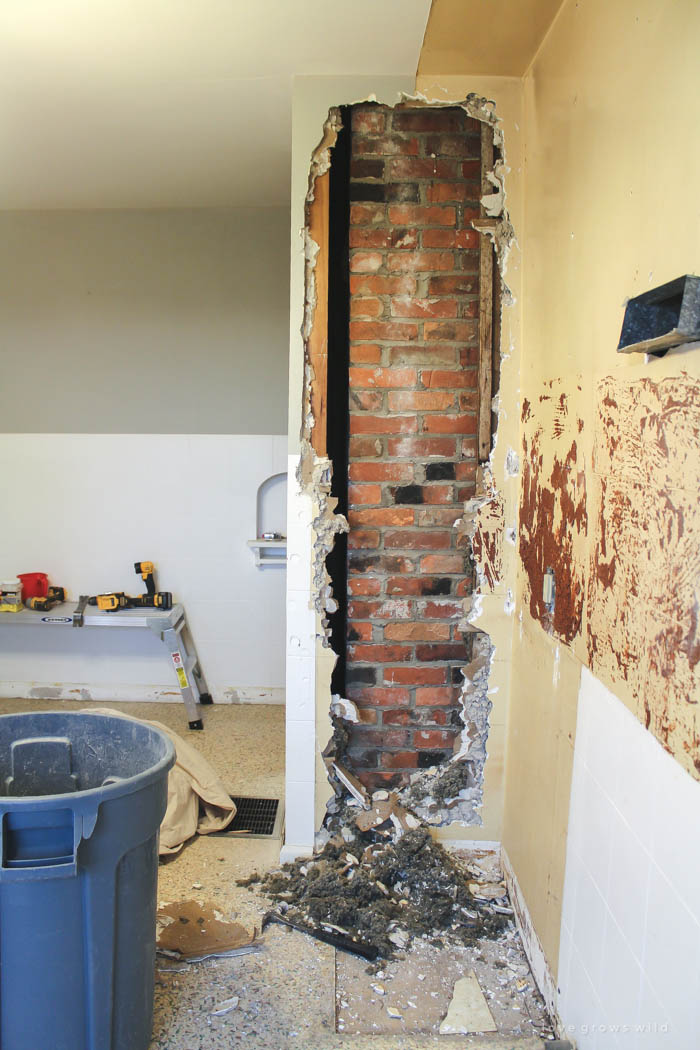
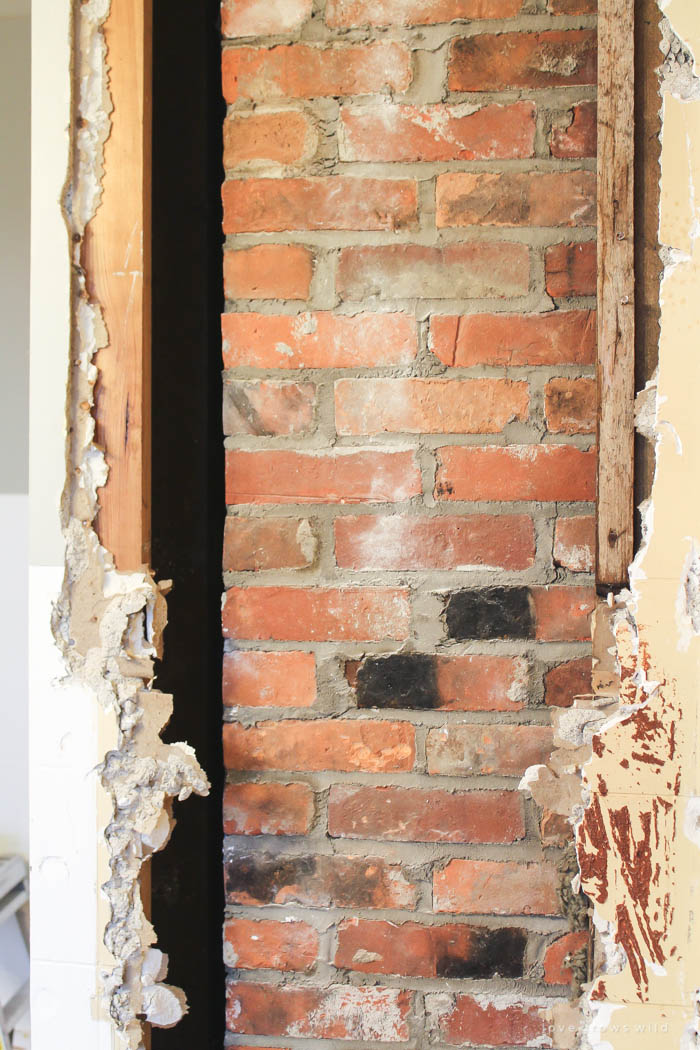
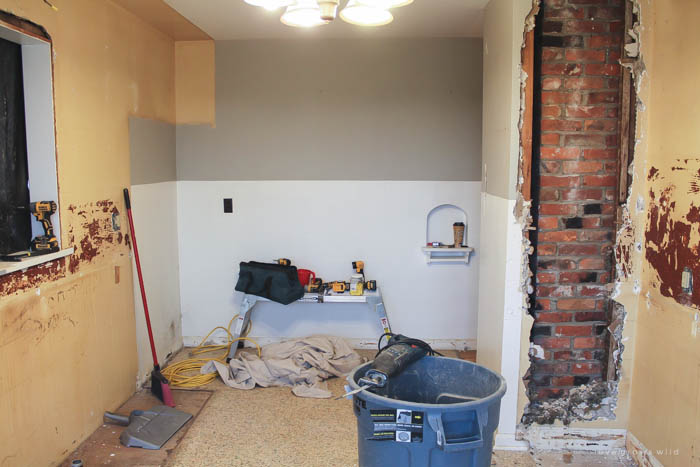
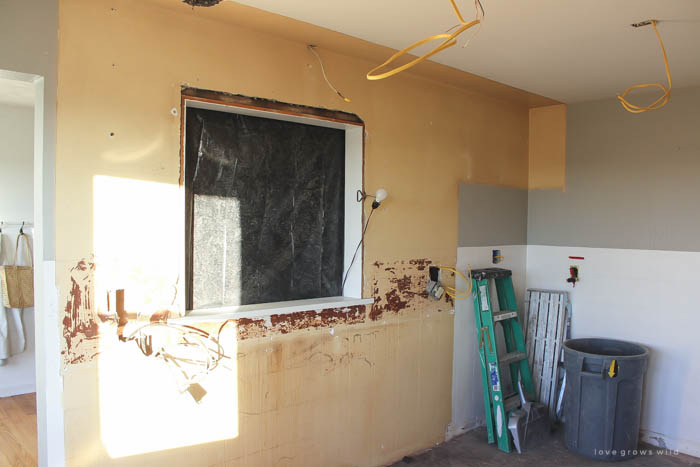
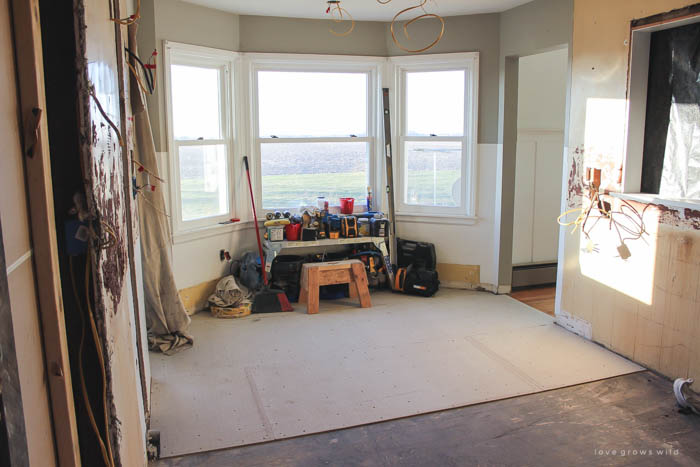
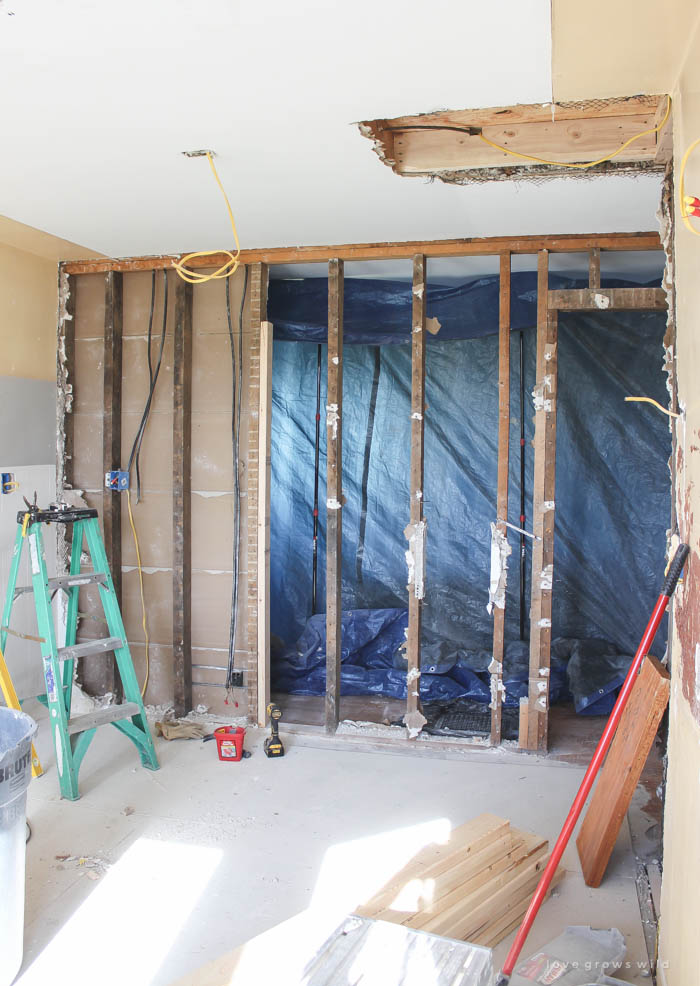
Cabinets, countertops, and the backsplash were torn out in no time, revealing the lovely yellow walls underneath. After those were out of the way, the guys got started with my first big request for the renovation… removing the chimney! Honestly guys, this was a tough one. I tossed the idea around of exposing the brick chimney and leaving it as a focal point for quite a long time. That old brick would be such a cool feature in the kitchen, but it still wouldn’t open up the space like I wanted, and with losing a cabinet already to add a dishwasher, I desperately needed the extra cabinet space.
As much as I loved the character that brick chimney would add, I would be so short on cabinet space that I knew I wouldn’t be happy with that decision. Functionality won over design this time. They tore the chimney out and got everything framed up properly, and yes, I most definitely saved some of the bricks they took out. I have no idea what I’ll ever do with them, but I couldn’t just let them head to the dump. Any ideas you guys have for what we could do with them are welcome!
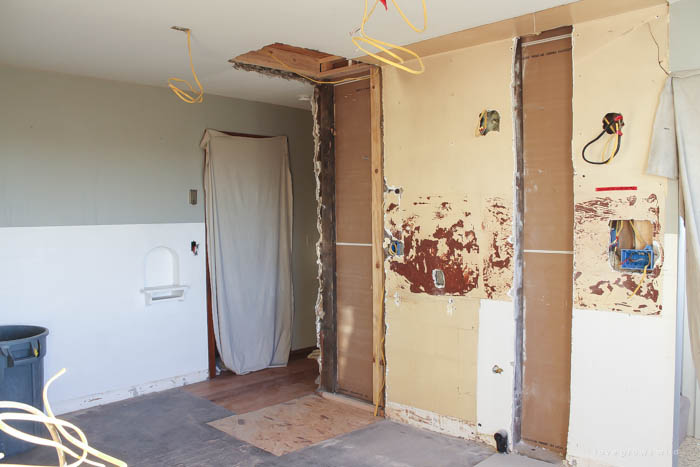
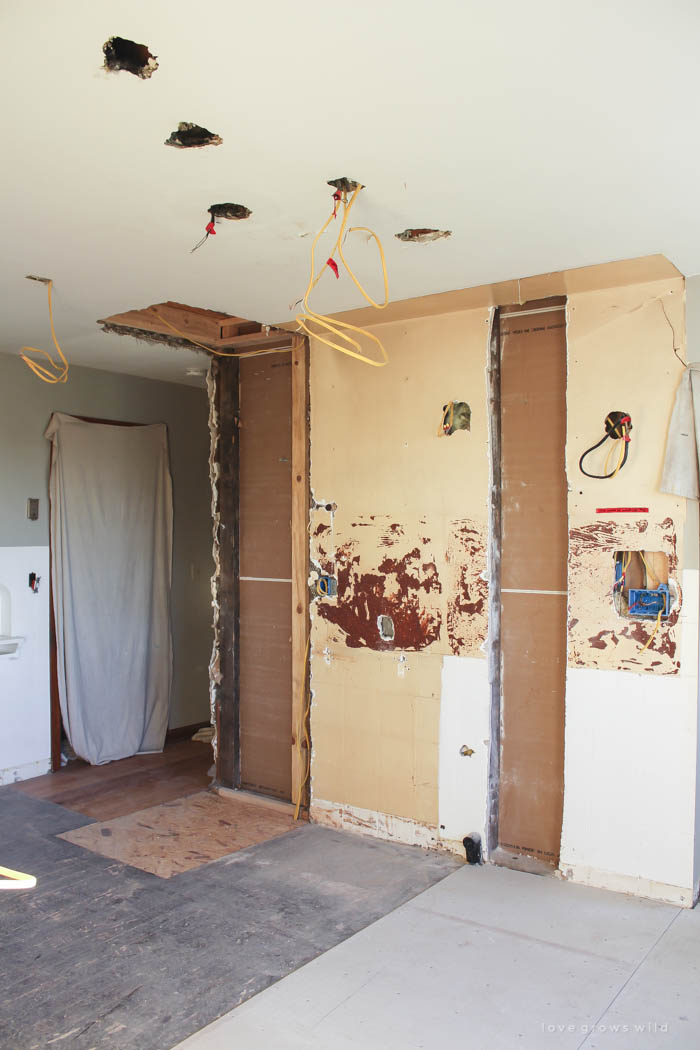
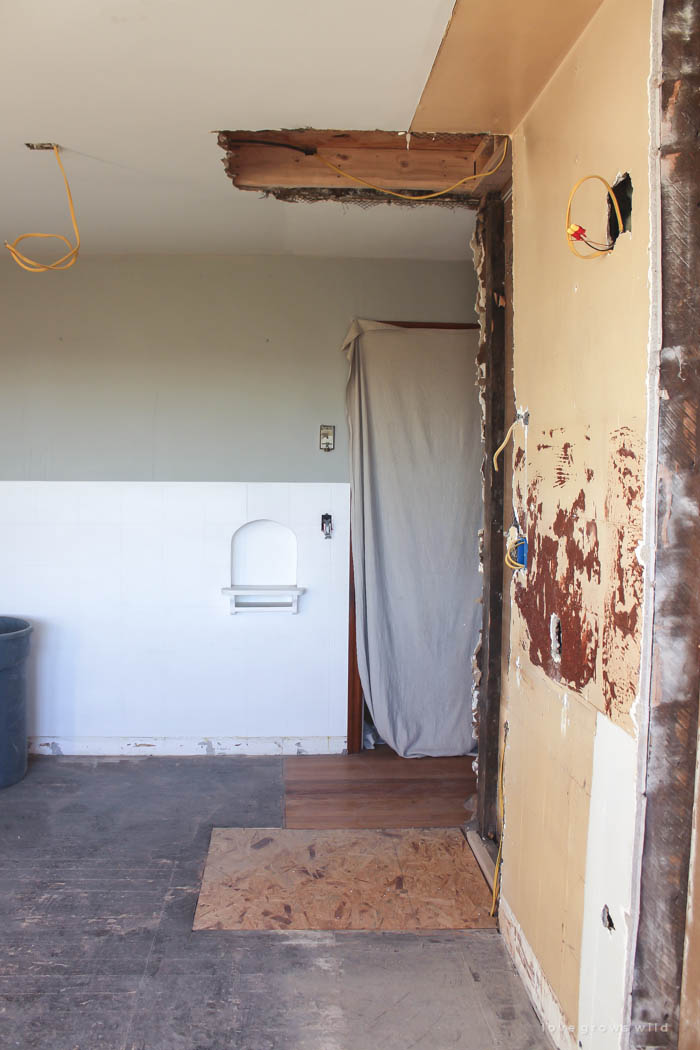
They got the old floor ripped up and started on electrical, which was QUITE a chore. I have very little electrical knowledge, but from what I could understand as Heath talked to Jeremy, we had wires running every which way, and it took a lot of mystery-solving to find out what went where. The holes where the wires ran through were so small compared to the size of the wire that they could barely pull the old wire out, hence the many holes you see in the ceiling. I won’t even pretend to understand all the hoops they had to jump through, but eventually they had everything re-wired and placed correctly. Getting to decide exactly where I wanted each outlet and light fixture to go was quite exciting after living in this old farmhouse for so long!
But the chimney wasn’t the only thing we were taking out in the kitchen…
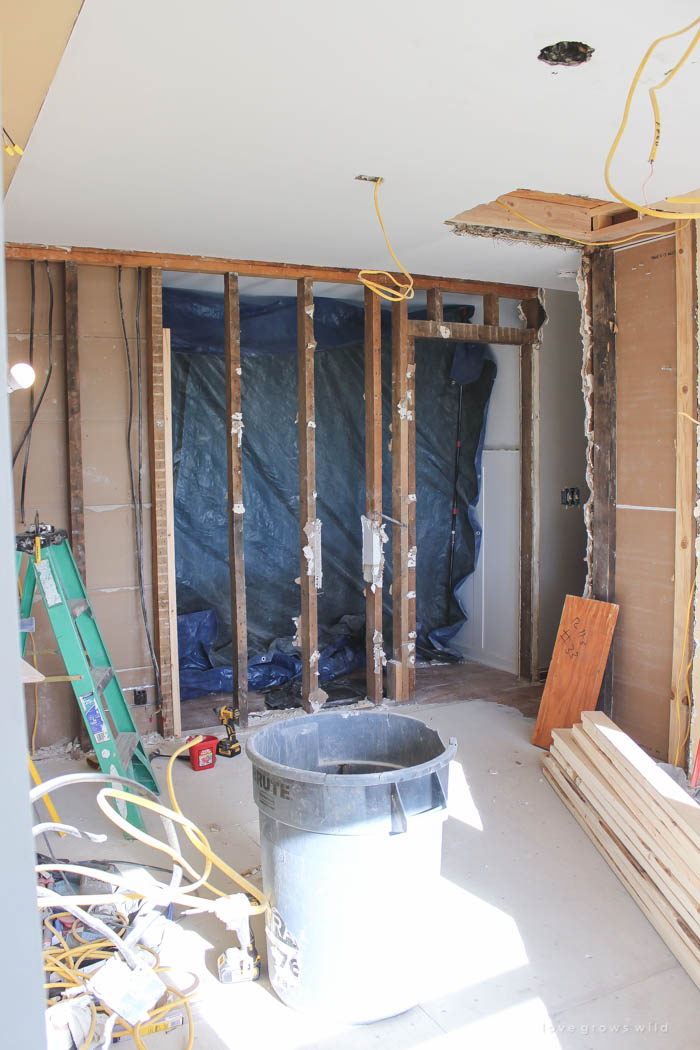
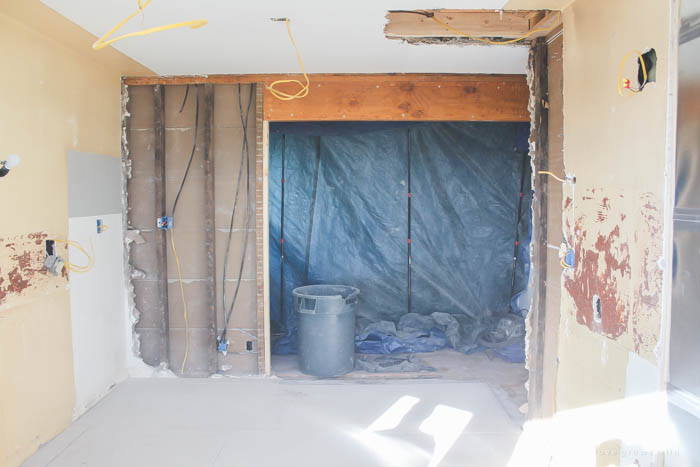
Ta-da!! That back wall is GONE! Well, almost gone. My other big request for this renovation was to open up the small doorway that leads to the living room. The kitchen felt so secluded and closed-off, and I knew that removing that wall would let a ton of light in and make the space flow so much better. But when the day came to tear down the wall, I had to do a little convincing with Heath and Jeremy.
“Do you really want an 8 foot opening?”, Heath asked.
“But if you take too much of that wall out, I’ll never be able to fit a bigger TV there!”, whined Jeremy. (insert eye rolling here)
Eventually we settled on a happy medium where Jeremy’s TV would still fit on the opposite side of the wall in the living room, and I would still get my nice, big opening. They couldn’t see my vision at the time, but I knew how amazing it would be and stuck to my guns.
We promised the boys that they could help do some demolition on the wall, and the guys were so awesome to let them go to town. There was a lot of, “I feel like I’m on an episode of Fixer Upper!”, said that day. Just like when we built our farmhouse dining table together as a family, this was a moment we will never forget. They will always remember the day Momma let them take a hammer to her walls… their expressions were priceless!
All the demolition was very exciting and also VERY messy. The guys put tarps and drop cloths up over all the doorways and openings, but trust me… the dust still gets EVERYWHERE. I had mentally prepared myself before the renovation even started for the mess, so I tried not to let it bother me too much. It has been weeks since the renovation was finished, and I’m still finding layers of dust throughout the house. But it was all worth it in the end!
Next week I’m sharing details of the flooring we chose for the kitchen… stay tuned! Let me know any questions you guys have!
LET’S KEEP IN TOUCH!
Subscribe to Blog | Browse my Shop | Follow on Facebook | Follow on Twitter
Follow on Google+ | Follow on Pinterest | Follow on Instagram




Isn’t demo day exciting? I scrolled back up and hope I didn’t miss a comment from you, but I hope you got a chance to hit something with a hammer. It literally feels like you are breaking all the rules to demolish something! It is so fun! I just found your blog about a month ago, and am so shocked you and I both live in NWI. How fun!
Sorry about the brick taking up valuable space in your kitchen, I’m feeling how much it would sting for me to HAVE to tear that out but function does sometime have to rule over pretty brick!
XO,
Christine
your pictures make even demolition look pretty!
Congratulations! Your finished kitchen looks amazing. Back in the summer we removed the wall between our kitchen and dining room and I too was amazed by how much dust I kept finding weeks after but as you say it’s all worth it. Even though we only finished our project just before Christmas, I can’t remember what it was like before!
Good Morning Liz, I like that (light) industrial style of your kitchen very much and since a long time I like to do the same renovation in my kitchen. But because of all the dust and the high costs which will come up I haven’t realize it ’til YET as I’ve seen your remodeling 🙂
I already was in 2 different hardware stores and they only provides that kind of subway tile style in only little tiny glass mosaic tilings. They look good but not so awesome like they were in pure white… So, my question is where I get such subway tiles??? By the way I’m living in germany and the worsest thing would be if we don’t have such tilings over here. It would be a great support if you could ask in your local hardware or contact your constractor if they export such subway tiles to germany or if those tilings are an international offer.. Beforehand I wanna thank you very much for your help!!!
Hey Tanja!! We bought our tile through Lowe’s Home Improvement, and I found a website where you might be able to order internationally: http://www.lowesquotes.com/taa/international/
Here is the tile we used: http://www.lowes.com/pd_64396-74035-SL1036MODHC1P4_0__?productId=3083627
I hope this helps!!
Isn’t it crazy how a space comes apart? When you take everything out it is so completely different. I couldn’t believe the difference when we did our kitchen.
Wow! And thanks for the info on the contractor! (I’m in nw Indiana). This gives me hope for my tiny old 1945 cape cod kitchen. I love the whole kitchen and have wanted to do the same style in my own home – I have to ask about the counters – are they Quartz? Marble? Something else entirely? I love the marble look but am scared of the marble maintenance lol
I loved the video! I’m happy they didn’t try to jump through the wall like Chip Gaines on demo day! Haha! He’s a crazy one but too funny!
I completely get why you didn’t keep the old brick fireplace. We have some original brick pieces from our house and we might use them to lay a pathway from our back porch to our shed. Just an idea if you have enough bricks! Can’t wait to see your flooring details. It looks a lot like what we placed in our mudroom. I love it!
I had to chuckle seeing your boys takin down the wall!! Our boys were about 3 and 6 when they took their first swing at a wall that came down! They are now 21 and 24 ! We call them reno babies cause they grew up always seeing some kind of change to the house! They both have wonderful ideas for their own homes now. I am a new follower, comin over from Shayla’s wonderful blog. Love your style!!
Memories you will cherish forever, I’m sure! So happy to have you here, Dawna! 🙂
what was the overall cost of the kitchen makeover including the electrical and such stuff? 🙂 Lol you think you had it tough with a 70 year old home hehe imagine the more than 120 year old home i purchased! Great job! Turned out amazing.
Lol, but I bet your home has some neat details being 120 years old! There are SO many factors that go into renovation prices. Where we live and with the products I picked out, our kitchen renovation cost just under $20,000. But where you live and the size of your kitchen might make a big difference in pricing!
Please disregard my question on your “Cabinets” section, as you’ve answered it here. Thanks!