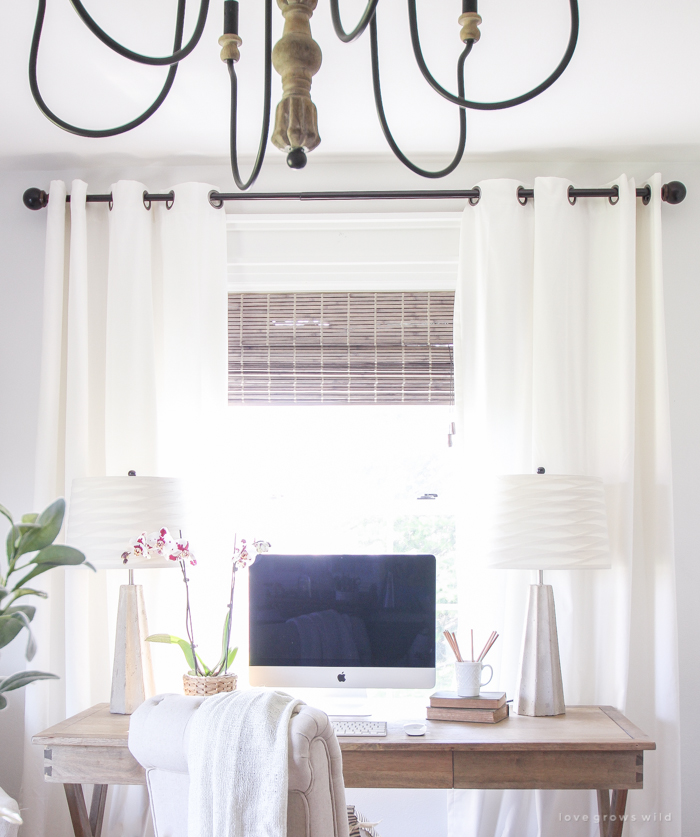
Over the last four years of writing this blog, I have given our little farmhouse a complete makeover from top to bottom… everything from major kitchen and bathroom renovations, to painting every last wall (at least twice), to replacing all the light fixtures, and more. Now that the sawdust has settled around here, I finally have had a chance lately to look back on all that we’ve done and all the lessons I’ve learned along the way.
I am a self-taught interior decorator, and I’ve had to learn a lot of lessons the hard (and sometimes expensive) way. As I was hanging new curtains in my office a few months ago, I thought to myself, “Boy, I’ve come a long way from the first set of curtains I hung in here! Maybe people would enjoy seeing some of the decorating mistakes I’ve made in the past and the lessons I learned from them…”
So today, I’m starting a new decorating series! Every month or so, I’ll share a new “Decorating Lessons I’ve Learned” post that shows changes we’ve made to our house over the years and lessons you can apply in your own home! Basically, I’ve already made the mistakes so that you don’t have to. : )
Today I’m starting with one of the most basic design elements you’ll add to a room, curtains.
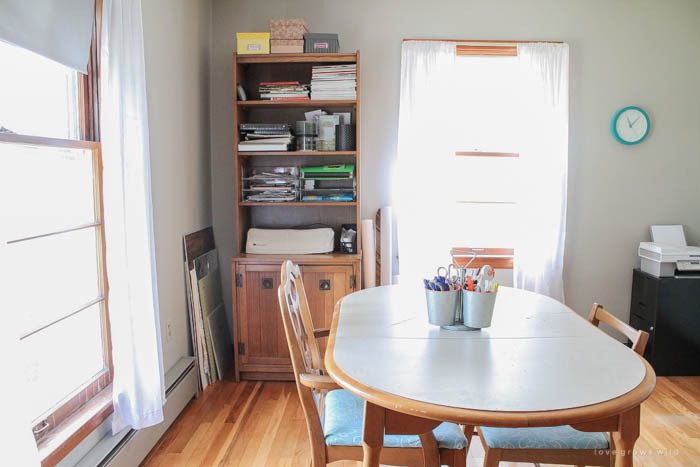
When we first moved into the farmhouse, I was seriously overwhelmed by the thought of buying curtains for thirteen different windows. We had a pretty tight budget and a whole new house to decorate. So when I found a major clearance on cheap, white sheers at Target one day, I bought every single one they had on the shelves. The windows in my office already had curtain rods mounted on the top piece of window trim along with white roller shades, so I just used the existing hardware and hung up my clearance curtains.
Once I finally got around to decorating my office a few years later, I knew that I wanted to change a few things with the curtains. First, I wanted to upgrade to a real curtain rod hung above the window and remove the roller shades. I also wanted to make the window appear larger by using a curtain rod longer than the window itself. This would allow the curtains to hang on the sides of the window, not just in front of it, making the window seem wider than it really is.
I studied decorating shows on television and read decorating magazines and eventually learned from the pros that curtains are supposed to hang all the way to the floor or even puddle on the floor, and that they should be hung as close to the ceiling and as wide as possible. So I measured my wall from floor to ceiling to see how long the new curtains needed to be and then started doing some price shopping. Holy sticker shock.
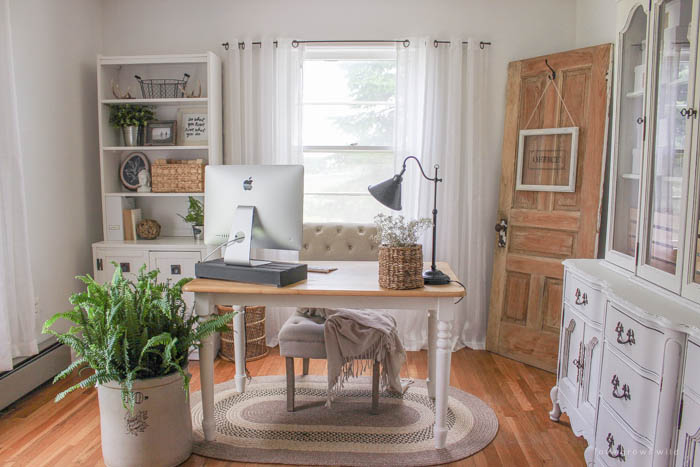
Not only could I not find extra-long curtains in the stores I normally shopped at, but they were also way out of my price range when I found them online. So I settled on buying normal length sheer curtains from Walmart, which kept the price down, but this time they had grommet tops. In the past, I had made my own curtain rods with electrical conduit, but this time I decided to buy real ones from the store. Again, sticker shock. I decided to go with the cheapest version Walmart had that would be long enough to extend past the sides of the windows. I stretched that rod as long as I possibly could, and you can see in the photo below that the super thin rod actually bowed with the weight of the curtains.
Round 2 of curtains in my office was a huge improvement from what we started with, and even though I didn’t hang them closer to the ceiling, at least they now touched the floor and were wider than the actual window. Adding that extra width with the curtain rod let so much more light come in since the curtains were able to hang on the sides, and it also added so much softness to the space. It was almost like having a wall of curtains behind me when I was sitting at my desk.
When I revealed my office makeover a few years ago, I had a very sweet reader, who also happened to be an interior decorator, leave me a comment that was super helpful. She said that she loved the new look, but suggested that I go with a thicker, more substantial curtain rod. I knew when I bought that skinny one that I should have paid a few more bucks to get a nicer one, but I was so scared of spending too much money on one little window that I talked myself out of it.
So when it was time to revamp my office again while writing my book, I decided to quit wasting my money on window treatments that weren’t exactly what I wanted and finally do it right.
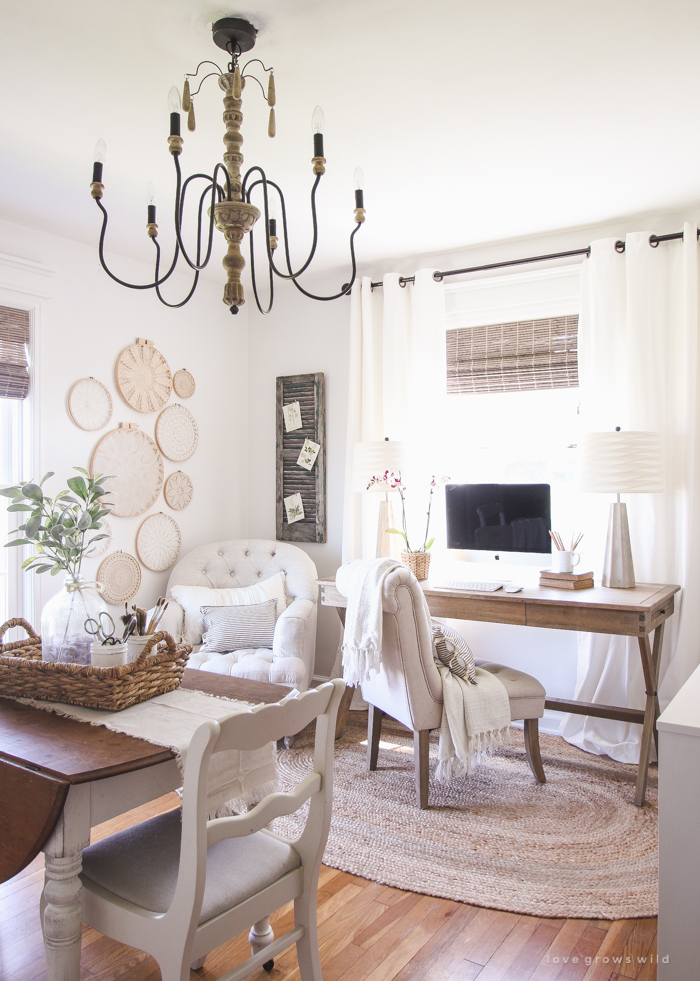
First, Jeremy and I beefed up the existing window trim (like we did in our master bedroom) using this tutorial. The extra few inches of trim detail on top of the window makes such a difference and gives it that classic farmhouse character that we love so much.
I love my white walls and white curtains, but I wanted to add some layers of warmth and texture to the window so it didn’t get washed out in photos. Using a bamboo roman shade underneath the curtains was the perfect solution. I’ve used these bamboo shades all over our house, and I just adore them!
I’ve always used sheer curtains in the office, but this time I wanted something that would feel a little more luxurious. I found extra-long velvet cream curtains from Target and totally swooned over them! At first I questioned whether velvet was a good choice. It seemed a little, I don’t know… granny-chic at first. But I am so glad that I took a risk with them because these curtains have such a high-end look without the high-end price.
And last, but not least, I finally bought a curtain rod that was worthy of all the bamboo shades, velvet curtains, and farmhouse trim details. It is a full 1″ thick and has nice, big finials on the ends. The curtains are hung just inches from the ceiling, reach all the way to and puddle on the floor, and extend about 18″ past the window trim on both sides.
Was it more expensive to use the floor-length curtains, a bamboo shade, and a large curtain rod? Yes, of course it was. But if you add up all the “cheap” solutions I’ve tried over the years and the time I spent being unhappy with the way our windows looked, I definitely wish I would have done just done this from the beginning. It might have even saved me money in the long run from all the changes I’ve made in the four years we’ve lived here!
You might have noticed that the other window in my office has a heater below it, so rather than hanging a curtain that is too short (so that it won’t catch on fire and burn our cute, little farmhouse down), I opted to just use a bamboo shade in that window and leave curtains off entirely. I’m still able to block the sunlight if I want to (which I rarely do), and it matches the other window, so I’m very happy with this solution!
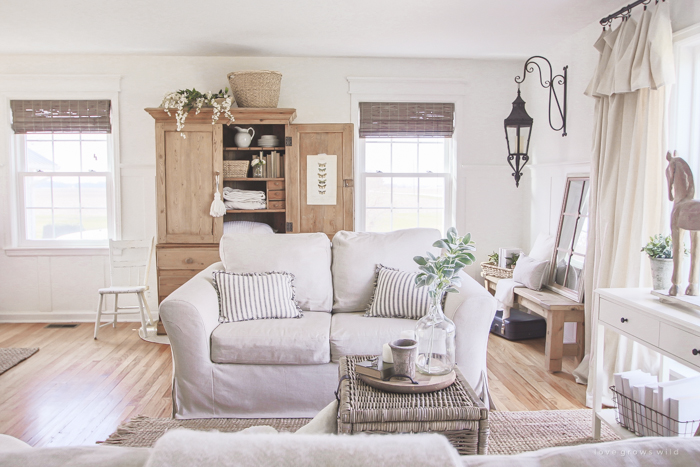
I had a similar situation in our living room. Once upon a time, these two windows had roller shades, the DIY electrical conduit curtain rods I was telling you about, and short, sheer Target clearance curtains.
One window had a heater under it, and the other did not, so I decided to use bamboo roman shades on both of them and leave off the curtains. On our big picture window (shown on the right in the photo below), I saved a ton of money by making my own floor-length curtains from a really inexpensive material. The tutorial for that curtain project is in my new book that you can pre-order now!
As I said before, I am a self-taught decorator, and the opinions I’ve shared in this post are just that… my opinions. If these ideas don’t work well for you and your home, that’s totally okay! I just wanted to share the process I’ve gone through in hopes that you might get some ideas for how to decorate your home and also to show you that my house certainly did NOT start off looking the way it does today! This has been a four year journey of learning the rights and wrongs for decorating our home, and as much as I wish I knew back then what I know now, that isn’t the way life works.
I hope that by sharing these “lessons” with you, I can save you a whole lot of time and money, and you can also see that creating your “dream home” takes time! It’s a journey… not a destination. I try to remind myself of that everyday!
I would LOVE to hear your feedback on this new decorating series and what you thought of today’s post! Did you learn something new? What “lessons” would you like me to cover in the future? Did you enjoy seeing the different looks our home has had over the years? Leave me a comment below and share!
LET’S KEEP IN TOUCH!
Subscribe to Blog | Follow on Instagram
Follow on Pinterest | Follow on Facebook




Liz,
Thank you for your sharing your “lessons learned”! I thought this post (and the series) will be SUPER helpful to your readers. It helps to see other designers “struggle” with the same decisions we all tend to find overwhelming when decorating our homes.
I would love to see a series on lessons learned from painting your walls (since you said you’ve painted each wall twice…haven’t we all!).
Love your blog!
Your office looks great! Lessons learned are the best thing about decorating yourself !
I have to tell you that I fell in love with your farmhouse window trim tutorial and used it for my office makeover. We just had our big reveal at our Memorial Day party and the family was blown away. We did the door ways as well, and will now be replacing the trim on all the windows and doorways in the house to give it the look that screams “us”.
We moved here 4 yrs ago and I will say I was hating it here until we started the office makeover and now I finally feel like we are making it our own.
Thank you for generously sharing your idea and tutorial!
Great tips! I have one for you, Target is great for curtains sometimes but if you need anything longer than 84″? Try HomeGoods or Tuesday Morning. And for beefier curtain rods? Try Big Lots. Sometimes my store gets those really nice ones (similar to Home Depot & Lowes)
Yes!! This is my favorite kind of post. By far. I despise when bloggers only share the perfect, the beautiful, the expensive. I like to know I’m not alone in not absolutely loving the way everything in my place is currently. PLUS– these are great tips & we can see all of your gorgeous progress!! I will be checking out every post in this series. THANK YOU!!
You have a great eyeeye, and all that studying has paid off immensely! I’m new to the blog, but I’m definitely looking forward to the seriesseries. I love when bloggers share all their tipstips, it helps us all. Good luck!! Can’t wait to see what’s up next!!
Loved this post!! Thanks so much for sharing. I look forward to putting some of your ideas to use in our new home. P.S. Can’t wait for your book!!
Hi Liz,
Thanks for the educational post, this came at the perfect time. My wife and I have lived at our home for over a year and half and finally are getting around to picking curtain options. My jaw just drops every time I get a quote from some curtain company, so we’ve decided to scour blogs and social media for tips. Thanks for the post and the style tips! We’re going to give it a shot in the upcoming months.
~Andy K
Hi Andy! I know what you mean… decorating affordably is not always easy, but most definitely doable! Sometimes it just takes a little bit of research and elbow grease! Best of luck to you and your wife! 🙂
I stumbled upon your site and so glad I did because I love it!
I find a lot of your style is similar to that of Miss Mustard Seed Marion Parsons.
Do you also give advice for design dilemmas? I have a few!
Have a FuNtAsTiC day!
Hi Wendy! I’m so happy you stumbled onto our site! Isn’t Marion such an inspiration? Love that girl!
Tell me about your design dilemmas… I would love some topic ideas for future “Decorating Lessons I’ve Learned” posts!
I really like how you stretched the curtains much further than the window. It gives the impression of a larger window. That really was good thinking. I want to try that out at my house. I will have to share this with my wife. I am sure she will love it.
Just found your site and really like it.
I do have a question about moving the curtain rI’d off the wood trim. I have plaster walls, as you must. How do you an or the rod without creating a hole the size of Lak e Erie? After a failure I went back to the trim.
Lol, yes we do have plaster walls… such a pain to deal with! I almost always use anchors made for plaster when putting anything into our walls. It makes a big difference!
Darn typing errors. Rod off the trim. Anchor the rod, and Lake Erie. Sorry
I just came across your site :). We moved in our house 3 yrs ago and piece by piece we’re working towards decorating our home. It’s been a struggle overall seriously. Trying to find the right stuff, jaw dropping prices from stores, DIYing what we can etc. As you can understand :). We just got curtains for our living room and it was weeks of searching and trying not to break the bank in the process. Not to mention, the right length :(. I finally found some at Home Goods and the prices were much more reasonable and panels were sold as a set!!! I highly recommend that store if you have one nearby. We needed 96 in length for our space and those are hard to find at a reasonable price.