
We’re giving our bathroom a big makeover! This week we reveal our new planked walls, vanity, and closet… you can catch up on the rest of the bathroom series here!
Welcome back to the bathroom makeover, sweet friends! We have LOTS to catch up on today.

So now that the new tub and tile have been installed, it was time to work on the walls. The top half of the bathroom walls were painted a dark charcoal gray, which I didn’t totally dislike, but it gave the bathroom a pretty dark, masculine feel. The bottom half of the walls were painted white, but had squares stamped into the plaster… I’m assuming to look like tile. Again, I didn’t completely hate the stamped plaster, but I had visions of beadboard or planked walls of some sort in here… something that would have much more of a farmhouse feel. I’ll admit, after we planked the walls in our master bedroom, I want to plank just about every single wall in our house! It’s an addiction guys… proceed with caution when planking!
Here’s the other issue I had to deal with… you may remember seeing these little, built-in coves from the bathroom “before” photos:
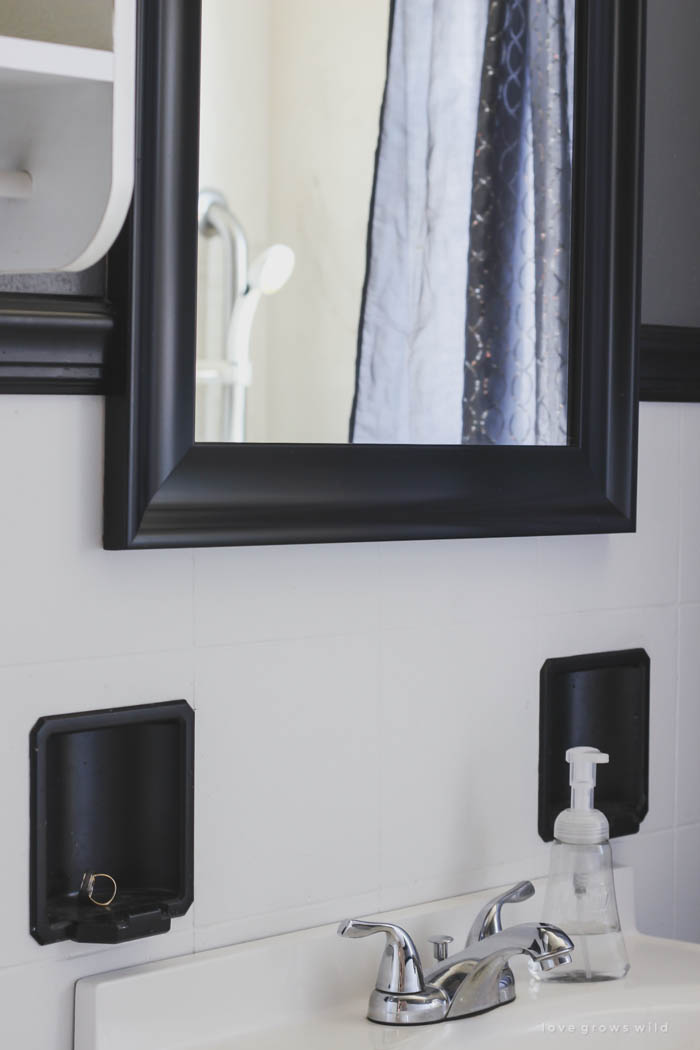
We had two over the sink and another by the toilet for a toilet paper holder. Whatever was originally holding them in the wall had either come loose or went missing, and they were basically falling out of the wall every time you touched them. They were kind of an eyesore in my opinion, and the easiest thing to do was just to take them out and cover up the holes. There was even a giant hole where an old medicine cabinet must have been originally.
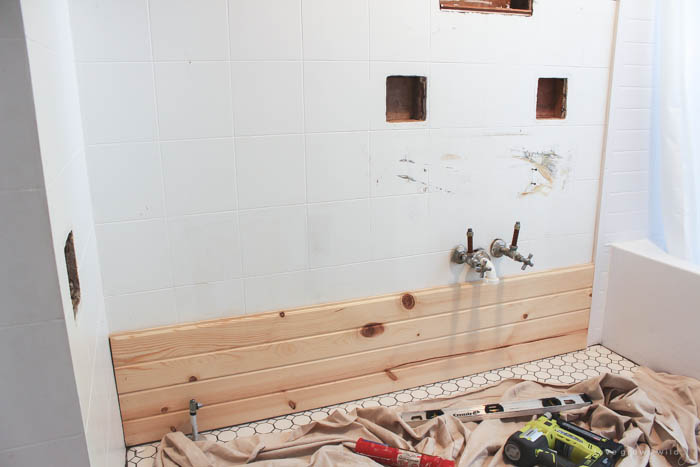
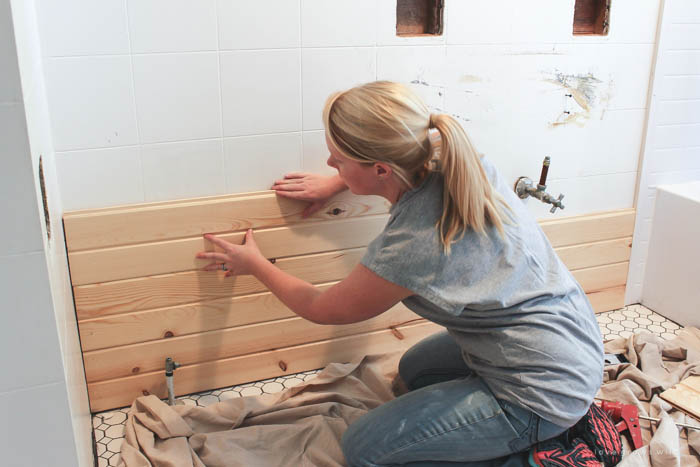
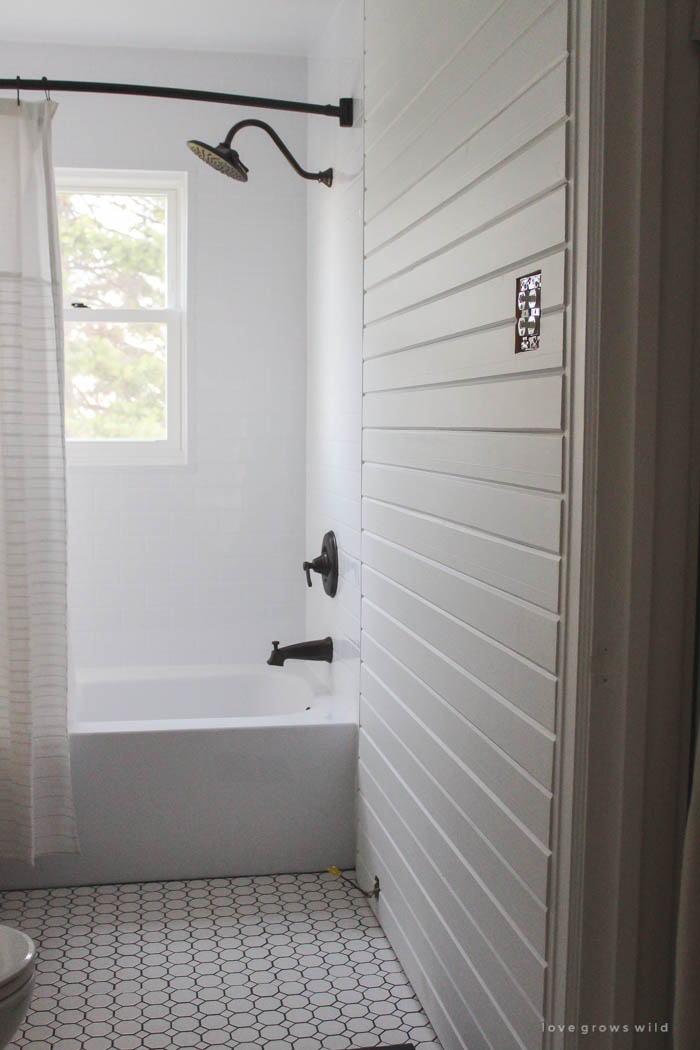
My first idea was to use beadboard horizontally to cover the bathroom walls, but I had a hard time finding a product that would be okay to use in such a high moisture area. After chatting with a super helpful employee at Lowe’s (I’m starting to really love that store, by the way), we settled on using pine tongue and groove boards. They cost a little more than I had originally wanted to spend, but they would also be super easy to install and have a really clean, consistent look to them. The flooring underlayment we used for planking our master bedroom walls definitely gives you a more rustic look, which I LOVE in there, but the tongue and groove boards have a more polished look, which would be nice for the main bathroom in our house. They came in individual 8 foot boards, and we sorted through the pile to make sure we picked ones without splits or major knots.
Note: Some of the links in this post are affiliate links, which allows me to make a small commission from your purchase, but your purchase price stays the same. Thank you for helping support our blog!
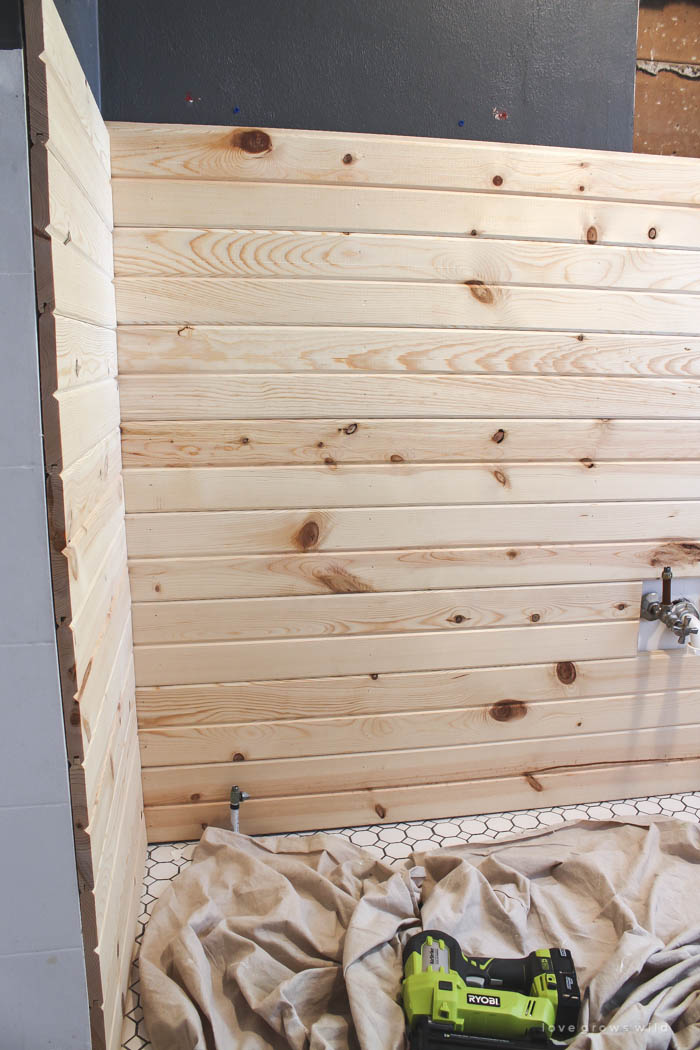
Jeremy is busy with harvest this time of year, so I knew this project would be a one-woman job. Guys… tongue and groove boards are SO easy to install. As long as you make sure your first board is level (I started at the floor), the rest is a piece of cake. I would measure the length, cut a board on my saw, test fit to make sure I measured correctly, apply Liquid Nails on the back of the board, fit the board onto the wall, and nail it in place with my brad nailer. The tongue and groove holds the boards in place on the wall, so you have free hands to grab your tools when you need them. Other than cutting around the plumbing and outlets, this process went really quickly!
We had originally talked about only adding boards up to where the stamped plaster stopped on the walls, but we couldn’t figure out a good way to transition the boards to the wall, and it happened to stop right where a light switch was. In the end, we added the boards all the way up the wall, and I am SO glad we did! It gives the walls a much more cohesive feel and saved us a lot of headaches.
After the boards were up, I added quarter round along the ceiling, corners, and shower edge to hide any seams. We waited to do the trim along the floor until the vanity was installed, so that project is still on the to-do list. I painted two coats of primer on the boards, THEN I covered the nail holes with spackle. I’ve learned that it’s actually much easier to see where holes need filled in after the primer is on, especially when covering up knots in the wood. I sanded over the spackled areas, wiped the boards down with a damp rag, and caulked any edges that needed filled in. Then I finished the boards with two coats of bright white Dutch Boy paint in a satin finish. I knew that I couldn’t get away with a flat or eggshell finish in a bathroom, but I didn’t want the walls to have a super glossy look either. I’m hoping satin will do the trick!
Do you remember the problem I was having with the closet door?
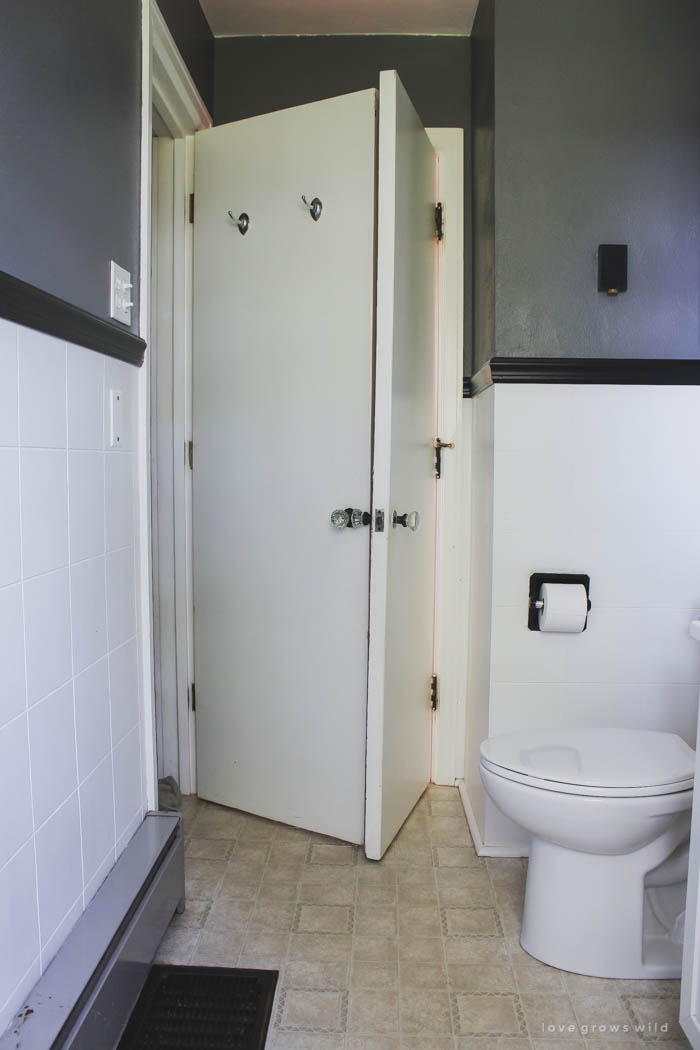
The kids were constantly opening it into the other door, scratching them both like crazy. The closet door didn’t even shut all the way, so I decided to remove it and come up with a different solution.
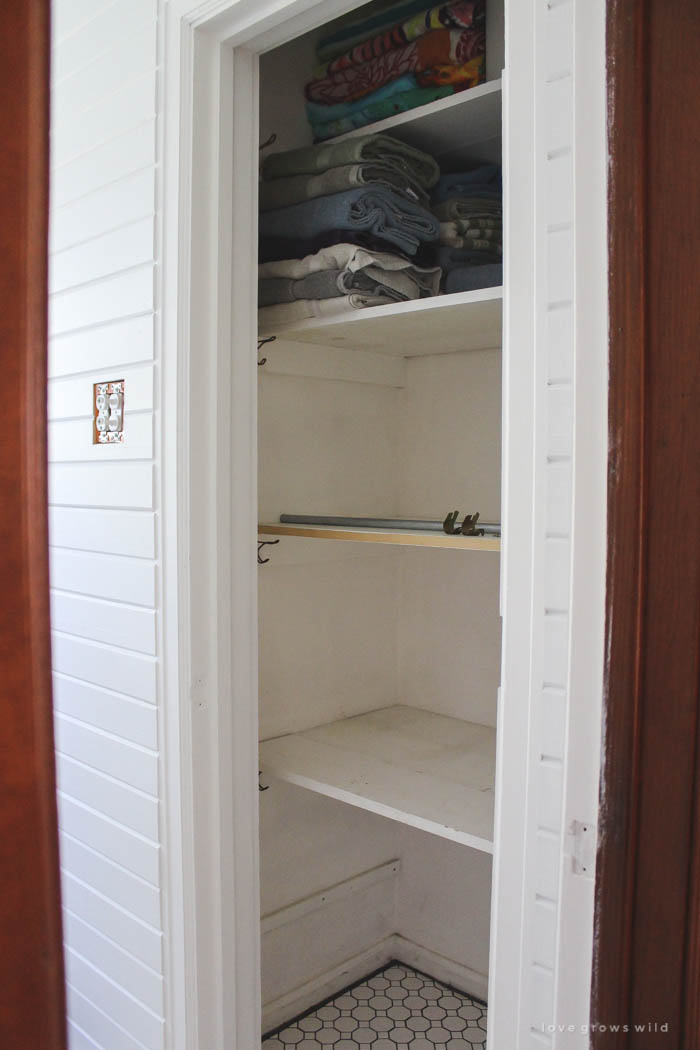
The easiest thing to do to cover up our bathroom closet was to simply add a curtain. It wouldn’t be in the way and would be a cheap, easy fix. I picked up a drop cloth, 2 curtain rod brackets with screws, and ring curtain clips from the hardware store. The hardware would all be hidden up inside the closet, so it didn’t matter what the finish was.
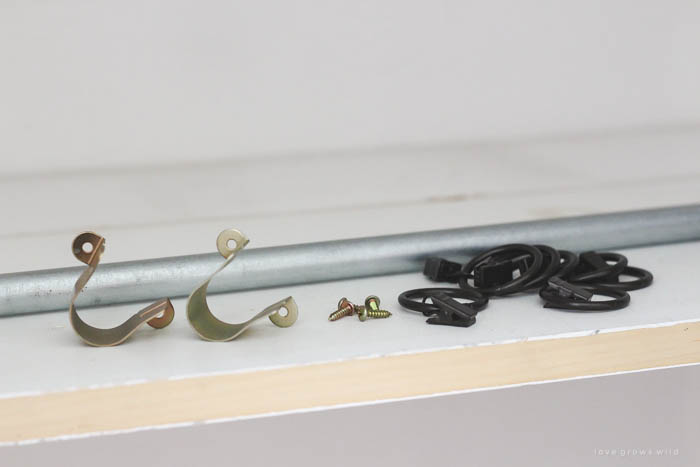
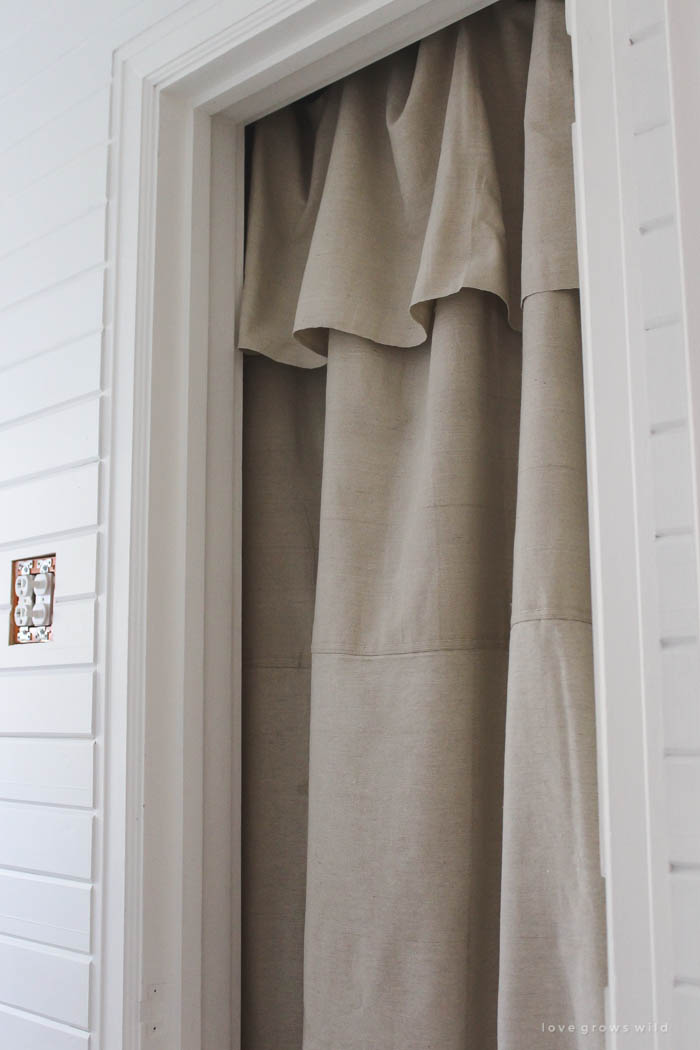
I installed the brackets at the top of the closet on opposite walls and used a piece of electrical conduit we had sitting in the basement for my curtain rod. Rather than trimming the drop cloth to the size I needed, I simply folded the top over about a foot and a half and clipped the curtain rings over the fold. Ta-da!! A five minute, no-hassle, inexpensive curtain to cover up all our crap! I would love to show you a pretty picture of perfectly folded linens and beautifully organized toiletries, but right now there’s a giant pile of dirty towels and a mess of toothbrushes, deodorant, hair gel, and Axe body spray hiding behind that curtain. There’s a bunch of boys living in my house, and I love having their mess hidden in a pretty (but functional) way now!
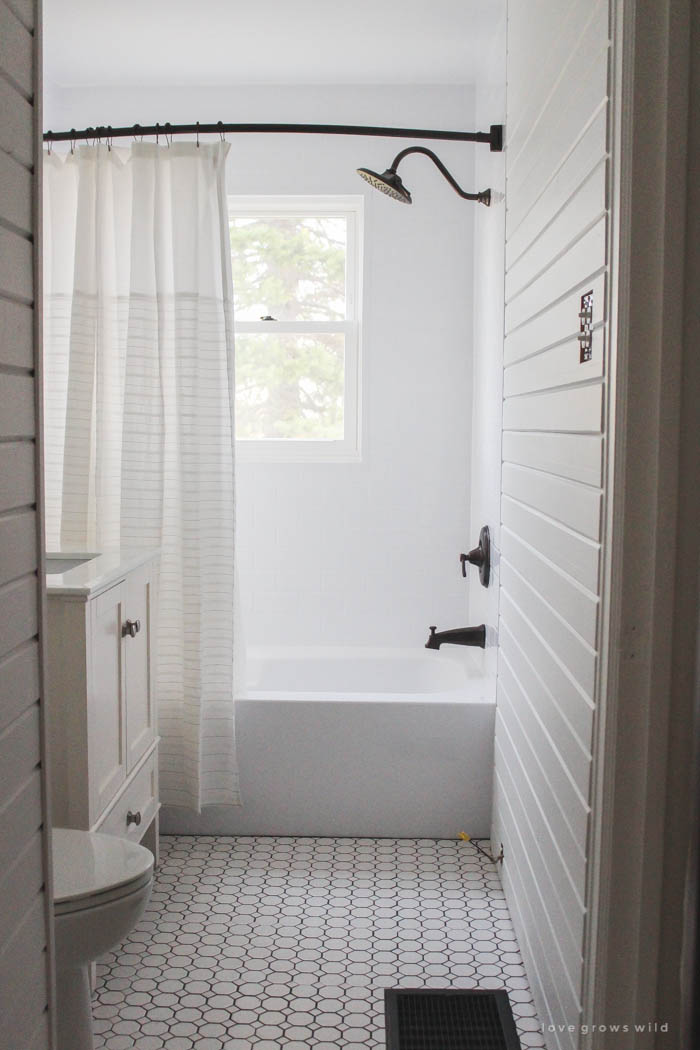
But enough about all that, let me show you our beautiful bathroom!
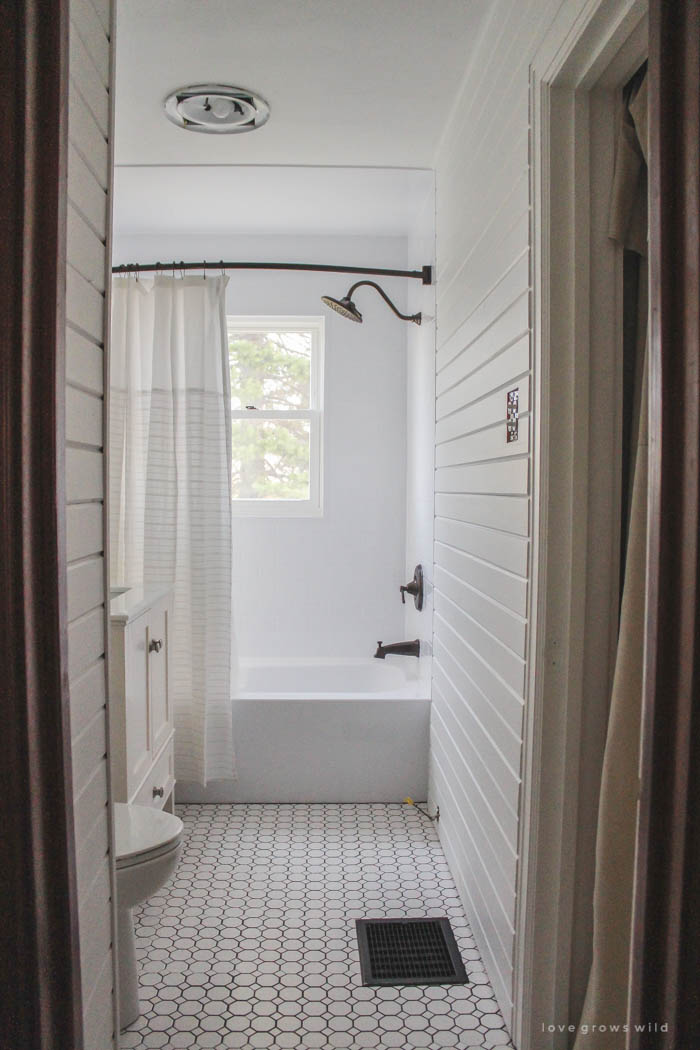
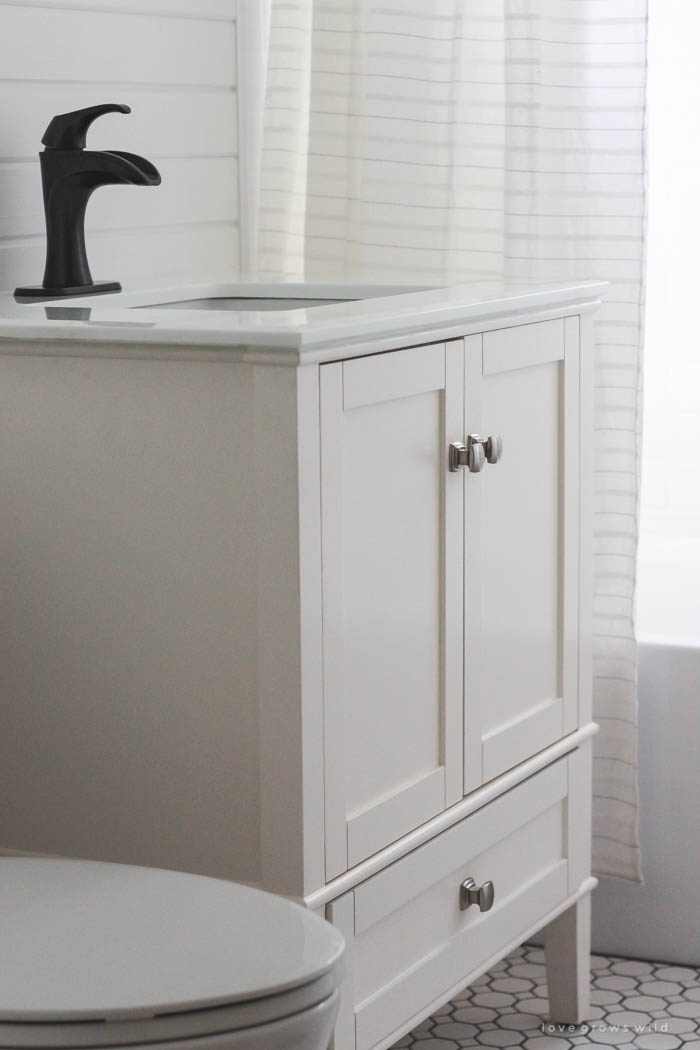
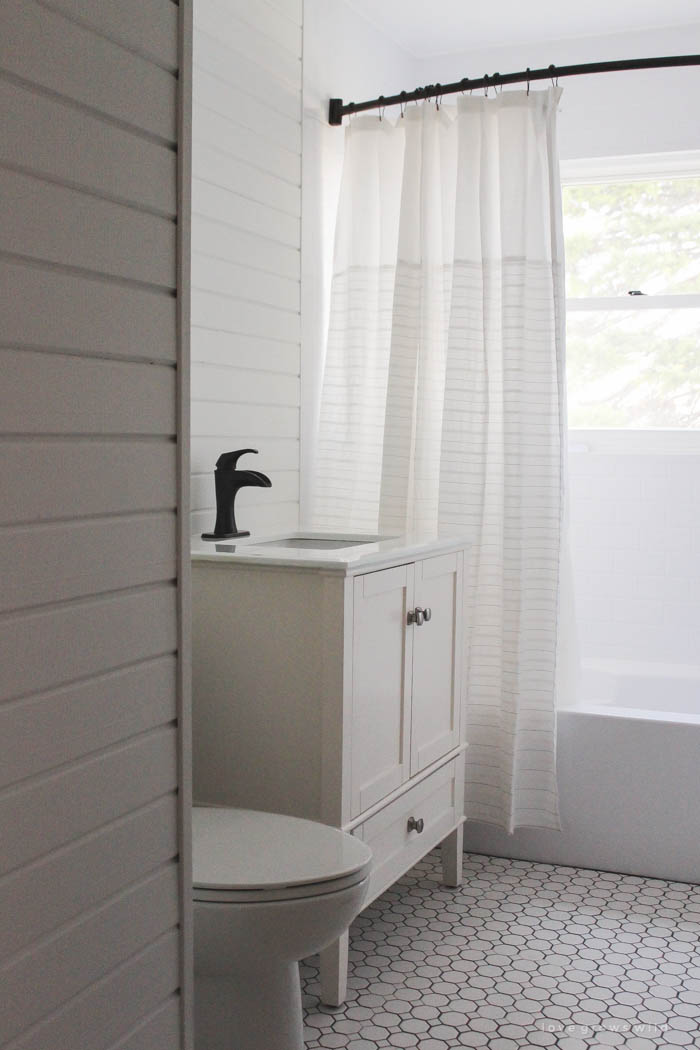
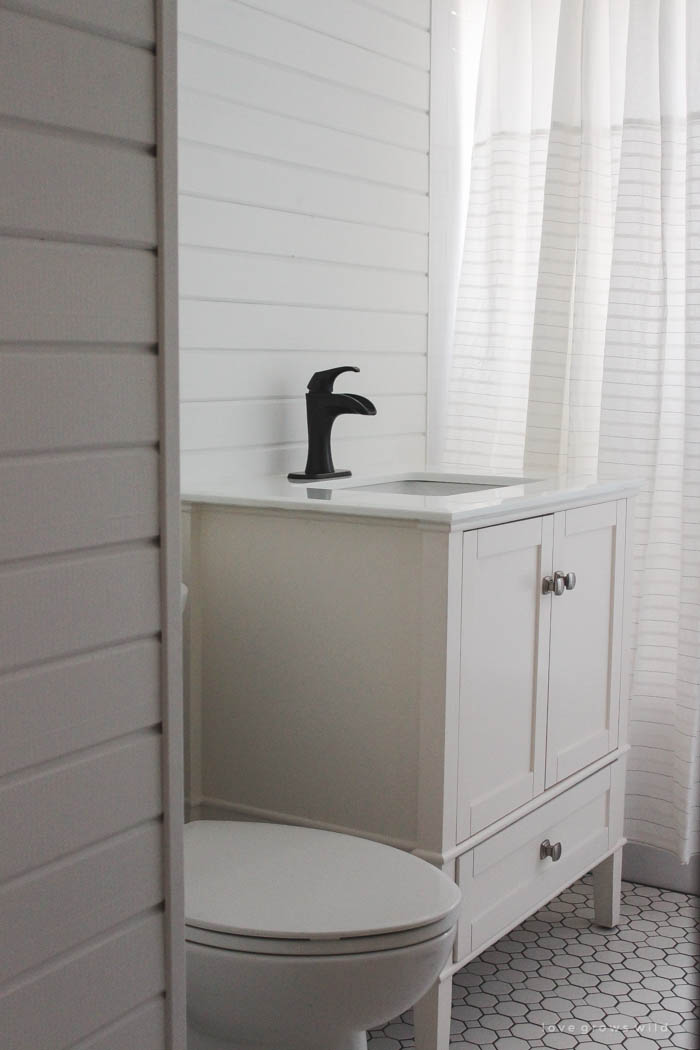
We ordered a white bath vanity that came with a white quartz marble vanity top and under-mount sink. Jeremy and I installed it a few nights ago, and although we had to rearrange some of our plumbing to accommodate the taller vanity, we LOVE it so far! I was super picky about what vanity we put in here, and I wanted it to have legs on bottom instead of just a cabinet going all the way to the floor. I also didn’t want it to have a backsplash attached to the vanity top so you could see the pretty planked walls behind the faucet. Time will tell if that was a good choice or not, but I feel like this type of vanity looks so much more custom and expensive. We’re going to replace the brushed nickel hardware to match the rest of the bathroom fixtures soon!
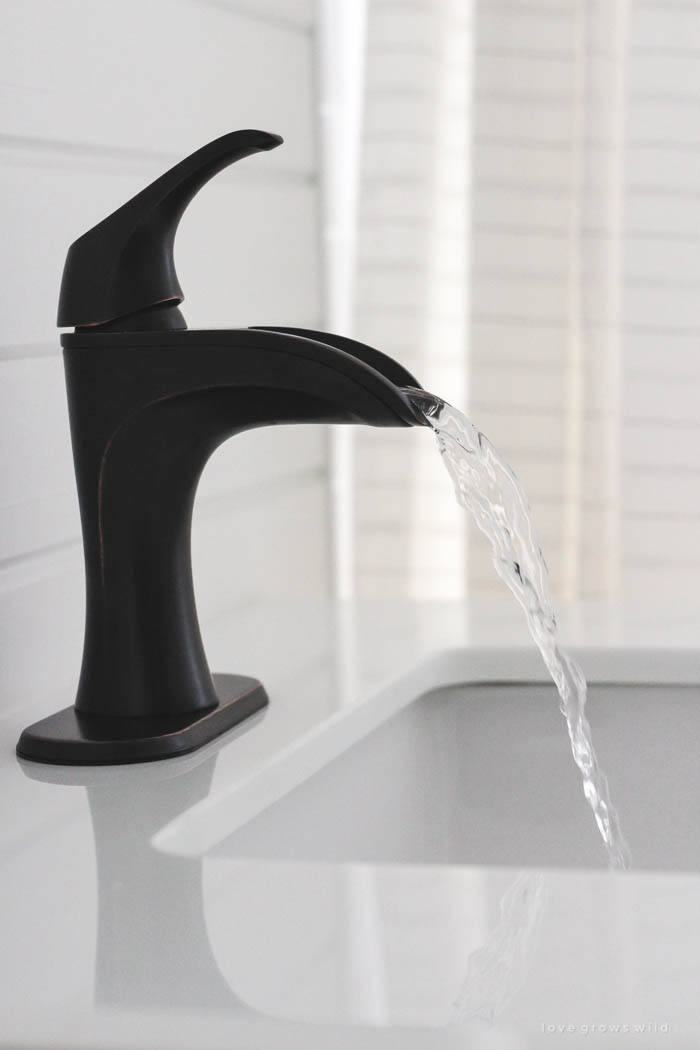
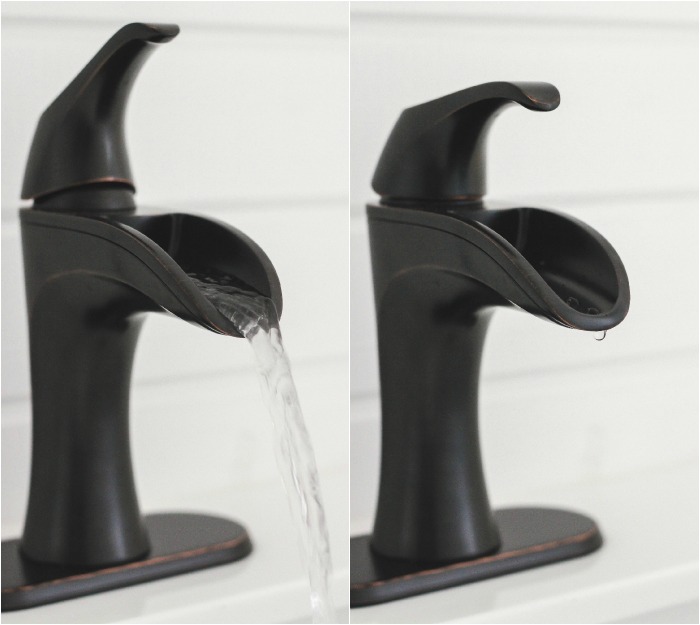
I let Jeremy and the boys pick out the faucet, and they decided on a oil-rubbed bronze single control faucet with a trough-style spout. I’ve taught them well. 🙂
The seersucker shower curtain came from Target, and I am DYING to hang a mirror I scored on clearance at Target ages ago… stay tuned for accessories coming in the next bathroom update!

Okay guys… your turn! Tell me what YOU think of the new updates to our bathroom! Are you as plank crazy as I am? What kind of vanity is in your bathroom? Leave me a comment below… I’d love to hear your feedback!

LET’S KEEP IN TOUCH!
Subscribe to Blog | Browse my Shop | Follow on Facebook | Follow on Twitter
Follow on Google+ | Follow on Pinterest | Follow on Instagram

That faucet tho!!!! Seriously gorgeous!
This bathroom is beautiful!! Can you come help me with mine—-LOL.
Lol, gladly! 🙂 Thanks for following along!
What color white did you choose and from which paint company
Hey Julie! I used Dutch Boy bright white paint in a satin finish on the walls, door and trim. So far the satin finish is holding up nicely in our high-moisture bathroom!
Incredible! You guys are doing a wonderful job renovating your bathroom. We have a couple here that could use your expertise, if you’re game. OK, we probably should have a fund in place before asking you that. Anyway, your bathroom is looking beautiful. Cheers, Ardith
Haha, we always seem to have dreams bigger than our bank account, don’t we? Lol! Thank you so much for following along, sweet friend.
Gorgeous! I love the planks, floor tile, faucets – everything! I have a master bathroom that I’ve been needing to update (it doesn’t have a shower, so I rarely use it), but I will have to do most of it by myself so I haven’t gotten around to it. But, this is some serious inspiration for me!
Love the plank wall and your choice of tile and fixtures. Great c house with the vanity. I like that it has legs as well instead of going all the way to the floor like a builder grade vanity.
Although your bathroom isn’t yet done I’m so in love with the bright shining white planks and the subway tile pattern. It’s totally my style!!! And it looks so huge now no comparison to the dark grey look before!!
We have only white planks in the hallway and in the living-room – it’s a interior mixture of office and farmhouse style and like you, too I wanted to have every room planked but my hubby didn’t, he still has to be more convinced from me 🙂
Yes- I’m totally plank crazy – I love what you have done. So pretty!!!!!!
Love the plank walls…everything looks so clean and fresh.
Another idea for the closet..open shelves with baskets to hold toiletries…one for each person
and pretty towels folded on the other shelves… easy access and decorative too.
The difference is amazing! Ya’ll should be so proud! I love the planks, vanity, and the faucet. That was a great idea for closet and it looks so good! I know you are enjoying your “new” bathroom
I am so in love with this bathroom and the sink is to die for!!! It is so charming!!!
I love your style, your determination, your philosophical perspective, your daring and your step-by-step cataloging. But what keeps me coming back is your heart and soul in all you do. You are authentic!! And, in this day and age, there aren’t many velveteen rabbits.
I wish you all the financial success you can ever reap. You already have the rest!
Hi Debra! Your sweet words mean the world to me, and I hope you know how much I appreciate you following along my journey. Velveteen rabbit… you just made my day! 🙂
love it all! love the planked wall,wish i wasn’t in a rental.really like the sink faucet. curtain for linen is a great idea and hanging inside the door~~love that. nice job!!!!
Wondering where you got that wonderful sink faucet 🙂
Hey Mary! This is the faucet we used in the bathroom. I found it at Home Depot too!
Your house is coming along beautifully, and I love that you use real-world real-budget items easily available to anyone!
I’m new to your blog and I’m in love with all of it!!!! This bathroom is fantastic!!!!
Hi there,
I just recently discovered your blog from Pinterest. Love your farmhouse style! In your ref. links, you show Lowe’s as the sink link, but when I click on it, Amazon comes up with an $1100.00 sink. Can you tell me where you actually purchased the sink?
Thank You and Have a Blessed Day.
Hey Margo! Thank you for bringing that to my attention! I purchased mine at Lowe’s, but it looks like they no longer carry that particular vanity. I did find it at Home Depot though! Here is the link: http://www.homedepot.com/p/Simpli-Home-Chelsea-24-in-Vanity-in-Soft-White-with-Quartz-Marble-Vanity-Top-in-White-and-Under-Mounted-Rectangular-Sink-NL-HHV029-24-2A/203736552
I hope this helps!
Hi Liz,
New to your blog and loving it so much.
Can you tell me where you bought your rectangle knobs for the bathroom vanity and the shower curtain rod.
Having so much fun reading your entries.
Thank you so much for your time and inspiration!
Hi Suzanne! Those are actually the same knobs that came on the vanity, but I painted them with oil rubbed bronze spray paint. And the shower curtain rod came with our shower/tub install from Bath Fitter… I believe it is made by Moen, but I know they sell those curved rods in stores as well! I hope this helps!