
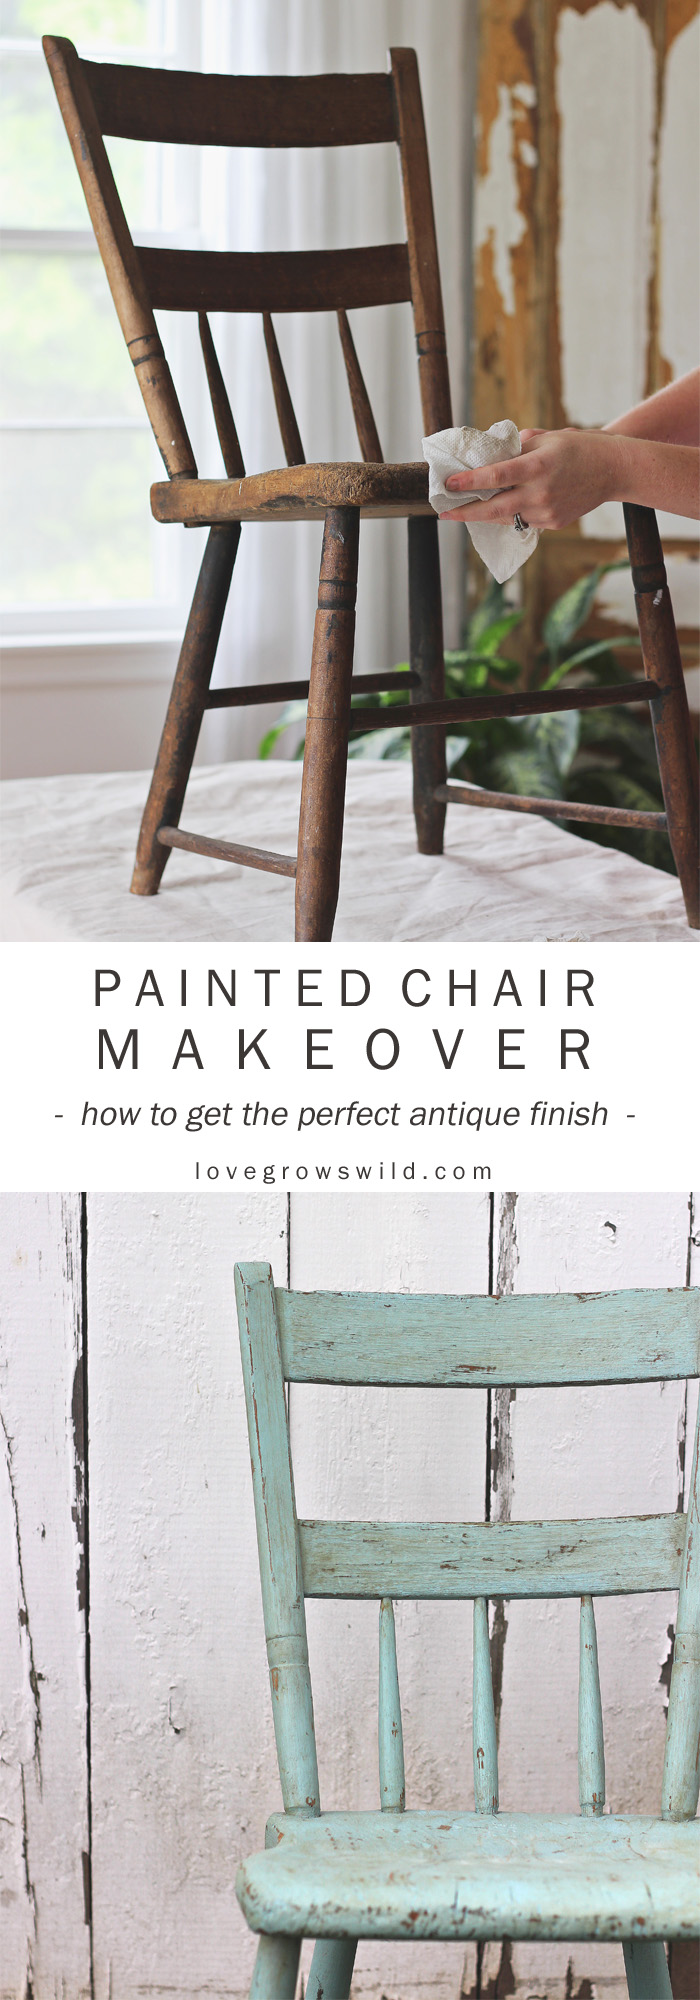
Learn how to create the perfect antique finish on furniture with this step-by-step tutorial sponsored by DecoArt. I have my favorite products to use and the best tips and tricks ready to share with you!

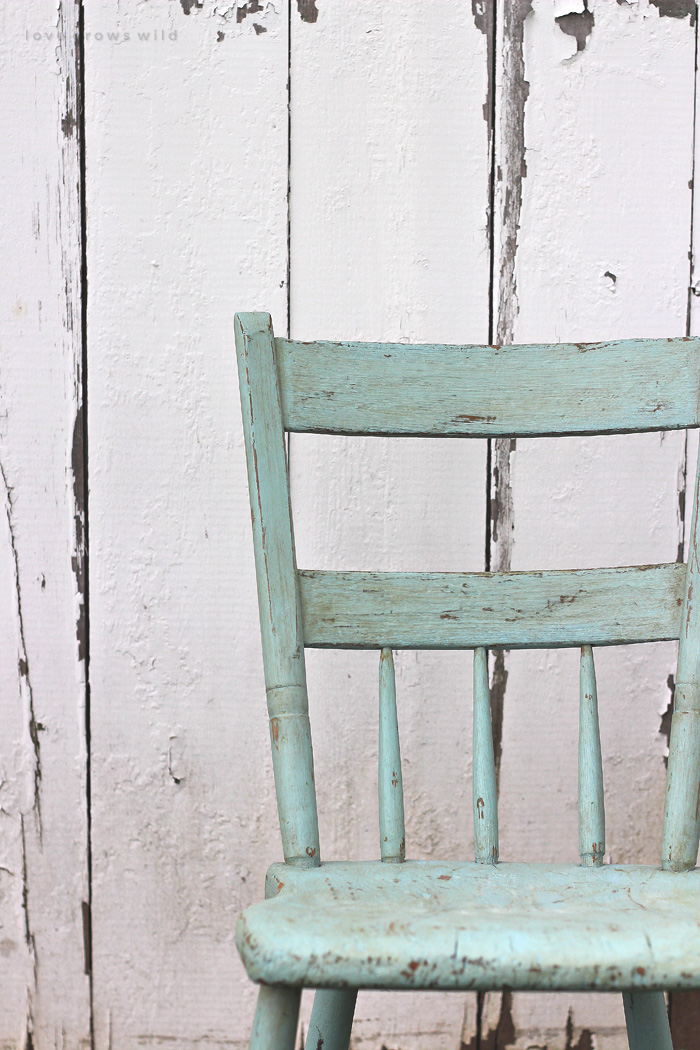
Can we just talk about that chair color for a second? You all know I am a neutrals girl when it comes to decorating my house, so a color like this is WAY outside my comfort zone generally. I think my mint desk in the office is just about the only real pop of color to be found! But I tend to feel a little more playful when it comes to outdoor decor, and that is exactly what I had in mind for this gorgeous chair.
There’s a house I drive by sometimes that has the cutest old chair in the front yard sitting next to a tree. The paint is all chipped away, the seat is nearly falling apart, and it looks like it has been out there for decades. Every time I drive by that house, I can’t help but think how cute the chair would be with a little potted plant sitting on the seat or a wreath tied to the back for the holidays. I decided it was time to have a cute outdoor chair of my own!
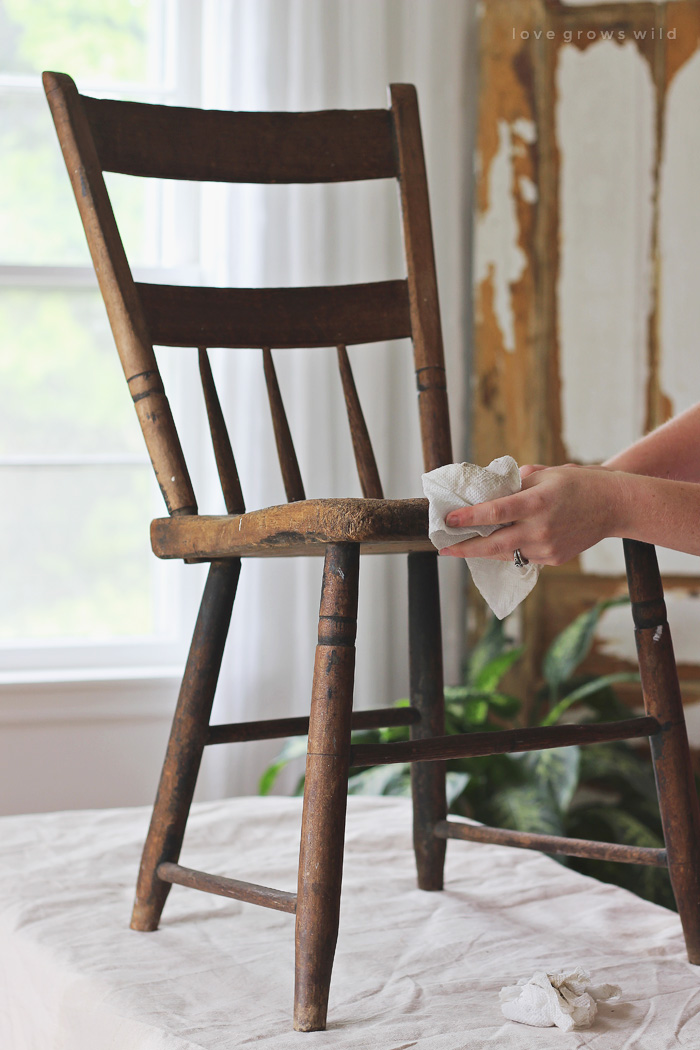
I recently picked up an old wood chair for about $15 and gave it a gorgeous antique finish with a bright pop of color. I wanted my chair to look just as old and weathered as the chair that inspired me, so today I’m going to share exactly what I did to achieve this beautifully aged finish. I’ll list the specific products I used and some will include affiliate links. Thank you for helping support our blog!
You’ll need:
paint
dark wax
matte varnish
metal scraper
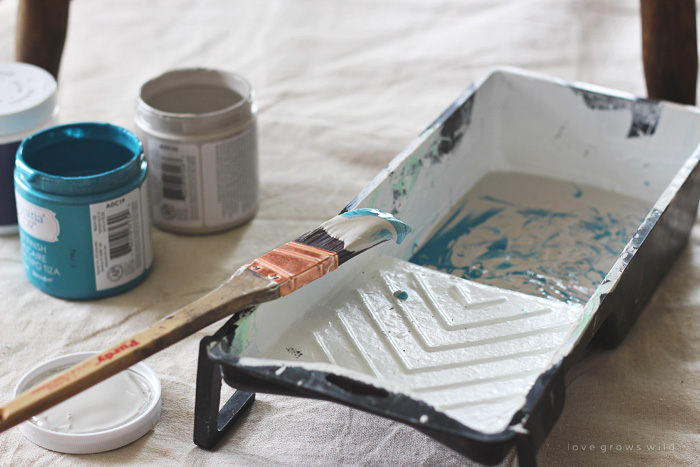
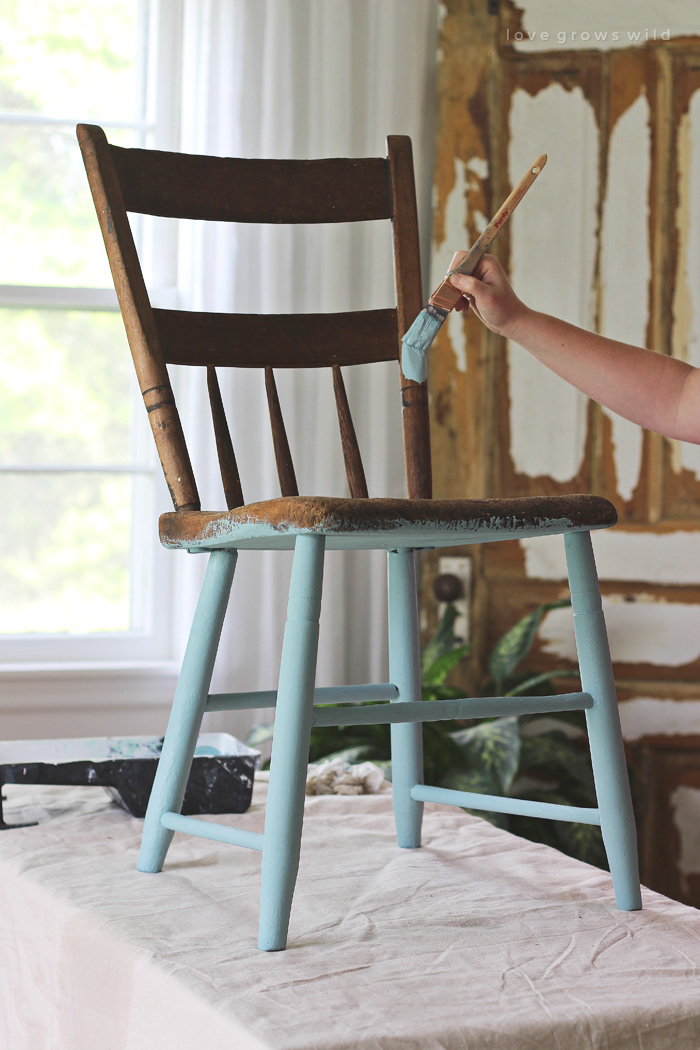
I like using a chalky finish paint for a few reasons: no prep work (a.k.a. sanding or primer) is required, it has a beautiful chalky, matte finish when dry, and it chips and distresses perfectly if you’re going for that look. For this chair I used DecoArt Chalky Finish Paint in a 3:1 ratio of Primitive and Treasure.
I started by wiping down the entire chair with a wet rag to remove any dirt, dust, and (ew) spider webs.
Then I painted on the custom paint color I mixed with a small brush. This chair only needed one good coat of paint… yay! It looks bright baby blue now, but we’ll fix that in the next few steps!
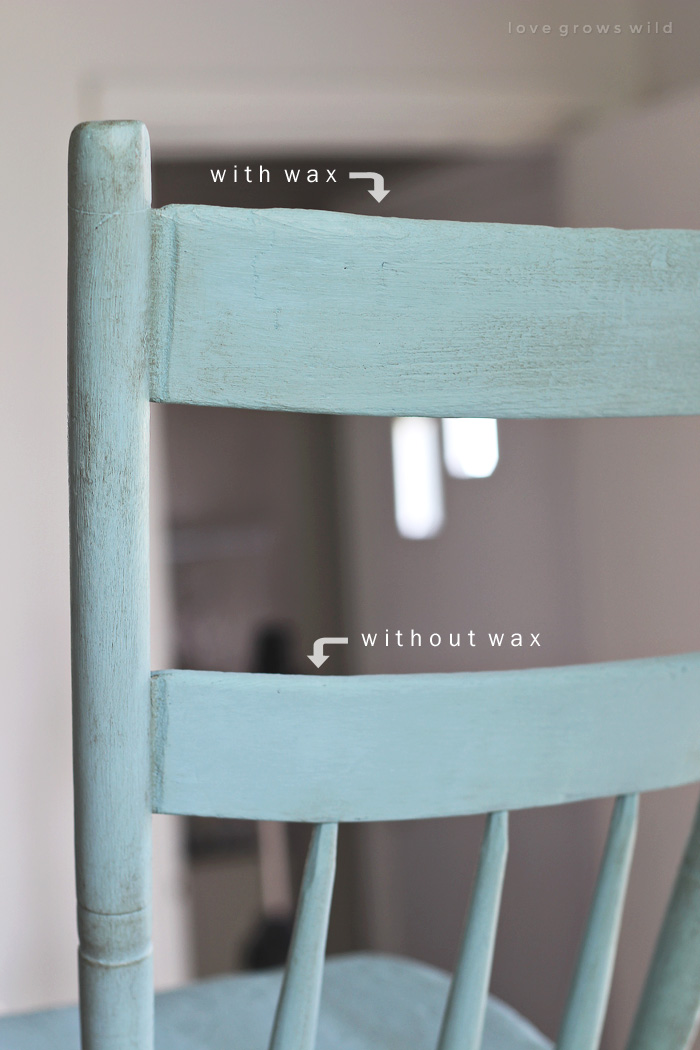
Once the paint was dry (which doesn’t take long with chalk paint), I applied a dark wax all over the chair. You’ll want to start small because a little goes a LONG way with dark wax. I like to keep a paper plate nearby and barely dip a paint brush into the wax, then wipe the majority off onto the plate before applying it to the furniture. This way you have better control of how much wax you use and don’t get dark spots that won’t blend evenly. Once you brush the wax onto an area, buff the wax into the paint with an old rag. I applied wax to the entire chair, but added extra in the corners and crevices and anywhere the chair would normally see a lot of aging. Below you can see an example of what the chair looks like with and without wax. I know this “dirty” aged look isn’t for everyone, but for a chair that is going to live outdoors and get dirty anyway, I think it is perfect!
After the wax was finished, I grabbed my handy dandy scraper. You can also use sandpaper to distress paint, but I’ve been favoring the scraper lately because it gives you a lot more control and you can get a more rough, random chipped paint look. Just run the scraper along edges and corners to remove some of the paint and expose the wood underneath. Focus on areas that would become worn naturally and try to be random about your distressing. You don’t want it to look uniform! There’s not a right or wrong way to do it, I’d just suggest starting small and adding more as you go until you get the look you want.
And last but not least, I sealed the chair. This chair will live outside in the elements, so I want to protect the finish I just created as much as possible. I used DecoArt’s Ultra Matte Varnish applied with a brush in an even coat all over the chair. It dries clear but adds a little bit of depth to the color of the paint, which I love. It’s also a matte finish (as the name suggests) so it won’t ruin your gorgeously antique finish with a super high gloss look.
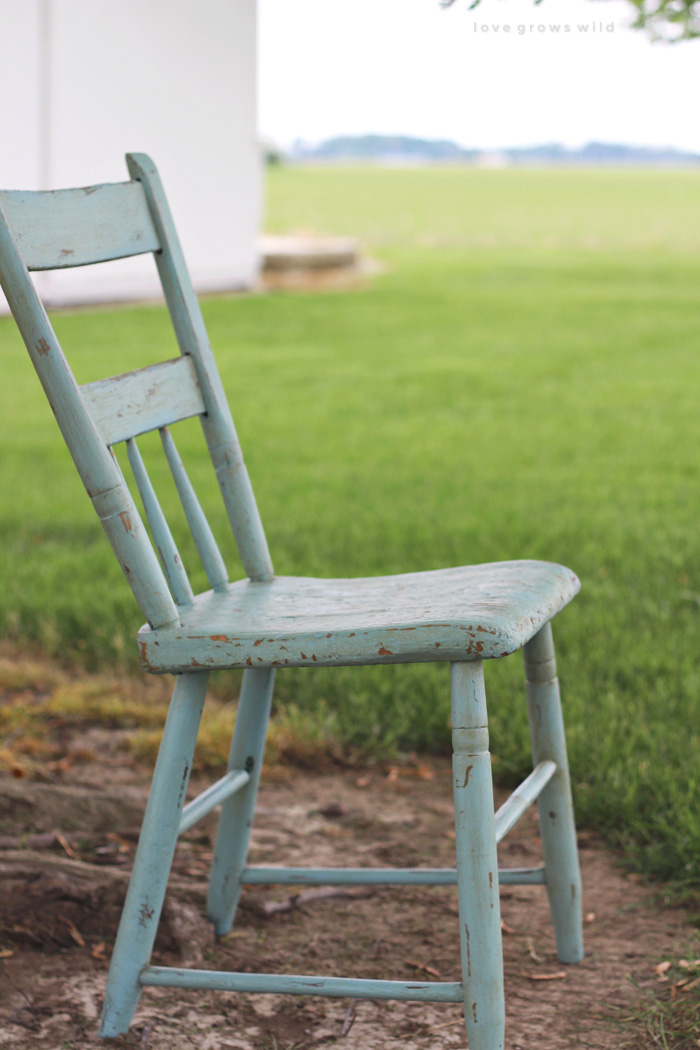
I think this chair is absolutely darling sitting out by a tree next to our barn, and I’m starting to add a few plants and flowers around it to create a little garden area.
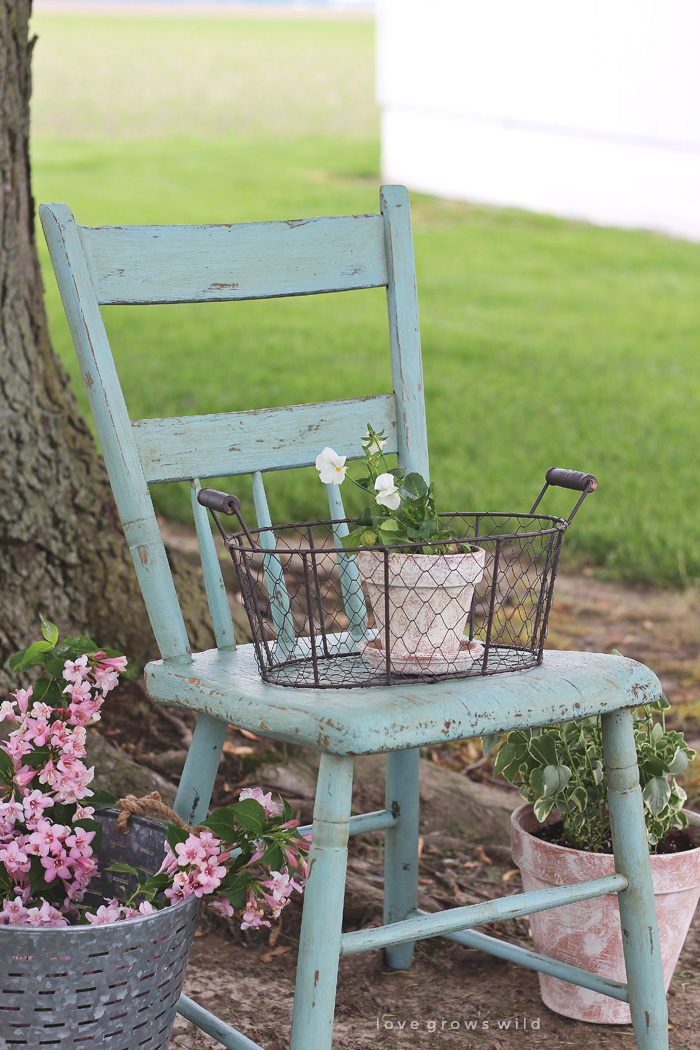
The boys love to come sit here in the shade when they need a break from running around outside. I feel like it’s thoughtful, little spaces like this that really make a house feel like a home!
TELL ME: What do you think about our new outdoor chair? Do you like the antique finish I did and the color? I’d love to hear your thoughts… just leave me a comment below!

This post is sponsored by DecoArt, but all thoughts and opinions expressed here are 100% my own. Thank you for supporting the brands that make this blog possible! Visit the DecoArt Chalky Finish website for more ideas and learn how you can enter to win up to $2000 cash and $500 in product in DecoArt’s Second Chances Contest!
LET’S KEEP IN TOUCH!
Subscribe to Blog | Browse my Shop | Follow on Facebook | Follow on Twitter
Follow on Google+ | Follow on Pinterest | Follow on Instagram

Wow, I really love this! Been gathering DIY ideas for our new place and this is definitely something I want to do for the outside! Love that color, too.
You achieved a finish that really looks like it has been aging for years. Love how this ended up looking!
I LOVE everything about this.
The chairs is so cute and vintage! I’ll paint one for my sea house too. Thanks for sharing!
it looks gorgeous and it IS neutral. It is a light, light blue…….weathered…..definitely neutral!
I think it is absolutely darling! I always hesitate using that much color also, but it is a refreshing change for outdoors.
Soooo cute!!! And love that color so bright and fresh 🙂
I love this chair and the color! I can’t wait to see how you change up the decor throughout the seasons! I want a rocking chair like this on the front porch next to a pitcher of sweet tea. Love your style and blog!!!
It’s perfect. I’m going to try your distressing technique on my old chair. Love how yours turned out!
This looks great! And thank you for the step-by-step process instructions.
I love you ideas and are looking forward to more of them 🙂
It looks lovely! I did not know that you could put varnish over wax. Is it holding up the summer elements well?
Hey Yvonne! Yes, the paint is holding up well so far! I will say that because I distressed the chair so heavily, you can see some areas where the paint is wearing off, but honestly it just adds to the beauty!
When you say 3:1 ratio, are you using 3 parts of the Treasure color or Primitive color? Thanks!
I apologize for the confusion! 3 parts Primitive, 1 part Treasure. I hope this helps! 🙂
How does the final coat of sealer stick to the wax you applied on the chair?
Hi John! Because I chipped away a lot of the painted/waxed finish, I wanted a final coat of sealer to protect the entire piece. It adhered over the wax very nicely!
Looks great. I just bought 4 wood chairs for $1 each at our local Habitat ReStore. I can’t wait to paint them and put them outside.
Thank you for this! I love the color you chose! I have a wooden rocking chair on my front porch that I need to paint again bc of the elements. I love this color, but I think I need to go black bc I have a red front door. What do you think? Anyway, I haven’t ever used chalk paint and have been wanting to try it! Do I have to use the wax? Is the purpose just for an antique look? If I’m using black…so I just skip the wax? Thanks for your help!
So good! And thank you for the step-by-step process instructions.