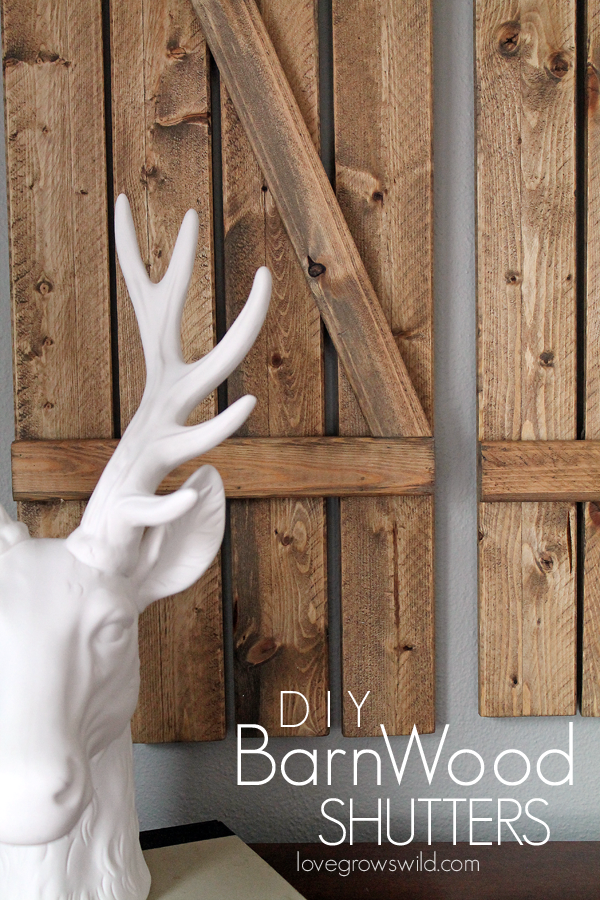
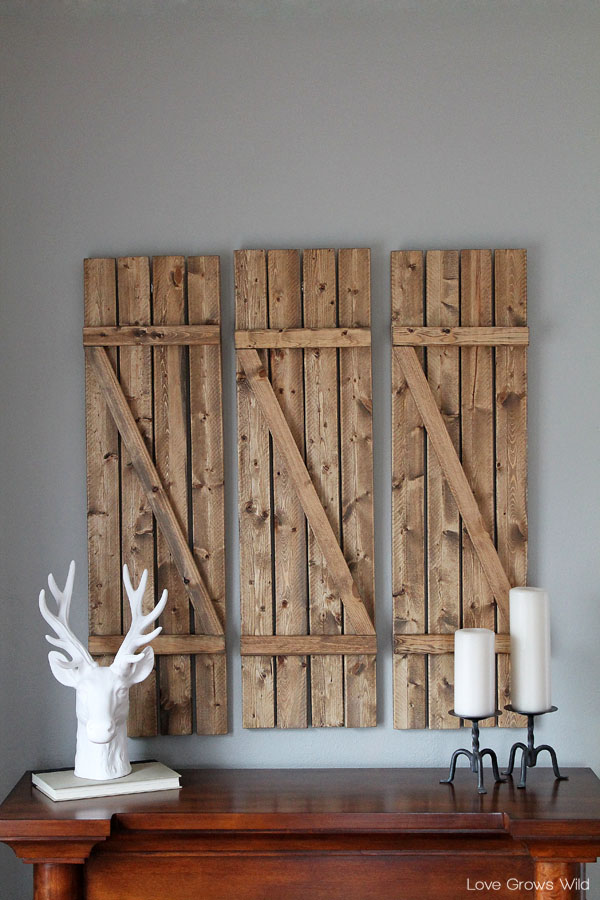
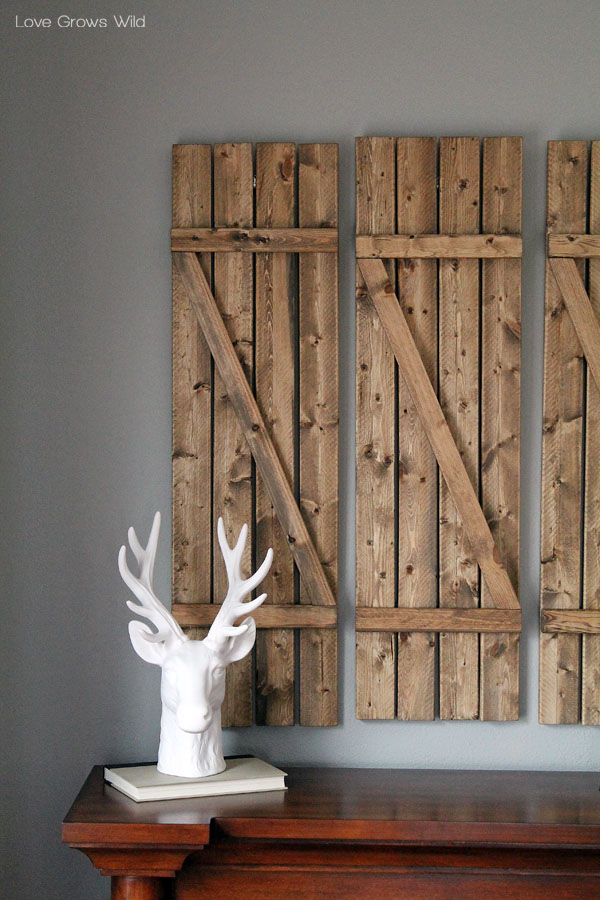
Are you ready for the first project of the new year?? I sure hope so, because this is a good one! I’m kicking off 2014 with a little makeover in my living room, and I’m so excited to share this first project with you! Yesterday I put together some lovely, rustic DIY Barn Wood Shutters to fill the blank wall space above my fireplace, and I’m sharing all the details today of how I made them! Grab a little snack and watch as I transform a pile of wood boards into gorgeous wall art for under $12!
Okay… so my living room. We moved into this house about a year and a half ago, and the living room hasn’t changed much since then. We had new gray couches, a glass coffee table, some dark, oversized end tables, and a whole lot of random hand-me-down furniture. Don’t get me wrong, I LOVE free furniture, but I was starting to feel overwhelmed by the amount of pieces that needed to be re-done, which made me give up on even trying to decorate my poor living room at all. Gray walls and gray couches with just about every wood tone imaginable scattered throughout. Ack!
But with my kitchen makeover finally finished and a brand new year ahead, I’m finally ready to tackle my bland, boring living room and give it the love it deserves! Starting with… our fireplace. Well, faux fireplace. It’s an electric heater that we got on a great discount a few years back, but I’ve never really loved the finish on it. The rich wood tone clashes with all the other wood tones in the room, and I’ve been thinking about painting it ever since it came home. Soooo while I’m getting ready to give the fireplace a little facelift, I’ll show you these awesome DIY Barn Wood Shutters that I just adore!
Here’s what you’ll need for 3 shutters:
6 – 1×3 wood furring strips
2 – 1×2 wood furring strips
miter saw OR miter box and hand saw
tape measure
1″ nails
wood glue
stain or paint
I started with this tutorial from Blooming Homestead as my inspiration and adjusted the measurements as needed to fit my space. I used furring strips from my hardware store just like the DIY mini pallet I created for my kitchen because #1 they’re a nice, small size to use and #2 they’re cheap! I picked up 6 – 1×3 boards and 2 – 1×2 boards for less than $12, which makes this project totally doable on my rather tiny budget!
You can cut the boards yourself using a miter saw OR have the sweet employees at your local hardware store do it for you. They’ll do the straight cuts, but you’ll need a hand saw and miter box to make the angled piece that goes in the middle of each shutter.
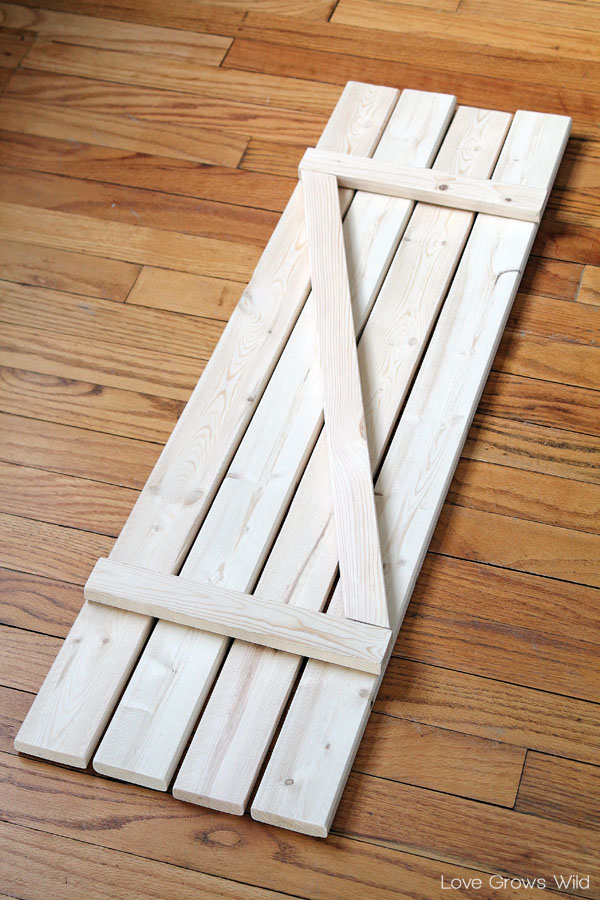
Here are the pieces you’ll need cut:
12 – 36″ pieces from the 1×3 boards
6 – 10 1/4″ pieces from the 1×2 boards
3 – 23 3/4″ pieces from the 1×2 boards, cut on a 22.5 degree angle
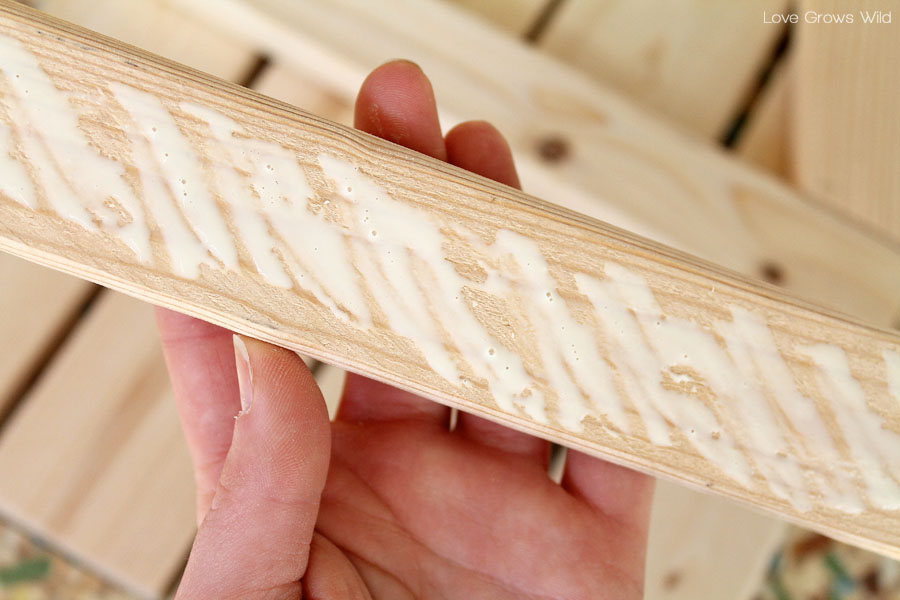
Once I had all the pieces cut (which I did in my FREEZING cold garage, by the way!), I laid them out on the floor to get an idea of spacing. The little gaps I added between the 1×3’s gives it a more old, rustic feel, which I love! Once I was happy with how they looked, I used some wood glue to attach the three smaller pieces on top of the 1×3’s. Important tip: anywhere the glue touches will NOT hold any stain, so be careful how much glue you use!
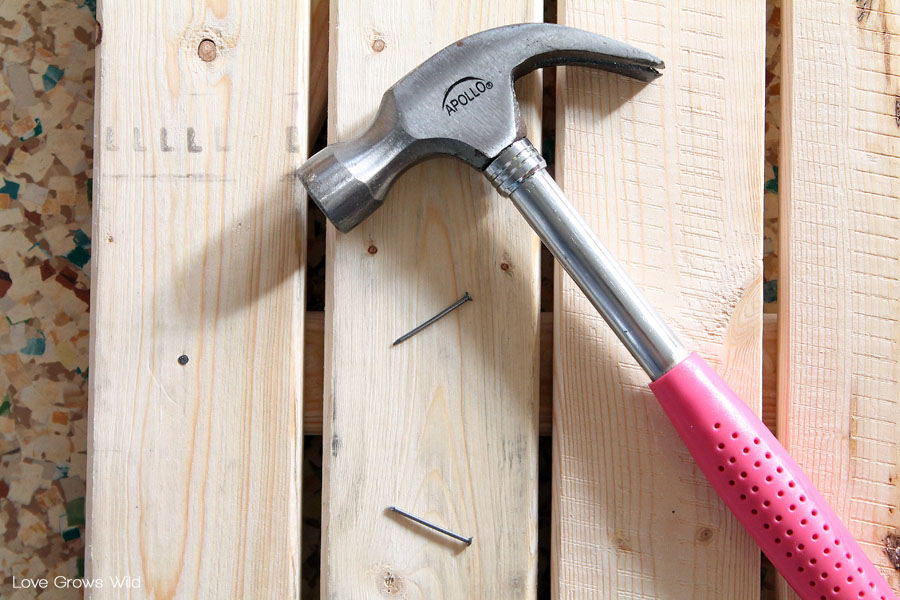
I clamped down the glued pieces until they were totally dry, then carefully flipped the shutters over to nail the boards together. I hammered a 1″ nail through each spot where the 1×2’s and 1×3’s connected.
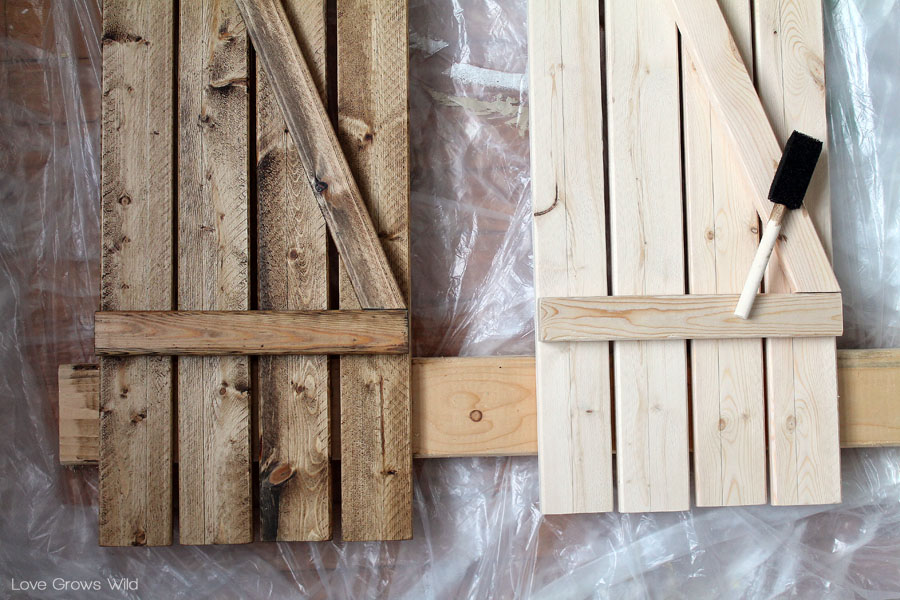
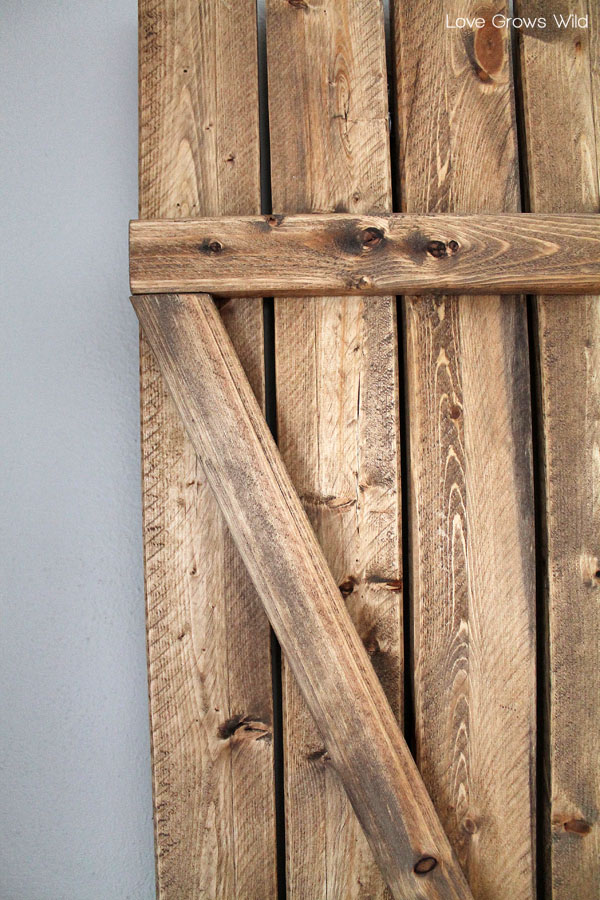
After all the shutters were assembled, I lightly sanded each board and stained them with a 3:1 mixture of Minwax Classic Gray and Dark Walnut. The Classic Gray stain doesn’t do much on the light pine boards, but add just a touch of Dark Walnut, and you get a GORGEOUS color that looks perfectly aged in just one step. The gray stain keeps the boards nice and light, but that dark walnut seeps into all the little cracks and crevices creating the perfect rustic look I was going for. I applied the stain with a foam brush, which makes is super easy to get in between the boards, and I just throw them away when I’m done. P.S. I loathe washing paint brushes! I also left the stain on for about 5-7 minutes before wiping away any stain that hadn’t soaked in. Oh, and don’t worry about finding boards that are absolutely perfect, because all those little imperfections just add character. This is why I LOVE this style of decorating so much… perfection NOT required! 🙂
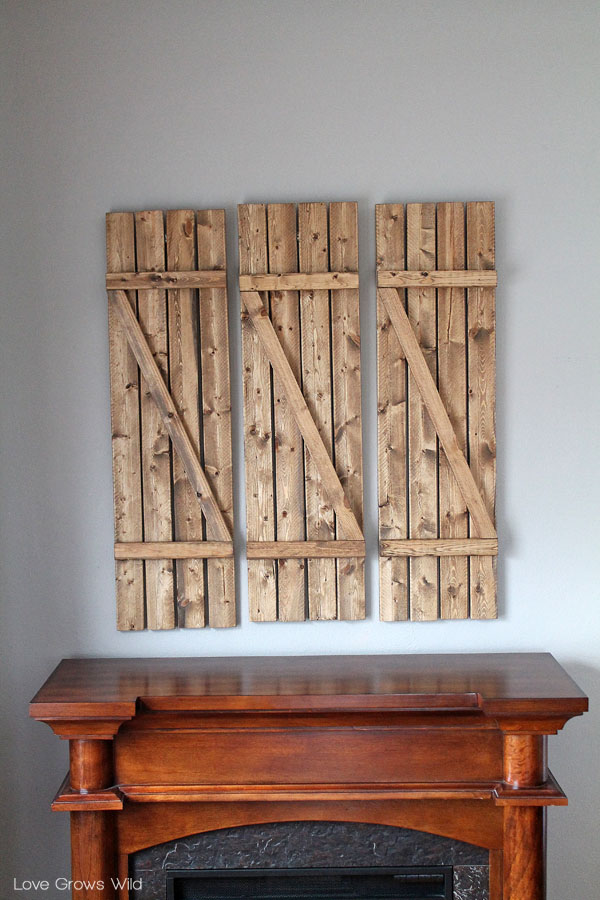
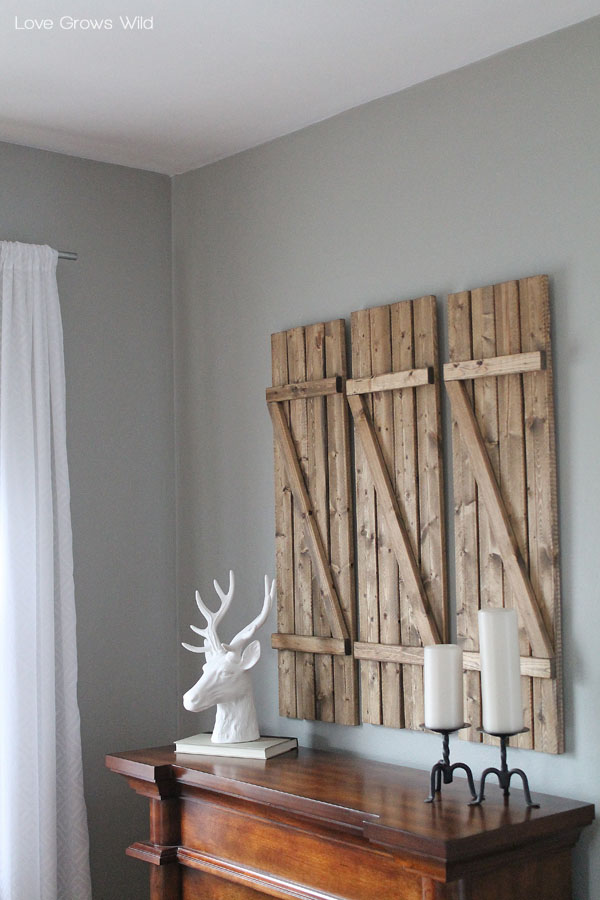
After letting the stain dry overnight, I hung the shutters on the wall over my fireplace using some eye hooks and wire from a hanging kit….
And Ta-Da!!
So yeah, the fireplace DEFINITELY needs to be painted, but just check out the gorgeous wood grain on these babies!
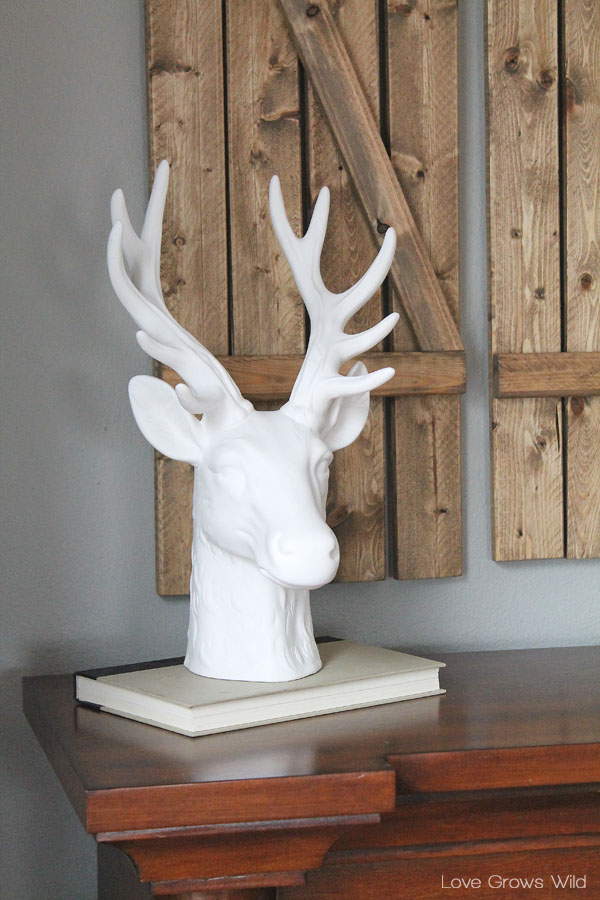
I’m not too worried about decorating the mantel until the fireplace gets painted, but I added a few accessories to dress it up, including the awesome deer head my boys got me for Christmas! Those little boogers know me so well. 😉
Once the fireplace is painted, I want to make a big, pretty wreath to hang on the middle shutter. What do you think… should I do a coffee filter wreath? Something with fabric? With flowers? Help me decide!
Since I already had the stain, nails, and wood glue, all I needed to buy for this project was the wood, so this giant piece of wall art only cost me $12! The hubby is so proud of my resourcefulness! And not bad for a few hour’s work!
TELL ME: How would you paint or stain these shutters for YOUR home? Would you do rustic wood tones? Bright white? A fun pop of color? I’d love to hear what you think!
Get inspired by these other lovely home decor projects:




Ahhhhhhhhhh! In love and I can’t hide it! AH! Gorgeous, Liz.
I would definitely do rustic stained tones in my home. I have been wanting to put an antique pair of shutters next to my TV on the wall to kind of make it look like “window” but WOWZERZ, I think I may have to have these instead?! AH, desicions.
Very nicely done!!!!! I predict an amazing 2014 for you and the blog already 🙂
I’m SO glad you’re as crazy excited over these as I am!! That’s a great idea to “frame” your TV, and these would be fantastic for that! Can’t wait to see what you come up with 😉
The shutters look fantastic! I would stain them a little darker but I think I’d definitely keep them unpainted. 🙂
Thank you, Megan!! I just love that wood grain showing through, so I totally agree on leaving them unpainted! So glad you could stop by and check out my latest project 🙂
Hi, so funny how I came across your shutters which I think are awesome, after the holidays my project is working on exterior wood shutters,,, just did a wall in my living using pine interlocking wood, stained it and then my sons shellacked it, my oh my ,awesome,,,,,so I’ve been waiting patiently to begin the exterior shutters ,but, I’m pretty sure I’ll be using wider pine wood and not adding the slant wood on front, and my house is white, think it’ll be awesome,,,,,, like yours,,,, so fun & let’s all enjoy everyday,,,,,
Love the project but I think your mantle looks fine. Just dress it up a bit.
Thank you so much! I’ll have to try and see what I can come up with. 😉
Could these be used on the exterior of the house? I’m looking to replace my original wood exterior shutters. I love this design!! Just not sure what I would have to do to “treat” them to withstand the snow and rain.
Hi Rhonda! I’ve certainly seen people use wood shutters like these on the exterior of their homes, and I would assume you could just stain and seal them with the same products you might use on a wood deck. They’ll probably need some maintenance every few years just like a deck would, but I bet these wood shutters would look beautiful on your home!
I love these! Wow, take about gorgeous shutters! I would love for you to link up at Link’n Blogs.
http://iputabirdonit.blogspot.com/2014/01/linkn-blogs-link-party-6.html
Have a great day!
xo
Daniela
Put A Bird On It
Thank you so much, Daniela! I love ’em too! Have a wonderful week!
Just found your blog and I am loving it! I am feeling very inspired this weekend!!
You are too sweet, Jen! Thank you so much for stopping by! I’m thrilled to provide a bit of inspiration for ya. 🙂 Have a wonderful week!
Hello awesomeness! Love this so much! I am featuring you tomorrow… Thank you so much for linking up with The Party Bunch!
You make my day, Desiree! Thank you so much for sharing my shutters! There were so many fun ideas linked up to your party this week. Take care, sweet friend!
The shutters look great. Unfortunately, I am so far behind all of you go getters…I haven’t gotten my tree down yet! I couldn’t sleep so I got up to organize my kitchen cabinets…just taking a fb break and came across your post (I still get them). I think a coffee filter wreath or grapevine would look fabulous!
Thanks Leslie! And don’t worry, most years I’m not this ahead of the game! So glad you could stop by! 🙂
Love! I think I would leave them stained so that they are a neutral background to whatever you hang on them or put on the mantel.
Those were my exact thoughts, Amy! You read my mind! This way I can easily transition my decor throughout the year, and I’m all about making things easy!
Hi Liz, I saw your lovely project on The Shabby Nest! Your photography is well done and very creative projects! I will keep an eye on what you are up to~ lovely site
kelly
Hi Kelly! I’m thrilled that you found me! Thank you so much for your sweet comments, and I hope to see you around more often! Have a wonderful week 🙂
so simple. so fab!
Thanks girl!!
I am so loving your shutters, you are some carpenter gal. Wow how did you learn how to work with wood so beautifully? You did such an incredible job. I had to pin these shutters as I’d like hubs to make some, both for decoration and for some on our windows
I really like your shutters stained but I’m a paint gal so a rustic paint job would be great also. Your “fireplace” is gorgeous. We’d love one but no room in our l/r for one.
For a mantel I have shutter shelf hubs made for me, have such fun decorating that crazy shelf, (except it’s over hubs chair right now and he gets nervous about something falling on his head). lol
I had to pin this so I can show these to him when weather gets nice, no garage or basement so he has to work outside when he builds anything for me. Can hardly wait for Spring as I have lots of projects for him to build. Happy days
You are so sweet, Jane Ellen! Thank you! I started playing around with power tools and working with wood just last year when I got tired of waiting around for my sweet husband to help me with all my crazy projects. Lol! Lots of trial and error and slowly tackling new tools. I’m a pretty impatient person when it comes to getting projects done, so when I want something done, I find a way to do it! It’s such a great feeling to be able to stand back and look at what I can accomplish with my own two hands. So fun!
I can’t wait for Spring either, so I can get outside and get some painting done! Thanks so much for stopping by, and I hope to see you around more often at Love Grows Wild!
Looks great Liz, I can’t wait to see it when the fire place is painted as well!
Thank you, Jacqui! I can’t wait to dive into painting that fireplace!
OOOOOO baby! Those are darling!… love love love these!… thank you for sharing this tutorial! Awesome work! xo!
Thank you, thank you!! I’m so happy you love them as much as I do! Thanks for your sweet comment. 🙂
As far as what wreath to make for your shutters….On youtube you can find a tutorial of a wreath made out of OLD yellowed pages from a book. You roll the pages to look like a funnel and staple them around a cardboard cut out. OMG it is gorgeous!! I plan on making one for my house soon. Its very cool.
Heres the video I liked best. 🙂
http://youtu.be/siwYIAXF2rE
Tracie, that’s beautiful! What a great idea! Thanks so much for sharing.
Love your shutters! I’m always keeping my eyes open for old shutters, but you make it look so easy to make my own! Thanks for sharing!
They were so easy to make, Mellisa! I know you could do it too! Thanks for stopping by, and have a great weekend!
LOVE these! They are gorgeous!
Thanks so much, Jamielyn!! I’m super proud of these babies!
Love the shutters (and of course, I’m obsessed with deer heads!) Great job, Liz.
In the photos, your fireplace mantel has a beautiful wood tone. Have you thought of just painting the black surround (tile?) to freshen things up? (Maybe a crisp white or another light color?) I just love the mantel wood tone paired with your wall color and your new rustic shutters.
Thank you so much! That’s a great suggestion about painting the darker part of the fireplace. I’ll have to think about that! Glad you could stop by!
Love this DIY – very clever! The stain mixture is perfect too! I have this weird partial glass block wall in our bedroom the kind you usually see in bathrooms (very strange ‘design’ element!) that I’ve been wracking my brain as to how to cover because tearing it out is just not in the cards right now! I think making these and hanging it to cover the glass would look great! Thanks for sharing the tute! ~ Heather
Don’t you just love those strange “design elements”? I know my house has a few! I bet these shutters would cover the glass blocks perfectly!
I love the contrast of the gray walls and couches with the brown accents. It just pops! Great tutorial and (since my husband is a construction type) I think I can totally do this!
You can definitely do this! It really was a super easy project. Hope you enjoy!
Love the shutters, you did a great job. And the stain just made them pop. Thanks!
Thank you so much, Terri! I agree, what a difference stain makes!
Perfect – I am sure I will be using your instructions in the future!
You asked about the wreath – I personally would make it out of natural botanical things, maybe even just simple boxwood – so that it really sets off the glory of your post-modern deer head which I covet so very much.
As for shutters, I have a set of pine louvered shutters which do not have a place to go yet (thanks craigs list!), but when I find it, they will become beach-bleached with remnants of old drippy/chippy paint. Right now they are orange 😛
A boxwood wreath would be gorgeous, Gabrielle! Great suggestion! And your Craigslist shutters sound amazing! I bet they will be stunning when you’re done with them. 🙂
These shutters are FABULOUS Liz! I love them!
Thank you, thank you, Trish!! I just adore them too!
Featuring YOU today! Thanks for linking up to {wow me} wednesday!
Ginger @ GingerSnapCrafts.com
YAY!! Thanks Ginger! You’re the best 🙂
Love it! I need some of these for backdrops!
These would look beautiful as backdrops! Why didn’t I think of that? Lol!
Love these shutters!! Thank you for sharing what stain colors you used. When I look at all the options, I never know what to pick. I want to make an aged looking picture frame and now I know how to get that look.
Thank you, Rachel! I always find that it takes some trial and error with paint colors or stain, so I love sharing what I use! I bet the frame you create will turn out beautifully! Thanks for stopping by 🙂
Ok, I’m in love!! Are you my twin?? I love all of your stuff! I found your site because I am looking for a tutorial on how to make a sign for my house using a piece of old wood I found in the woods. (Did you know that on the page where your “Good Eats” sign is, you have a broken link for how to do stencils without a silhouette?) Anyway, do you think I have to treat the wood with anything before I start painting? It’s just an old plant, but it’s pretty old…a couple mushrooms were growing on it!! I sanded them off though.
THank you for doing such awesome stuff!!
We can definitely be twins! 🙂 If you’ve sanded the piece down and you’re going to paint over it anyway, it should be fine without any special treatment. What a neat piece to display in your home!
Gorgeous!! I just found your blog and I LOVE all the projects!! Now I have a million more things to add to my to-do list ;P I’m sure you’ve already thought of something beautiful to hang on those shutters, as I’m a bit late to the game here, but a boxwood wreath would look fantastic hanging on there 😀
You’re too sweet, Laura! I’m so glad to have you here! You’re right, a boxwood wreath would look absolutely gorgeous!
Love this!!!! Such a good idea. I’m pretty obsessed about your deer head. I have been looking every where for one just like this to hang my jewelry on and I can’t find one anywhere!
Thank you, Jessie! That’s a great idea to use it as a jewelry hanger! I found this one at Meijer (a large local grocery store) around Christmas time, so keep your eyes peeled with the holidays coming up!
I found you on Pinterest and am so glad I did! Amazing job on your shutters! I have a couple of questions. Did you use water-based or oil-based stains? When you applied the stains did you premix them or apply the classic gray first then the dark walnut? Thanks in advance!
Great question, Whitney! And welcome to Love Grows Wild, by the way! 🙂
I’ve always used oil-based stains from Minwax and love the quality. The clean-up definitely isn’t as easy as with water-based though! And yes, I premixed the two stain colors before applying it to the wood. I hope this helps!
I am always looking for DIY barn door type of projects that my readers will enjoy. You have done such a great job with this article , I would like to link to it in an upcoming post I have planned. Thanks
hello, thank you for your tutorial is great! bravo!
where did you find the head of deer? I love all a bit rustic
I absolutely Love the color that you chose to stain your DIY wood shutters with. I also happen to be on Pinterest and seen your DIY decor project, I too think that a boxwood wreath would look very pretty or a Magnolia wreath. Could you tell me the color of your walls in the picture where the shutters are hanging? I think the stain and the wall color compliment one another, Very Pretty – You’ve done a Great Job. Thanks for your post, very much appreciated. Happy Holidays!