A few months ago I shared the big news that I finally decided to pull the trigger on expanding our outdoor living space by building a deck off the back of the house. I took photos as each phase of the deck was completed, and before I share the big reveal of the finished project later this week, I wanted to go through step-by-step as the deck was being built so you can get a front row seat of the progress as it happened. Whether you have plans to build your own deck in the future or are just curious how it looked as it all came together, I hope this post is helpful for you! And I promise A LOT of pretty pictures of our new outdoor space all decorated and styled very soon!

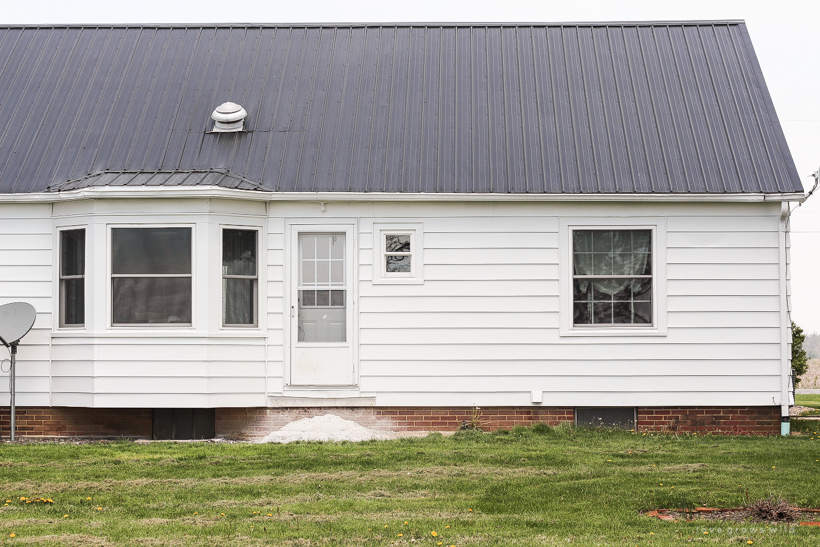
But first we start with this blank slate in our backyard…
As I mentioned in my last deck post, I hired the same contractor I worked with previously on my kitchen renovation (RHK Contracting in case you are local in Indiana), and the first thing he did was remove the concrete steps off the back door and the sidewalk that went from those steps to the breezeway door, which sits just to the left of the back of the house, connecting the house to the garage.
Removing the sidewalk was a breeze, but we ran into our first snag when after nearly an entire day of jackhammering those back steps, we realized they were poured several feet down into the ground. Rather than spending time and resources on getting completely rid of all that concrete which would be covered up by the deck anyway, we decided to just build over what was left. No one will ever know unless they tear the deck down someday, and I can guarantee that won’t happen while I’m here. : )
Next they dug the holes for the footings, which they dug by hand just to make sure not to disturb the septic or any other lines running to and from the house.
Then they started framing out the deck, which was really exciting to start seeing just how big the deck was going to be. We decided to extend it all the way outside the bay window in the kitchen with a set of stairs on both ends of the deck. The taller posts you see below on the right side are where the covered gazebo will be, and the rest of the deck will be open.
Next they got the floor installed and started on the railing.

The deck itself actually went up extremely quickly. Two guys had it knocked out in a matter of just a few days. The gazebo structure and finishing the railing took a little more time, which is where a lot of the cost adds up quickly. But I knew I wanted to have part of the deck shaded so we would get the most use out of it, so it was well worth the added labor and material cost.


They finished the main gazebo structure, added both sets of stairs, and added vertical skirting all the way around the deck, which my contractor suggested. You’ll often see decks with lattice underneath, but he thought this would look a lot nicer and more finished and also keep critters from making a home underneath. I am so glad he suggested that and just shows another reason why it’s so important to find a contractor you connect with and trust!

One revision I made to the contractor’s original plan was widening the main stairway to a full 6 feet. When I looked through photos of deck designs online, one thing I didn’t like was when the deck stairs were very tiny and narrow. I think a nice wide step looks more appealing and also gives you the opportunity to set potted plants on each step if you want, which I am so looking forward to doing next year. How pretty would that be?

The last step of completing the deck was adding a black metal roof on the gazebo to match the house, running electrical to the gazebo so we could have a ceiling fan and an outlet, and finishing the ceiling of the gazebo. This was the part of the deck that took the longest, but not because of actual labor time. My contractor was able to squeeze me in between some other big jobs, which was wonderful because I was able to start decorating and enjoying the deck much earlier this summer than I expected, but finishing the gazebo was put on hold for awhile while he finished up some other jobs and waited on materials to come in for the ceiling.
We came up with several ideas for finishing the gazebo ceiling, but I didn’t want to pour a lot more money into this last detail or have something that would be hard to keep clean and maintain. In the end we settled on white paneling for the ceiling with white aluminum wrapped around the exposed wood and beams. I already had a beautiful matte black ceiling fan picked out, so I knew a white ceiling would really make that fixture stand out. The paneling comes in 8 foot pieces, and the gazebo is 14 feet, so we had to figure out where to place the seams that wouldn’t look off center. My contractor came up with another great suggestion of creating a plus sign in the center of the gazebo with wood beams so the seams would be hidden behind the beams. He created the “beams” by stacking two 2×6’s and wrapping them in the white aluminum. Then he centered the ceiling fan where the two beams intersected.
I’ll have photos of the finished ceiling for you in the reveal post!
With treated lumber like this, it is recommended that you give the lumber a little bit of time to dry and release any moisture before you stain or put any kind of finish on the wood. We had a VERY wet spring and early summer, so I knew by the time the deck was completed it would be next year before I put any kind of finish on the wood. To be completely honest, I have no idea yet what color or product I’m going to use for our deck. There are so many options, and I can’t decide whether I want a light wood finish, dark wood, white wood, gray wood… a different color on the deck floor than the railing? The entire house is black and white with no wood elements at all, so I don’t have anything I’m trying to match. I just want something that will feel classic and timeless and coordinating with the house. Feel free to share your opinions in the comments if you have any!
Thanks for stopping by today, and stay tuned for the BIG deck reveal coming next!! P.S. Your excitement with this project has made this whole experience that much more fun for me… thank you for being the best community ever. xoxo Liz


I love it and it looks beautiful. I also have a deck that I’d like a cover over, but …..not sure how to do the roof. So, I have a question, how do you keep the rain water from going down the back wall from the gazebo roof? Thanks!
That’s a great question, and I need to add this to the blog post! A few years ago I replaced the gutters on the front of the house because they were in really bad shape, but waited to do the back of the house. When we started building the deck, it was obvious the back gutters needed to be done as well. Once the gazebo was completely finished, they installed seamless gutters all along the back of the house and all around the gazebo so that water won’t pour down that back wall. It was a detail I never really thought about being an issue, so that’s why I’m happy to have a great contractor to think of these things for me. 🙂
Love your deck an you have designed it well! Love the unique features you have added. Some advice as you decide on the finish. I have had a deck for years an so have friends. Always use stains never paint. Stains will wear off eventually an you just restrain but paint will peel an crack an an lots of headaches trying to repaint!. On stains biggest decision is to go with a solid or transparent. I love seeing wood grain thru the stain an it comes in lots of colors. But one year they sold me solid an I had it on before I realized mistake so I am stuck with sollid an can no longer see the grain of the wood. I guess your wondering how often you will have to restain. I live in Florida so our weather is brutal to my exposed deck. I go over it about every 4 years. Hope this has been helpful.
This is so helpful, Peggy! Thank you for the advice! I had the same thought you did, starting with a semi-transparent because once you go solid, you can’t go back. Thank you again!
This adds so much to the house! Literally, of course, with the nice outdoor structure. But also in terms of the appearance of the house. Beautiful design. Gloria
This looks really lovely and will be so useful for your family. Your view is so lovely. One question though about the skirting – won’t that inhibit airflow?
Good question! There skirting boards are spaced close together, but the deck floor boards on top have a gap in between so water can escape. I believe that is all it needs in terms of airflow!
Your deck looks amazing and your contractor is brilliant. Love the gazebo and the way the bottom of is finished. You and your family will
have many years of enjoyment using it.