

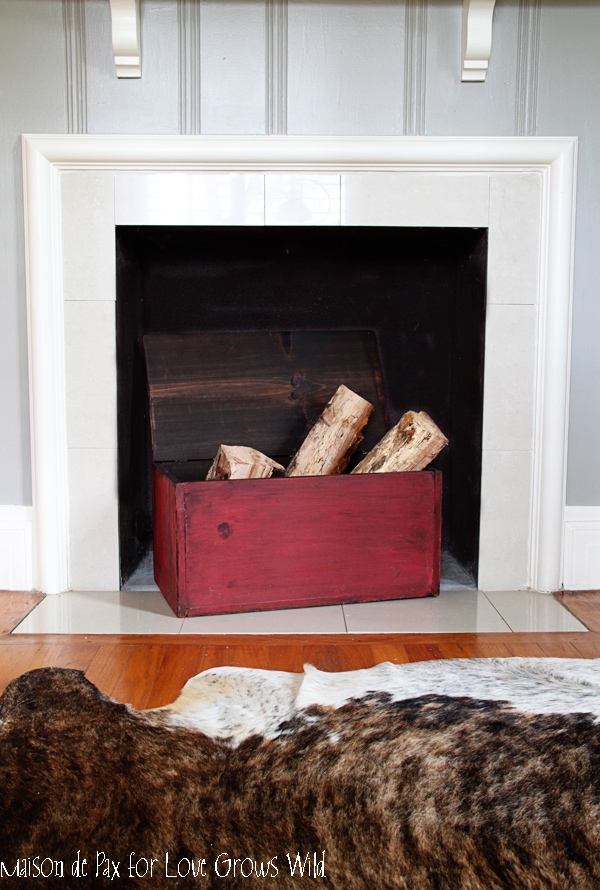
Happy New Year, Love Grows Wild readers! It’s Rachel again from Maison de Pax. Today I’m pleased to share with you an easy technique for creating gorgeous, aged finishes on any wooden surface. To demonstrate, I turned a boring pine box into this rustic beauty:


I use this box all over my house. You may have seen it as part of the decor during the vintage travel-themed party I hosted. Sometimes it serves to hold toys or blankets, and it even makes its way into my fireplace from time to time. I love versatile pieces!
To achieve this look, you will need:
- raw wood box (or frame, or sign, or tray… or whatever you’d like to paint!)
- dark stain
- vaseline
- milk paint (I used Miss Mustard Seed’s in tricycle red)
- sand paper
- clear wax
- dark wax (optional)
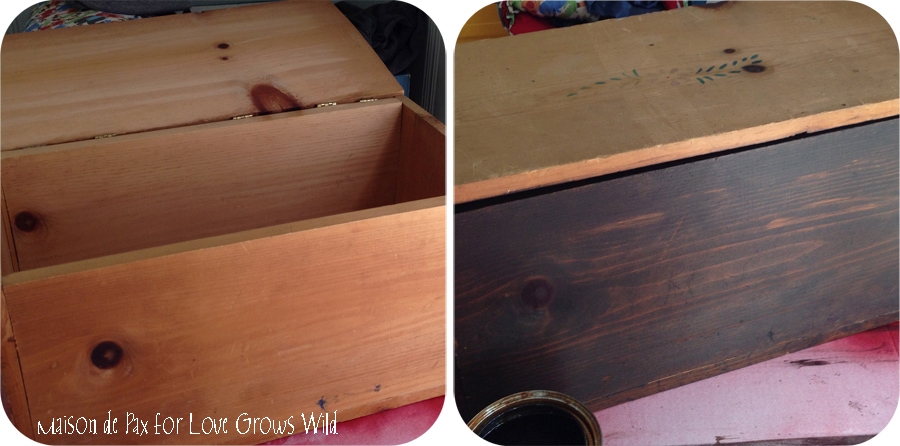
You can truly use this on any piece of raw wood, but I found this pine box at Goodwill for $3! The best part about this layered technique is that it can create beauty out of…. well, something not so beautiful. This box was definitely. not. so. beautiful. before.
1. Stain the entire piece with a dark stain. Let dry.
2. Add vaseline in random places, especially focusing on areas that would receive natural wear and tear (like corners).
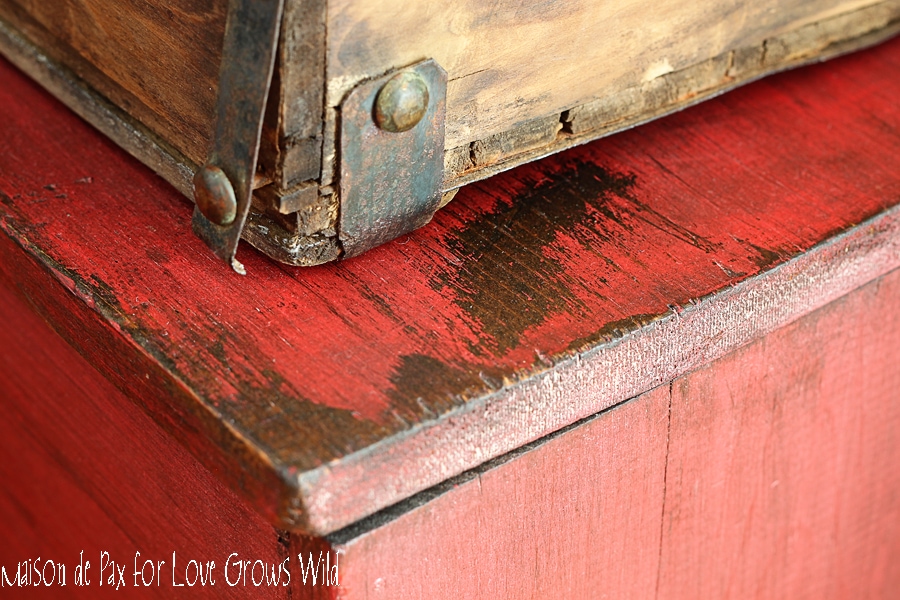
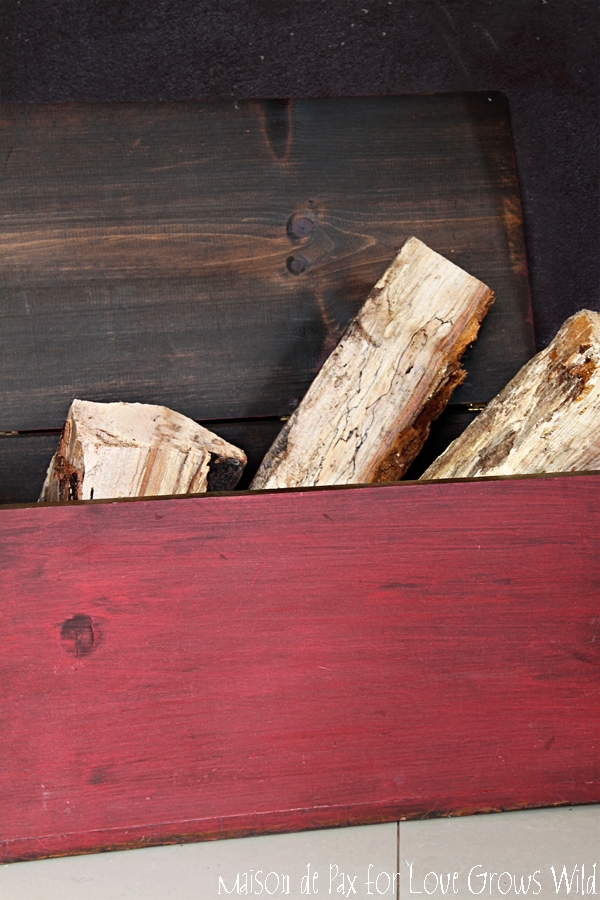
3. Paint the outside of the box with milk paint. My first experience with milk paint was transforming a dresser for my husband. If you’ve never worked with milk paint before, it has a different texture than latex or chalk paints. You can achieve a similar effect by layering vaseline with latex or chalk paints, but the dual effect of vivid color that is slightly transparent is best achieved with milk paint. You can see how the grain of the wood almost shows through in places, even where vaseline was not applied. And, obviously, I chose only to paint the outside of my box, leaving beautiful dark stain showing when the lid is open.
4. Use sandpaper (especially where you put the vaseline) to distress the paint. Keep going until you love it.
5. Wax the entire piece with clear wax. Follow with antique wax if desired.

It’s that easy. I love how the red acts as a fun accent, while the rustic nature of the piece keeps it from being too overpowering in a room. I’ve been toying with making more of these since a cheap pine box would be a simple DIY construction… In the meantime, I’m enjoying this one. 😉
What’s your favorite versatile accent piece?
Connect with Rachel:
 Blog | Facebook | Twitter | Pinterest
Let’s Keep in Touch!
Subscribe to Blog | Browse my Shop | Follow on Facebook | Follow on Twitter
Follow on Google+ | Follow on Pinterest | Follow on Instagram

This looks just like pottery barn! I love it!!
Yes it does!! Thanks for stopping by, Chelsea!
Gorgeous! I really have to give milk paint a try. Pinning the tutorial- thanks for it Rachel!
Me too, Krista! Now I have to give milk paint a try! Thanks so much for stopping by.
The box looks great Rachel. Thanks for sharing how you achieved that beautiful time-worn look. Love the color too.
Blessings,
Audrey Z. @ Timeless Treasures
I agree, Audrey! It’s beautiful! Rachel did a fantastic job, as always. I love seeing what she’ll come up with next! Thanks for stopping by!
This is a very useful post. Thank you for sharing it with us! I always wanted to learn how to make wood take this rustic style!
You are so welcome, Maria! Enjoy!
I love this project! So beautiful and versatile. And I have some mms milk paint samples just waiting to be used 🙂
I need some MMS milk paint samples! How fun! This technique works great on so many pieces, so have fun playing with it!
Fantastic! I absolutely love this technique and that shade of red. I really need to try this (and MMS paint) on a project soon!
Have a great week!
Angela @ Number Fifty-Three
Isn’t that red just to die for? Gorgeous! Thanks so much for stopping by!
On step 5, when you say wax it with clear wax….do you mean poly. or real wax like canning wax?
Hi Kim, great question! I actually don’t mean either; I mean furniture wax. You can buy some expensive boutique brands (Annie Sloan is great, Miss Mustard Seed is wonderful, Country Chic Paint is fabulous), but you can also use Paste Wax, a much cheaper alternative. SC Johnson makes some that you can find at your local hardware store for less than $10 for a good-sized can, and it will last you a long time, especially for a little project like a box! Hope this helps!