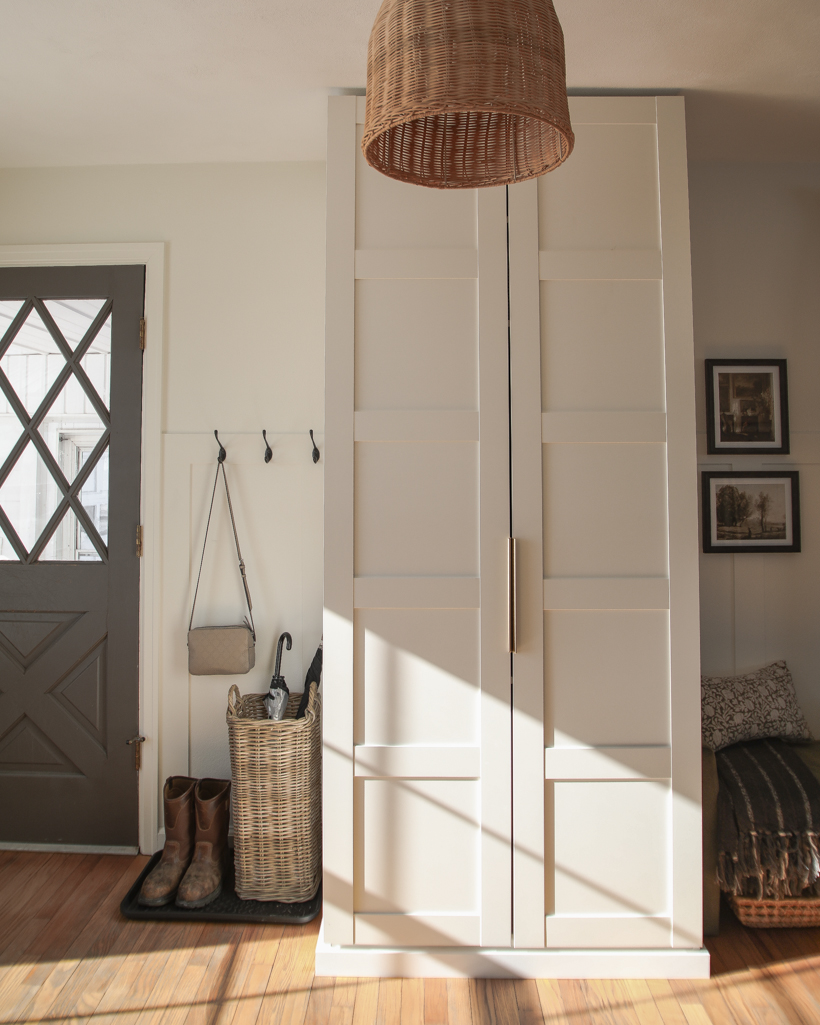
I’m making it a goal this year to finish all the little unfinished spaces and projects that have been forgotten about, and I decided to start right in the entrance to our home. We actually use this side door instead of our front door because it’s closer to the driveway, but I’ve always had a hard time organizing this space because there is no closet here.
With a little planning and a few clever organizing solutions, I think I’ve found the perfect balance of style and function in our entryway. Let’s dive into the details…

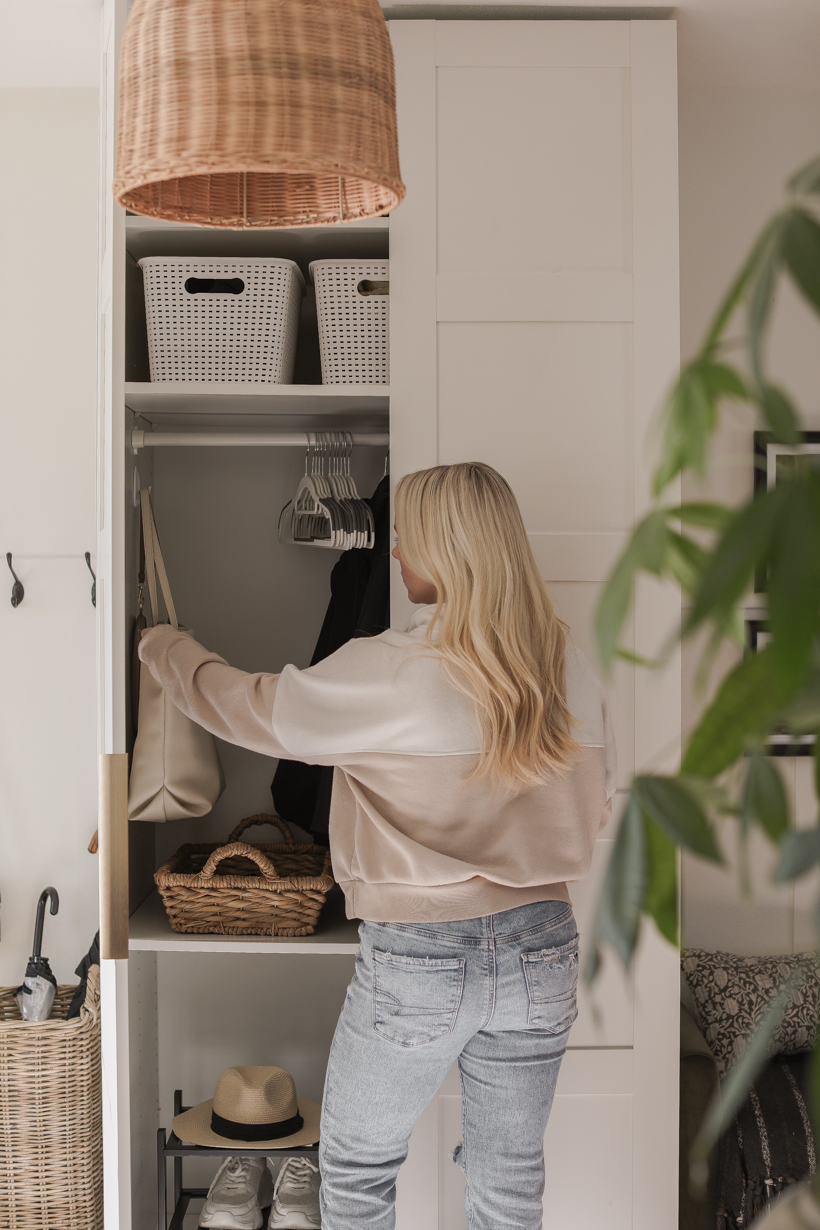
Around this time last year, I bought an IKEA Pax wardrobe cabinet that I hoped would be the answer to the majority of our storage problems. Most wardrobe or armoire cabinets with a clothing rack inside are either really small or really expensive, and I wanted something that could not only fit our coats, but also have room for other outdoor gear and maybe even shoes.
This particular cabinet is almost 94″ tall and just barely fits our ceiling, so assembling it was quite the experience. I think I deleted the video I took because there was probably a lot of swear words and frustration. But before I had a chance to do organize or style or do anything with it… the accident happened. Actually, we were going through our camera rolls the other day, and I’m reasonably certain we finished putting on the doors and installing the shelves literally the DAY the accident happened. The significance of this is not lost on me – for almost a year this cabinet sat mostly empty with a few random things tossed inside. A year of trying to survive and just keep my head afloat and many things getting pushed to the bottom of my to-do list, this cabinet included. This is just one symbol of many of the pieces that are left to pick up after someone you love passes away.
It was just this week that I finally decided to actually finish what I started and make this space purposeful for our family. Just weeks away from the one year anniversary. This project feels like a “look how far I’ve come and how much I’ve gone through” reminder that I desperately needed right now. Life has a funny way of coming full circle and reminding you of memories, both good and bad, when you least expect it. When your eyes are open to it, you can find little life lessons and important perspectives almost anywhere – even IKEA cabinets.
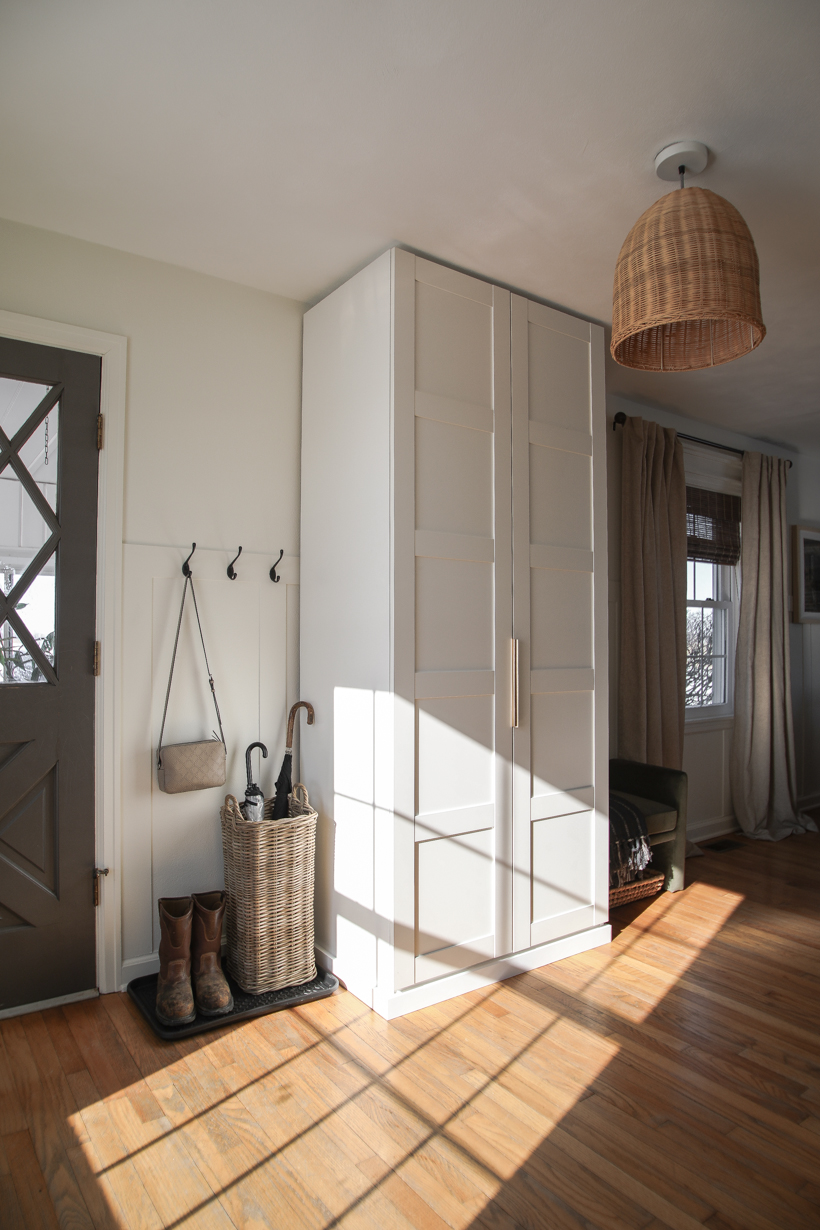
The first thing I did was level the bottom of the cabinet. Our home was built in 1949, and the floors and walls certainly are not level, so the cabinet looked like it was majorly leaning forward and the doors were also uneven. I wedged a 1 x 2 underneath the front of the cabinet to lean it backwards against the wall and also placed one of these little leveling shims under one corner to even out the doors. This made some pretty large gaps between the bottom of the cabinet and the floor, but that can easily be covered up with some trim.
I cut 1 x 3’s with 45º mitered edges to fit the front and sides of the cabinet and attached them with brad nails directly to the bottom of the cabinet. I filled in the nail holes, caulked the seams, and painted the trim in a bright white semi-gloss to match the cabinet finish.
Originally I thought about completely trimming out the cabinet along the back and ceiling as well to make it look built-in, but decided against it because:
1. The doors go all the way up to the top of the cabinet, and there’s not a good place nor enough room to be able to attach any trim.
2. I move things around in our house so much that I’m hesitant to do anything I can’t easily move and change. Even if I just wanted to shift the cabinet over a few inches, I’d have to tear off all the trim I installed, repair the wall and ceiling, etc. I’m also hoping to eventually refinish our hardwood floors on the main level and would want to be able to move this cabinet to do so.
Just doing the bottom trim allowed me to level the cabinet and give it a more finished look, and I can still move it whenever I need to. I’m very pleased with the end result, and it was a really quick, easy project to ease me into the new year. The longest part was just waiting for paint to dry between coats.
Okay, now let’s talk about how I organized this massive cabinet and made room for all our things without having an actual closet.
EVALUATE: First, I gathered everything I wanted to be able to store here and assessed just how much and what kind of storage I needed.
MEASURE: Next, I measured the inside dimensions of the cabinet as well as measurements of specific things I wanted to store. For example, I knew I needed enough space to hang our big winter coats and also store some taller boots. I needed somewhere for umbrellas, which are an awkward size, and smaller items like lint rollers and gloves.
SOURCE: Then I searched for specific bins, hooks, racks, etc. to fit our needs.
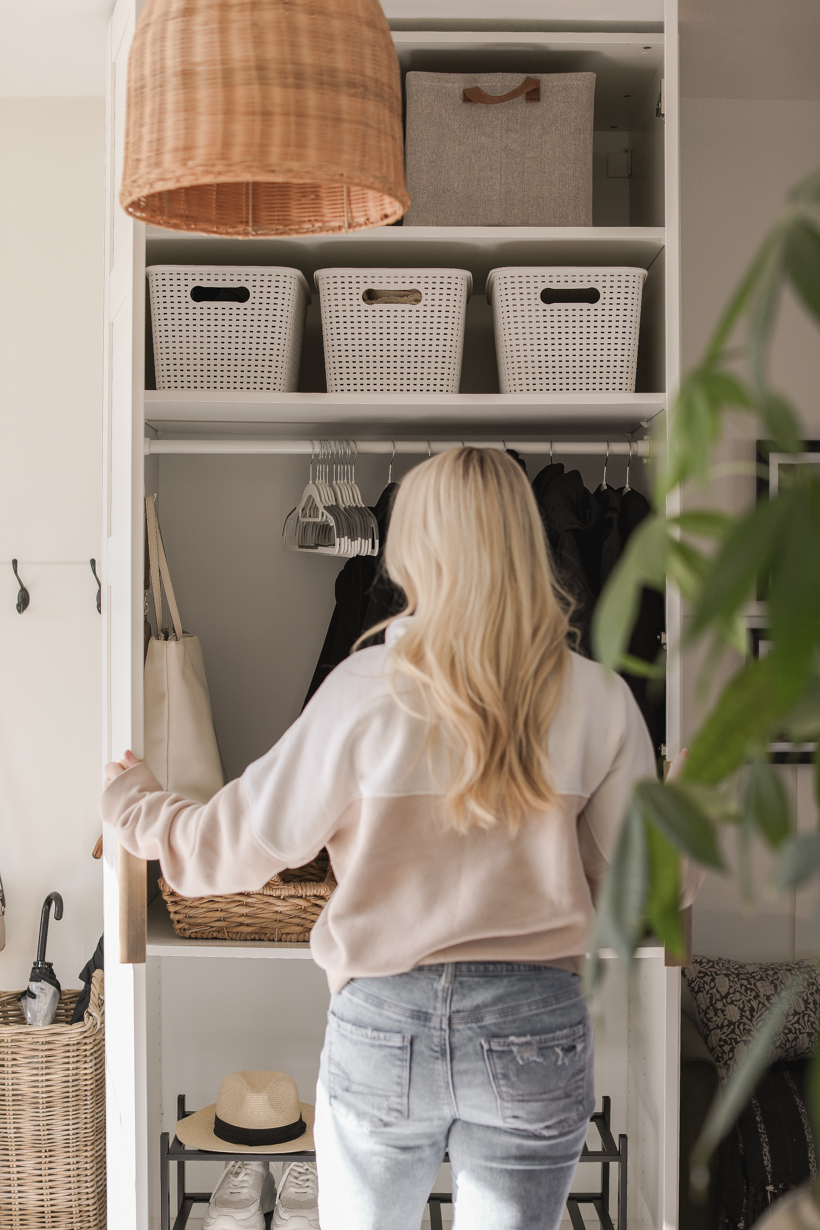
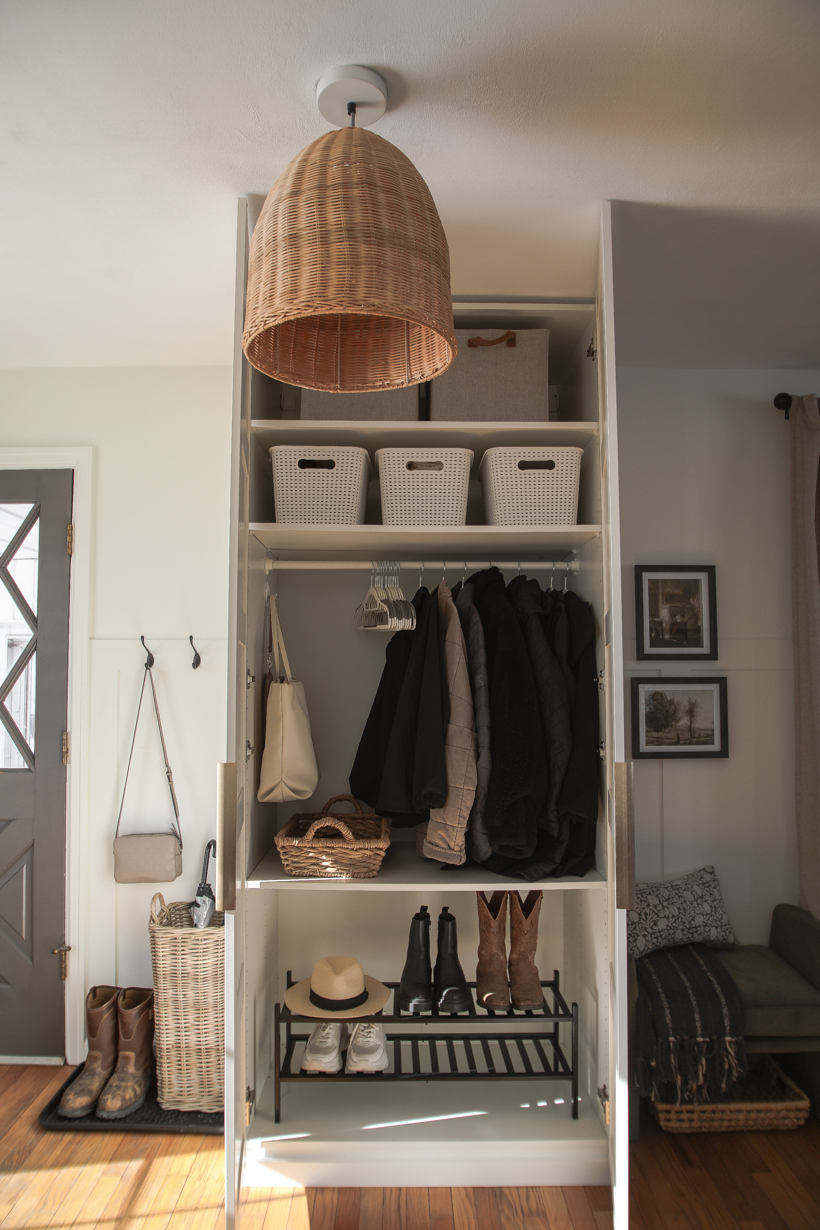
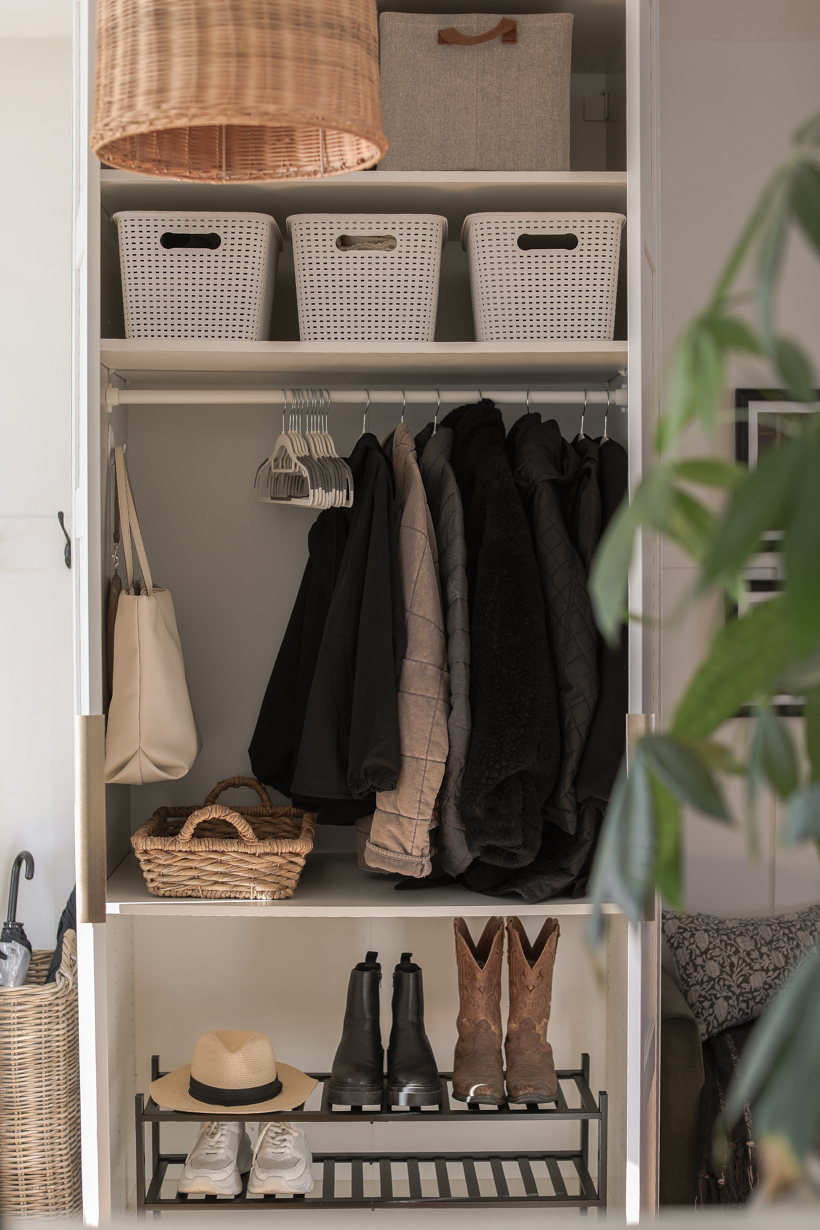
The nice thing about this cabinet is that it has adjustable shelving, so I’m able to completely customize the storage from top to bottom. After playing with several different layouts and looking for storage containers to maximize the depth and width of the cabinet, I settled on this:
ORGANIZING SOLUTIONS:
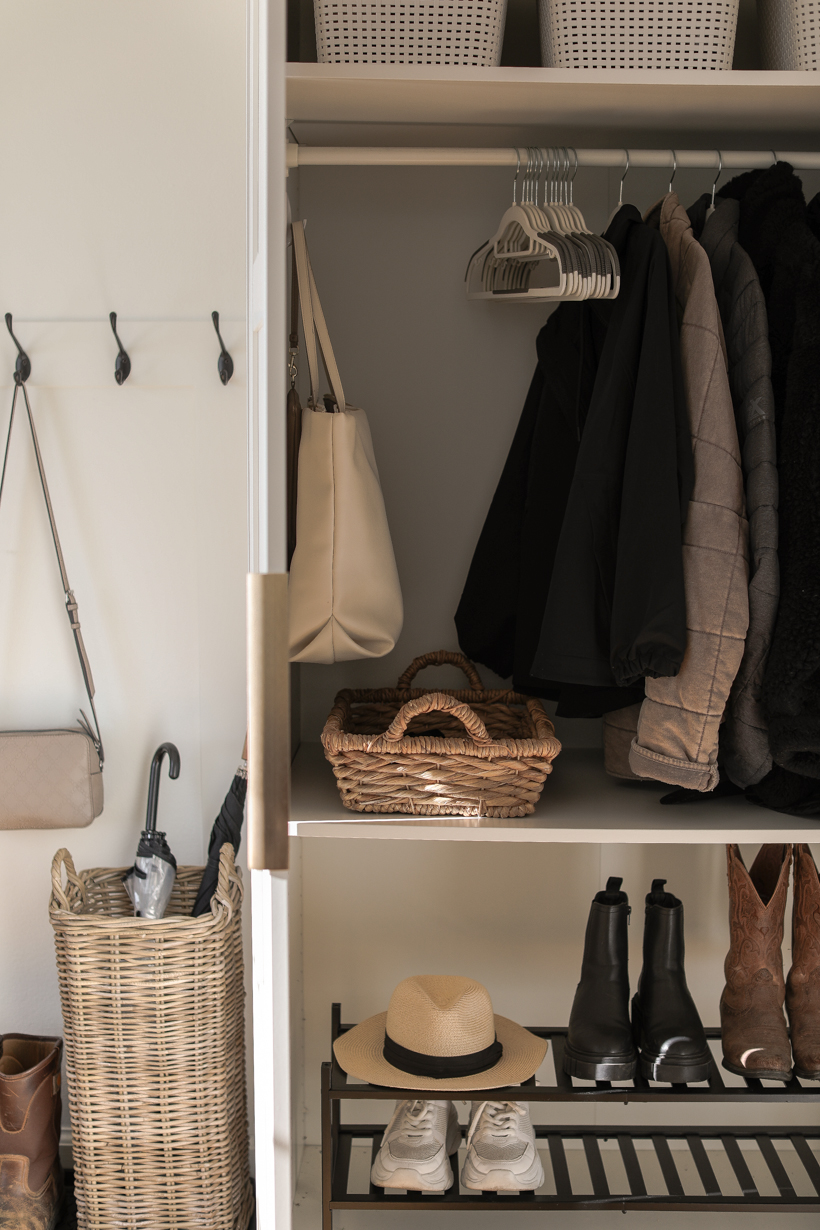
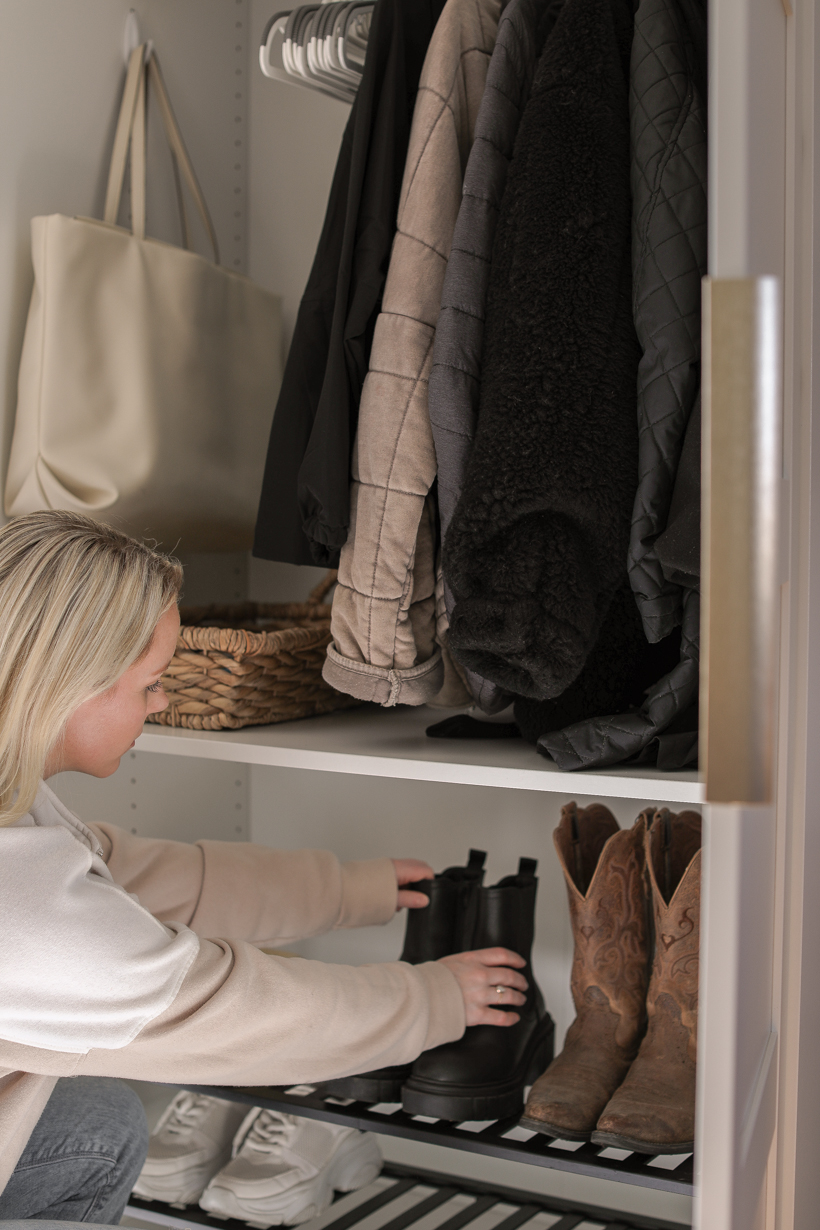
I debated between having an actual shoe rack or just bins to toss shoes in on bottom, but ultimately I decided this nice black bamboo rack would look better and keep our shoes nicer/more organized. It’s also available in natural bamboo and brown, and you can add additional tiers on top as well.
Above that, I have these non-slip plastic hangers with rubber grips for our coats (I’m not a huge fan of velvet hangers that show all the dust and fuzz). And I added a big Command hook to one side to hang my bigger tote bag – I hang my everyday purse on the wall hooks to the left of the cabinet. I had just enough space to set a woven tray for our keys, sunglasses, wallets, and other miscellaneous items.
I found this 4 pack of white plastic bins to hold our gloves, winter hats, and scarves. I like that they are stackable, come with a lid, and have holes for ventilation if anything was a little damp or snowy. The only downside is the lid basically just sits on top – it doesn’t close tight or seal. These bins come in white or gray and in two different sizes.
Then at the very top, I got two extra large fabric bins for bigger items that we don’t use as often, because I most definitely need a step stool to reach up there. But the goal was to maximize storage for this massively tall cabinet, and I certainly made the most of every inch. These fabric bins come in four different sizes and some really pretty soft, neutral colors and subtle patterns.
To the left of the cabinet, I kept the black wall hooks I installed on our DIY board and batten trim years ago, and added a small black boot tray and this gorgeous woven rattan umbrella holder to warm up all the white in this space.
And I can’t go without mentioning these gorgeous extra long gold handles I found on Amazon for the cabinet doors. No hardware is included with the cabinet, so I had to find my own, and I love that these are almost a foot long to accentuate the height of the cabinet itself. They have 5 length options and also other metal finishes and black too.
The boys and I keep the majority of our shoes in our bedroom closets upstairs, but it’s nice to have a space now to tuck shoes away when we walk in the door so they’re not just cluttering the floor and also for guests.
I can’t tell you how good it feels to check this project off my to-do list and to finally have sufficient storage in our entryway. Everything is hidden away behind these cabinet doors, but easily accessible, which is exactly what I was looking for. Let me know if you have any other questions!
SHOP ENTRYWAY STORAGE + DECOR
click images below to shop
white wardrobe cabinet: IKEA |
door paint color: Rust-Oleum Door + Trim paint in Rustic Pewter
As always, I sincerely appreciate you shopping through the links I share, which allows me to make a small commission from your purchase while your purchase price remains the same. When you use my affiliate links, I’m better able to create content for this blog as well as support my family, and I thank you from the bottom of my heart for supporting what I do!



Leave Your Comments