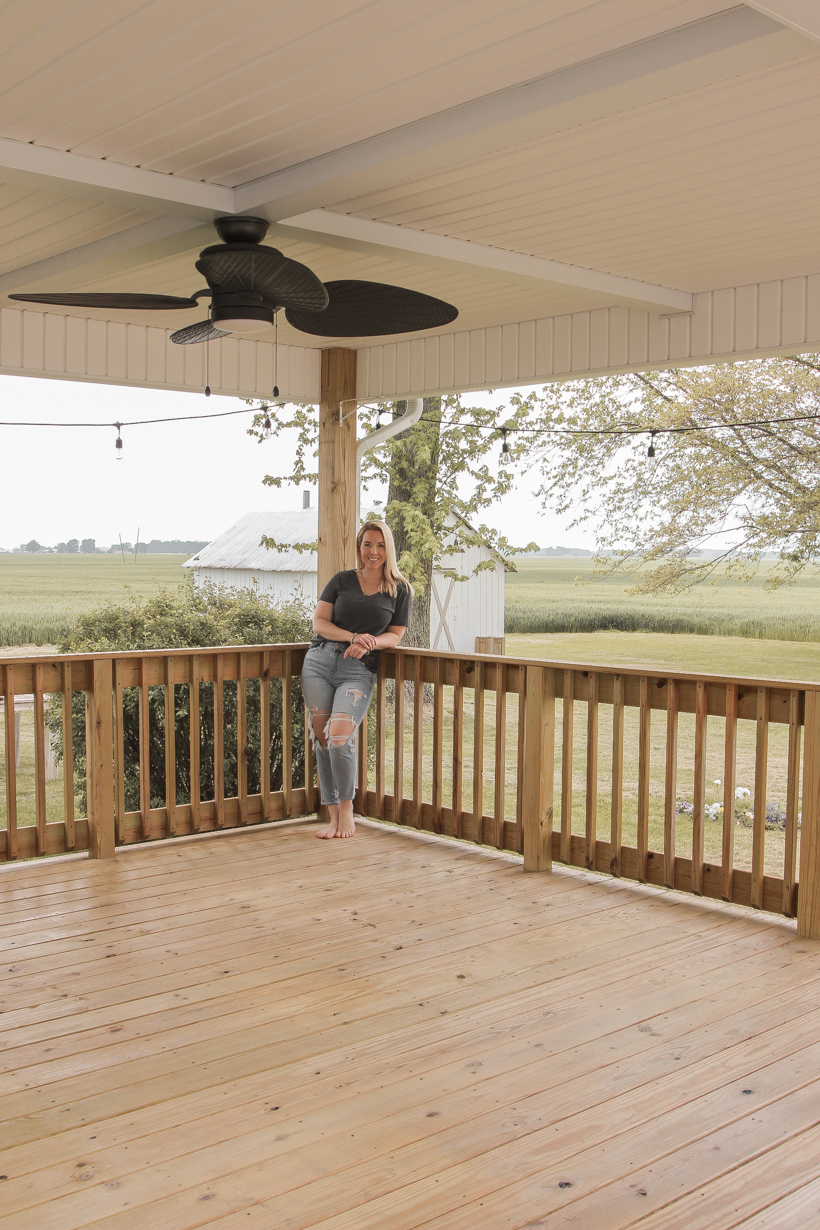
This project has been two years in the making, and it’s finally completed. I stained/sealed/finished/protected the deck! I won’t lie and say that I wasn’t a little intimidated to take on this massive project of staining a full 545 square feet of deck, railing, 102 spindles, and two sets of stairs, but I knew the investment I made in building this deck needed to be protected, and it was time to finally check this project off the to-do list.
I researched products, washed, scrubbed, and applied a beautiful wood stain, testing out almost a dozen different application products and methods so I could report back to you with the best, easiest, most long-lasting way to stain your deck. I have a ton of information and tips/tricks I learned along the way, so let’s dive right into everything you need to know from prep to finish on staining a deck!

OUR DECK
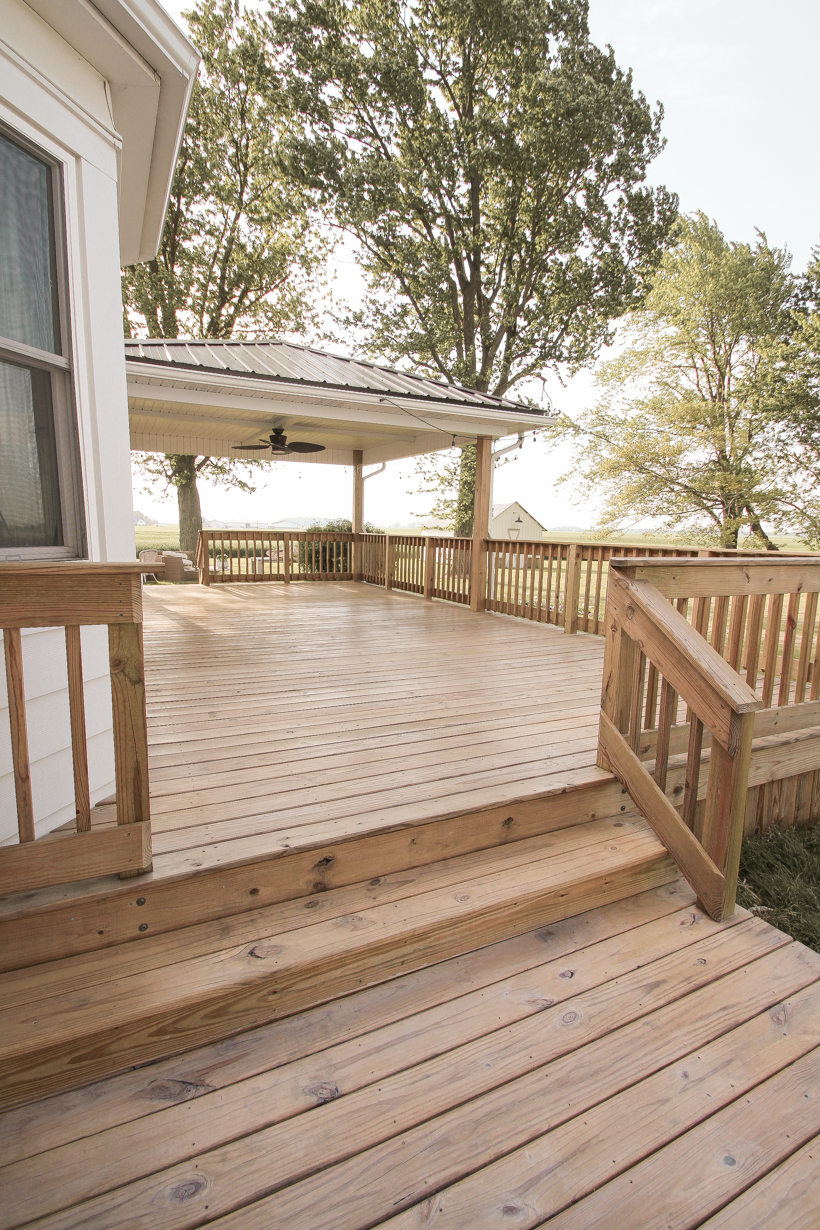
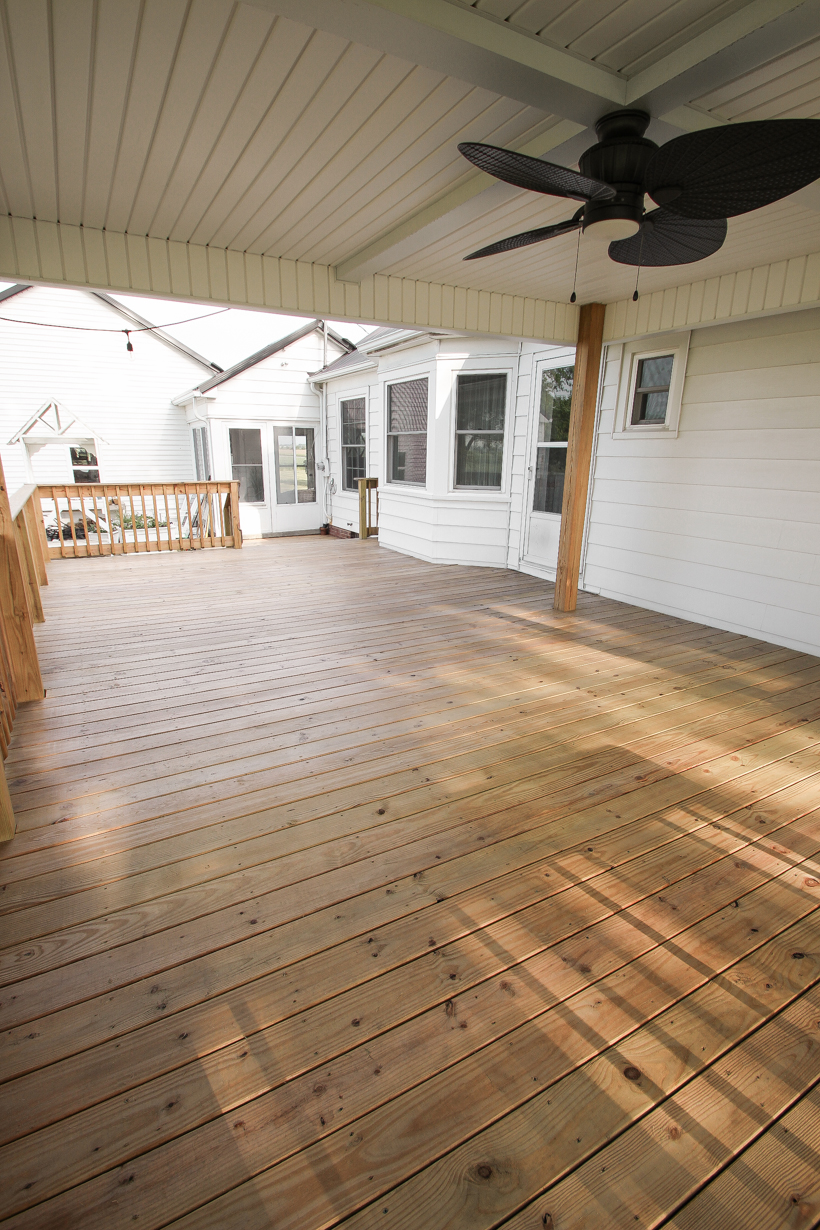
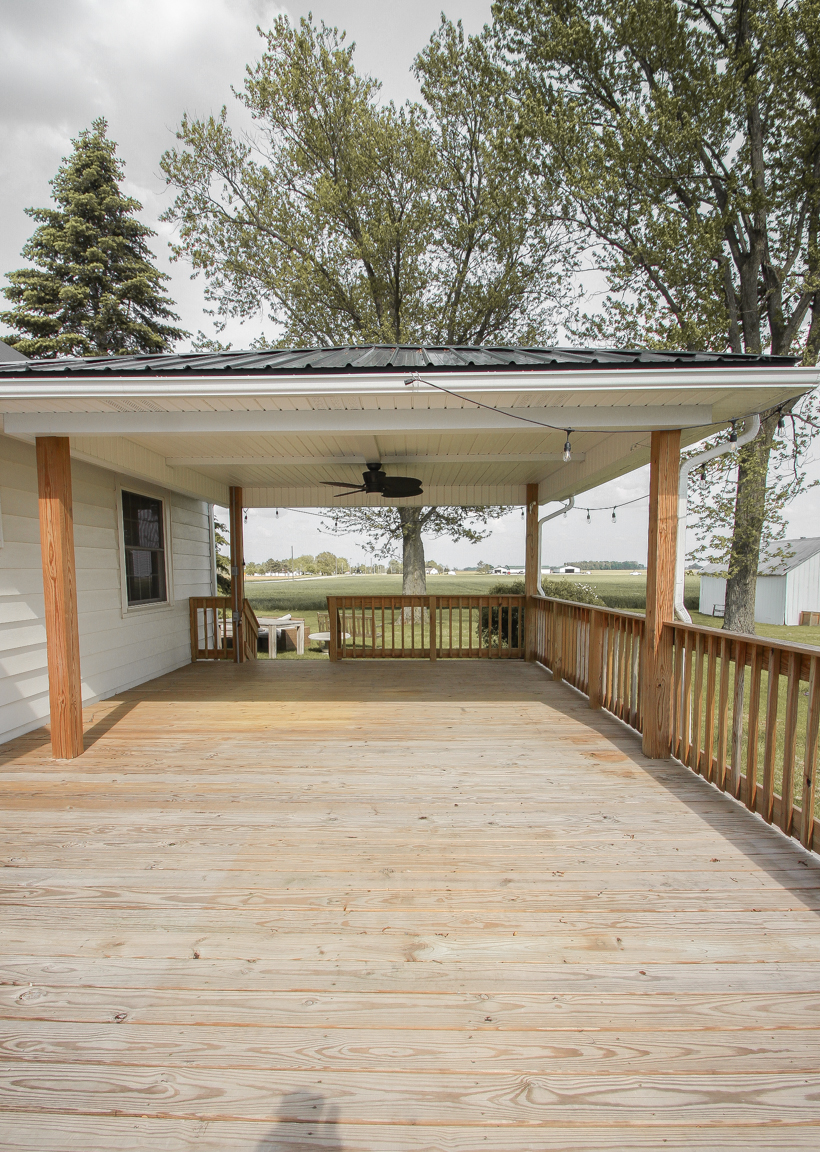
This deck was built the summer of 2019, and it is basically the entire length of the back of our house. I wanted enough room to have both a seating/entertaining and a dining area, plus plenty of space for plants and flowers. Part of the deck is covered under a gazebo structure, and the other part is open and exposed to the elements. When the deck was first built, it was recommended to allow the wood to dry for at least a month and up to a year so it would be porous enough to accept stain well. The following summer I ended up having a smaller lower level added on to the deck to connect it to the breezeway between the house and garage. It was a pain to try and mow such a tiny area of grass (a cracked, broken sidewalk was there previously), so it just made sense to extend the deck all the way over to the breezeway.
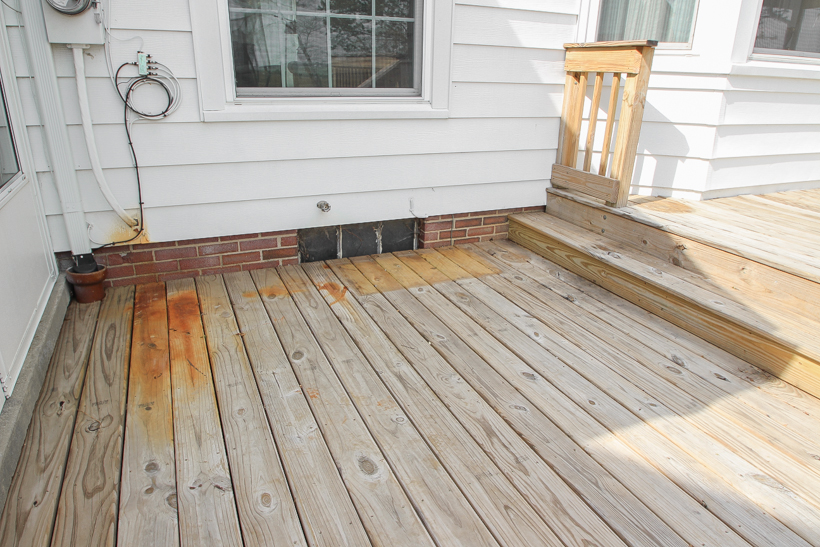
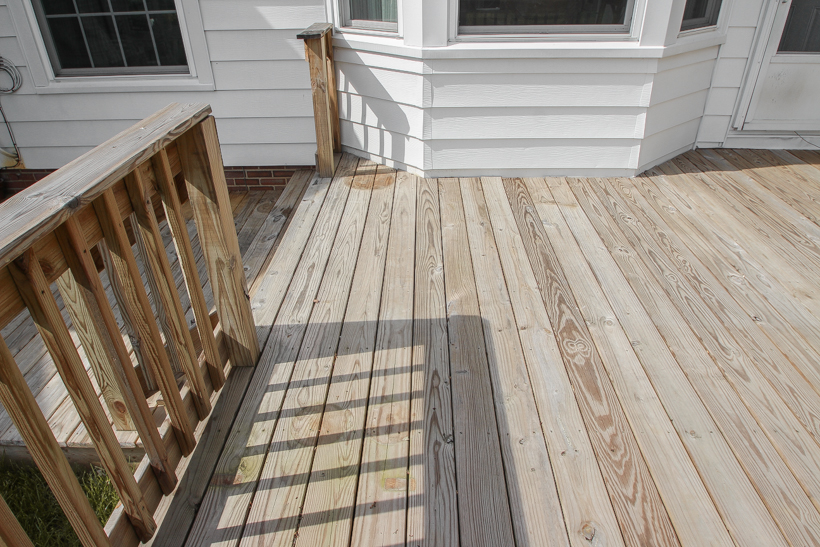
Once the addition was finished, I now had part of a deck that had weathered for a year and part that was fresh, brand new wood, so I decided to wait a little longer until the color and porosity of the wood was a little more equal… which brings us to now! The photos below I took just before starting this project so you could see how the wood looked naturally after 1-2 years of weathering.
The lower level deck addition had the most amount of dirt, grime, and yuck probably because this is where the water hose is hooked up. It also doesn’t see as much sunlight as the rest of the deck, so the wood stays wet much longer.
You’ll also notice some pretty bad rust stains on the wood where the hose was connected, as well as a large rectangle where a planter box sat. Since the wood underneath any pots or planters didn’t get exposed to sunlight, it didn’t weather and oxidize like the rest of the wood.
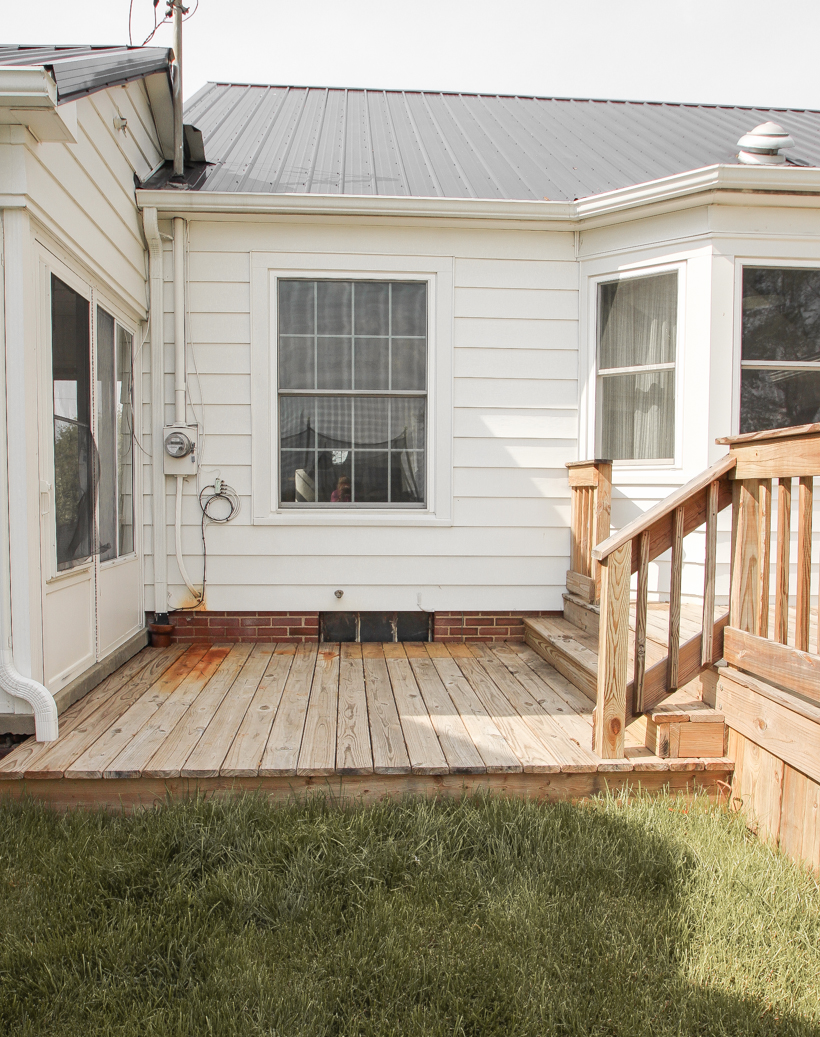
Luckily most of the deck did not have any mildew issues, except for a few spots where the potting bench and some planters sat.
You’ll also notice that the railing and posts holding up the gazebo look much less weathered than the deck boards on the floor. They aren’t exposed directly to the elements as much, so they retained their natural wood color more. Needless to say, I was a little nervous about getting all the wood cleaned up enough to look nice and even once the stain was applied.
HOW TO STAIN A DECK
SUPPLIES:
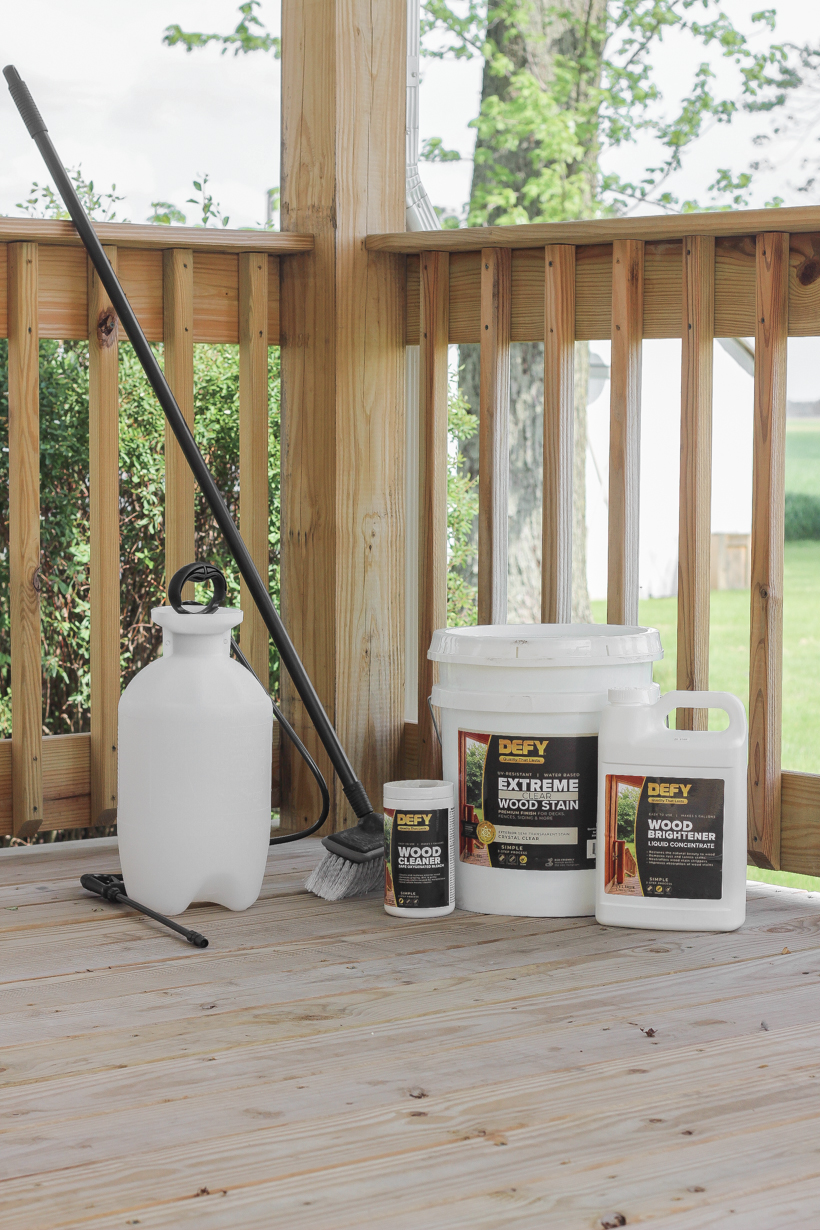
wood cleaner
wood brightener
wood stain
garden hose with adjustable nozzle
lawn/garden pump sprayer
long handle deck brush
plastic drop cloth
5 gallon bucket
5 gallon paint grid
long handle 4″ roller frame
4″ high density ½” nap roller cover
9″ roller frame
9″ ½” nap roller cover
angled polyester paint brush
paint mitt
12″ stain applicator
paint tray
It may seem like an extensive supply list, but for a job this size I wanted to find products that would make this as quick and easy as possible. As I go through each step I will discuss why and how I used each specific product so you can decide what might be the best options for you.
STEP 1 – CLEAN DECK OF LEAVES AND OTHER DEBRIS
If you have a significant amount of leaves or debris on your deck, you can use a leaf blower or a broom to clean the surface. If you notice leaves stuck between deck boards, use the highest jet setting on your hose to dislodge and clear the space. If you have any splintered areas that need sanding or nails/screws that need reset, now is the time to take care of those tasks.
STEP 2 – WASH THE DECK WITH WOOD CLEANER
I chose to use Defy brand products after reading through many articles and reviews online, and they suggest using both a wood cleaner and wood brightener before applying stain. After going through this process, I am here to tell you that PREPARATION is key! DEFY Wood Cleaner safely cleans and restores wood and wood composites to their original appearance, removing dirt, mold, mildew and algae. This product is a powdered concentrate that is mixed with water, which is why I purchased a pump sprayer for easy application. It is biodegradable and will not harm pets, grass, and most plants. To scrub the deck clean, I purchased a car wash brush because it was actually less expensive than deck scrubbing brushes and the long handle really saves your back! I ended up using one entire 2.25 lb container of wood cleaner for my 545 square foot deck.
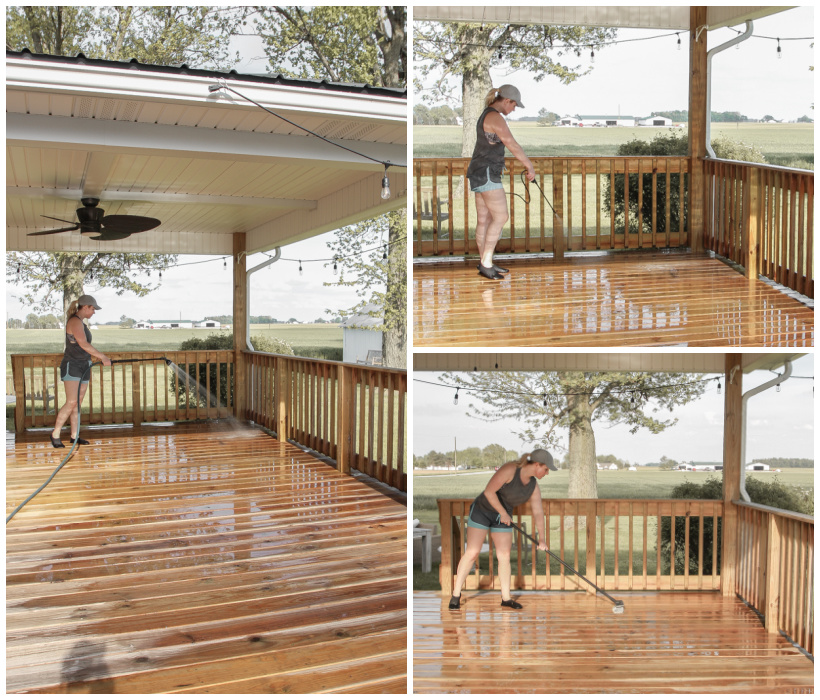
Mix your wood cleaner with water in a pump lawn sprayer according to package directions. The product I used called for 6 oz. (¾ cup) of powdered concentrate with each gallon of water. While the concentrate dissolves, wet the surface of the wood with plain water before applying the cleaner. Depending on the size of your deck, you may want to work in small 20-30 square foot sections at a time.
Spray the wood cleaner onto the wet wood and allow the solution to stand for 15-20 minutes, keeping the area wet with additional cleaner if it begins to dry. Then use a long handle scrub brush to thoroughly scrub the deck clean. Rinse with a garden hose or a pressure washer on the lowest setting.
STEP 3 – RESTORE THE DECK WITH WOOD BRIGHTENER
After washing the deck, it was definitely cleaner, but the wood color was still pretty uneven in some areas. That’s where a wood brightener comes into play. DEFY Wood Brightener is a liquid concentrate that is mixed with water to brighten and restore the natural beauty of exterior wood. It removes tannin, rust, dirt, grime, and fungi stains and will not harm wood fibers, grass, or most plants when used properly. I used one entire 1 gallon container of wood brightener and decided that a few spots on the deck (mainly the lower level) needed additional cleaning and brightening. Because I had ordered most of my supplies on Amazon and couldn’t wait for another shipment to arrive, I purchased this wood cleaner from a local store, and I was impressed with its cleaning power as well.
Mix your wood brightener with water in a pump lawn sprayer according to package directions. The wood brightener I used called for 1 part product mixed with 4 parts water. Just like applying the wood cleaner, first wet the surface of the wood, then apply the solution and allow to stand for 3-5 minutes. Keep the area wet, applying additional solution if needed. Rinse thoroughly and repeat process if necessary. Allow the wood to dry completely before applying stain.
* If using an oil-based stain, you will need to let the wood dry completely, most likely several days depending on the heat and humidity. If using a water-based stain like I did, you can start staining a little sooner. I washed and brightened my deck on day 1, allowed it to dry day 2, and started staining on day 3.
THE DIFFERENCE BETWEEN DECK SEALANT, STAIN, AND PAINT
I did a ton of research on options for finishing the deck, and I ultimately decided to go with a clear stain. I’ll explain why in a second, but first I want to go over the different types of products on the market and what they do.
SEALANTS are primarily used to protect against moisture damage. They contain waterproof or water repellant properties and have a thicker viscosity than stains. Unwanted moisture can lead to fungal growth and wood rot so it is crucial in reducing the chances of jeopardizing the wood’s longevity. Unlike stains however, sealants lack pigmentation and generally provide little to no UV protection. Prolonged and unprotected exposure to sunlight can lead to graying and fading. It also dries up the wood’s natural oils causing cracking and splitting. So although a sealant will protect your deck from moisture, it could still turn gray and become sun-damaged.
STAINS have the same water-resistant qualities that a deck sealer does, but they also have added pigment, which adds color to the deck and helps protect against UV damage. The opacity of the stain can vary from solid to semi-transparent, and the darker the color, the more sun protection the stain will provide.
PAINT can protect against both UV and moisture damage, but generally doesn’t hold up as long sealant or stain. Also, if there’s any lingering moisture in the wood during application, paint will be susceptible to bubbling and chipping. Paint is also generally more expensive than stain and requires multiples coats and products.
STEP 3 – STAIN RAILINGS, SPINDLES, AND OTHER VERTICAL SURFACES
Because my deck is relatively new and had never been previously sealed or stained, I wanted to keep the natural color of the wood as long as possible. I could already see the beginning stages of UV damage on the wood and knew that it needed more than just a sealant for moisture protection. But I was nervous to try deciding on a stain color for such a large deck! After a lot of research, I decided to go with a brand that had many positive reviews and a water-based clear transparent stain with UV protection. It seemed like an option that was the best of both worlds with a crystal clear finish and protection against both moisture and UV damage.
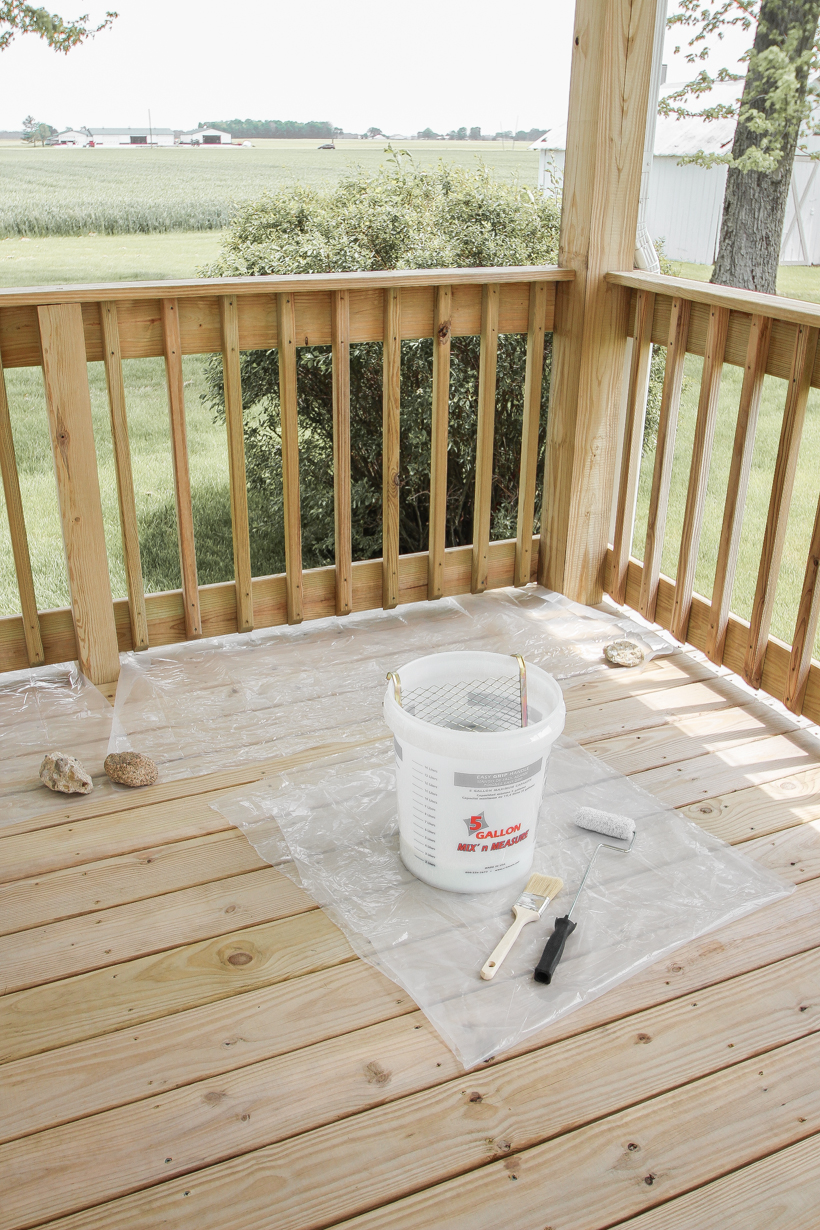
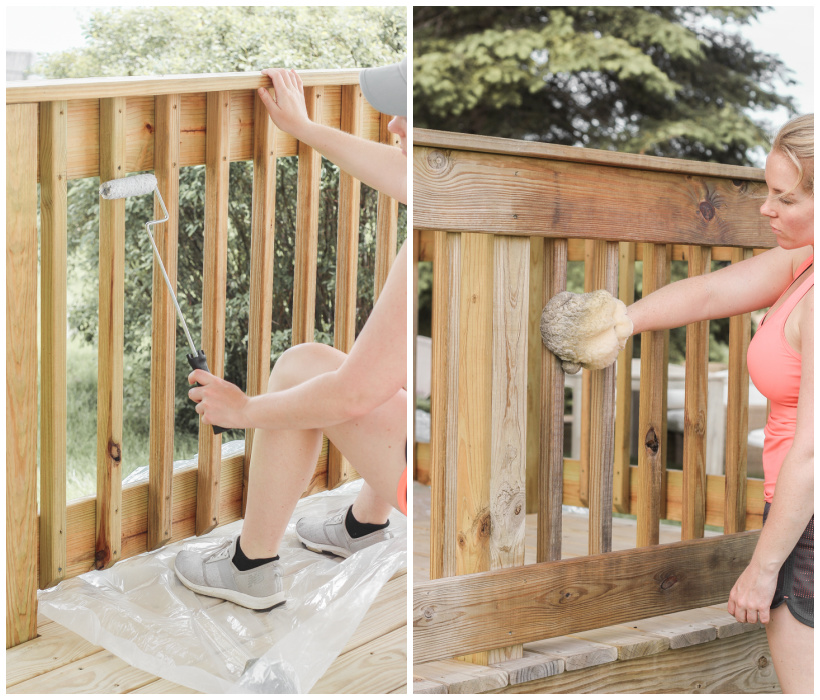
I purchased a heavy plastic drop cloth and cut it into small pieces to slide underneath the railing as I stained it to protect the floor. I started staining the railing with a 4″ long handle roller, and while it worked very well, it was very time consuming with the amount of spindles I had to do. Eventually I switched over to the paint mitt, simply dipping the mitt into the stain, giving it a gently squeeze with my hand inside of the mitt to remove some excess product, and literally wiping stain all around each spindle. It went SO much quicker being able to simply move your hand around to reach every surface vs. having to manipulate the roller in every direction. I will say that the paint mitt is a little messier and less precise, which wasn’t a problem for me since the stain I used was clear, but if I was using a darker stain I would have to be a little more cautious.
After the wood is clean and completely dry, prepare the area for stain, starting with any railings, spindles, and other vertical surfaces. Cover any windows, siding, plants, etc. with plastic or cardboard to protect from runoff. Shake or stir the stain prior to using and throughout the project to ensure product uniformity. Pour stain into a 5 gallon bucket and insert a paint grid on the edge of the bucket. Use either a long handle 4″ roller or a paint mitt to coat the wood with stain and a nylon or polyester paint brush to coat hard to reach areas. For pressure treated and other porous woods, two coats is required. Work in small areas at a time, as it is very important not to let the first coat dry completely before applying the second coat. Complete entire sections or up to a natural break before allowing to dry. Never break in the middle of a board. Only apply as much finish as the wood can easily absorb to avoid the possibility of peeling.
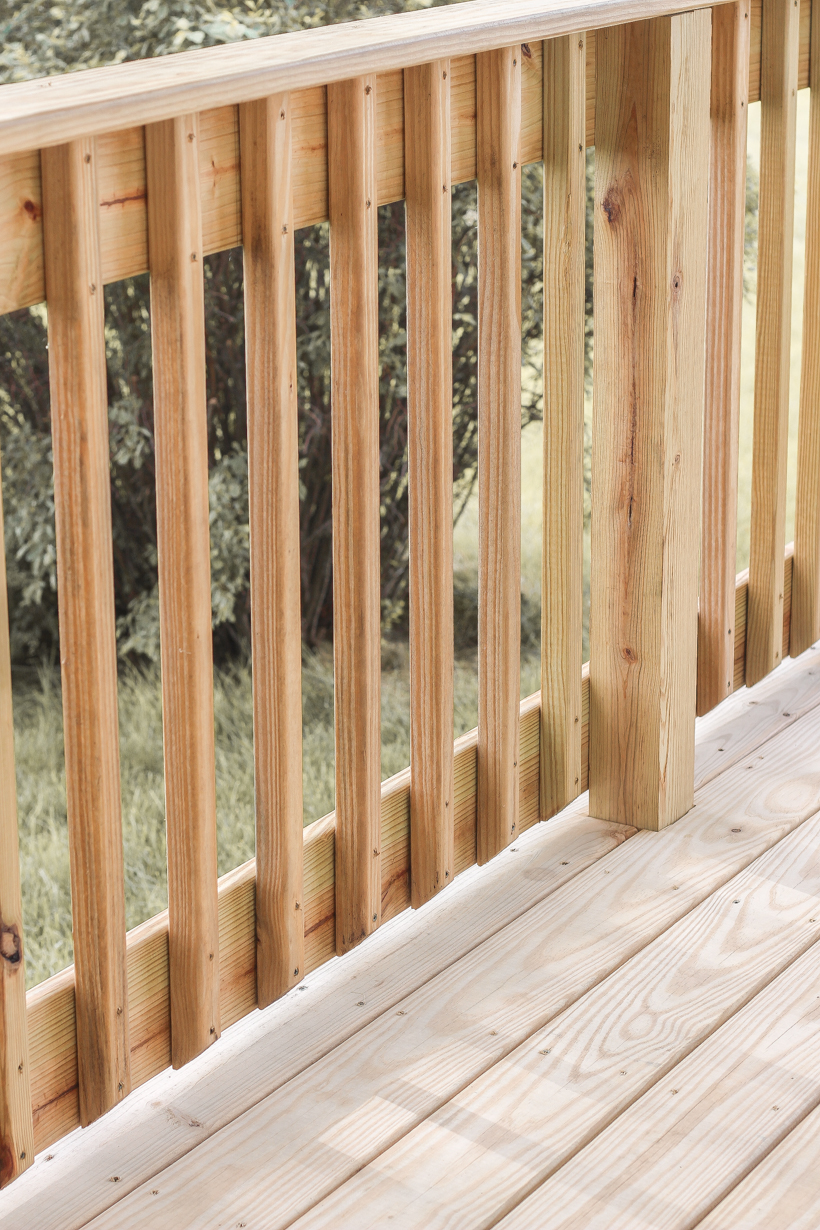
In the photo below you can see the difference between the railing coated in clear stain vs. the unfinished deck floor that has been cleaned and brightened.
STEP 4 – STAIN HORIZONTAL SURFACES
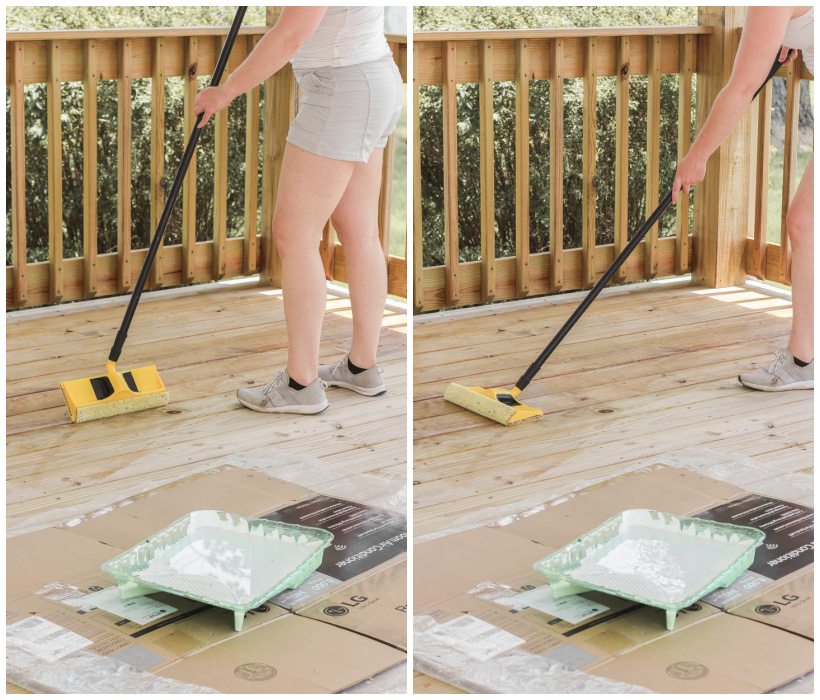
The railing was by far the hardest part of this project, and once I got to the deck floor, it felt like a piece of cake. I definitely recommend using an applicator with a long handle to save your back, and I really liked this stain pad that reaches between boards and has a 180º swivel head. Hint: If you purchase the scrub brush that I mentioned earlier for cleaning the deck, you can use the handle on it to attach to this stain pad applicator! I found it easiest to pour the stain into a paint tray to dip the stain pad in and place a piece of cardboard under the paint tray to catch drips and make moving across the deck easier. I was able to stain two boards at a time with this applicator, and just like before, I made sure to apply a second coat before allowing the first coat to dry.
I had to tighten the connection between the stain pad and the handle often, and less than halfway through the deck, the part that attaches the stain pad to the handle broke. I wanted to get this project done as quickly as possible and luckily I had a plan B, so I switched over to the scrub brush I used to clean the deck! Because it is a softer bristle brush made to wash cars, it was perfect for applying the stain and made such a quick and easy job of it. It actually held a lot of product, which meant less trips back and forth to the paint tray, and while I don’t think it was quite as good as getting in between the boards as the stain applicator, the bristles did a much better job of it than a roller would. I used either the paint brush or the 4″ roller to get along the edges. The 5 gallon bucket of stain said it would cover 500-750 square feet with two coats, and I used absolutely every last drop to finish the deck.
Apply stain to the deck floor using either a stain pad applicator or a deck brush. Follow the same guidelines as before: Shake or stir the stain prior to using and throughout the project to ensure product uniformity. For pressure treated and other porous woods, two coats is required. Work in small areas at a time, as it is very important not to let the first coat dry completely before applying the second coat. Complete entire sections or up to a natural break before allowing to dry. Never break in the middle of a board. Only apply as much finish as the wood can easily absorb to avoid the possibility of peeling. The wood should be dry to the touch in 2-6 hours, depending on the temperature and humidity. Allow 24 hours for the deck to completely cure before using.
TIPS:
Not sure when it’s time to restain an older deck? Pour a little bit of water on a high traffic area of your deck. If the water absorbs quickly or immediately, it’s time to restain your deck. If the water sits on the surface of the wood and beads up, you’re probably good to wait and check again next year.
Pay close attention to the forecast to plan the timing for this project. Ideally you want to apply stain between 50º-90º when it hasn’t rained for several days prior and the forecast calls for at least two days of dry weather after you’re finished. Avoid staining in direct sunlight if possible so the stain doesn’t dry too quickly.
Every product is different, so be sure to completely read your label for preparation and application instructions.
When choosing a stain, you first need to consider when opacity you want to use.
- A CLEAR STAIN will give you the most natural look and allow the beauty of the wood grain to fully come through. If you have a brand new deck or used an expensive wood, this would be a good option to consider.
- SEMI-TRANSPARENT STAIN will add a hint of color, while still allowing some wood grain to show through. If your deck is older or you have had to replace deck boards, this may be the best option for your deck.
- SOLID STAIN will completely hide the wood grain and give you the most UV protection. If your deck is older with lots of stains and imperfections (even after you wash and brighten it), you may want to consider a solid stain.
If you have a new deck and are staining it for the first time, remember that the darker and more solid of a stain you choose, the harder it will be to lighten it or get the wood back to a more natural look in the future. If you’re choosing stain for the first time, I would recommend going with a clear or lighter semi-transparent stain because you can always go darker and more solid in the future as the deck ages.
Continually stir or shake the container of stain both before you start and as you work to keep the color and consistency uniform. Even though the stain I used was clear, I made the mistake of not stirring it enough. By the end of the bucket, there was a lot more white pigment in the last little bit of stain, and I had to work extra hard to try and even out the finish on the lower level where I used it. This is especially important for tinted stains!
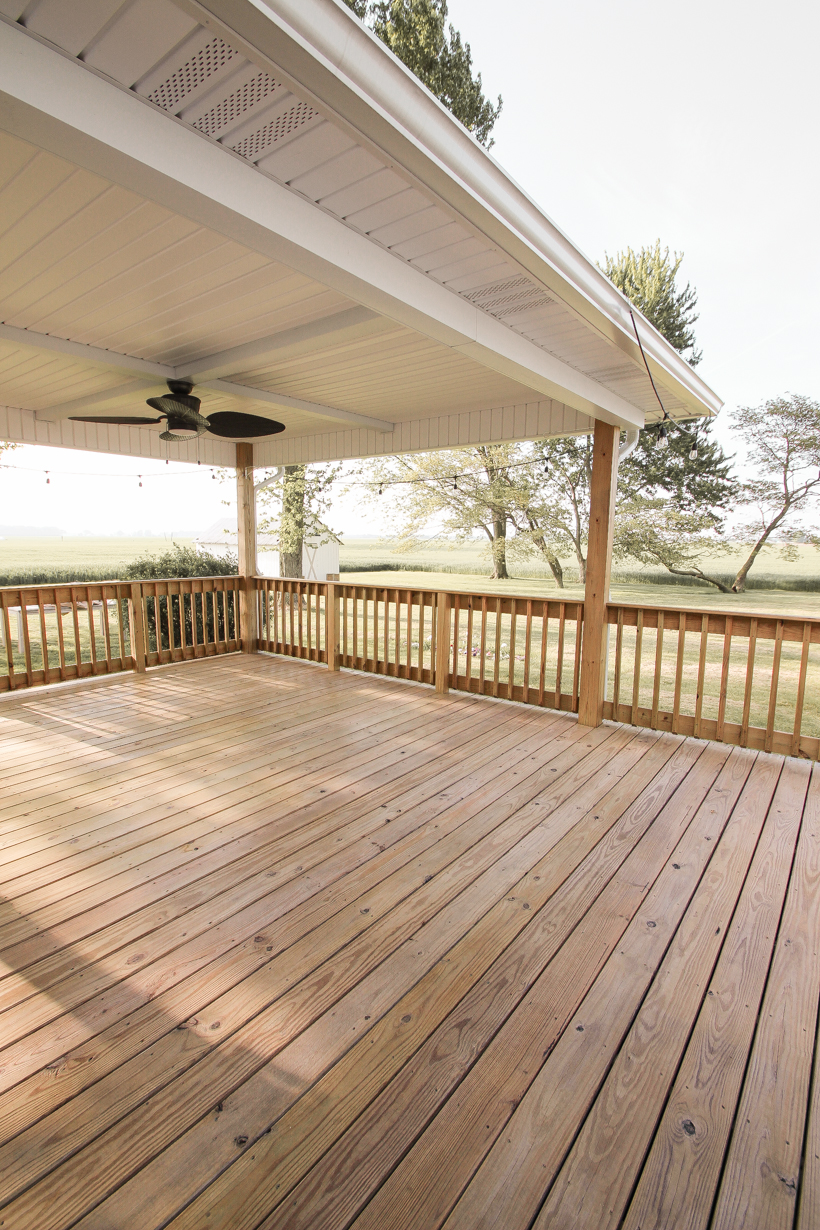
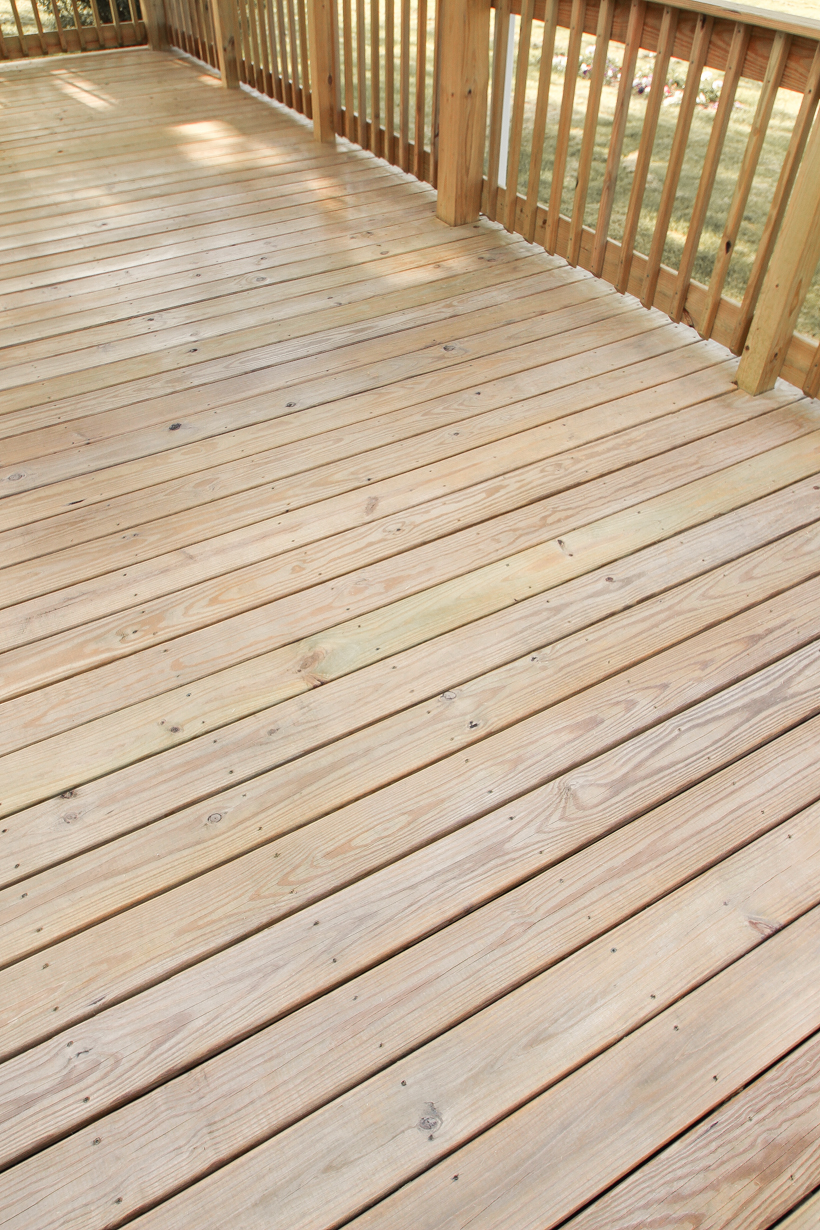
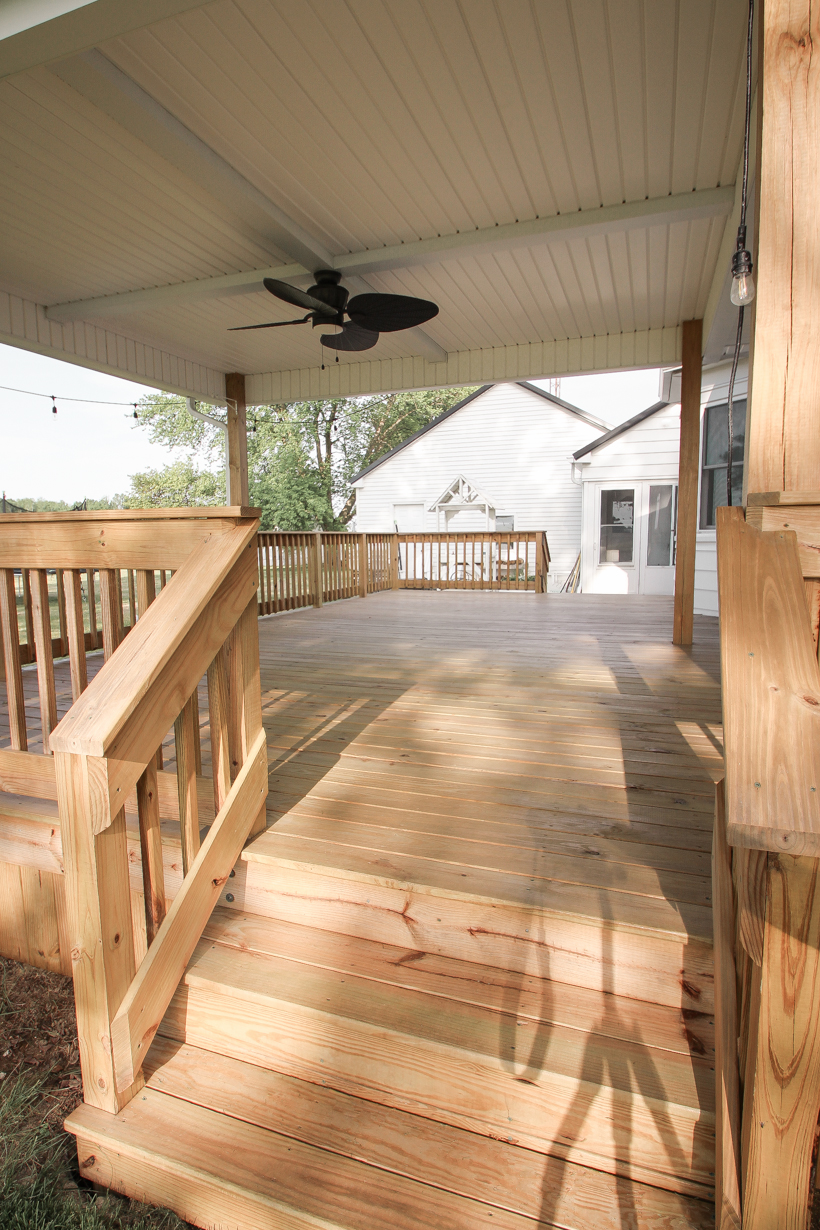
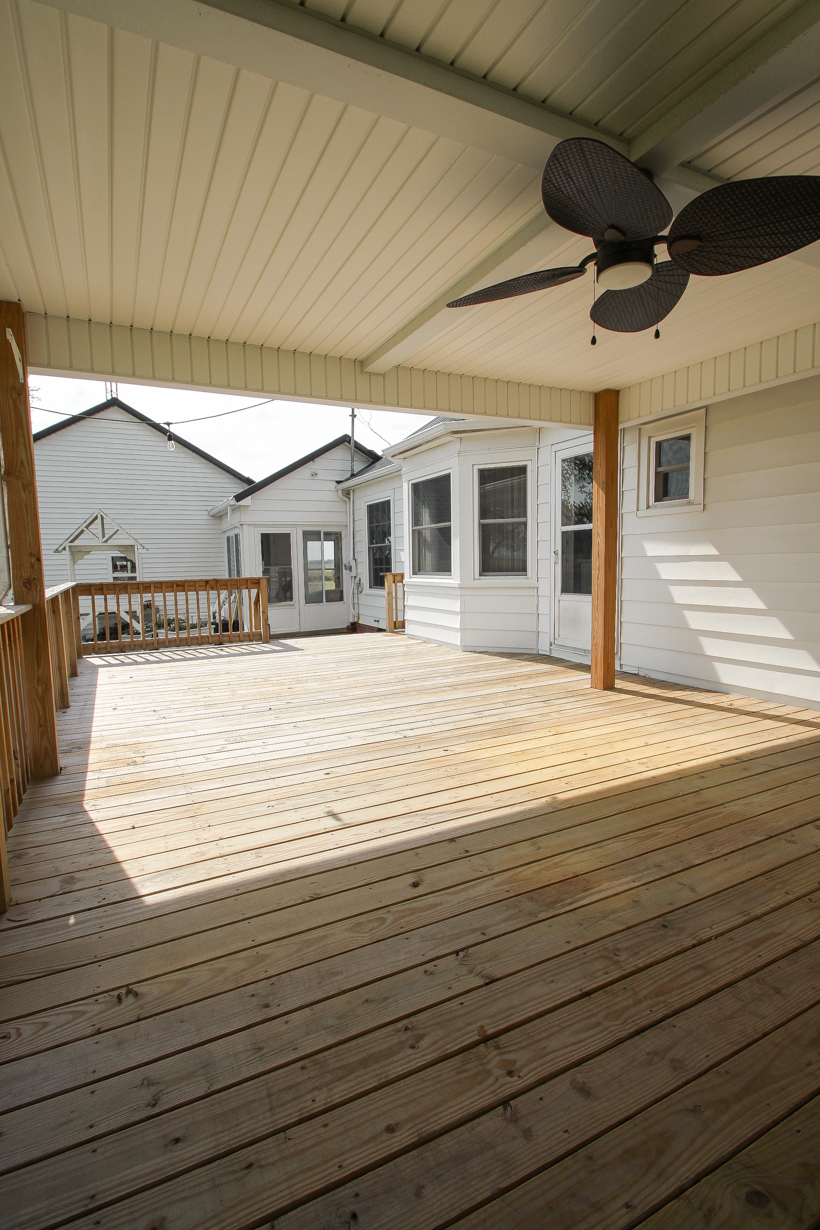
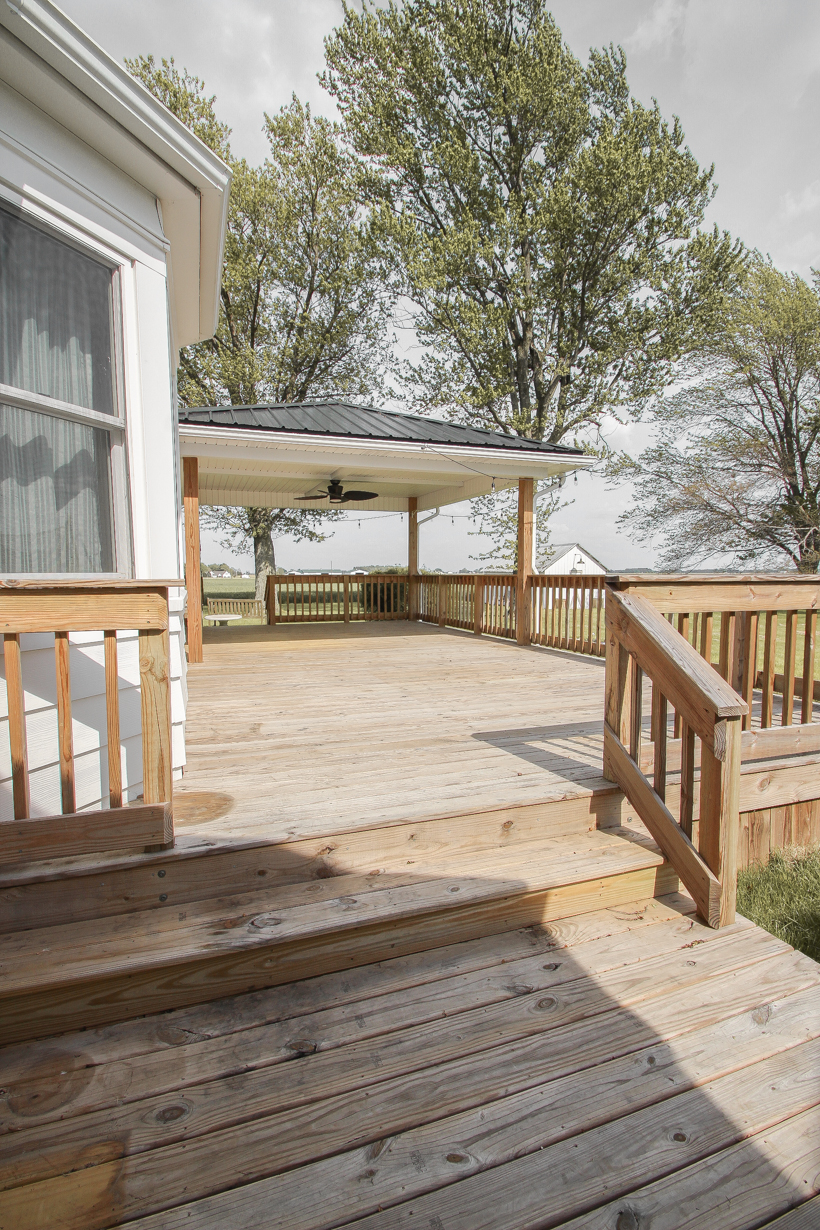
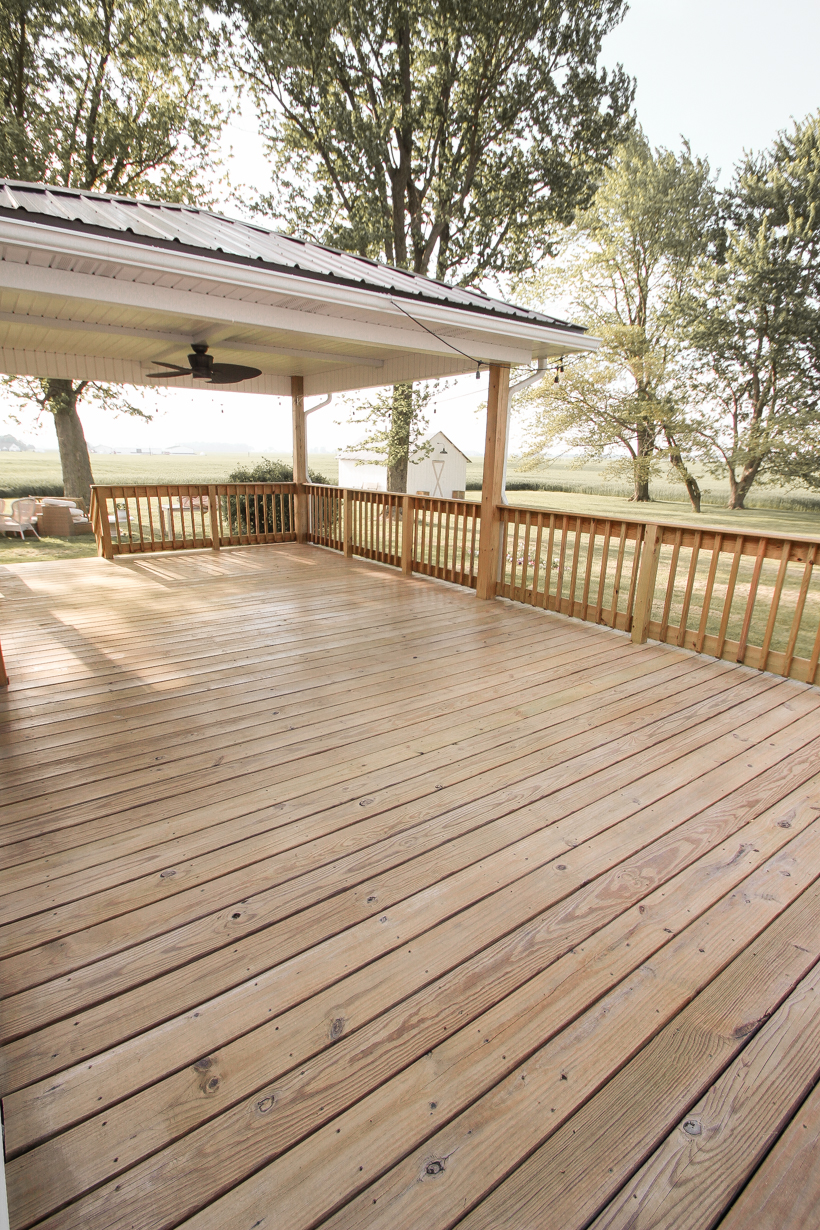
Here is the finished product after drying for a few days! The clear stain brought back a lot of the beautiful warmth of the wood, and now water beads up on the surface without penetrating at all into the wood. I’m very pleased so far with the results! I hope this stain will last several years before needing any touch-ups as long as I keep it clean and free of debris. Time to start decorating the deck again for the summer!
Do you have any deck staining questions? Just let me know!
MORE OUTDOOR PROJECTS:
How to Clean Your Outdoor Cushions and Pillows
Barn Makeover
Deck Reveal
Tall Outdoor Cedar Planter DIY
and more!
As always, I sincerely appreciate you shopping through the links I share, which allows me to make a small commission from your purchase while your purchase price stays the same. When you use my affiliate links, I’m better able to create content for this blog as well as support my family, and I thank you from the bottom of my heart for supporting what I do!



Liz,
Lots of hard work but the end result looks amazing!!
That’s a big job! Well done Liz! Your deck looks beautiful.
Thanks for all the tips.