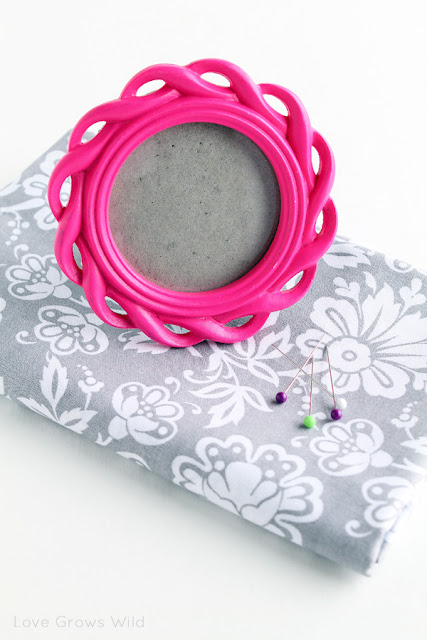
Do you sew? I’ve started sewing just this past year, and even though I’m not very good at it yet, I love to see what I’m able to create with some thread and fabric! Today I’ll show you how to create a Picture Frame Pin Cushion to not only hold your pins while you sew, but look pretty too! Say good-bye to that ugly, old tomato pin cushion!
So like I said, I only started sewing recently when I asked my husband for a sewing machine for Christmas. I honestly wanted it to use it for card making and things of that nature, but I had high hopes of eventually learning to actually “sew”. I watched my new sewing machine sit in the box for a few months because I was too scared to try to learn how to use it, until one day I finally got it out, stared at it for awhile, looked at the manual, and decided I had no clue what I was doing. How do I thread this thing? What’s a bobbin? Why does this have a pedal like a car? I was in way over my head : )
After a few hours and many youTube tutorial videos later, I learned how to get it running and made my first project… Curtains! Go big or go home, right? Now I’m pretty familiar with my little sewing machine, and I have developed a ridiculous obsession with making new pillow covers for almost every season. (Seriously… you can check them out here, here, here and here!)
So now that I can say I have joined the “sewing club”, I thought it would be fun to share how to make a Picture Frame Pin Cushion to help keep your pins in check while you sew!
All you need is a picture frame (any shape will do), some fabric, batting, cardboard, hot glue, and of course, pins!
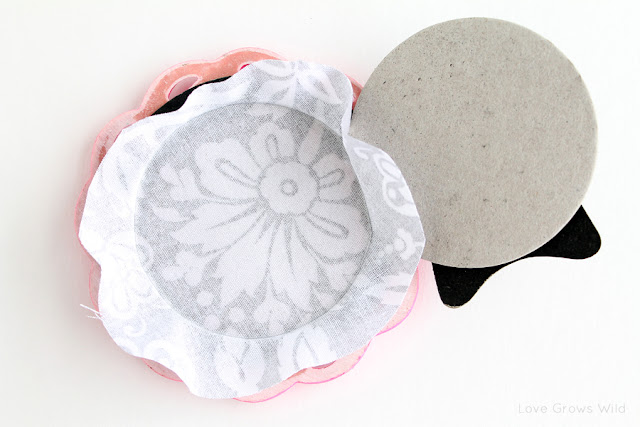
Start by removing the glass and anything else from inside the frame. Place the glass on a piece of cardboard, trace around it, and cut it out. This will be the back of your pin cushion. (You could also use the cardboard insert that came inside your frame if it had one) Now trace around the cushion back onto your fabric, making sure to center the design of your fabric if necessary.
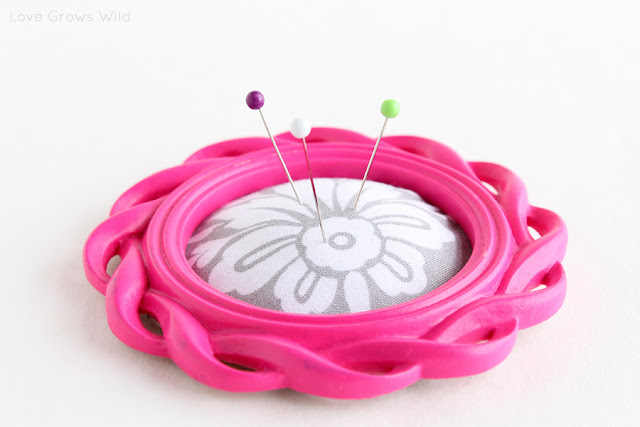
*I found this adorable little pink circle frame in the dollar section at Target (love that store!) and thought it would be the perfect size for a pin cushion. My frame had a piece of plastic instead of glass, so I just used that as my cushion back.
Cut your fabric out and wrap it around your cushion back. Place it into your frame to make sure the insert still fits after adding the thickness of the fabric. If the insert is too tight now, carefully trim around the outside of your cushion back until it is the right size.
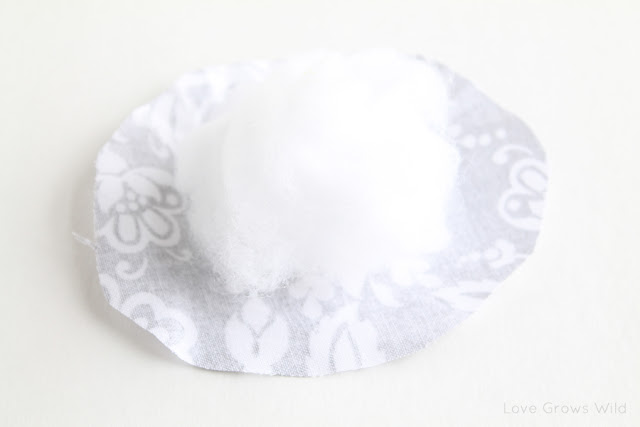
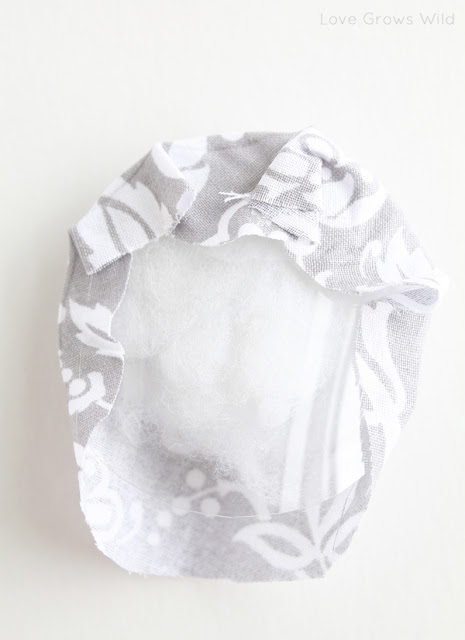
Next lay your fabric face down and place a good size ball of batting in the center.
Place your cushion back on top of the batting, and pull your fabric up over the sides. Secure with hot glue all the way around the cushion back, but leave about a 1″ gap open on one side. Place your cushion back into the frame to see how it fits, adding extra batting if necessary to make the cushion more full. Once your cushion looks nice and plump, take it out of the frame and finish glueing the fabric around the cushion back.
Put your cushion into the frame again, and close the back of the picture frame. If your cushion is large and you are unable to close the frame, simply replace the frame backing with a piece of card stock or cardboard cut to size and hot glued all around the edges to hold your cushion in place.
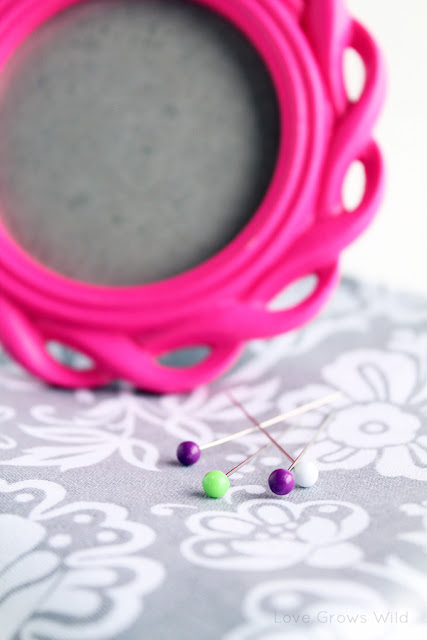
Your pin cushion can stand up like a picture frame or lay flat on the table, but either way it will be totally adorable! After finding the picture frame at Target, I made this pin cushion with things I already had at home. Cute, simple, inexpensive, and would make the perfect little gift!
So tell me… Do you sew? When did you learn? Who taught you? I’d love to hear your stories!
Let’s Keep In Touch!





Oh you are a girl after my own heart since I too just started sewing last year and just started blogging this year. Oh how I adore these! I’m not sure if you knew this or not but if you stuff the pin cushion with human hair it’ll keep your pins sharp and keep them from rusting. So if you have hair clippings from your kids its even more of a keepsake. Can’t wait to dive into your blog more!
This is just too cute, Liz! They would be perfect for Mother’s Day!
This is too cute! What a wonderful gift idea or party favor, oh the possibilities. Ok, I kind of want one for myself. Love this Liz!
This is so cute! No, I don’t sew. I wish I did….and I love seeing ways that people can put thread and fabric together to make something fun! Thanks for sharing at Pinworthy Projects.
What a clever idea–too cute!! I featured you today on my Kick-Off Friday post!
http://craftivitydesigns.blogspot.com/2013/04/kick-off-friday_26.html
Have a great weekend!
Erica @ Craftivity Designs
SUCH a great idea!!! I keep picking your posts in the link parties as the ones that stand out to me. You make awesome stuff!!
Simple but yet creative and cute. LOve it. Thanks
This is really cute, and I have just the frame I can use! I’m a new follower, by way of the Create & Inspire party. Have a nice weekend!
Melanie
http://violetsbuds.blogspot.com
such a cute idea! I love the colors and fabric too!
Thanks for linking up! I featured your post in my wrap up http://tidymom.net/2013/mothers-day-ideas-2/
Have a super Sunday!
Super cute!
Love this idea! I keep passing those frames at Michaels and thinking… what could I do with those… you figured it out! Too cute!
Take care,
Trish
I love this! Pinned and done!
A great idea. Thanks for sharing. http://craftwithcartwright.blogspot.co.uk
I love this idea, it’s SO pretty!
Beautiful project, and beautiful pictures!
Super cute! Love the idea!
Have a wonderful week!
Hugs from Portugal,
Ana Love Craft
http://www.lovecraft2012.blogspot.com
This is such a fun idea Liz! Love it!
Liz! Thanks for linking up at the Create & Inspire Party last week. We’re featuring YOU at tonight’s party – hope to see you there! xo, Kimberly
I saw this on Craftgawker and have been looking for a beautiful frame ever since. Great idea, and so pretty!
nancy
http://www.dosmallthingswithlove.com
SO SO cute!! Love the pink frame 🙂
I’ve featured on my blog today!
http://www.52mantels.com/2013/05/handmade-mothers-day-gift-ideas.html
This is so adorable Liz! I taught myself to sew after my hubbie got me a machine for Christmas too! It’s been fun learning 🙂 Have you tried a kids quilt yet?
when my dad’s mom started sewing, she had to make a dress by hand to show my great-grandpa she was serious and wouldn’t waste a sewing machine. My mom’s mom was a home ec. teacher, and mum had been sewing since she was pretty little. When my three sisters and I wanted to learn to sew, Mum was too busy to teach us, so she gave us Grandma’s challenge, and added that we had to make our own pattern as well. Now all four of us girls are practically fearless when it comes to altering things because making a dress by a pattern you made and having to wear it in a picture will do that to one!
Happy sewing!
Lorelei
I absolutely love this story, Lorelei! What a great way to teach your children how hard work pays off. I’ll have to keep this lesson in mind someday for my kids! Thanks so much for stopping by and sharing!
I learned to sew from my mother, who learned from her grandmother (it skipped a generation in there somewhere). I mostly learned by watching her and sitting in her sewing room as she made me and my cousins clothes. I started with barbies, and then american girl dolls, and then myself!
I am a complete visual learner, so sometimes I even surprise her with stuff I knew how to do without an actual lesson — osmosis baby!
Osmosis, baby… I love it!! That’s so wonderful that your family is passing down such a great tradition.
I Have tried it two times but not got too good results like in the picture.The pin never gets inside the cushion.