• Home
  • MEET LIZ
  • contact
  • Blog
  • JOIN OUR COMMUNITY

Love Grows Wild

  • Home
  • SHOP MY POSTS
  • Our Home
    • bathroom
    • dining room
    • entryway
    • exterior
    • kids bedroom
    • kitchen
    • living room
    • master bedroom
    • office
    • playroom
  • Project Gallery
    • diy decor
    • decorating advice + inspiration
    • furniture makeover
    • woodworking
    • crafts
  • Seasonal
    • spring
    • summer
    • fall
    • winter
  • Recipes
    • appetizers/snacks
    • beverages
    • breakfast
    • dessert
    • meal ideas
    • side dishes
  • SHOP
    • Grow + Gather
    • Shop My Posts
    • My Amazon Store
    • My Book
Decorating and Home, Our Home, Tutorials

How to Make a Faux Roman Shade

August 24, 2013

Pin
Share
Post
Email
Print
Love the look of roman shades but not the price tag? This tutorial will show you how to make Faux Roman Shades on a budget!
How to Make a Faux Roman Shade by LoveGrowsWild.com #diy #romanshade #curtain

Yay!! My kitchen finally has curtains! I’ve been sharing little teases of this project on Instagram, (you’re following me right?), and today I have the tutorial for you: How to Make a Faux Roman Shade!

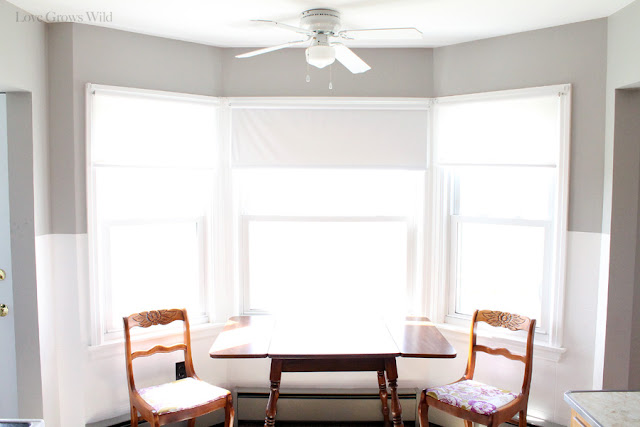
Let me give you a little reminder of where my kitchen makeover started…
How to Make a Faux Roman Shade by LoveGrowsWild.com #diy #romanshade #curtain
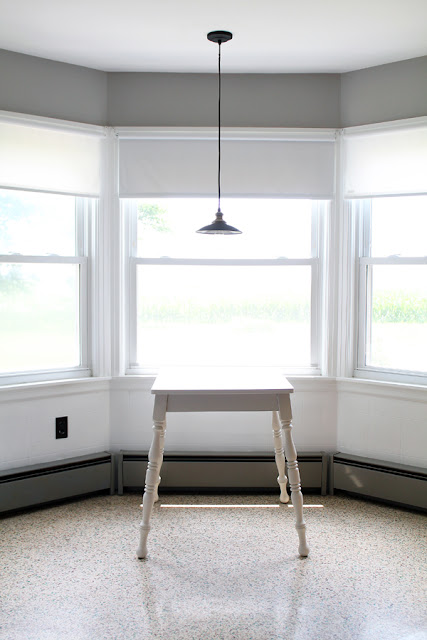
I love my two-tone wall color, but the white roller shades and misplaced ceiling fan had to go. I’ve already switched out the fan for a gorgeous pendant light and given the table a makeover, and those chairs are currently in my barn a.k.a. paint studio getting a makeover too! 
How to Make a Faux Roman Shade by LoveGrowsWild.com #diy #romanshade #curtain
Now all that is left are those darn roller shades! To be honest, I actually don’t mind them. (I know… gasp!) They’re functional, provide shade when we need it, and were already in place when we moved in. But the space desperately needed the softness and warmth that fabric adds, and with all the basic gray and white neutrals in the kitchen, curtains would provide a bit of texture, pattern, and color as well. 
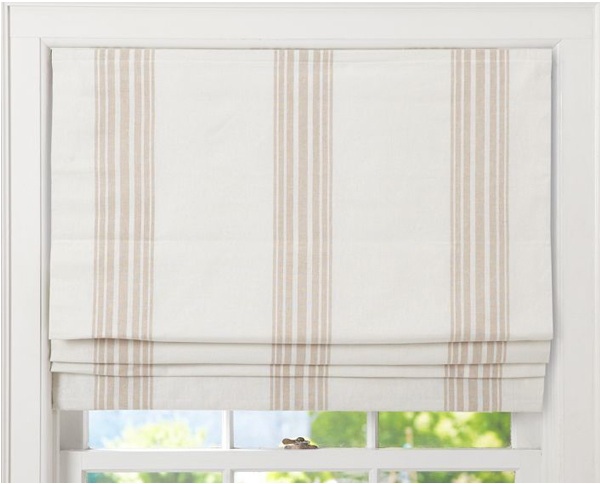
So WHY roman shades? Well for a few reasons… We have electric heaters beneath the windows, so fabric draping down to the floor isn’t an option. Since we’re short on counter space, I do a ton of food prep on that little table, and I don’t want to worry about splattering food all over my curtains. And since these are bay windows, I couldn’t decide how I wanted to hang normal curtains anyway. So I came up with a different option! I’ve been dreaming of roman shades in this kitchen since the first time we walked through the house, but the price tag on gorgeous roman shades (like this one from Pottery Barn) is WAY out of my price range! I’m talking like $200 – $250 out of my price range! 
How to Make a Faux Roman Shade by LoveGrowsWild.com #diy #romanshade #curtain
(photo via Pottery Barn)
So what’s a girl to do? DIY IT!
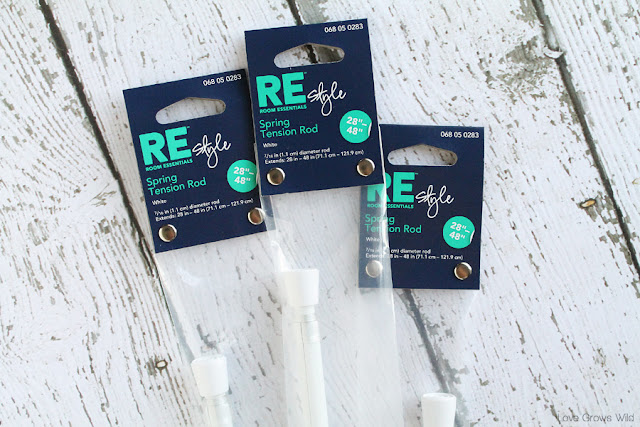
I was inspired by a genius idea from Imparting Grace, and I’m so excited to share my faux roman shades with you! Here’s what you need to start with: Spring tension rods. 3 of them per window. I found these at Target for $3.14 each. I needed nine of them for my three windows, so the total stung a little bit, but is was still cheaper than purchasing three regular curtain rods. 
– Make sure you measure the inside of your window frames before you head to the store! These rods come in different sizes.
How to Make a Faux Roman Shade by LoveGrowsWild.com #diy #romanshade #curtain
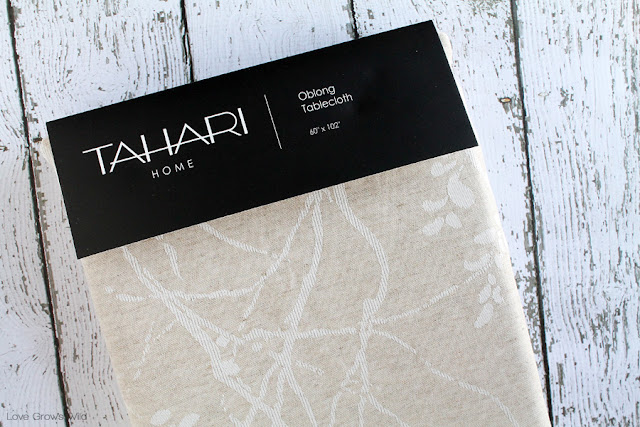
Next I shopped for my fabric. It was quite the excursion, let me tell you! I started searching at Jo-ann’s, and after 2 hours occupying my poor son and 7 different bolts of fabric in and out of my cart, I walked out of there with nothing more than a spool of ribbon. I couldn’t find a color I liked or a price tag I was comfortable with. I had already spent $30 on the tension rods and was trying to keep this project on some sort of a budget! As I strolled through TJ Maxx, I stumbled upon this awesome idea… Tablecloths! This one I found was the perfect neutral color and had a beautiful, subtle pattern in a gorgeous shimmer thread. LOVE! The tablecloth was 60″ x 102″ which would be the perfect size to fit my three windows, and it was only $24.99! It was destiny, I tell you!
How to Make a Faux Roman Shade by LoveGrowsWild.com #diy #romanshade #curtain
Okay, now that we have the materials out of the way, here is how I made the faux roman shades:
Step one: Decide your measurements.
I first measured the inside of my window frame. I added two inches to the width (an inch on either side to hem) and used the length of the window as my fabric length. For example, my small window measured 27″ x 51″ so my fabric dimension would be 29″ by 51″.
 – For my shades, I only wanted the fabric to sit at the very top of the window so all that gorgeous sunlight could still come into my kitchen. If you want long shades that will block more light, you’ll want to make the length of your fabric DOUBLE the length of your window. Imparting Grace made her shades this way, and you can see them here. 
Step two: Cut your fabric.
If you are using something with an existing hem (like a tablecloth), make sure you adjust your measurements accordingly. On the sides where I used an existing hem, I subtracted the 1 inch added to the width. This is important because if your shades end up not wide enough, they won’t cover the tension rods, but if they are too wide, they will bunch up and not lay flat. So measure twice, cut once : )
Step three: Hem loose edges.
Step four: Sew your shade.
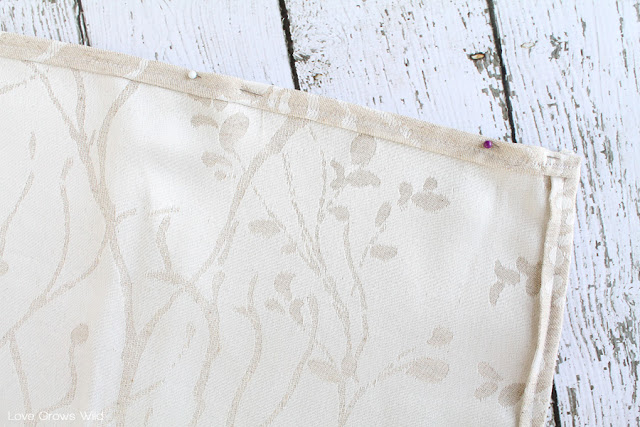
To assemble the shade, I folded the fabric in half lengthwise with the right sides together. Then I pinned the edge opposite of my fold and sewed it together, creating a big loop of fabric. 

How to Make a Faux Roman Shade by LoveGrowsWild.com #diy #romanshade #curtain
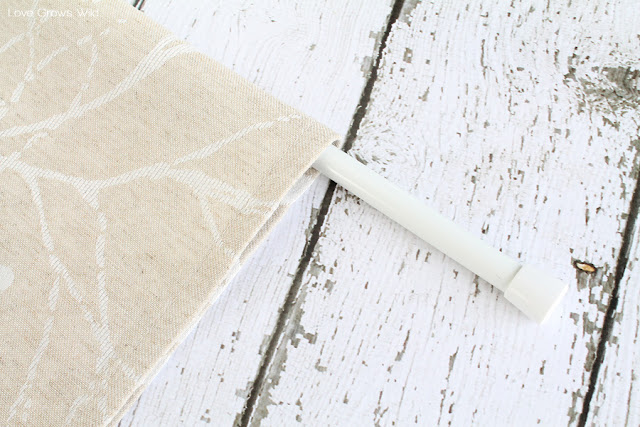
Step five: Add a tension rod.

I turned the fabric right side out and inserted a tension rod through the loop I made.

How to Make a Faux Roman Shade by LoveGrowsWild.com #diy #romanshade #curtain
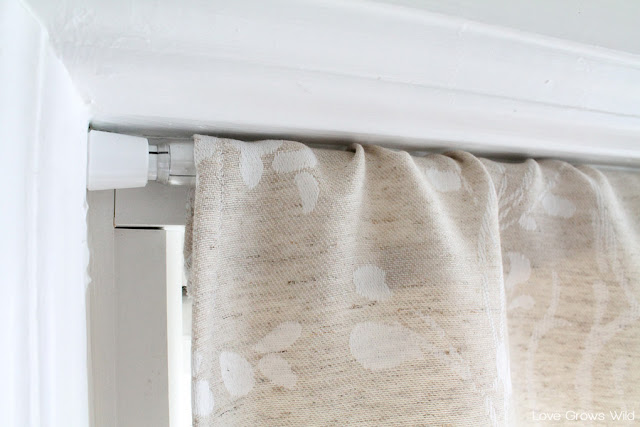
Step six: Add tension rod to window.

I added my first tension rod to the top of the window frame. You’ll want to adjust the rod’s length slightly bigger than the window so you’ll have good tension to hold your shade up.

How to Make a Faux Roman Shade by LoveGrowsWild.com #diy #romanshade #curtain

How to Make a Faux Roman Shade by LoveGrowsWild.com #diy #romanshade #curtain

Step seven: Add other rods to window.
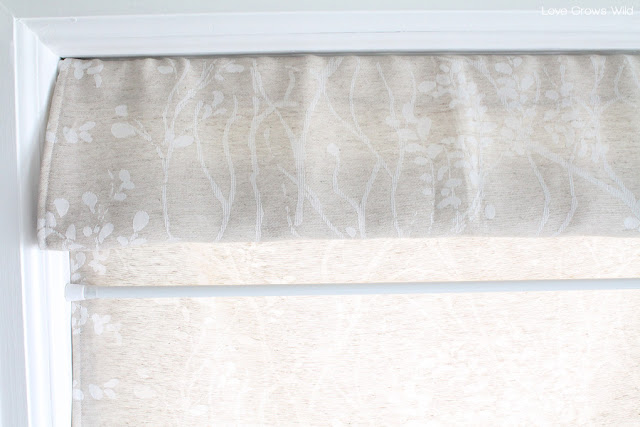
I added my other two rods to the window frame about 4 inches apart.

How to Make a Faux Roman Shade by LoveGrowsWild.com #diy #romanshade #curtain

Step eight: Pull fabric over rods.
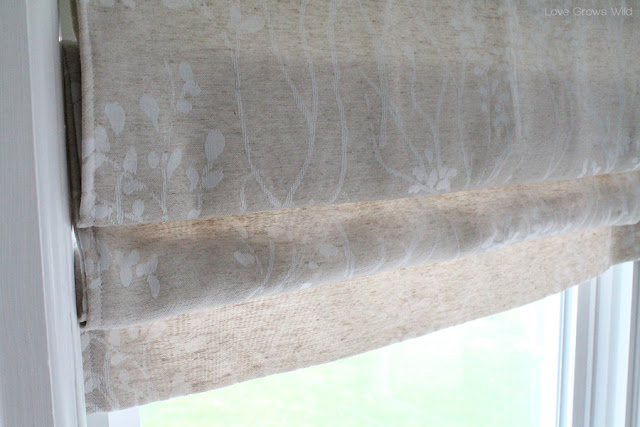
Now comes the fun part, setting up your shades! I pulled my fabric up and over the middle rod and let it drape down. Then I did the same thing with the bottom rod. This part took some playing with until I found the right rod spacing and draping, so just play with it until you like the way it looks!

How to Make a Faux Roman Shade by LoveGrowsWild.com #diy #romanshade #curtain

Step nine: (optional) Pin and iron.

My freshly-hung curtains weren’t laying flat like I wanted, so I pinned all of the folds and very carefully removed the top rod from the window with the shade attached. I ironed over the folds to make a nice crease and hung them back on the rods.

How to Make a Faux Roman Shade by LoveGrowsWild.com #diy #romanshade #curtain

Step ten: Pat yourself on the back!
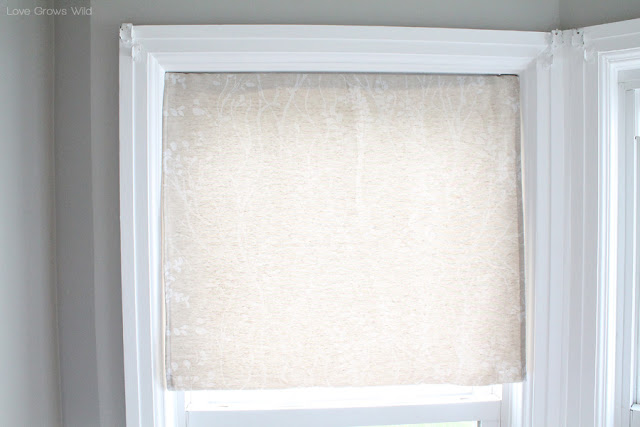
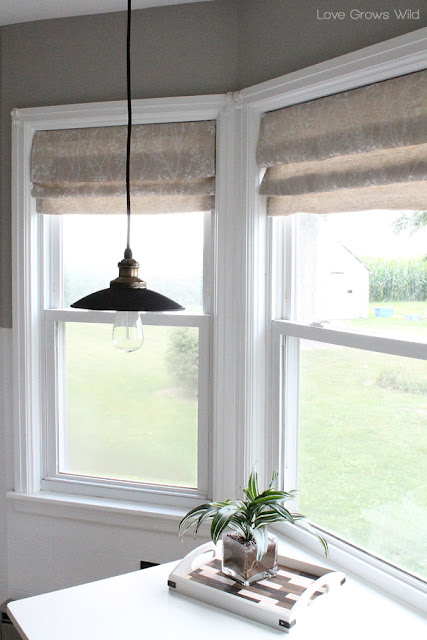
I removed all the pins and marveled at my gorgeous, custom, faux DIY roman shade!

How to Make a Faux Roman Shade by LoveGrowsWild.com #diy #romanshade #curtain
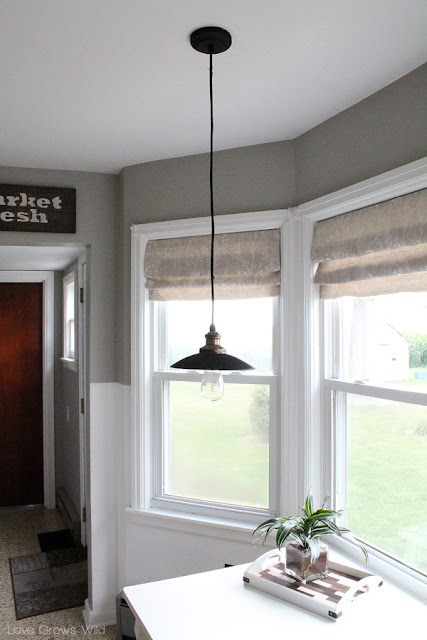
I am positively 100% smitten with my new kitchen window treatments and so proud that I did it all myself! Let me just note that taking photos of windows with bright sunlight shining through is NOT the easiest, and these pictures definitely do not do justice to how beautiful they are!
How to Make a Faux Roman Shade by LoveGrowsWild.com #diy #romanshade #curtain

How to Make a Faux Roman Shade by LoveGrowsWild.com #diy #romanshade #curtain
I still have 12 curtain brackets to remove from the window trim that the previous tenant left (a little overkill?), but they were nailed in and painted over multiple times, so I’m leaving that project for another day. For now I just want to stare at my pretty new roman shades!

How to Make a Faux Roman Shade by LoveGrowsWild.com #diy #romanshade #curtain

Are you a fan of roman shades? Where would you put them in your home?
Check out other projects from our kitchen makeover:
Upcycling and Thrifting: Decorating on a Budget
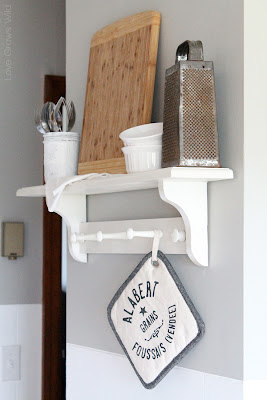
Decorating on a Budget: Up-cycled and Thrifted Kitchen Decor

DIY Photo Clipboards
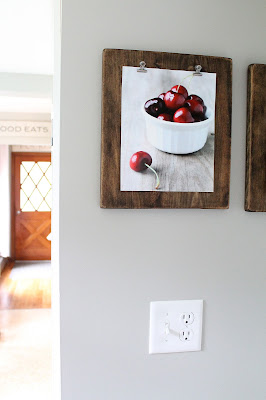
DIY Photo Clipboards and Food Photography

Market Fresh Rustic Wood Kitchen Sign
Market Fresh Rustic Wood Sign

How to Make a Rustic Chalkboard
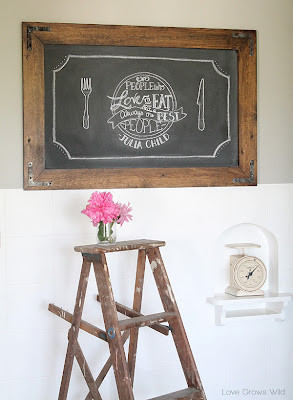
DIY Rustic Industrial Chalkboard

Let’s Keep In Touch!

Subscribe to Blog | Browse my Shop | Follow on Facebook | Follow on Twitter Follow on Google+ | Follow on Pinterest | Follow on Instagram | Subscribe to Newsletter
P.S. I’m sharing this post at some awesome link parties… Check them out HERE!
Pin
Share
Post
Email
Print
DIY Decor Kitchen
by Liz Fourez 
25 Comments

About Liz Fourez

View all posts by Liz Fourez

Related Posts

  • Kitchen Cafe CurtainsCrushing on Kitchen Cafe Curtains
  • gallery wall artwork inspirationHow to Fill a Blank Wall with Art
  • Yarn Wrapped Christmas TreesYarn Wrapped Christmas Trees
  • Neutral Living RoomTone on Tone Woven Wall Art DIY
PREVIOUS: Back to School with an iMac Giveaway!
NEXT: Pecan Crusted French Toast

Comments

  1. Heather Kinnaird says: August 24, 2013 at 8:08 pm

    you are a GENIUS!!! I LOVE this project. pinning and making for my kitchen

    Reply
  2. Selene @ Restoration Beauty says: August 25, 2013 at 3:27 am

    I’ve always loved this genius idea but have yet to get mine done! We have lived in our home for 4 years and the window by my kitchen sink is still naked…sad, I know!
    Yours look beautiful, Liz! Pretty fabric and colros!

    Reply
  3. kelly says: August 25, 2013 at 8:08 pm

    Absolutely freaking amazing!! I would love to try this with my plaid curtains. Do you think plaid would look okay in a roman shade? I still want to keep my country primitive theme but my valances are just too overwhelming. And poofy.

    I love your light fixture, too! I just found a 1904 Electric Supply Catalog yesterday and it has that EXACT style of lamp in it! It even has a page for just the bulbs. I posted about it today and even took a picture of the page with that lamp. You should check it out.

    Love your kitchen. Absolutely adorable. Vintage farmhouse style perfectly executed ๐Ÿ™‚

    Reply
    • Liz Fourez says: August 26, 2013 at 10:38 am

      Thank you, Kelly! I think they would look great with your plaid curtains! And what a neat find with the catalog!

      Reply
  4. Tanya Runkle says: August 26, 2013 at 6:15 am

    Brilliant!! These look so pretty, Pinning!

    xo, Tanya

    Reply
  5. The Hartland says: August 26, 2013 at 7:39 pm

    Cute! I’m just gonna steal all your cute little designs. Love that Market fresh sign too!

    Reply
  6. Carissa Rasmussen says: August 27, 2013 at 2:31 pm

    i love the look of crisp clean roman blinds. you pulled these off perfectly! i’m still hunting for a way to make them look the same when they are mounted outside the window when there are existing blinds. any ideas?

    Reply
    • Liz Fourez says: August 28, 2013 at 10:03 am

      Thank you Carissa! What about using cup hooks and dowel rods? I think that would work perfectly!

      Reply
  7. Alyssa Rivers says: August 28, 2013 at 3:04 am

    You amaze me.

    Reply
  8. Jocelyn says: August 28, 2013 at 12:27 pm

    I love these and I can’t wait until you come help me with mine!!! I agree with Alyssa…you are amazing ๐Ÿ™‚

    Reply
  9. Little Vintage Cottage says: August 28, 2013 at 1:43 pm

    Wow, now that’s genius! What a great idea! Pinning!

    Tania

    Reply
  10. Krista thehappyhousie says: August 28, 2013 at 4:12 pm

    What a fabulous creative idea – I have done faux romans with no-sew hem tape before but they looked a little too stiff. I love the tension rod idea!! Thanks for the great tutorial! I would love if you would consider sharing this or any of your other fabulous projects at our new mega-party Work it Wednesday if you haven’t already. Each link will be shown on 4 blogs! Work it Wednesday

    – Krista @ the happy housie

    Reply
  11. Capturing Joy with Kristen Duke says: August 30, 2013 at 3:26 am

    Genius idea!!! These look so great! I will definitely keep this in mind for future reference!

    Reply
  12. Ricki M says: August 31, 2013 at 2:30 pm

    I love this idea! I really like the look of these. I tried making roman shades once and they just didn’t look the way I wanted them too. These look exactly like I had wanted mine to look so I’m thinking I might try this…

    Thanks for the inspiration.

    Reply
  13. Leslie Stewart says: August 31, 2013 at 11:00 pm

    What a great idea! I’d love for you to share it at my Twirl & Take a Bow Party at http://www.houseontheway.com. Have a great weekend!
    Leslie

    Reply
  14. kristi@ishouldbemoppingthefloor says: September 1, 2013 at 3:29 am

    Love, love, love these! They turned out super cute.

    Reply
  15. [email protected] says: September 1, 2013 at 4:35 am

    You did such a great job, and they look perfect in your kitchen. ๐Ÿ™‚

    Reply
  16. Trish - Mom On Timeout says: September 1, 2013 at 9:43 pm

    These shades look fabulous! You make it look so easy ๐Ÿ™‚ I need to find a window where I can do this too!

    Reply
  17. Kayla Janachovsky says: September 2, 2013 at 9:03 pm

    Great tutorial! Don’t forget to link up to The DIY’ers. http://homecomingmn.blogspot.com/2013/09/the-diyers-27.html

    Reply
  18. Bonnie and Trish @ Uncommon says: September 3, 2013 at 2:43 pm

    Ah you are so clever Liz! These turned out great! ๐Ÿ™‚ Bonnie @ Uncommon Designs

    Reply
  19. Brat says: September 6, 2013 at 4:10 pm

    Love, love, love! Very impressive Liz, I am inspired to do this project myself and your EXCELLENT tutorial is wonderful. Thanks for posting this. Your Roman shades are gorgeous!

    Reply
  20. LauraLou says: September 18, 2013 at 12:21 pm

    Absolutely stunning design – I recently did my own roller blinds and it’s a lot harder than it looks!

    Reply
  21. whitedaisy000 says: October 15, 2013 at 9:42 pm

    You could maybe use a flat iron (for hair) to iron while still hanging… I use mine all the time for that kind of stuff! Just an idea (too late, anyway)!!!

    Reply
  22. Tina says: November 13, 2013 at 5:55 am

    You have made it very clearly.

    Reply
  23. Maria says: December 16, 2016 at 12:52 pm

    This is exactly what I have been looking for and instructions were on point. Thank you! I can even do this in time for Christmas!

    Reply

Leave Your Comments Cancel reply

Your email address will not be published. Required fields are marked *

Liz Fourez started Love Grows Wild in 2012 with a passion for interior design and homemaking and a dream to help others create a home they love.  From simple project tutorials, to holiday and entertaining ideas, to her journey renovating a 1940’s farmhouse, Liz demonstrates how to create a beautiful and inviting home with a handmade touch. She turned her signature cozy, neutral style into a best-selling book in 2016 and continues to inspire readers with her captivating photography and easy decorating ideas. Read more about Liz > > > >

LOOKING FOR SOMETHING?

FOLLOW ALONG

  • contact
  • MEET LIZ
  • advertise
  • privacy policy/disclosure
  • Blog

Copyright © 2025 · Prima Donna theme by Georgia Lou Studios

COPYRIGHT ยฉ 2017 ยท DESIGN + BRAND: BLISS AND TELL BRANDING COMPANY