Do you love the vintage, rustic look? Learn how to instantly age new hardware for your rustic decor with this tutorial!
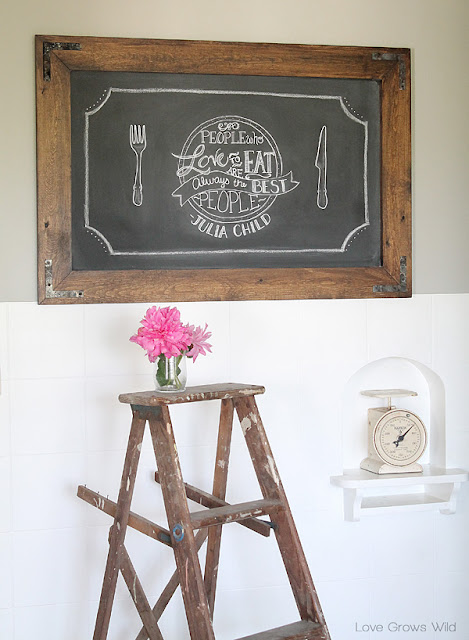
Okay, so did you see the fabulous new chalkboard I made for my kitchen? (If you didn’t, you should totally go here and check it out!) I am 100% smitten with my rustic industrial creation, and I couldn’t be more proud that I DIY’ed it myself! With a tiny bit of help from my hubby perhaps : )
As promised, today I’m going to show you the corner braces on the chalkboard and how I instantly turned them from shiny new silver to gorgeous old patina.
* I want to note that since we shared this tutorial, we’ve discovered the harmful side effects of burning the zinc coating off these brackets and advise everyone to take extreme precaution if attempting this project. We worked in a very well-ventilated area and didn’t get sick in any way, but I want to make sure I state that burning zinc is unsafe, and I most likely won’t tackle this specific method again. Thanks for listening to my PSA!
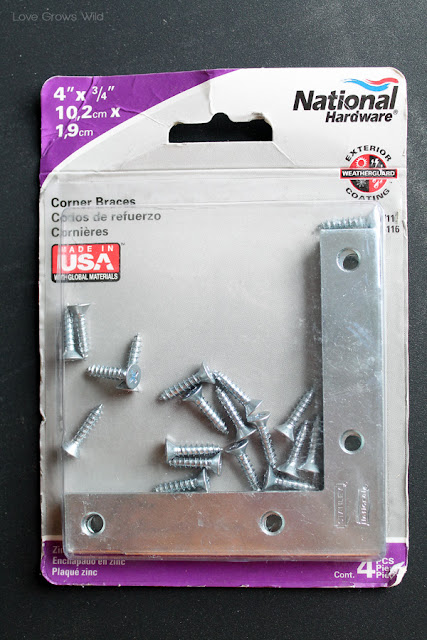
I started with these corner braces (or L brackets) that I purchased from the hardware store. I wanted to add some detail to the chalkboard frame, and simple hardware like this is an inexpensive way to give your project that great industrial feel. I got these 4″ braces for only $3.97.
Sometimes bright, shiny silver is great, but on this project I wanted to keep that old, rustic look so I had to figure out a way to add some age to them quickly. I knew I had seen on the internet before using some kind of heat source or fire to age the metal, but of course I couldn’t find a good tutorial anywhere when I was looking for one. Plus, I really didn’t feel comfortable playing with fire and hot metal.
My sweet husband heard me mumbling about my conundrum and said, “You know I have a torch in the garage, right?” Let me tell you people, my husband almost NEVER willingly volunteers to help me with my projects (I usually have to beg and bribe him with food), so I was not about to pass up on this offer! Even though I had no tutorial to go off of and no clue what we were doing, I figured what’s the worst that can happen? I waste four bucks? Let’s go for it!
Let me first say, that we took every safety precaution during this process, and I don’t advise doing this unless you are totally comfortable with it! Fire is not something to play with, my friend. Unless of course you need antique hardware stat, and then it’s okay : ) Make sure to be in a well-ventilated area (we were in our garage next to the open door) and use gloves and safety glasses.
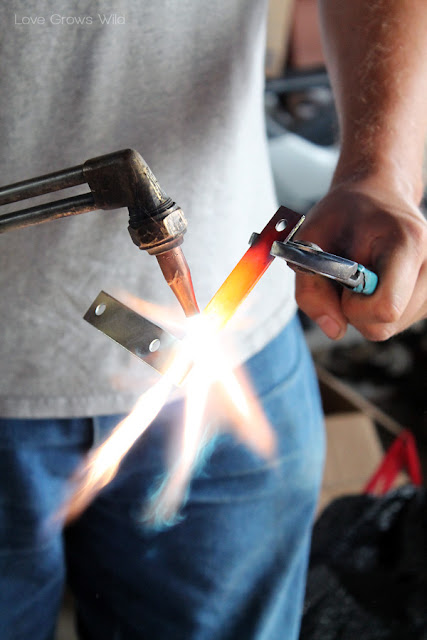
My husband used a pair of pliers to grip the brace and carefully applied heat using his torch until all the zinc coating had melted off the brace. It only took about 45 seconds to 1 minute to get the look we were going for. Make sure you use big enough pliers that you can keep your hand away from the heat! It doesn’t show it in these photos, but he ended up putting on a glove to protect his hand. Safety first! Once I was happy with the way it looked, we dropped the brace into a bucket of cold water to cool it down. Since the heat was only on the brace about a minute, it didn’t take more than a few seconds to get cool enough to touch.
And course I didn’t want awesome looking hardware with shiny silver screws, so we aged the head of each screw as well. Before we heated the last brace, we dropped screws into each of the holes and briefly applied the torch over each screw. We were afraid the screws might get stuck in the holes, but they came out perfectly when we flipped the brace upside down. Just like the braces, we dropped them in the water bucket to cool them down and repeated the process until all the screws were done.
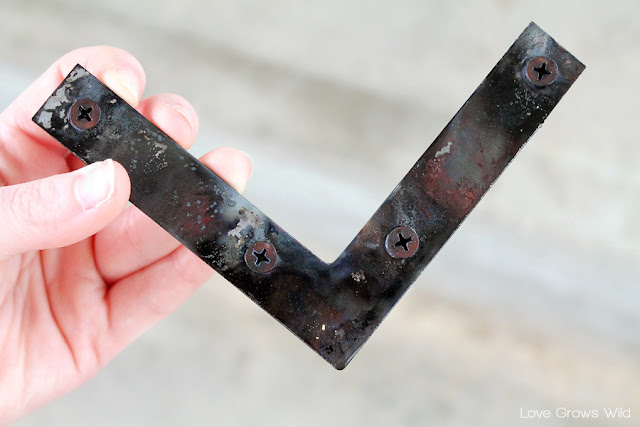
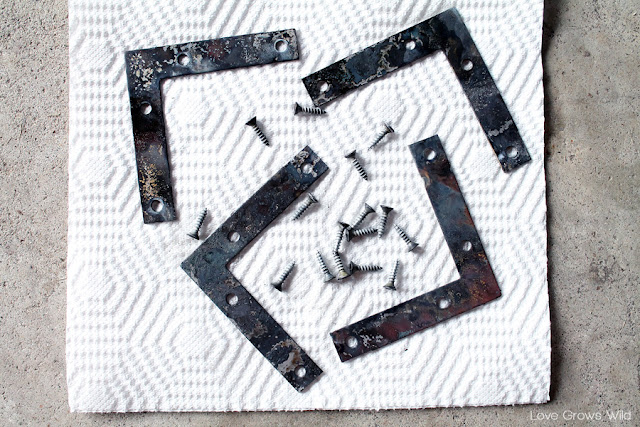
Check out the GORGEOUS patina these braces have now! And all in under 5 minutes!
We took all the braces and screws out of the water and laid them on paper towels to air dry. You don’t want to rub the braces or that beautiful patina you created will come off!
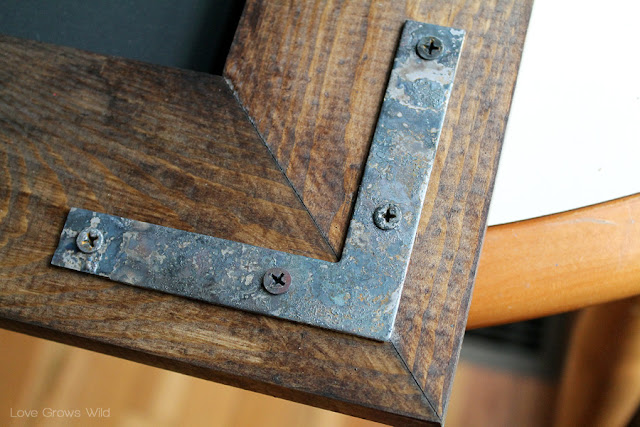
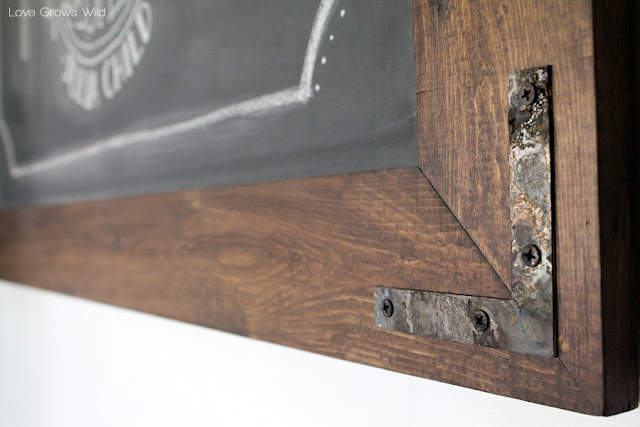
When they were totally dry, I screwed the braces into the corners of my chalkboard frame.
HELLO Gorgeous!
So that’s my secret! We took brand new hardware and made it look like it had been on that frame for decades. This was a total DIY win!
For the full tutorial on my Rustic Industrial Chalkboard, click here.
So what do YOU think? Would you have kept the bright, shiny metal or gave them this aged, rustic look? I’d love to hear your thoughts!
Check out these other rustic projects:
Let’s Keep In Touch!
P.S. I’m sharing this post at some awesome link parties… Check them out HERE!









This is SO cool! I love this! Thanks so much for sharing!!
So THAT is how you did that! Great idea, thank you for inspiring 🙂
xo, Tanya
You guys are BRILLIANT!!! The hardware came out amazing!
I totally didn’t expect fire to be the way you aged the hardware. Smart idea — and fast — which makes it that much better!
– Lora @ Craftivity Designs
This looks fabulous – thanks for the how-to!
Love it! I need me a blow torch – this is super cool! You’re blog is awesome!
I absolutely love that technique! Love your tutorial on how to build the chalkboard too. I’ll have to get my hubby to show me how to properly use the blow torch!
Oh, why can’t I ever figure out a simple solution? Several years ago, when I wanted to accomplish the same thing, I bought an expensive book The Colouring, Bronzing and Patination of Metals)to help me figure it out. I do love the book, but I’m using your method from now on!
Such a clever idea! My little brother is a welder, and I know he would jump at the chance to start lighting hardware on fire for me!
Awesome! I wonder if I could just throw some hardware in our fire pit??
Haha. Yes. I was going to Comment that it’s much easier. When we need aged nails and hardware, we simply make a little fire pile and put the pieces in. By the time we need to pieces, they’re done burning and can be cooled and used. Most of the time a cardboard box, and a little scrap wood is all that’s used so it doesn’t take too long for it to burn out (or drag the pieces out if you get ready for them beforehand). Works great. Same concept, just easier I think.
So cool! The frame looks great, this is perfect hardware for it. I wonder same thing as commenter above – we don’t have a torch but we have a fire pit. I’m gonna try this in the fire pit!
Very cool! I could have used this when I was making some shelves awhile back and wanted them to look more rustic. Of course, I would have had to buy a torch first, so it might have been overkill….
What a great technique! I’ve pinned this so I can refer back to it in the future. Thank you for sharing!
I just wanted to let you know that I featured your wonderful project on homework. Thanks so much for sharing it on The Inspiration Board. Have a great weekend!
carolyn
homework &
DETAILS
I keep telling my hubby I need to take a welding class. I want to cut tin. I need to age hardware…the reasons keep coming. Very cool!
I’d like to do this to our kitchen cabnet pulls… do you know if I should spray them with a cover or something after? Will that petina rub off?
thanks for sharing!
This look would be gorgeous on cabinet pulls, but to be honest I’m not sure how well it would wear. Since my hard ware is just on a chalkboard, it doesn’t really get touched much. I would pick up a new pull from the hardware store to test it out on, and try a clear coating spray over it. If you get it good and sealed, they should be fine I would think! Sorry I couldn’t be more help, but let me know how it works!
So you didn’t have to bribe your hubby with food? That is because he got to work with metal and play with fire.
These are SOOOOO beautiful! Just a note — my husband works in manufacturing and he wanted to note that the melting zinc can produce hazardous fumes.
I love the look!
I am a metal worker and Wyldrice is right. Zinc fumes are extremely dangerous! I know of people ending up in the hospital for days due to zinc fume poisoning… and they were outside! They told me it was horrible and it felt like they were dying. I am pretty sure the amount of zinc fumes in this project is minimal, but if you are going to do it use a fumes mask (not the paper kind) and do it outside with a fan blowing away from the house… you don’t want those fumes building up in your garage… Safety first!
Thank you for the tips! Of course, we’re no experts in working with metal, so this is very helpful! Safety first, always. 🙂
I love the look and will try it next time I age hardware. I have aged chain by soaking it in acid (place in oversized glass bowl with just enough to cover object, wait an hour and fill bowl with cool water to overflowing to dilute the acid). I do this step in a rocked landscape area outside away from pets and children. Then I take the wet metal and bury it in a mound of salt (it adds rust), after achieving the amount of rust I like it’s on to the garage for the torch method. We have a small bottle of gas with a nozzle on the end and instead of holding it we lay it on the concrete of the garage floor and heat until red hot and drop into a bucket of cool water to finish.
Liz,
I wanted to inform you that this method is very unsafe. The braces that you used are coated with zinc. In the picture of the package, in the bottom left, you can see where is says that it is zinc coated. When zinc is burned, it releases many poisonous and dangerous fumes. The look that you created was a result of this zinc coating burning off. The method would be safe on steel braces, but it would seem like a good idea to warn people in this article about using zinc coated braces. The product looks great however, and I hope that you will consider amending your article.
here is an excerpt from a blacksmith’s warning about burning zinc
“Burned zinc gives a toxic vapor that can make you VERY ill (even in a well vented shop). Before I knew of it I gave my self zinc fever (a form of heavy metal poisoning). It feels kind of like a bad flu. The effects are cumulative and once you have had it, if you are exposed YOU WILL GET IT AGAIN and a worse case. Welding galvanized metal and in some cases over heating brass along with brass grinding/sanding dust can also poison you. To be safe soak the part in muriatic acid overnight (to remove the zinc) and then then rinse with water.”
The article can be found here:
http://www.anvilfire.com/iForge/tutor.php?lesson=safety3/demo
Thanks for the information, Paul! Of course, safety is always our main concern, so I added a paragraph in the post with more information on what I’ve learned. Thanks again!
One method to remove zinc is to get a product called “The Works” at Home Depot in the cleaning section. It’s less than $2 and will take the Zinc coating off of steel about 20 minutes. It’s HCl based, so be careful, but it is a household cleaner and is much safer than melting Zinc. It leaves the steel bare.
GREAT tip, Jim! Thanks so much for the input!
Wow, I LOVE this! Who knew?! Thanks for sharing this! I’ve always heard of using acid, but have never wanted to trek out to the store to look for it. But I have a blow torch and gloves in the garage! Brilliant! 🙂
very cool. I got a propane torch at Menards and the same braces to try this out. I don’t think the normal propane torches get as hot as the (apparently super fancy, er, I mean manly) torch your husband has. We got the zinc off, but can’t seem to get it to change color beyond that.
I see… that’s good to know, Megan! The hubs’ torch is pretty heavy duty, so I think you might be right. Thank you for sharing this with us!
Thanks for sharing your aging metal idea – will definitely try it. One suggestion if you’re trying to achieve antique look – lose the Phillips head screws and exchange for slotted ones.
GREAT tip, Pam! I never would have thought of that! 🙂
There is a danger to heating metal with Zinc platting.
This can cause a deadly problem called Metal Fume Fever.
This is deadly. Refer to link
Use metal that is not coated for this form of aging.
http://www.anvilfire.com/iForge/tutor.php?lesson=safety3/demo
Cool, I’m wanna make vintage wall letters made of some kind of metal and was looking all over the place for an easy metal ageing method. All I found till now is rusting techniques but I’m not a big fan of it.
Should have used slotted screw heads for the corner bracket it still looks modern
I’ve been doing similar for a number of years now and the store bought hand held propane torches do work ok. …what I’ve found is, if you give it a quick blast of tinned spray paint (I use black) as soon as you have burnt off the zinc and removed the heat source …just enough to cover. ..then remove the paint when it’s cooled a bit (the paint doesn’t need to fully dry) using a rotary nylon abrasive wheel. .or a scotch pad wheel you’re left with a better end product. If you use the hand held propane torches you’re only looking to burn off the zinc and get the metal to a dull grey (no need to go to red as you showed using the acetaline torch). Its also worth rounding off the sharp corners eith s file and beating the bracket with a hammerecommendation before you begin the aging process with the heat…..Hope that helps anyone else who’s considering aging metals.