Method #2
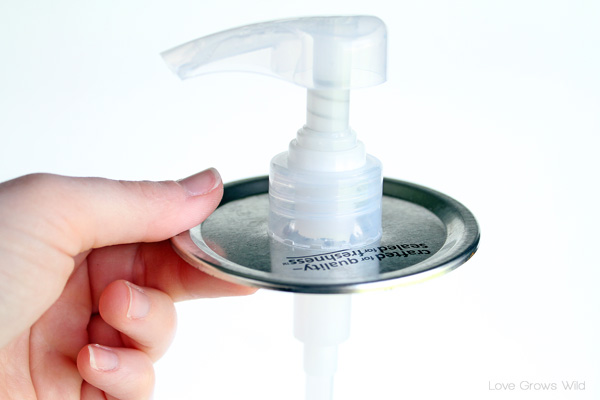
Step One: Take the pump out of the soap bottle and wash to remove any soap left on the pump.
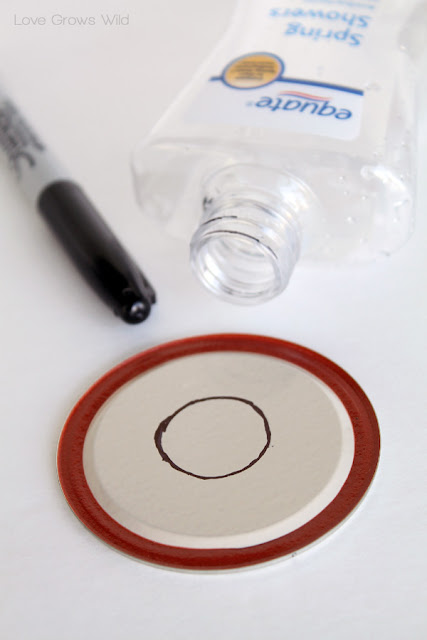
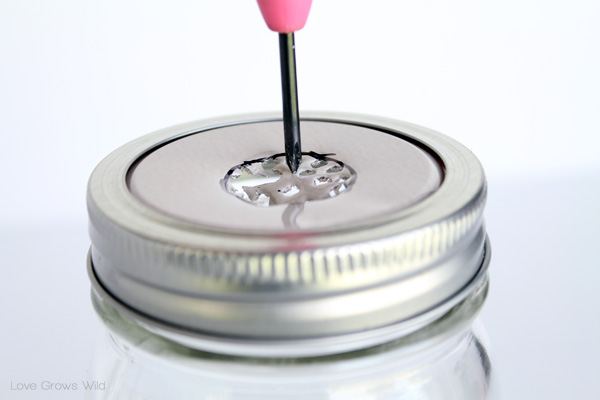
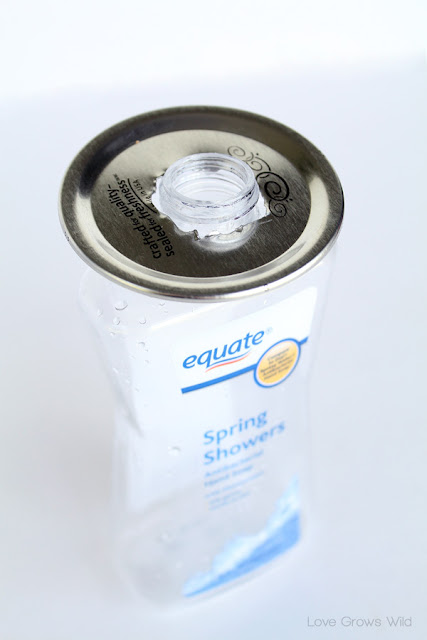
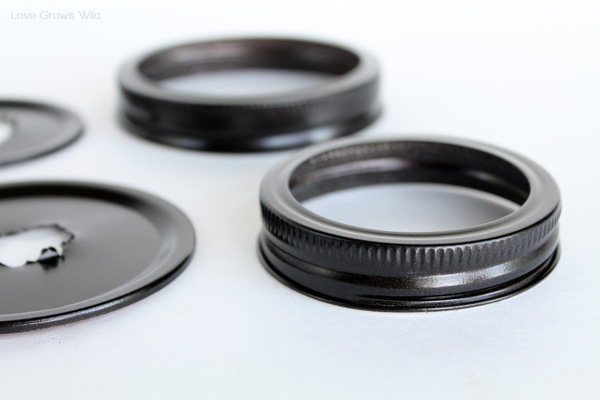
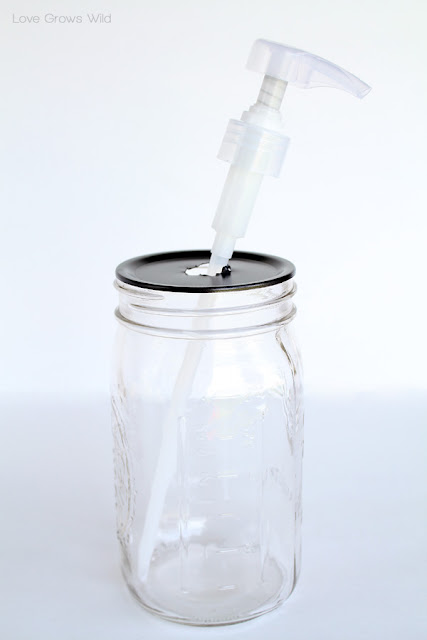
Step Two: Put the lid on the mason jar and make a mark in the center of the lid. Place a small screwdriver (or other pointed object) on your centered mark, and using a hammer, tap the screwdriver until it pierces through the lid. Continue making holes around the center until you create a hole just large enough to fit the pump inside.
Let’s Keep In Touch!
This post has been sponsored by:
 The Weary Chef features weekly menus of tasty, quick dinners PLUS kid dinner ideas, bonus recipes, and Friday cocktails! Follow The Weary Chef on Facebook and Twitter to never miss a recipe!




I have a mason jar pin holder in my sewing area. My MIL has these really big old fashioned mason jars in her kitchen that I LOVE! Great job on yours, love them 🙂 pinning
Pinned this! Will have to make these for my kitchen & bath. Thanks for sharing your tips on each method.
– Lora
I have a whole slew of mason jars at home. Definitely doing this with some of them! Thanks for the directions.
These are super cute. And who doesn’t love mason jars? Just picked up 4 small ones at the $0.99 store yesterday. I love them! Definitely going to use this idea. Thanks! Great job.
These are so cute! Thanks for sharing.
I have been wanting to make some of these and even have the mason jars and soap dispensers handy. Thank you for testing out both methods and giving your feedback on both. I definitely feel like I am ready to tackle this project now.
~Katie
Love the look of them! I also love that you tried both methods. I never would have thought of method #1. Glad to know that method #2 is easy and sturdy!
KC
I love how easy these are to make! Thanks for he great idea!
Super cute! I keep seeing these on Pinterest and reallllly want to try them out for myself, but just haven’t gotten around to it yet. I suppose I should get one that, huh?
I would love it if you would link up at Martha Mondays, open now through Wednesday night!
http://www.watchoutmartha.net/2013/06/martha-mondays-link-up-party-features-63.html
~Amanda
http://www.watchoutmartha.net
So pretty!! Thanks for the tutorial. I’m pinning this!
Heidi @ handmadefrenzy.blogspot.com
This is SO awesome Liz! Totally doing it!
Great tutorial. I have to try. Thanks for the hard work on this!
Gina (http://ginascraftcorner.blogspot.com/)
I just LOVE this idea-can’t wait to try it!!!
This I’ll certainly try myself. It’s such a great idea!
Love your blog and am now a new follower through Friend Connect.
Hope that you’ll visit my blog when you’ve got the time .0)
LOVE this! I have been wanting to make one of these myself for sometime, and just have not pulled it off! I most certainly will soon, your tutorial and photos are fantastic!! I have no excuses now! Your blog is so bright and cheery! I am now your newest follower through Friend Connect and Google Plus! Have a great day!
Jeanne@ http://www.idreamofjeannedesigns.com
Stop by if you have a chance to check out my blog! Thanks.
Soo cute- they turned out darling. Thanks for linking up at Feathered Nest Friday!!
Those are so cute and I’ve wanted one forever. You sure make it look easy!
These are so much cuter than those boring soap bottles!
I’m hosting a crafting link party today and the featured supply this week is mason jars. This project would fit in perfectly! I’d love for you to link it up here.
Danielle at Framed Frosting
I love this! I was wondering how I could accomplish the mason jar soap bottle with what I already have…..Thank you !!! I think I’ll be making one of these this weekend. 🙂
Our Simply Create Link party is going on right now. I would love to have you link up, as I’m sure my followers would like to see what you created too. Hope to see you soon!
Melissa
redflycreations.com
What a great post.. The crazy thing is I made mine yesterday without seeing your post.. Ha what are the odds of that. And so far my viewers can’t wait to make it too. I did method number 2. I had great success I was able to hole perfectly snug so no glue needed. I was a little worried to glue it just in case I wanted to change out my dispenser.. My dispenser I used from a old one that no longer went with the decor. And I love it.. since the dispenser was the same metallic color as the lid of a mason jar.. no painting involved.. awesome.. So this project literally look me a few mins.
by the way I decided to link your mason jar hand soap post on to my page to show method number one. Thanks!!! http://whatthekeckisgoingon.blogspot.com/
CONGRATS!!
You have been featured at The DIY Dreamer! YAY! Come on over and grab your featured button, you deserve it!
http://thediydreamer.com/from-dream-to-reality/rustic-features-70/
This is exactly what I was looking for! I’m going to use them to dispense Sunscreen at my outdoor wedding this summmer 🙂 Much cuter than the bright ‘Banana Boat’ bottles
These are fab – I so want to do this.
I would love for you to link up at the Mommy Archive – we’re focused on mason jar crafts and ideas this week, Alice @ Mums Make Lists<
Does the glue keep the jar from rusting? I found the cutest antique jar and did method #2 but with no glue and it rusted. 🙁
Hi Amanda! Since I spray painted my lid with Rustoleum, I haven’t had a problem with it rusting. I would try painting it next time! So sorry yours rusted!!
Do they make a plastic insert for mason jars in case you do not want to spray paint? if so, you may be able to drill a hole in the lid to fit the pump in.
Great question, Cathy! I’m not sure, but that would be a good solution!
What about tracing the metal lid onto a plastic disposable container (such as a large yoghurt or cottage cheese lid or bottom, and cut out? You could put the white side up, drill a hole, zip, zap!
Great tutorial! Very detailed and nice pictures! Thanks!
I am going to make these, for every sink in the house 🙂
Thank you for this idea.. very nice. If I can suggest a small flathead screwdriver or a chisel tapped along the line of the hole.. that would go through a lid quite easily. A set of tim snips can also cut through a lid easily… might be quicker.
I LOVE LOVE LOVE this idea. I need soap outside, I live on a farm and I am always needing to wash my hands at the barn, this will be GREAT out there!!
I made this using a clean jar that had store-bought Alfredo sauce n I sanded the paint off the lid. I enjoy the rustic look n was delighted when the silver lid rusted some! 🙂
WOW!!! this actually brought back memories, we made these in Girl Scouts many, many, many moons ago. until today I had forgotten all about them. and since I’m trying to find something different to make for Christmas gifts this year, this is perfect. I thought why stop at soap, so I have made a gift set of 3 bottles all are empty, I painted the lids all white, I enclosed homemade sticker labels, Dish soap, hand soap, lotion, shampoo, conditioner, hand sanitizer and a blank one too.
Hello….I saw in the link on how to make the homemade hand soap that the dispenser was also sprayed black. I would like to do that. Is there anything I should know before I do?
Fantastic idea! Thank you so much for sharing.
Hi Nancy! I sprayed the lids of my mason jars with an oil rubbed bronze spray paint, which worked beautifully! I would recommend spraying the lids with a metal primer first so the paint will adhere well, and finishing with a clear sealer to protect the paint. You’ll love the charm these little soap dispensers will add!
Hi! I love your blog!!! Particularly these mason jar dispensers. You should totally sell these I would literally buy like 6! But since you don’t I will just have to try to make them myself! Thanks to your lovely tips!!! I am thinking of putting a chalkboard label on the ones I put in my bathroom (Sanitize and Wash) so that my guests can distinguish between the soap and hand sanitizer. Thanks for the inspiration!!
Hi Sarah! You are too sweet! I’m so glad you love these cute mason jars as much as I do! Chalkboard labels would be absolutely adorable on these. Thanks for stopping by and Happy Holidays!
I received these as a gift and have been using them for a few weeks. My only problem is that dawn dish soap leaks around the pump. Any suggestions?
Hi Tiffany! What a nice gift! I’ve been using the ones I made for months now and haven’t had any leaking issues. Is the pump glued in or just set in the lid? Maybe try adding a layer of waterproof glue around the pump under the lid and see if that helps.
Thanks for posting this in such detail. I have been wanting to make one for a long time but the previous tutorials I’ve read made it look a bit daunting.
May I ask what brand/kind of soap dispensers you purchased in order to get the actual pump part? Thanks!
I should have specified that my question was regarding the larger pump – the 35 oz larger bottle of body wash with a pump.
Also, would either of these work for foaming hand soap? Or does that need a tighter seal to work? Thanks!
I haven’t tried one with foaming hand soap yet, but I’m sure it would work using the same process. As long as you’re using a foam pump, you should be good to go! You’ll have to let me know how it turns out!
You’re so welcome, Michelle! It really was a pretty simple process! I believe I used the generic Equate brand soap for the smaller jar and a large bottle of body wash for the larger jar. Maybe Dove brand? I just walked around Walmart until I found sizes that I liked! Best of luck!
I found this project via pinterest and I cannot wait to do it for my Kitchen 🙂 Thanks for sharing <3
You’re so welcome, Amanda! I think you’ll love these in your kitchen!
I have a store bought dispenser that is starting to rust on the bottom and leaving rings on my counter. I think I may have just found it’s replacement! Glass is great because it’s nin reactive with most things you find in a bathroom. I think if I use method 2 I may be able to reuse the pump!
That’s great, Ashley! I think you’ll love having one of these mason jar dispensers!
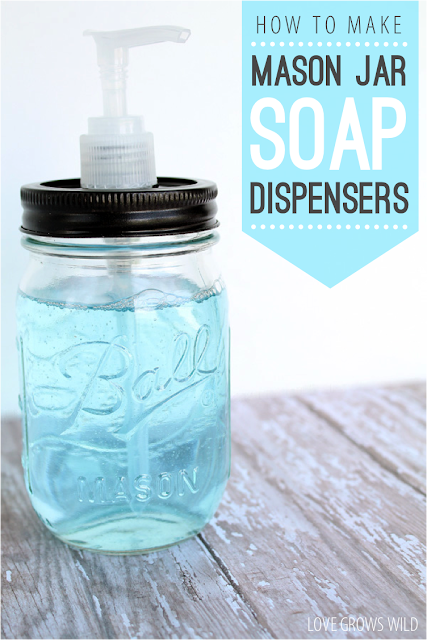
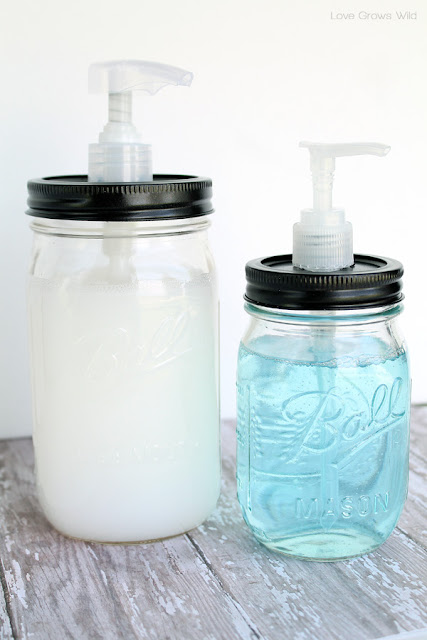
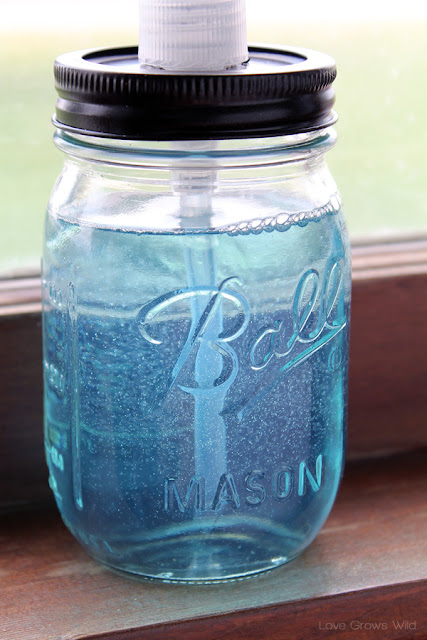
Can you tell me what kind of dish soap is in your dispenser? I love the beautiful blue color! Great idea and sooo beautiful – thanks for sharing.
I wish I could remember, Bridget! I think the blue was a hand soap and the larger mason jar was the dish soap. Sorry I couldn’t help more!
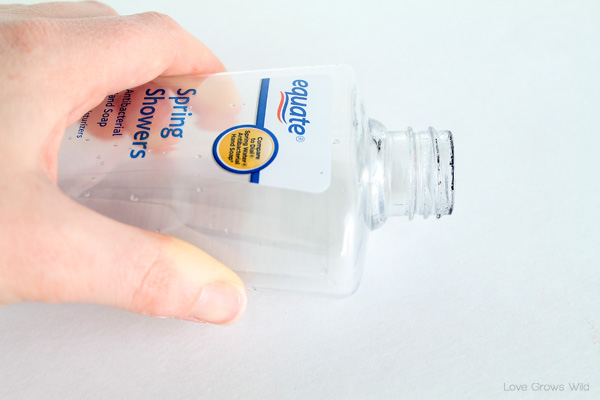
Is it the Equate brand called Spring Showers shown in the beginning picture that is blue?
I made those so long ago, I can’t remember what it was called now! Sorry! Anyone else know?
I bought two drinking glass mason jars today at hobby lobby.
They were a little pricey but I got them at 50 off. I need to get glue.
I am going to use them for his and her shampoos. Oh so cute and practical.
That sounds perfect, Patty! Have fun creating!
When I saw this I just had to make it. So I started directly. It is so lovely. Now I have one in the bathroom and i love it! I look forward to make another one! Thank you for sharing this!
That’s wonderful, Camille! I’m so happy you enjoyed the project! 🙂
I just found 4 blue mason jars with the zinc lids this weekend at a flea market but wasn’t sure what I was going to do with them! I love this idea! Thank you!! 🙂
Love those vintage blue mason jars! I bet they will make absolutely beautiful soap dispensers!!
Hi, thanks for sharing this how-to! Question: I love making my own shampoo, and would prefer to store it in a pump glass container like this one. Otherwise, the heat of the shower will cause estrogenic compounds to leach out of plastic containers into the shampoo, thereby defeating the purpose of homemade shampoo, right?? But of course, there is the very legitimate concern about glass in the shower. I’m wondering if anyone has seen, or knows how to make, a mason jar “wrap,” if you will, that would protect it from shattering if it fell. I’m picturing something similar to the foam or rubber soda can holders/covers that people use to keep cans of soda cold. I don’t drink soda myself so I apologize if there is a more correct name for such items! Anyway, if someone knows where to get something like that for mason jars, or wants to come up with a creative way to make them, please share!
Oh, I just looked on Amazon and I guess those soda can holders are called “coozies” or “koozies.” Who knew? May try to find some at the Dollar Store and see if I can modify them to work with this soap dispenser, so I can have my homemade shampoo in my pretty soap pump mason jar 🙂
Hey Alison! I’ve been brainstorming trying to come up with an idea for you… the best I can think of is to add a piece of no-slip liner to the bottom of the jar, which will help prevent it from slipping and sliding all over the place in the shower. But as far as something to protect it completely, I’ll have to keep brainstorming!
Crochet one.
Hi Alison,
I’m a bit late to the game, still…the koozies should work, but a balloon (mouth cut off) would help both with grip and provide some breakage protection. Use a coordinating bathroom color. Would be interested in your shampoo recipe if you were willing to share.
I was also concerned about breakage since I have a ceramic sink and my soap jars will be sitting on its edge. I ordered double-sided suction cups from Amazon to help secure them. Maybe this would also work to prevent them falling in the shower?
Do you think a painted mason jar (inside & outside) will affect the soap any? You did a wonderful job and I can’t wait to see your finished kitchen. Good luck
I think painting the outside of the mason jar should be fine, but I wouldn’t paint the inside. Best of luck with your project!!
Those look awesome!! Should you want to make more in the future you can get those pumps and screw ons online for pretty cheap(under 3.00 each) 🙂 Absolutely love all your ideas!
That is a great tip, Amber! Thank you for sharing!!
My mason jar lid is rusting. Anyway to prevent that?
Hey Addie! Did you paint the mason jar lid?
I made a mason jar soap dispenser about a year ago. But it is now rusted. Thanks for the great tip on the spray paint. 🙂
You’re welcome, Brianna! 🙂
Hi! i was just wondering how picky it is about the glue. would a hot glue gun work? also, what kind of paint should i use?
Hi Amy! I’d definitely recommend using a water-resistant glue, and I used Rust-Oleum spray paint for mine. Hope this helps!
Totally trying these! Did you spray paint the inside and underside of the lids? Not sure if I didn’t wait log enough after painting but the paint rubbed off when I tried screwing the lid on! Not a big since you can’t see it anyway I was just wondering!
No, I didn’t spray underneath, and mine rubbed off a tiny bit too when screwing on the lid. Like you said though, no one will notice! 🙂 Hope you enjoy the new soap dispenser!
I love this idea, will use it for Christmas. Will pin after Christmas!!
Thanks, Robbie! 🙂
Hi! I absolutely love these and this post! I made several of them and I’m running into a problem. After a few days the pump isn’t picking up soap. If I remove the lid and run the tube under warm water it will eventually start working again, but then stops after a few days use. Have you ever encountered this? I used soap from Bath & Body Works, and used the pump from those bottles. The only thing I altered was I cut them down to fit.
Any ideas?
Thank you for your help!!!
Hmm… that’s strange! I haven’t had any issues, but it sounds like the pump you’re using for some reason doesn’t want to work. You might have to try switching to a new pump. So sorry I can’t be more help!
Readers: Anyone else run into this problem?
Yes, this has happened to me twice now. I’m finally going through the process a third time and this time I’ll use Method #1 so that I can just unscrew and replace the pump the next time it fails. My first tries were with Method #2, and since it’s glued on, once the pump fails you have to throw it out and start again. Hoping Method #1 will help the project last without having to do all the work over again.
I’ve been wanting to do these, so I have a pump saved from a bottle of lotion, have lots of mason jars and have some lids that are a little rusty, i also have the spray paint that i used for a soap dish in the bathroom, i first tried #1 and made a big hole and discarded it until i scroll down and saw method 2 in a minute i’m done, thank you, will be saving all pumps from now on
Yay! I’m so glad you found which method works best for you! Have fun creating these cute little soap dispensers!
I did this myself this morning! Love how it turned out..used a pretty pint jar for hands soap in my bathroom 🙂
I bet it looks beautiful in your bathroom! Great job, Michele!
Now at Michaels they have all kinds of different lids that can be added to mason jars. I also found these at Target. You can change a mason jar with these new lids to drink jars with straws, storage containers for spices, or even liquid soap containers with a pump. What I have in my kitchen is a hanging light fixture that has spaces for four clear glass shades that go over the lights. What I have done is replace the glass shades with mason jars…
Not only are your directions stupid but they are dangerous. Never should you hammer a nail or a pointed object on the lid while attached to a jar. It is too easy to break the jar and end up with a serious cut from the glass. If someone is going to ‘punch out’ the hole with a pointed object, simply place the lid on a soft piece of wood , then hit the pointed object. A much better way to make the hole is to simply drill a hole with a electric drill and then use an aviation (tin) snips to cut the hole to size. This also avoids the ragged edged around the hole that can also cut your fingers.
Perhaps you could make your suggestion in a polite way instead of being so rude! Your suggestion holds validity, but your style is atrocious.
I will be using the plastic mason jars just in case any of the kids will be washing dishes. The hand soap i will put in the bathroom. I will also use the mason jars for home made detergent liquid for the laundry room.
Thanks for the project! In the beginning stages of making over my kitchen. This is a Must Do on my list…
Michelle D.
What a great idea. I’ll be doing this for our bathroom, but I’m going to try painting the Mason jar with chalk paint. Thanks for the step by step so that I don’t have to reinvent the wheel.
These are so easy to make! I tried method #2 and agree it is simple. One suggestion…after making your initial small hole in the center of the lid with a screwdriver or punch, I used a pair of needle-nose pliers and reemed out the hole to make it the exact size I needed. The hole was perfectly circular and it was easy!
Like the DIY, but you left out one or two key tools – the pointy object and the hammer.
Where did you get the dispenser for the big mason jar? I have a big mason jar and want to use that but didn’t know what dispenser you used for that one. Can you help me ?
Hey Brooke! I believe it was one of the larger (maybe a liter?) shampoo bottles that comes with a pump. I hope this helps!
Hi Liz – Just wanted to say I love your tutorial! In addition to running my lifestyle blog, Peachfully Chic, I’m also the DIY Editor for Craft Box Girls (think etsy meets pinterest). Anyways, I wanted to let you know that I highlighted your tutorial on the site today. We would love to have you guest post anytime if you are interested, and it can even be a roundup linking back to your site like I did. Just think of us as an extension to your network! Here’s the link directly: http://www.craftboxgirls.com/post/simple-mason-jar-soap-dispenser.html OR you can go to CraftBoxGirls.com and check it out for yourself.
Best,
Allie
This is an awesome project I am doing for my bathroom which is the ocean theme and it goes well with all my other glass and colors in bathroom. Awesome thing is I found use for my antique blue jars had to use other lids as my antique lid is glass inside of lid so I am storing those away incase I ever change Ideas. Thank you for posting this project almost finish letting glue dry as I am typing this so hopefully when I get home I can finish and start using them. going to use large antique jar for the kitchen soap…thanks again. Happy crafting!
My hubby made one for me that I keep at my kitchen sink. He is going to make some more as Christmas gifts.
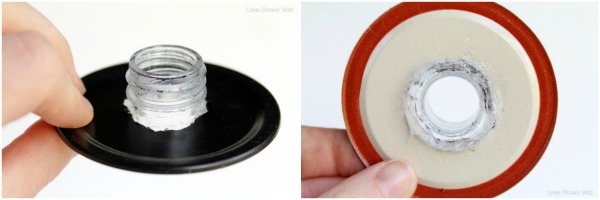
I must be just dumb as a board, because I can’t figure out how gluing the bottom of the lid makes the pump stable. What am I doing wrong? There’s nothing to glue on the underside of the lid, that comes into contact with the lid itself. So again, what am I doing wrong?
I loved these so I made several. The first ones I made I used hot glue gun and it didn’t hold. The pump came loose within the first several uses. So on the next ones I used epoxy and E6000 and it held better but I have to use so much that it’s built up on the lid and it’s noticeable. The rim of the pump isn’t very wide so there isn’t much to adhere to. Do you have any suggestions on this problem.
I have Mason jars in every size and age. I have a bug phobia after bringing home some mothes. I use the jars as cannisters for everything!
Now I want to try these soap dispensers.
Thank you for the wonderful tutorial. I wanted to make a cup of these, but was not sure how. Thanks for sharing.
Love these jar dispensers! I made the initial hole and then used a dremel tool to complete the hole, making it even and smooth. I also make my own foaming hand soap so the jars are perfect dispensers. Thank you for sharing the idea.