This project has been on my to-do list for years, and I finally decided it was time to make my kitchen more functional and organized by creating some additional pantry space. Our kitchen cabinets were overflowing, and extra groceries were always sitting out on the counter, which drove me crazy to see all the clutter. I’ve spent the last year majorly reorganizing all the closets in our home one at a time, which opened up a small closet space next to the kitchen, just on the other side of the staircase.
The last few weeks I’ve prepped, painted, researched, and ordered a ton of pantry organizers, and while this space isn’t 100% finished yet, I wanted to first share the details of the organizers I chose and why. This project has already been a total game changer for how our home functions, and I found some great tips and products that make life so much easier.
Let’s create a pantry!
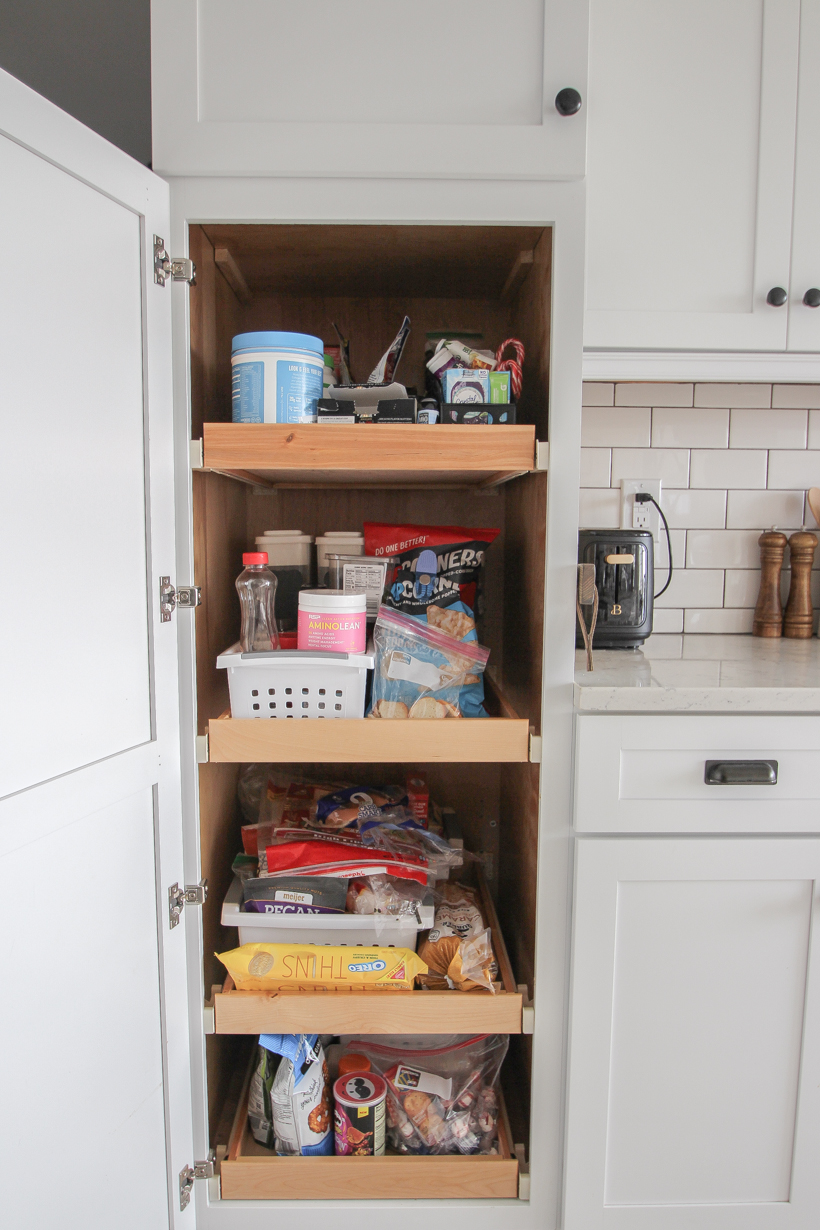
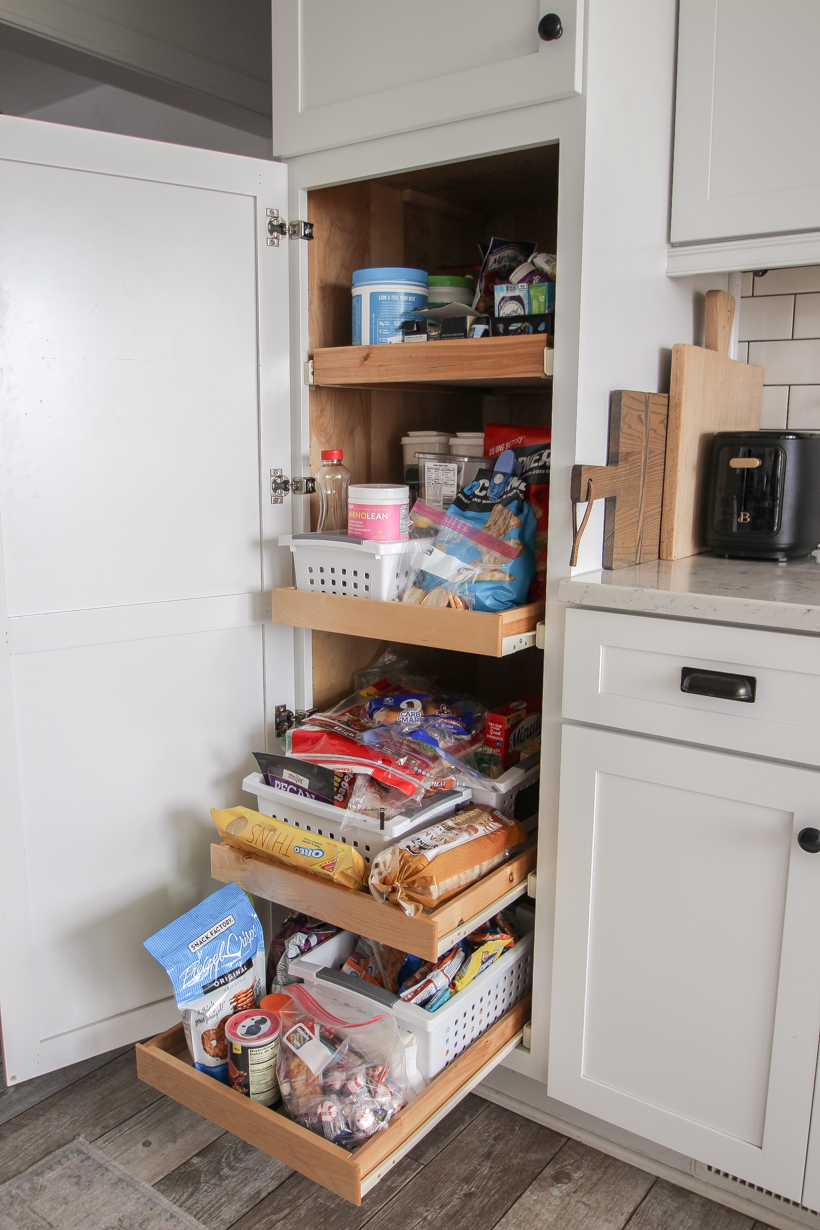
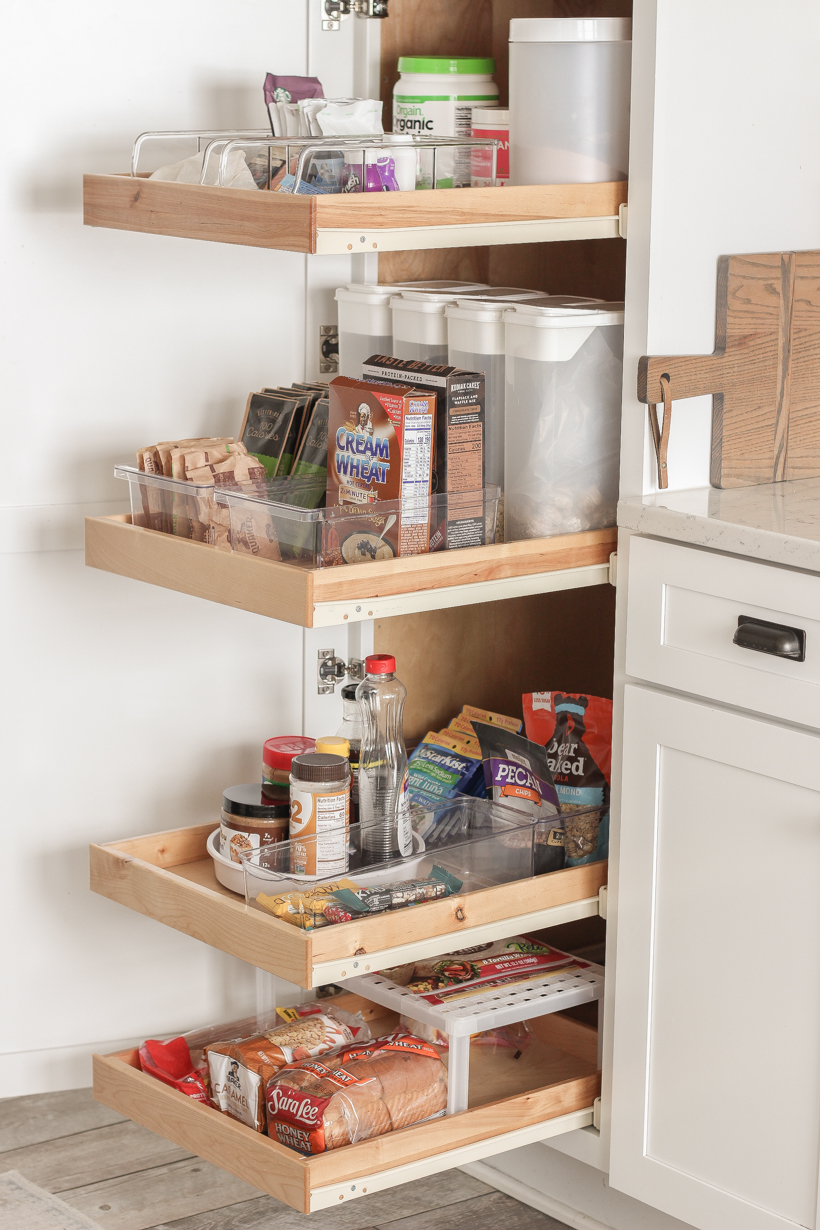
In our kitchen, there is one tall cabinet with four pull-out shelves that I’ve been using for our pantry. For the last six years, I’ve crammed every bit of food for our family in this one cabinet, which is becoming increasingly challenging as I now have two teenage boys to feed. I try to keep the shelves somewhat organized and have a few random bins and containers, but as you can see, everything is just messy and overflowing. It was time to create some extra pantry space.
HOW TO PLAN YOUR PANTRY ORGANIZATION
The first thing I did was empty everything on the shelves and write down what we had, categorized into:
BEVERAGES – tea bags, hot cocoa, protein powder, drink mixes, pre-workout/supplements, coffee
BREAKFAST – oatmeal packets, pancake mix, muffin mix, cereal, syrup, granola, bagels, honey
LUNCH – tuna packets, bread, wraps/tortillas, rice cakes
DINNER – breadcrumbs, pasta, rice, sauces/marinades, onions, potatoes, broth, canned vegetables
SNACKS – popcorn, fruit snacks, chips, protein bars, applesauce pouches, cookies, crackers, nuts/seeds
BAKING – flour, sugar, baking soda, baking powder, brown sugar, powdered sugar, vanilla, chocolate chips
HERBS/SPICES – garlic powder, dried basil, chili powder, oregano, cinnamon, paprika, cumin, ground mustard
OILS/VINEGARS – extra virgin olive oil, canola oil, sesame oil, rice wine vinegar, apple cider vinegar
I did have some of those items like baking supplies and spices stored in other cabinets, but doing this really helped me visualize what all I had and how to best group and organize everything.
TIPS:
- Be thorough when writing down your pantry items and be specific about the different types of packaging. Do you have a bulk container of oats or individual packets of oatmeal? Do you use ground coffee or single-serving plastic pods? These details help decide what types of organizing containers you need.
- Really think about your family’s preferences and the way you use your pantry. Are you never at home for breakfast, but love snacks and keep ten different varieties of chips on hand at all times? Customize your pantry to best fit your needs!
- Throw out anything old or expired, and give your shelving a good cleaning while it’s empty.
- Take measurements of your available space, and write everything down. I even sketched out a little drawing of my pantry space to help me visualize where things would fit best.
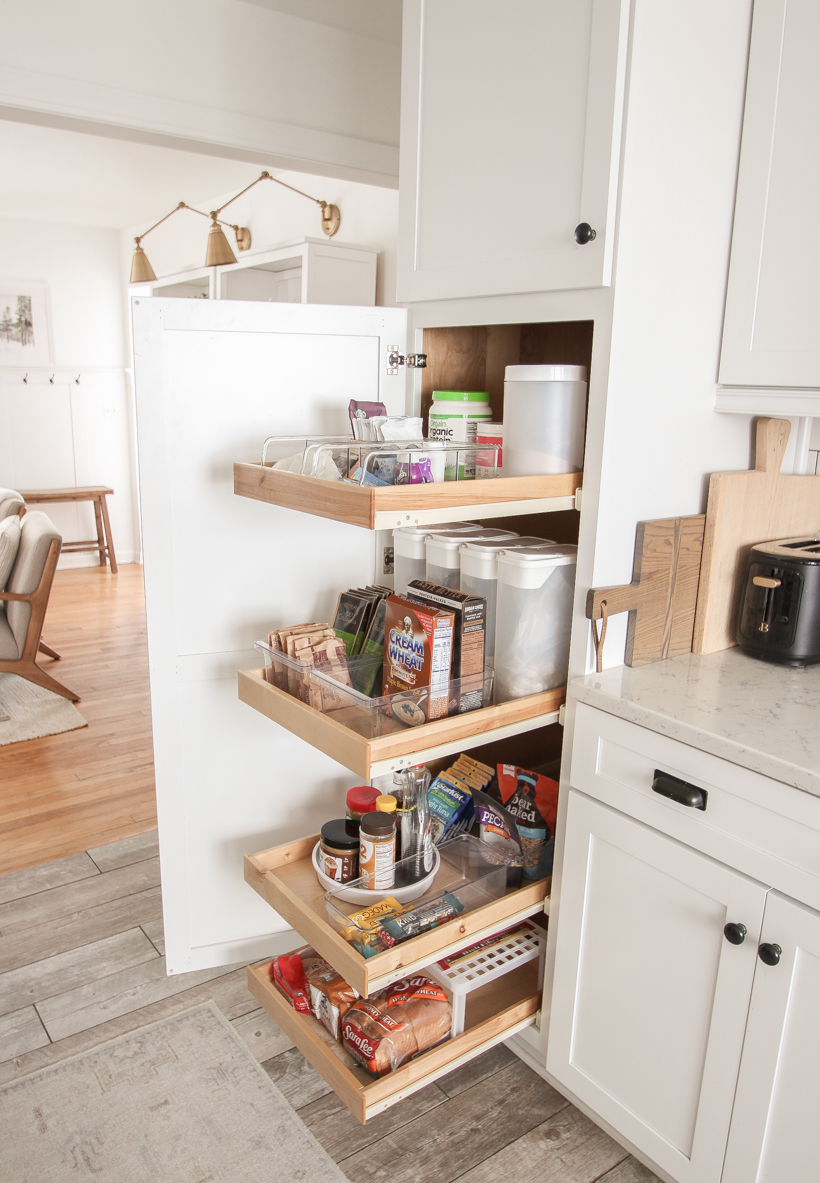
After a TON of research and planning, I finished round one of pantry organization with the tall cabinet in my kitchen…
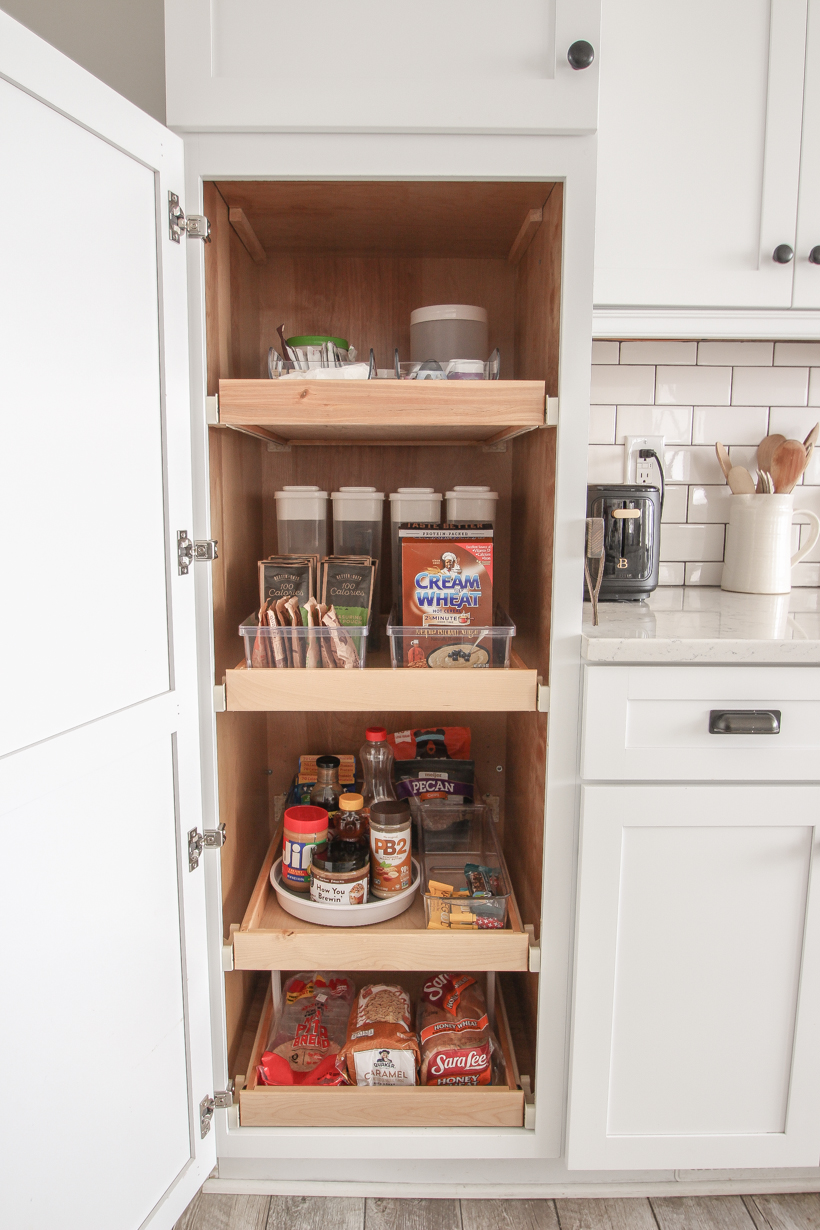
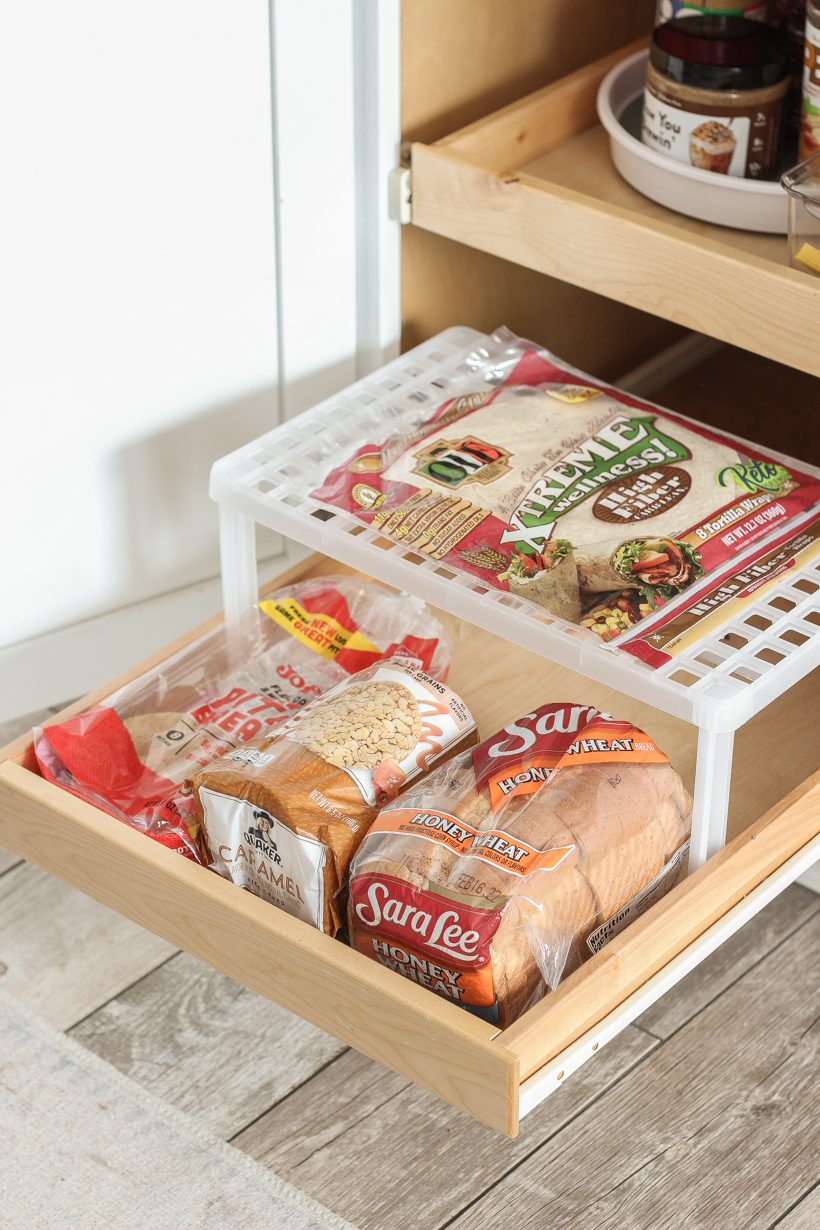
I used one shelf for all our “bread” items: loaves of bread, bagels, pitas, tortillas, wraps, english muffins, hamburger buns, etc.
To maximize available space, I found a small shelf that would fit larger items underneath and flat items (like tortillas) on top.
source: plastic shelf
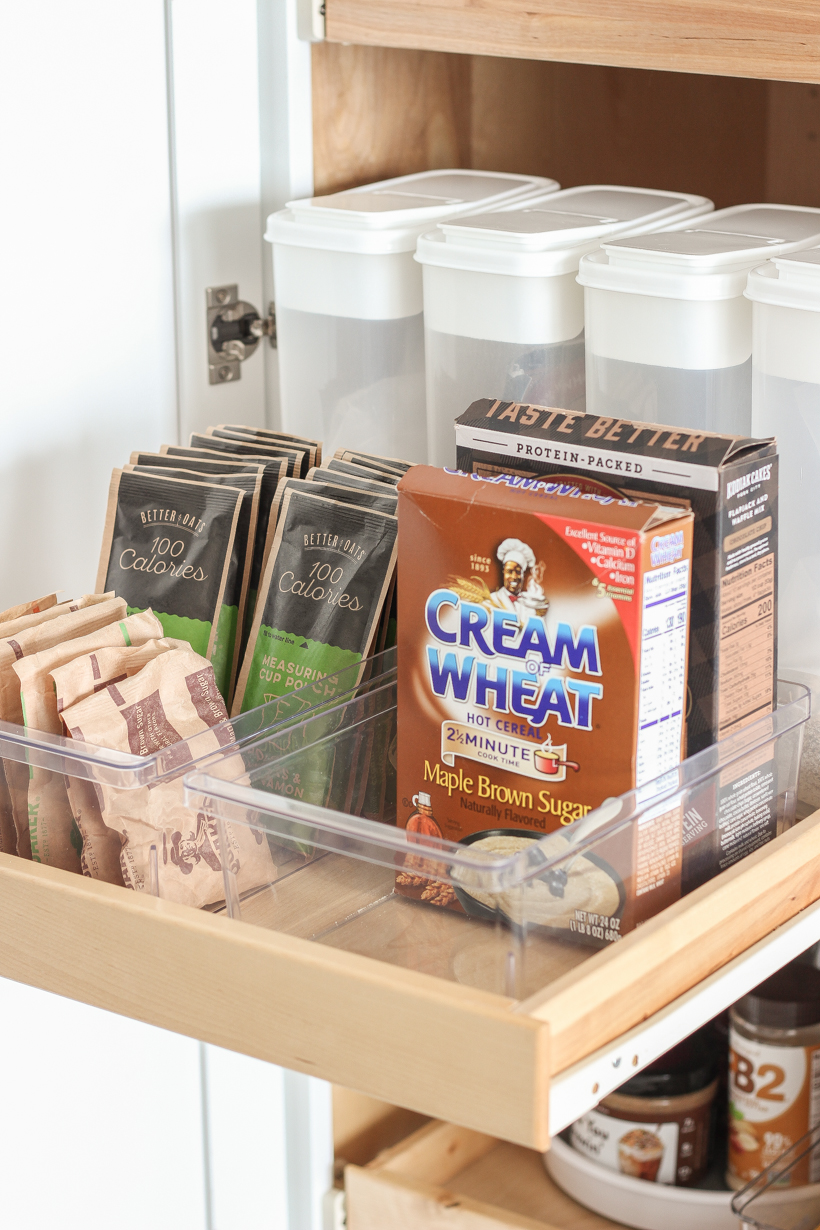
On another shelf I added all our breakfast items: oats, oatmeal packets, pancake mix, muffin mix, cereal, etc.
source: acrylic bins
source: cereal containers
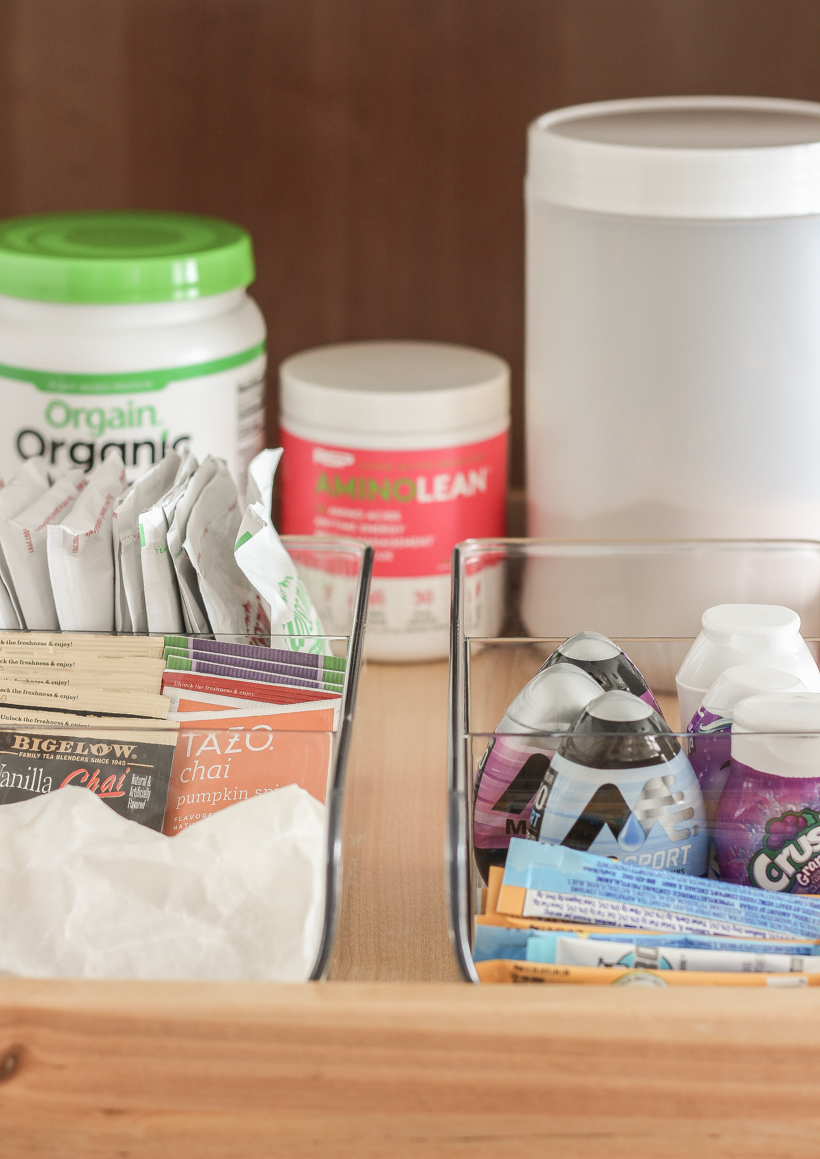
On the top shelf, I placed all our beverage items: tea bags, hot cocoa packets, drink mixes, protein powder, pre-workout, etc.
source: divided acrylic bins
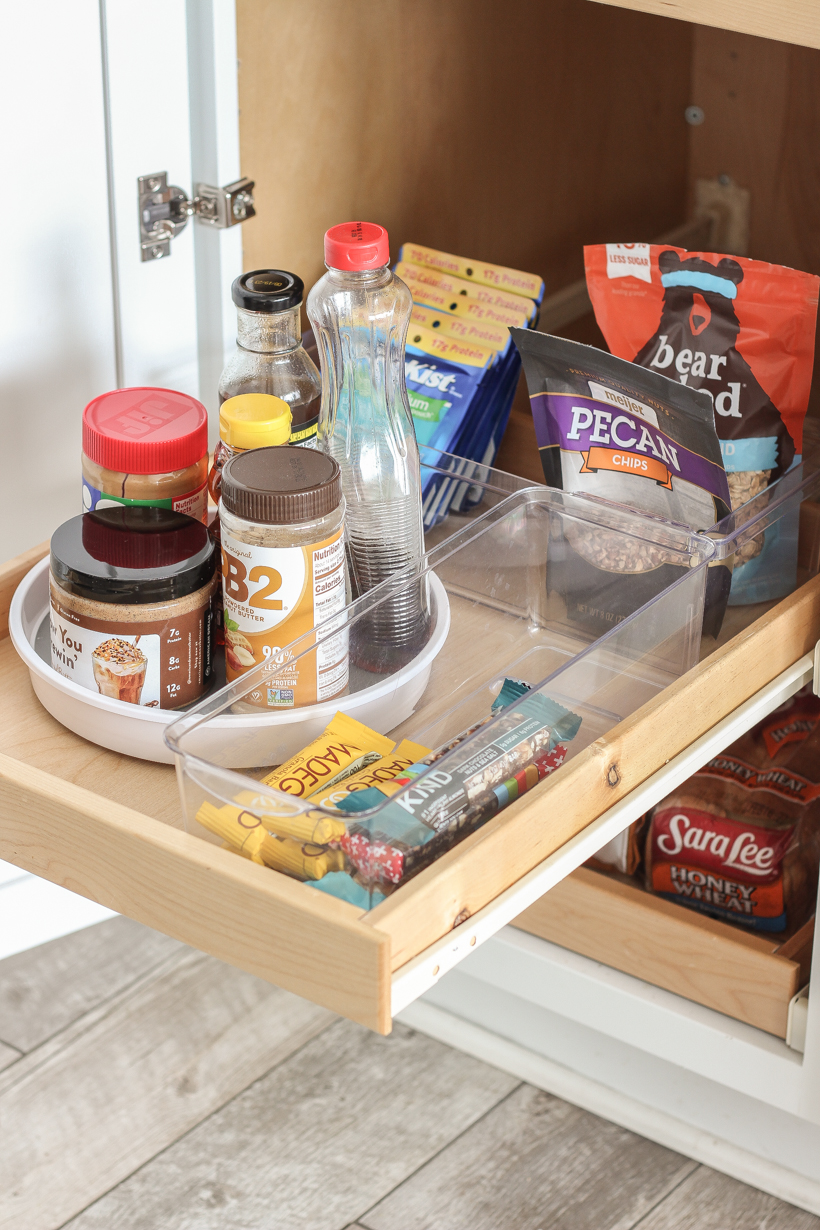
And on the last shelf I added a mix of items I use frequently for my breakfasts/lunches since I am home most often: tuna packets, granola, peanut butter, honey, syrup, granola bars, protein bars, etc.
source: 10″ plastic turntable
source: acrylic bins
One of my goals in this pantry organization was to leave extra space and not fill every little nook and cranny so I don’t end up with groceries sitting out on the counter anymore. I have enough space to stock up a bit or try new things without overflowing the shelves now!
Now for part two of the pantry project…
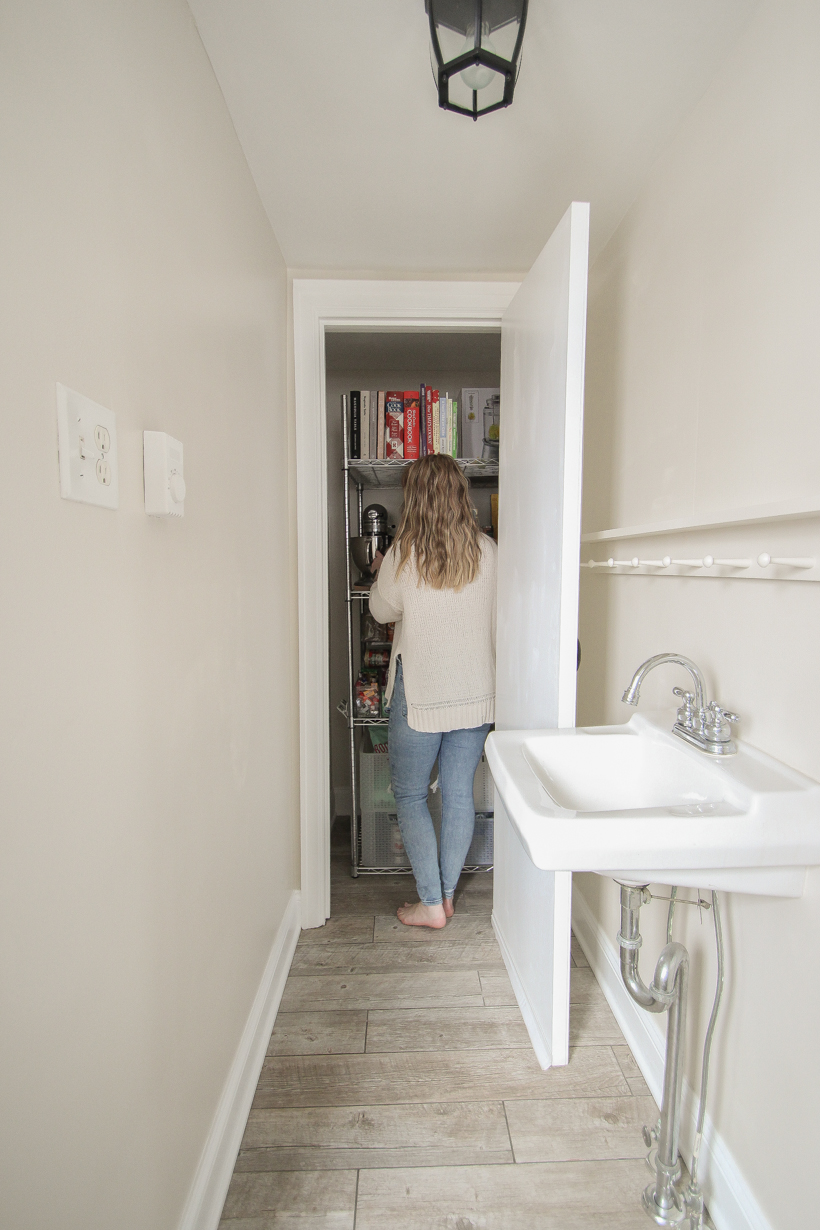
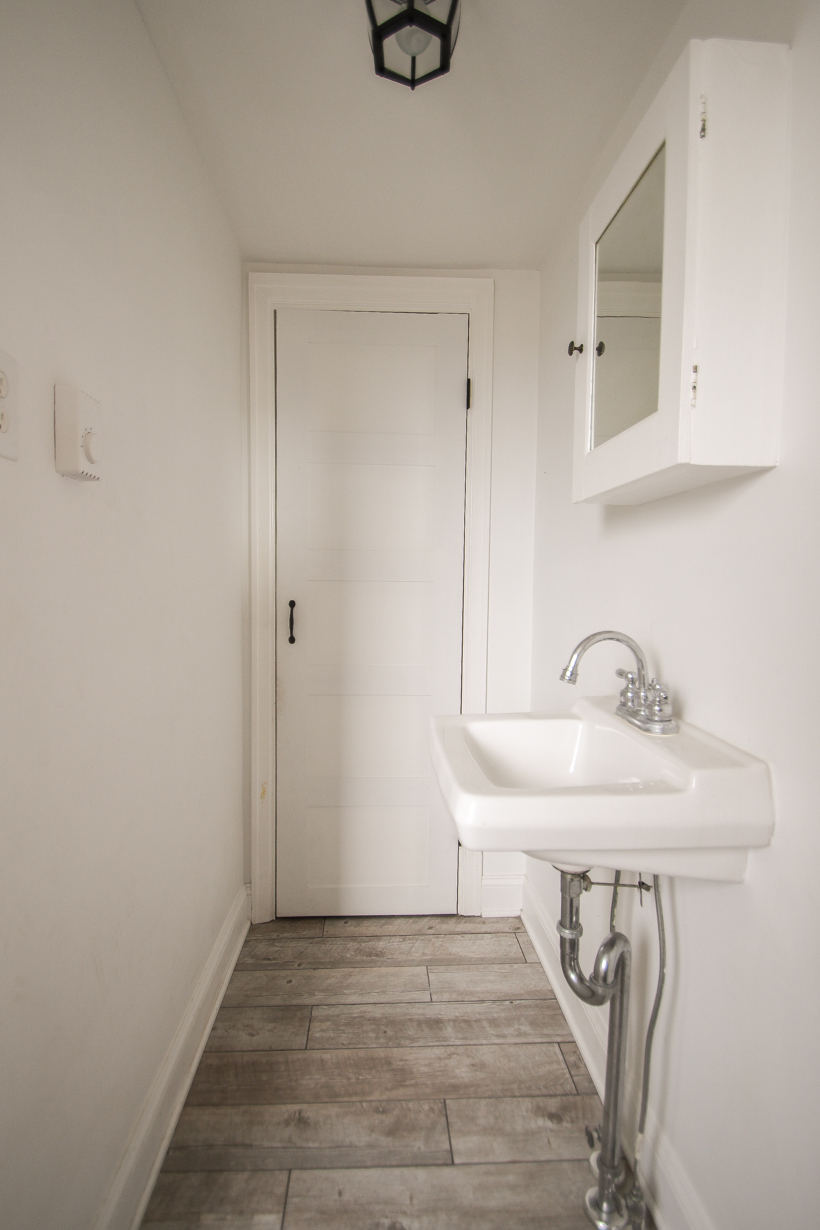
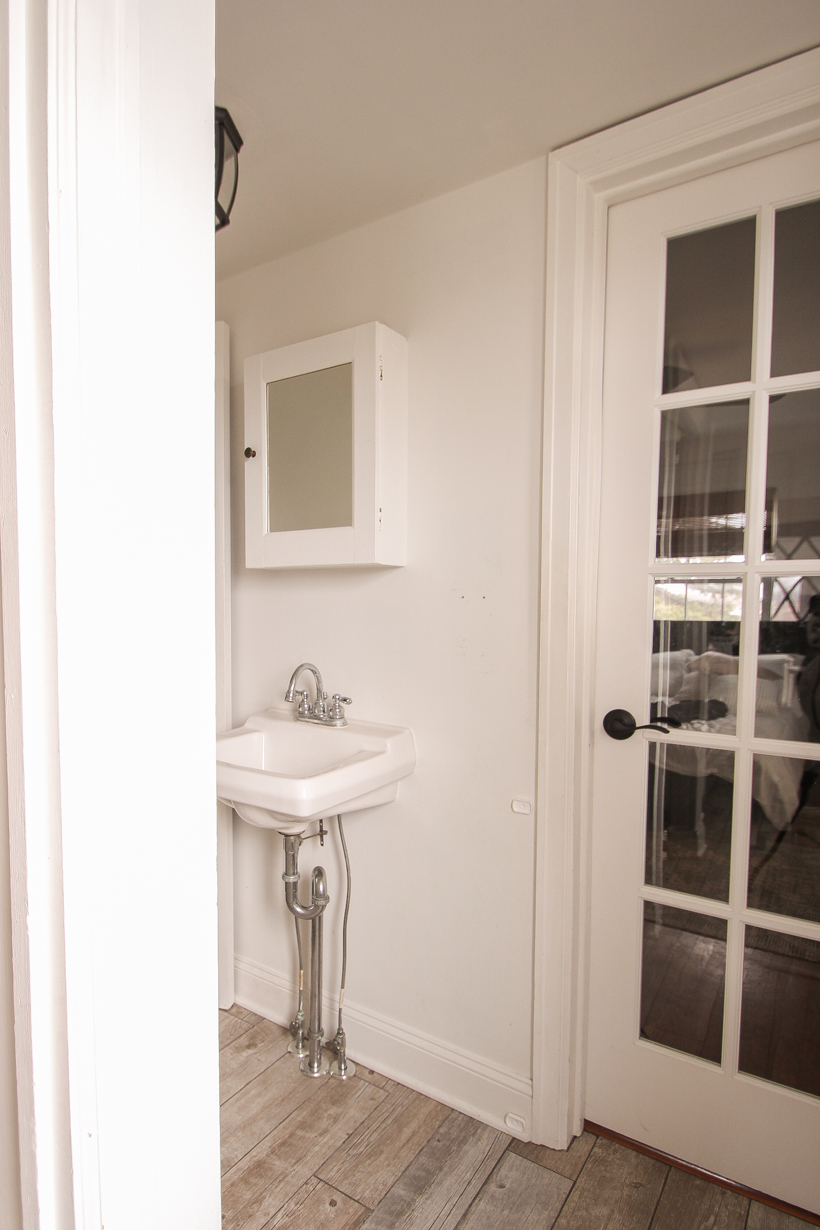
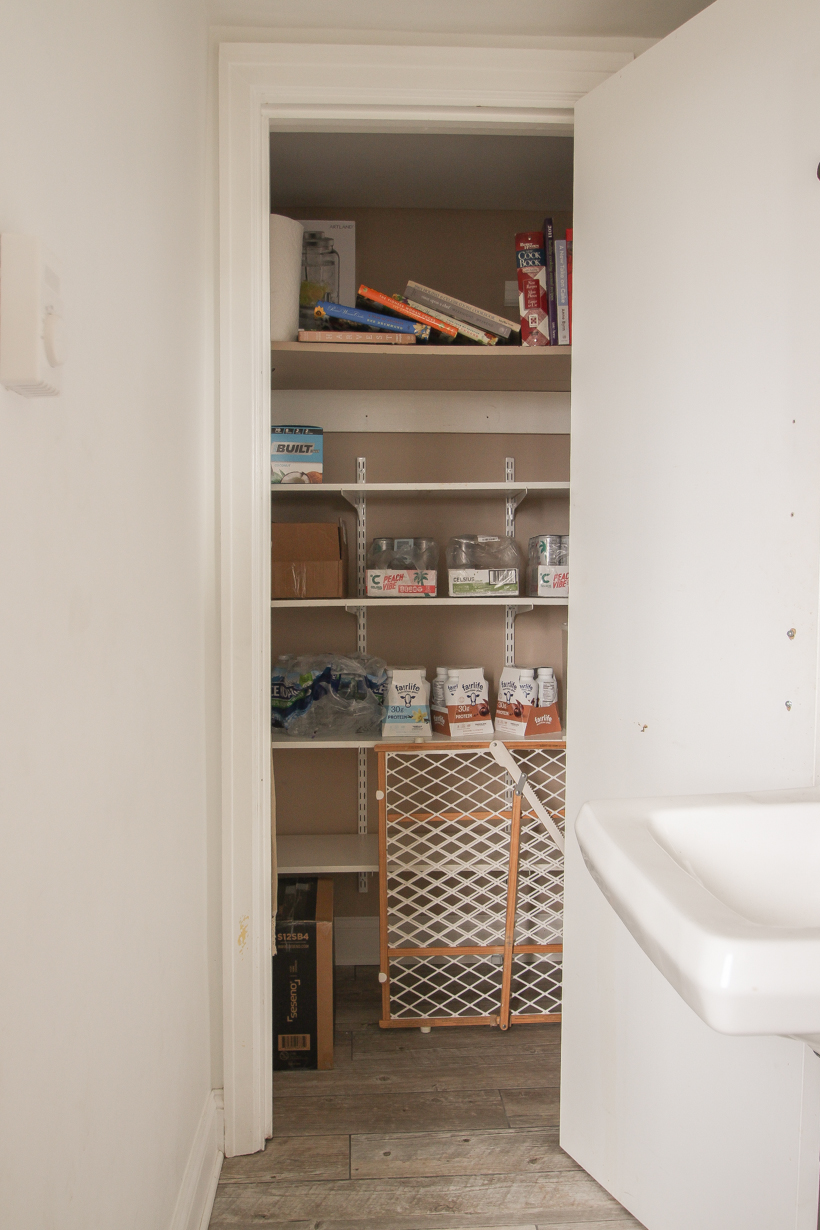
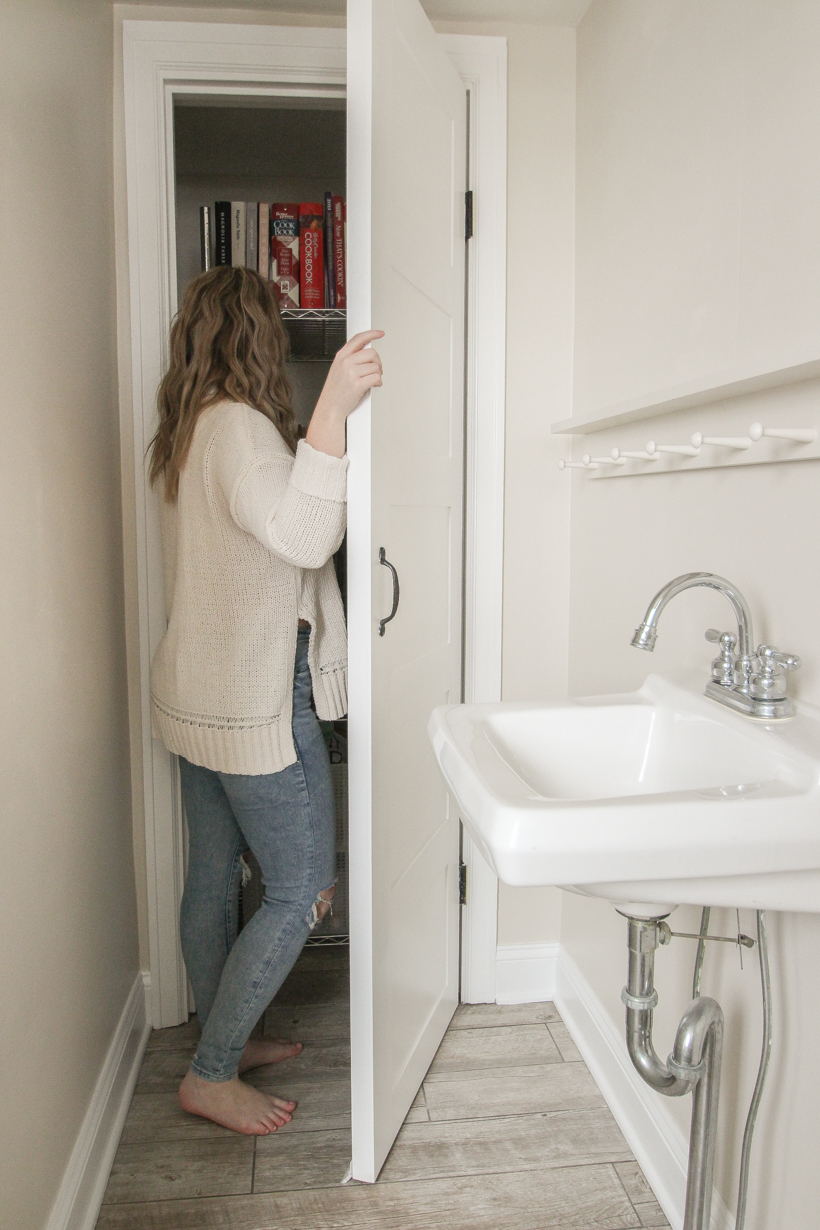
This little sink/closet space is just a few steps from the kitchen and has always been underutilized. Back when the house was first built in 1949, it used to be a sort of “mudroom” where you could come in through the backdoor with a sink to wash up and a closet for coats and shoes. We don’t necessarily need it for that purpose, so I decided to use the closet as an additional pantry and make the sink area a little prettier and more intentional.
Here’s how it looked before I got started…
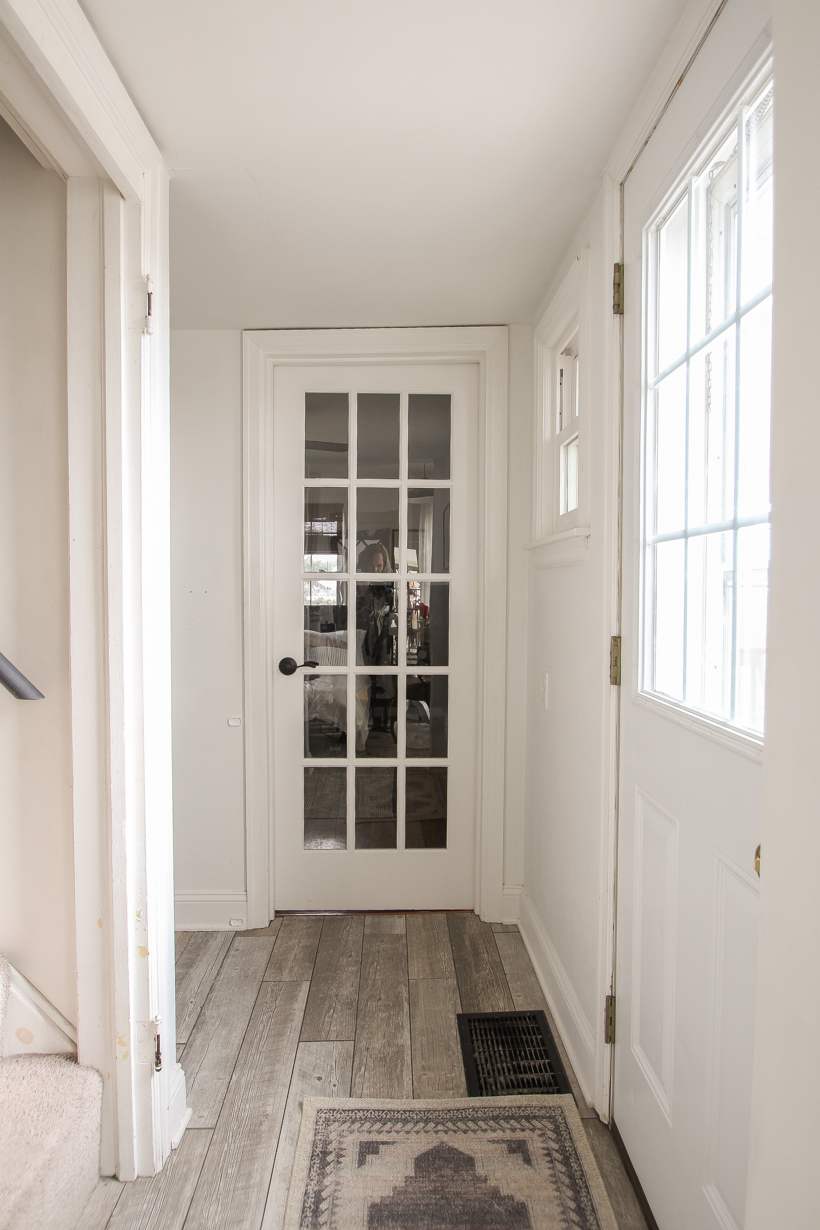
To give you a little better idea of the layout, there is a bedroom to the right of this space and a staircase going to the upstairs bedrooms on the left.
In the view below, I’m standing in the kitchen next to the table with the backdoor to the deck on the right and the stairs in the opening to the left. As you can see, a good coat of paint was much needed.
Inside the closet was a mix of shelving and random extra things. I removed all the existing shelving, patched holes, and painted both inside the closet and the walls outside the closet Edgecomb Gray by Benjamin Moore, lightened by 50%.
Wait… lighten a paint color? What does that mean? Why would you do that?
The simple answer is because my sister has this color in her house, and I like it. The more complex explanation is that lightening a paint color keeps the same color value, undertones, etc. but just makes it lighter (or darker, if that’s what you want). If I were to try choosing a different paint color altogether, I might have a hard time finding this same color (which I really like) in a lighter shade.
HOW TO ASK FOR A LIGHTENED PAINT COLOR:
At the paint counter, I asked them to mix one gallon of Edgecomb Gray by Benjamin Moore lightened by 50% in a satin finish. You’re basically removing 50% of the color “recipe” that goes into the base, making it 50% lighter and changing the LRV, or light reflectance value.
The closet is narrow and deep, and it took a bit of searching to find shelving I liked that made the best use of this closet space. I decided to go with a sturdy metal shelving unit with adjustable shelf height rather than built-in shelving for a few reasons. One, because the price of good quality lumber isn’t cheap right now, and building a pre-made shelving unit felt much easier than building custom shelves from scratch. And two, because I really wasn’t sure how much space I wanted between shelves until I was able to start putting things back in the pantry. I’m a very visual person and needed to see how it would look before committing to something custom built.
source: metal shelving unit – I have the 30″ W x 24″ D x 72″ H 4-tier wire shelving unit
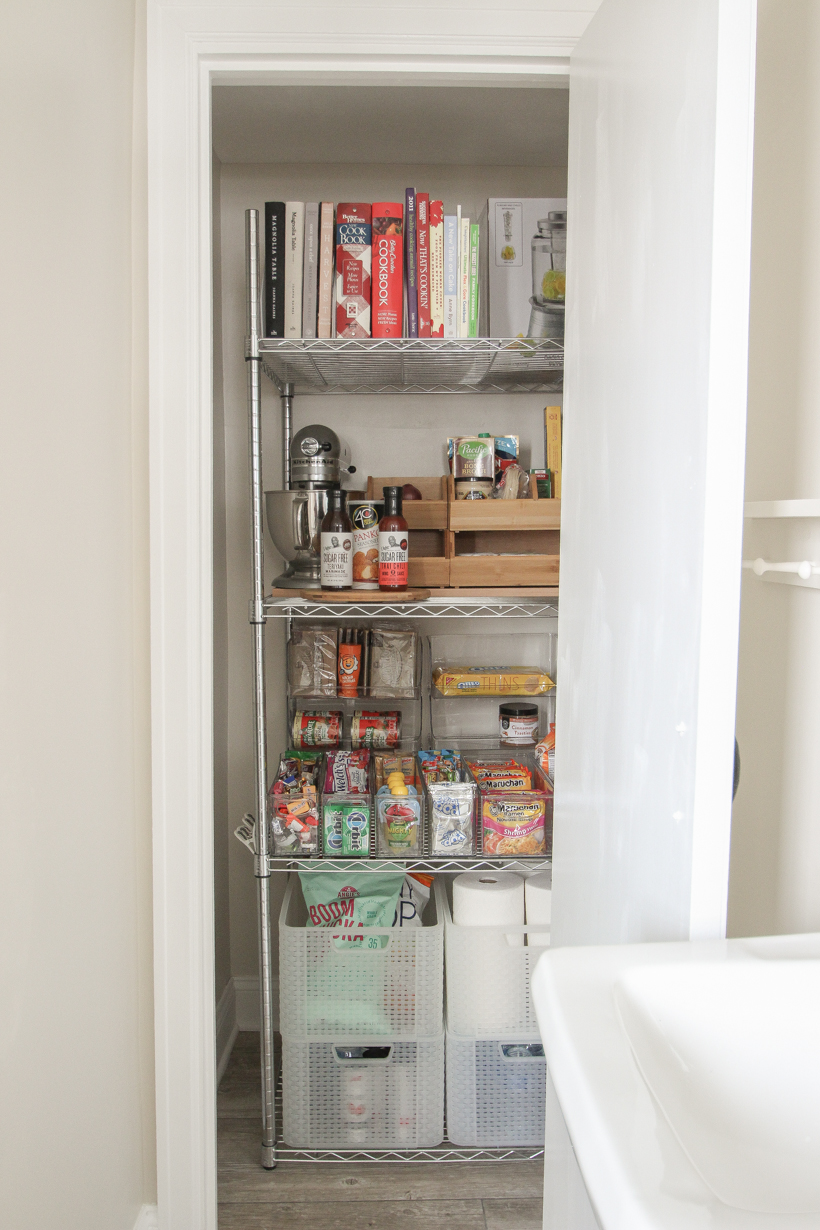
Here is how it turned out!
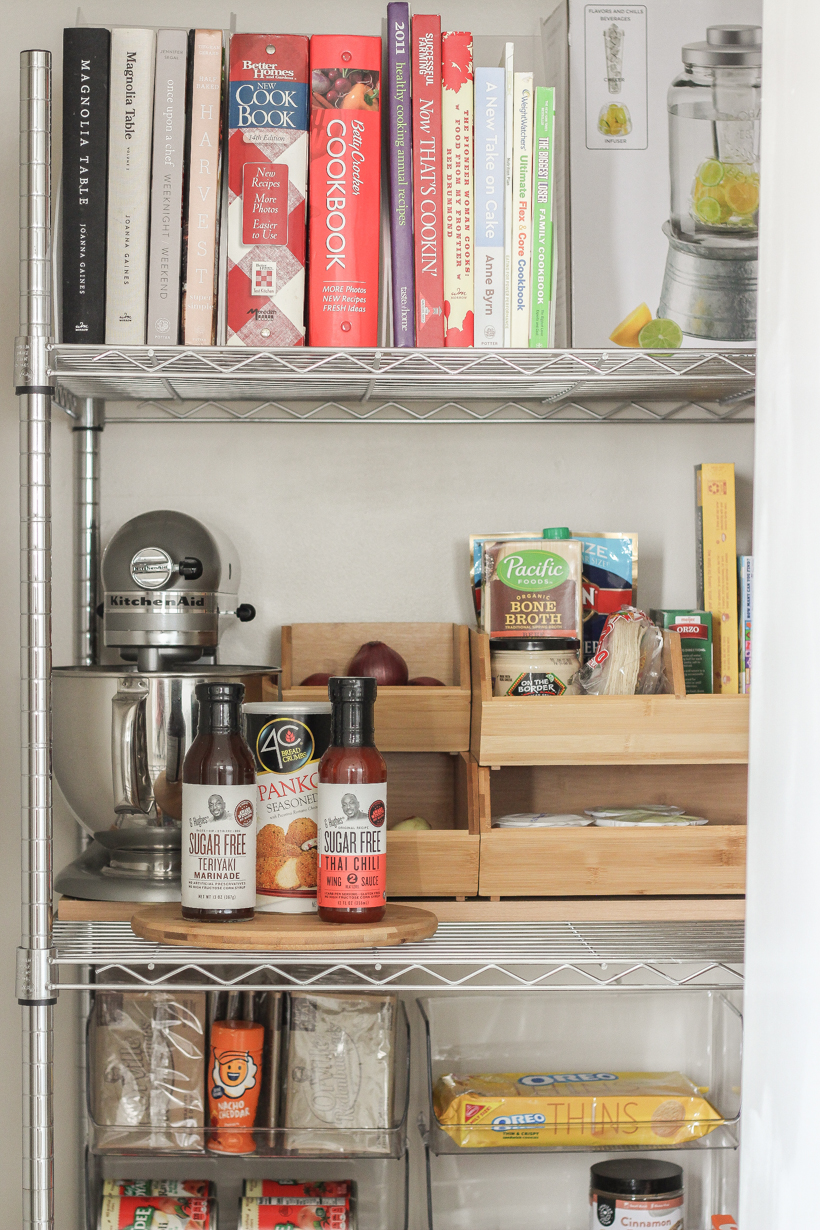
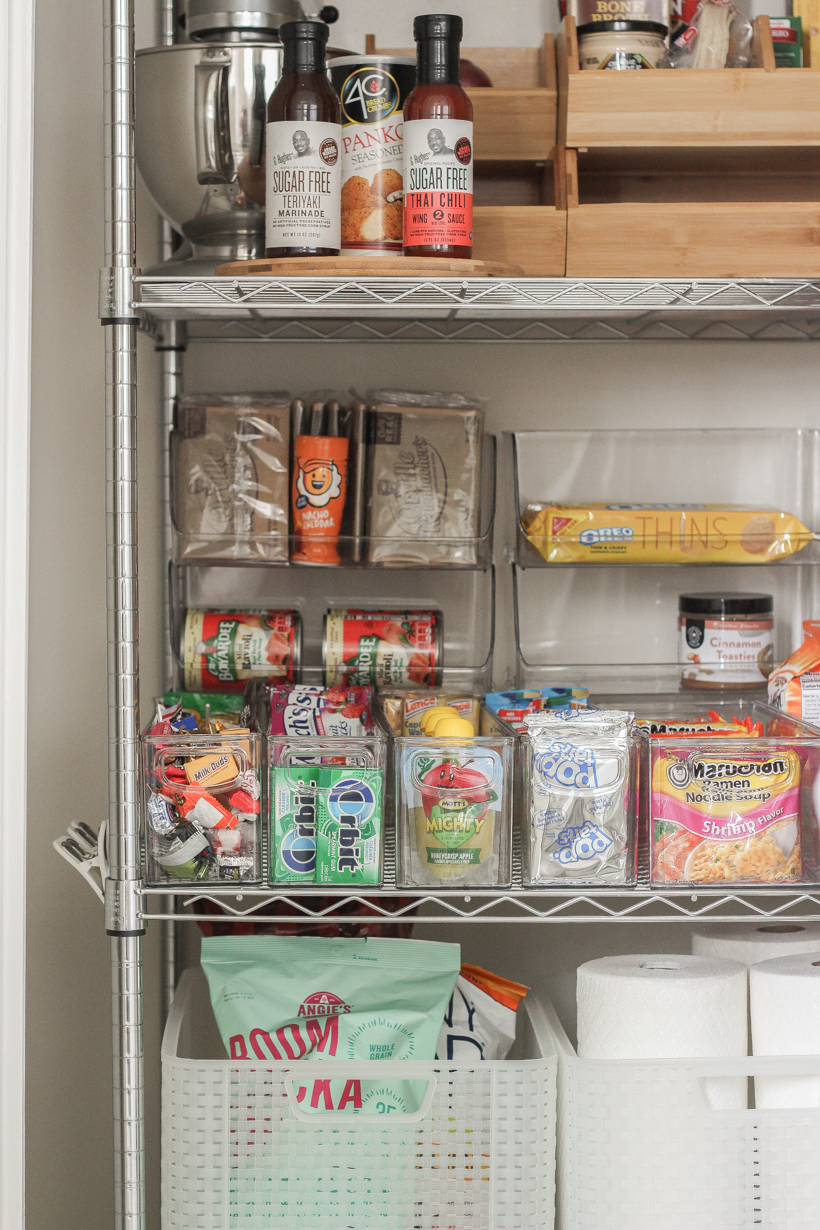
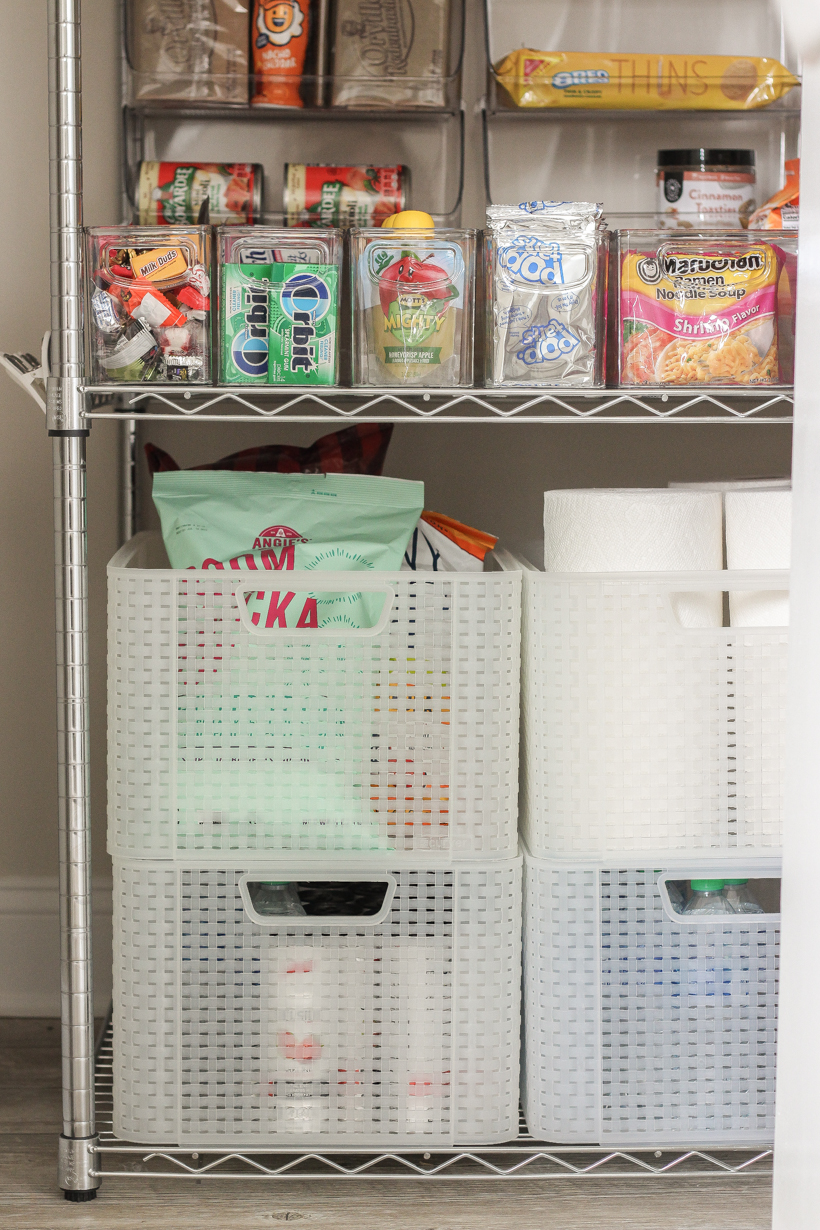
On the bottom shelf, I wanted large stackable sturdy bins for taller items like bags of chips and extra storage for things like paper towels, water bottles, cases of pop, and anything else I want somewhat “hidden” away.
source: translucent basketweave bin with handles
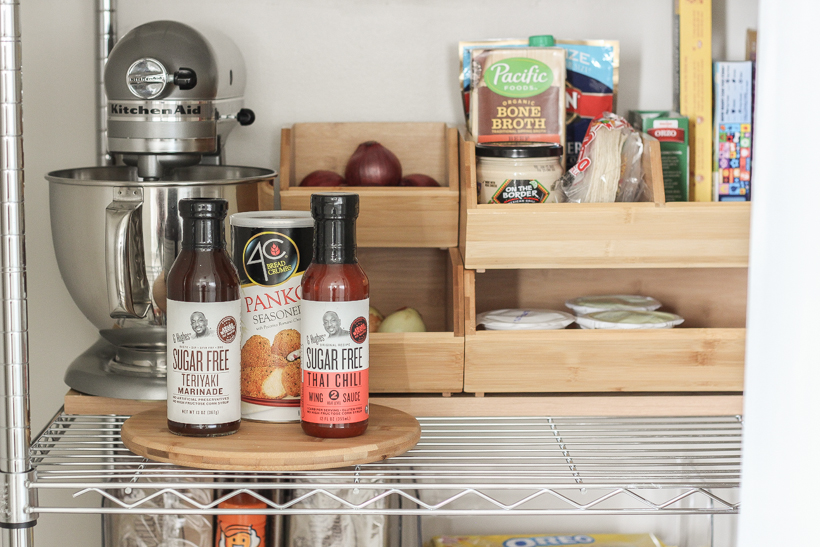
On another shelf I organized all our dinner items: rice, onions, brother, pasta, sauces, marinades, breadcrumbs, etc.
I didn’t necessarily worry about having every organizer I used be the exact same style or material. I focused more on finding pieces that would fit the items we keep on hand most often AND make the best use of the deep shelf space we now have. This is a good example of prioritizing function over fashion… I love the look of woven baskets in pantries, but they would be much harder to clean with crumbs and spills and would also get caught on the metal wire shelving. I spent days looking at dozens of websites and hundreds of organizing options, trying to find things that were affordable, durable, easy to clean, and easily accessible. My brain hurt after awhile trying to narrow down the best options for our space, but I am so pleased with everything I chose. Putting in the time to really plan out the best organization for our pantry has more than paid off, and I highly recommend writing everything you keep in your pantry down like I mentioned before. It’s so helpful when you actually go to pick out organizers!
source: bamboo lazy susan– I have the 10″
source: bamboo bins – I have the large divided bin, the mini, and the medium deep
source: kitchenaid stand mixer
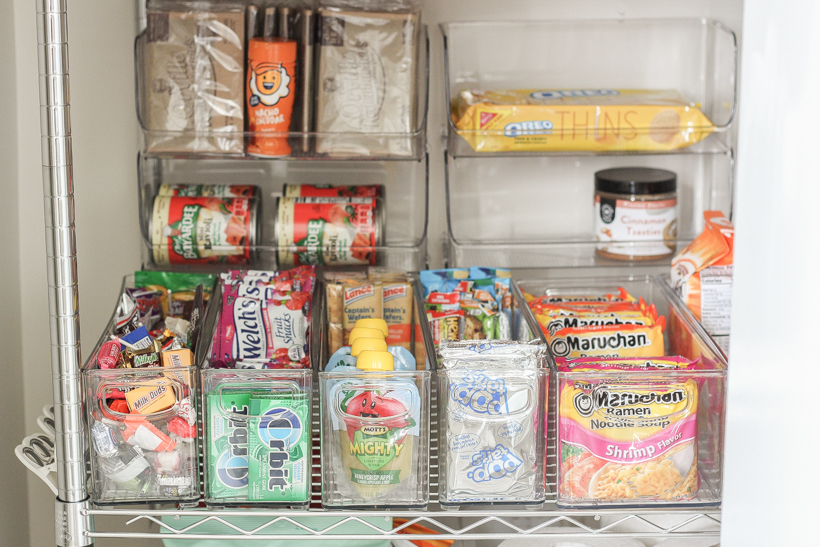
On one of the lower shelves, I filled it with the kids’ favorite things: fruit snacks, crackers, applesauce, granola bars, noodles, ravioli, popcorn, cookies, and their never-ending supply of Halloween candy.
I chose clear acrylic containers for this shelf so the boys could easily see what we have for snacks, and I can see what needs restocked. And if you look on the left side of the shelf, you’ll see a row of chip clips that are magnetic so I can conveniently store them on the side of the metal shelf when we’re not suing them!
source: narrow acrylic bins
source: wide acrylic bins
source: stackable wide opening acrylic bins
source: magnetic chip clips
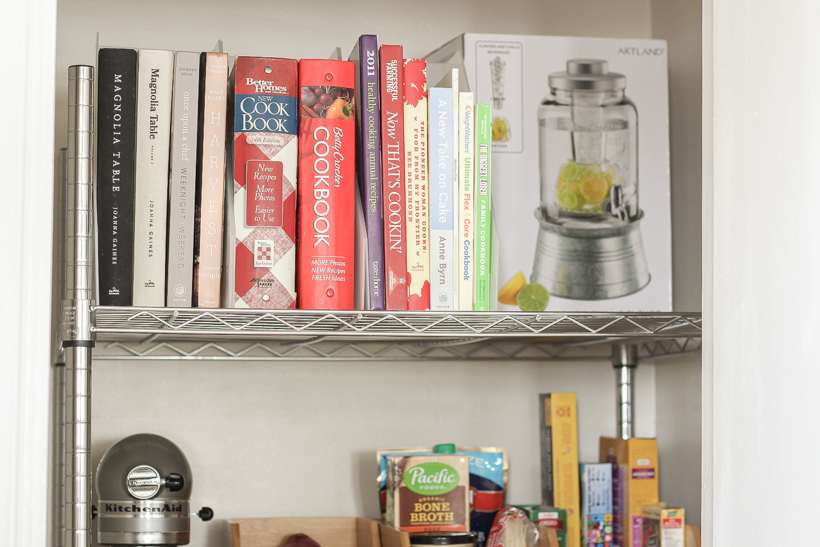
And on the very top shelf I have my cookbooks and some extra space for other random kitchen items I need to store. I found some thick, wide plastic magazine files to help keep the cookbooks organized and tidy.
source: magazine file
And that’s where we’re at so far! I cannot tell you how much easier and more enjoyable this project has made our lives, and I find myself spending more time cooking in the kitchen now that I have more space and everything organized.
What questions can I answer for you regarding the pantry organization?
SHOP PANTRY ORGANIZERS:
As I mentioned before, I still have some finishing touches to do for the sink area, and I’ll be sure to share photos once that is completed as well. Thank you for being here today, and I hope this gives you some good ideas for organizing your own pantry and kitchen!
As always, I sincerely appreciate you shopping through the links I share, which allows me to make a small commission from your purchase while your purchase price stays the same. When you use my affiliate links, I’m better able to create content for this blog as well as support my family, and I thank you from the bottom of my heart for supporting what I do!



thanks for your great ideas in terms of a variety of storage units…. you have given me and my pantry-less home, HOPE!!!!!!
Great ideas. I’m in the process of organizing my pantry and your suggestions came at a good time. Love the paint color and how you styled the shelf above the sink. My laundry room sink area definitely needs help with a refresh. Thank you!