

Hello there Love Grows Wild Readers! It’s Ashley again from Cherished Bliss! I hope you are all recovering well from the Holidays! I finally got all my Christmas decorations taken down over this past weekend and I am so ready to get some DIY projects done! If you are familiar with my blog you already know this, but I moved into a new house back in August. It is my 4th house in a two year span after renting, and this one is mine to paint, tear down walls, and do whatever I please! Ok, my husband might say no to the tearing of the walls… but you get the idea ; ) There are lots of things I want to do with this house, but today I’m going to share a little project with you for the nursery I’m working on for Adam.
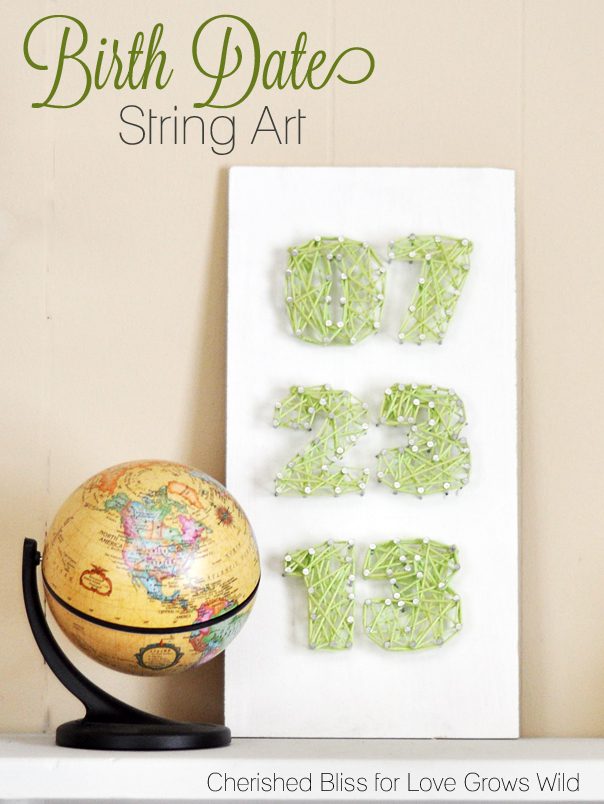

I am going with a Vintage Travel Themed Nursery, so I wanted to incorporate some items that looked like “signs”. I also wanted to throw in some personal touches to the room without it screaming look what day I was born. Not that there is anything wrong with that, just not the style I was going for ; ) so I decided on this string art. He was born on July 23rd of 2013 so those are the numbers I went with. Sneaky eh? This day was an important one for me, not only is it the day I got to hold my new little man, but it is also the last day I will hold my very own baby for the first time! We are done having kids and I will never have that again : ( I now understand why the last kid gets babied a little more. It’s bitter sweet knowing that Adam is my last kid to potty train, the last one I will see go to his first day of kindergarten, the last baby in the house. Ok, now I’m just getting all emotional… let’s take a look at the project ok? ok! Let’s get some supplies together.
Supplies:
– A piece of wood that is cut to the size you want it. Mine is 6″ x 12″ (craft wood from Hobby Lobby)
– 3/4″ nails (depending on thickness of wood. You want the nails 1/2″ longer than the thickness of the wood)
– Paint and paint brush
– Hammer
– Embroidery String
– A print out of what you will be tracing out
Tutorial:
The First thing I did was create a template for the numbers. I just sized it to the dimensions I needed based on my wood and printed it out. Then I painted my piece of wood white and let it dry. Now take your supplies to a place where you can hammer a bunch of nails repeatedly into your piece of wood. I have to admit, I had a headache by the time I was done. So worth it though!

I cut my paper down to the size of my board so that I could center it easier, then just tape it in place and start hammering your nails in around the edges of your text. A few tips while doing this, don’t just do an entire number then move on to the next. I started that way and it got hard to hammer into some of the places I needed to because my fingers wouldn’t fit. Instead I found that going across the top of the numbers all the way from left to right. Imagine you drew a grid across the numbers… then move down to the next row and go all the way across. This just helped me to get into some of the tight areas.

As you can see my nails aren’t all perfectly straight. This is ok, you can’t really tell when you wrap the string around, but I was also fine with the imperfection. If you like everything perfect you might want to take your time and go slow while hammering. Once you are done hammering just rip your paper up. I had to use tweezers to get some of the paper up that was stuck in between the nails. Now it’s time to wrap the string around.

There is no right or wrong way to do this. I just tied a knot around an easily accessible nail and started at it. Then when I was happy with how the string looked, I went all the way around the outside of the numbers to help define it a little. Just keep in mind you might need to wrap it all the way around one nail when making corners and such. It will all make sense when you get started ; ) Then I wrapped back around to where I started, tied another knot, trimmed off some of the excess and stuck the tails under in between the nails (under the string).

And that’s it! Now you just have to find the perfect place for it! : ) If you want to see more of the nursery you can check out some of the projects below : )
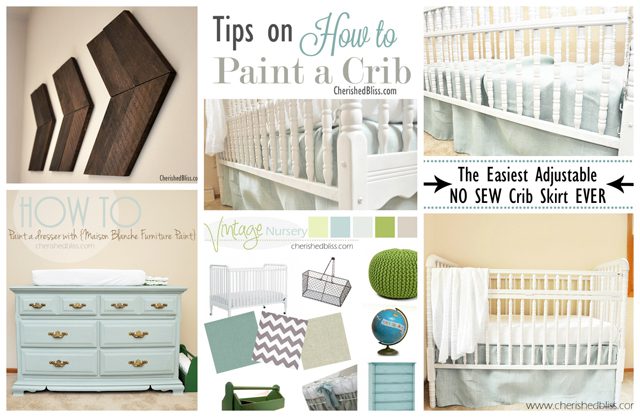 Wooden Arrow Tutorial // How to Paint a Crib // Crib Skirt Tutorial // Dresser Redo // Design Board
Have a beautiful day!


What a cool idea!!
Isn’t that neat? I can’t wait to try it somewhere in my home!
Thanks Megan! : ) It’s really fun too!
This is so sweet and would make such a lovely gift. 🙂
I agree, Brandi! This would be perfect for a baby shower! Thanks so much for stopping by!
Oh, this is adorable. Your first paragraph about your last baby choked me up a little. Very sweet.