
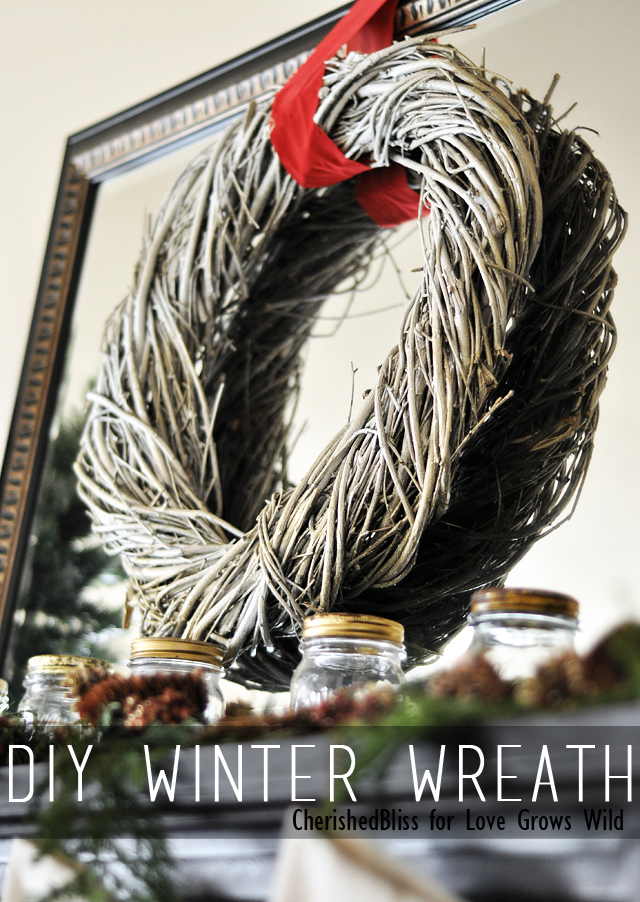
Hello there, it’s Ashley again from Cherished Bliss! I have been in major Christmas mode lately, but as bloggers we are always thinking ahead. I don’t have a whole lot of time on my hands so I try to make things as interchangeable as possible! This year I created a Rustic Christmas Mantel featuring my “winter wreath”… I call it a winter wreath, because it’s on my Christmas Mantel, but it totally works after the season is over! As a busy mom of 3 that is right up my alley!


When I imagined this wreath, I wanted it to look like it snowed little flakes of gold, and adore how it turned out. It is kind of hard to see in the pictures but it does look like there is snow on it. It just makes me so happy to stare at this wreath in one of those rare occasions where I am sitting on my couch cuddled up in a blanket! : )
You only need a few things for this:
-Rattan Wreath
– Gold Spray Paint (with primer)
– White Spray Paint
– Gold Glitter Spray Paint
So let’s get started. First thing you’ll want to lay your wreath out on a drop cloth so you don’t get paint on anything. Because no mater what I might think… you can’t spray paint without getting it anywhere ; )
 Then we are going to use some gold spray paint to completely cover the wreath. I personally didn’t flip mine over to do the other side because you can’t tell at all…. and I’m super impatient and was more than ready to hang it up!
For the spray paint I used Krylon’s Gold that has the primer and spray paint in one. I wanted to use the primer one because I felt it need a good base coat since it had a little bit of a glossy-ness to this particular wreath.
 It didn’t come out super gold because of the brown base, but I didn’t want that anyways so even better right?!
Then once you have your base coat of gold on you will just need to spray a little white on, I stood back pretty far while spraying it on so it didn’t get thick spots of white.
When you are happy with how that looks, add some of your spray snow, and then top it off with some glitter spray. Since this is a wreath and not a piece of furniture I didn’t let anything dry before moving on to the next steps. It’s faster that way ; )

Now once you spray the snow on I did let that dry completely, and then I sprayed on some spray polyacrylic to hold the snow on and just seal everything up nicely. Then once that’s dry you are ready to go! If you aren’t happy with how it looks just keep spraying. It took me a few times to get the right balance of white and gold in there, but it is pretty hard to mess up ; )
After it is all dry you get to take it in and hang it up! YAY! I just took some ribbon and attached it to the wall behind the mirror!

Now go grab yourself some hot chocolate, cuddle up on the couch and enjoy this wonderful Holiday season!
Have a Merry Christmas! Hope to see you around over at the blog!


Ooh, this is so cute and simple! I love decor that can translate into the rest of winter as well. Great job! I’m coming over from the Strut Your Stuff link up. I’d love to you see pop over to my site!
http://www.lifeasmrslarson.com
Have a great weekend!
Jessie
Hi Jessie! Thanks so much for stopping by! I agree, any decor that I can keep up for more than just a few weeks is perfect for me!