

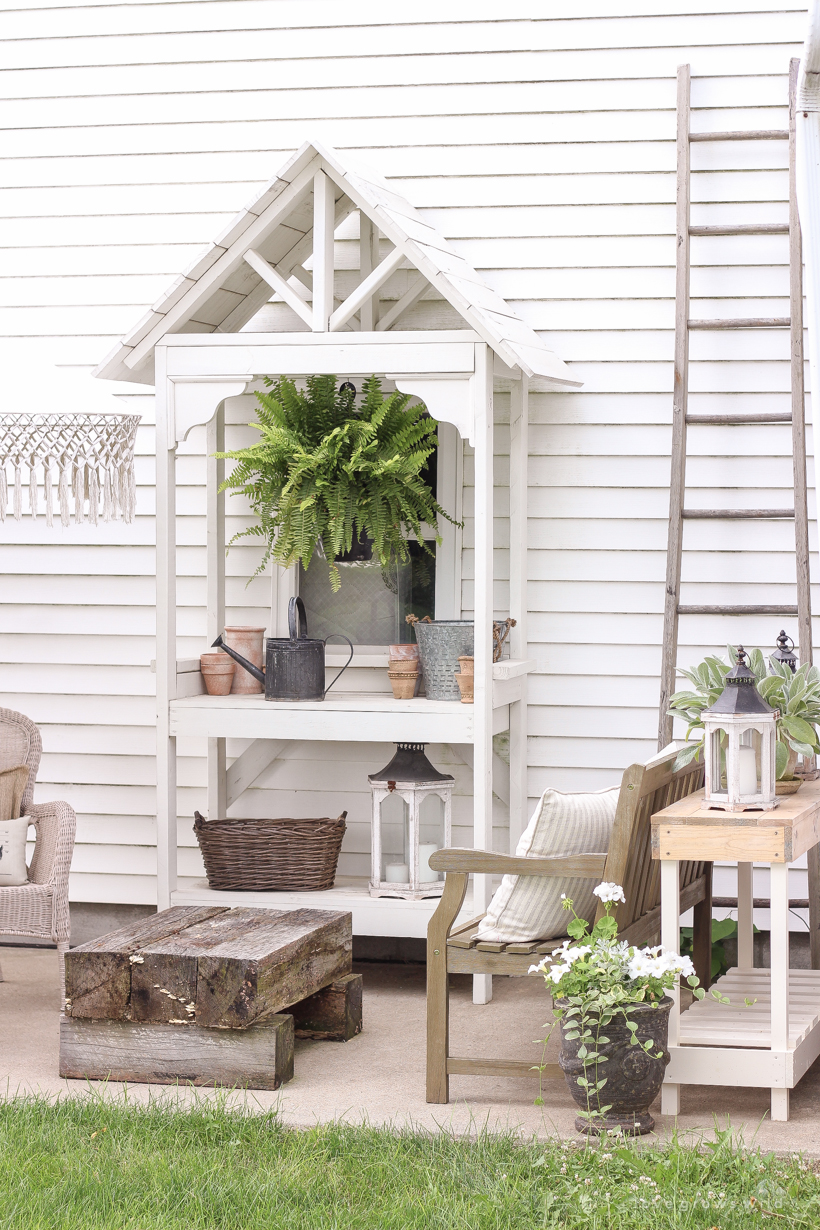
One of my favorite new additions to our patio that I shared on the blog last week is this cute little outdoor console table. All spring and early summer I looked for a simple table I could use outdoors, but only found limited options with prices way out of my budget. I was surprised how hard it was to find something like this! I decided that instead of spending more money than I was comfortable with on a table to sit outdoors in the elements, I would build what I had in mind and weatherproof it the best I could. And by popular request, today I’m going to share how to build an outdoor console table!
Some links in this post are affiliate links, which allows me to make a small commission from your purchase, but your purchase price stays the same. Thank you for helping support our blog and keep it going!
SUPPLIES:
tape measure
pencil
saw
drill
wood glue
2″ exterior screws
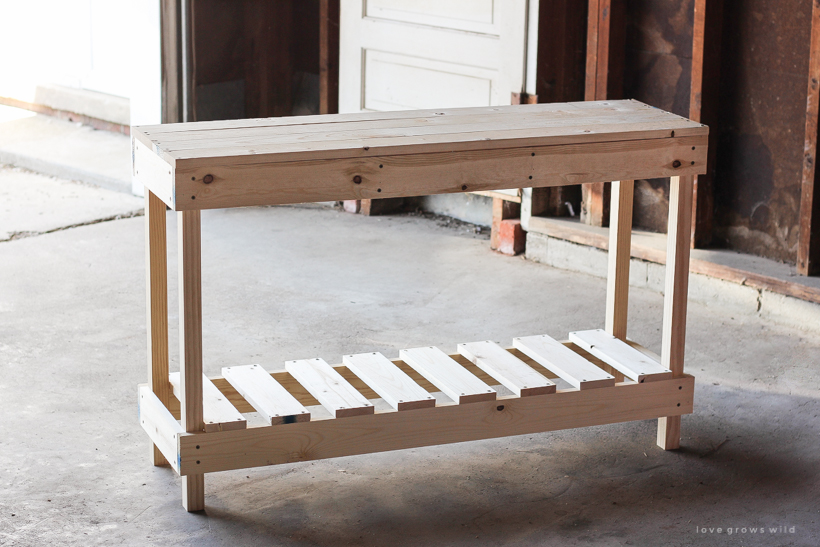
CUT LIST:
4 – 2 x 2 cut to 29 1/4″ (legs)
4 – 1 x 4 cut to 48″ (front + back aprons)
4 – 1 x 4 cut to 12 1/2″ (side aprons)
4 – 1 x 4 cut to 48″ (top)
8 – 1 x 4 cut to 14″ (bottom shelf)
2 – 1 x 4 cut to 12 1/2″ (shelf supports)
INSTRUCTIONS:
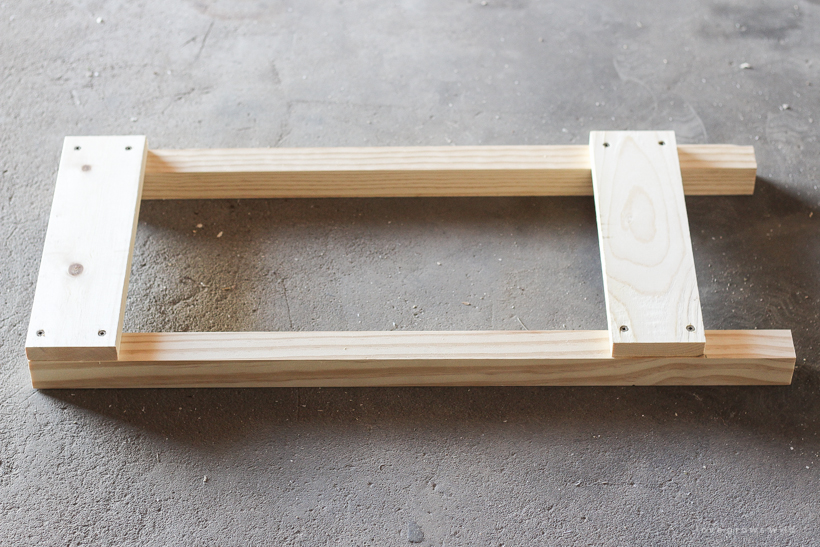
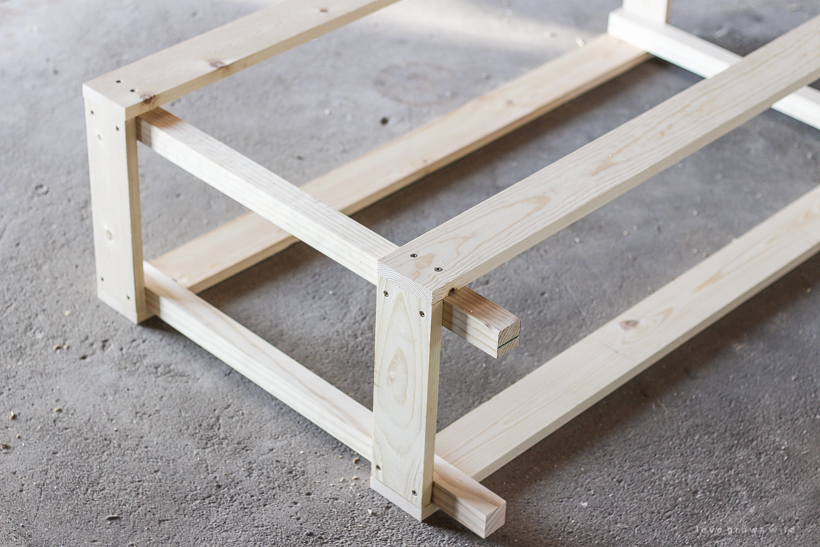
Attach two side aprons to two of the legs using wood glue and 2″ screws. The top apron should be flush with the top of the legs, and the bottom apron should be 3 1/2″ up from the bottom of the legs. The sides of both aprons should be flush with the sides of the legs. Repeat this step with the remaining two side aprons and legs.
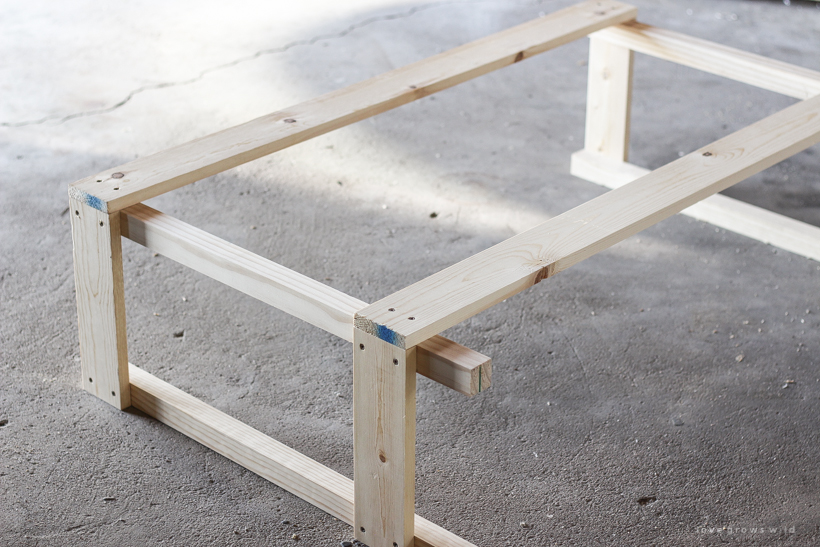
Connect the side pieces you just built by attaching the front and back aprons to the legs. The top apron should be flush with the top of the legs, and the bottom apron should be 3 1/2″ up from the bottom of the legs, as done in the previous step with the side aprons. The ends of the front and back aprons should cover up the ends of the side aprons.
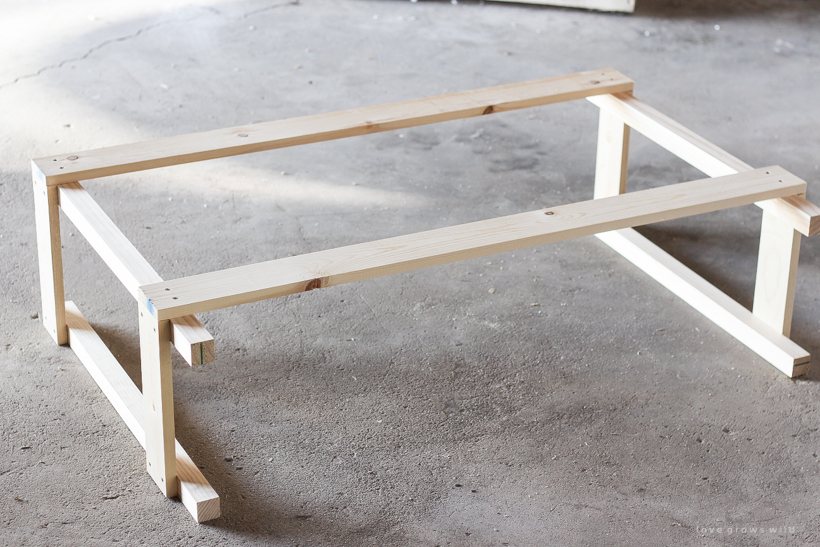
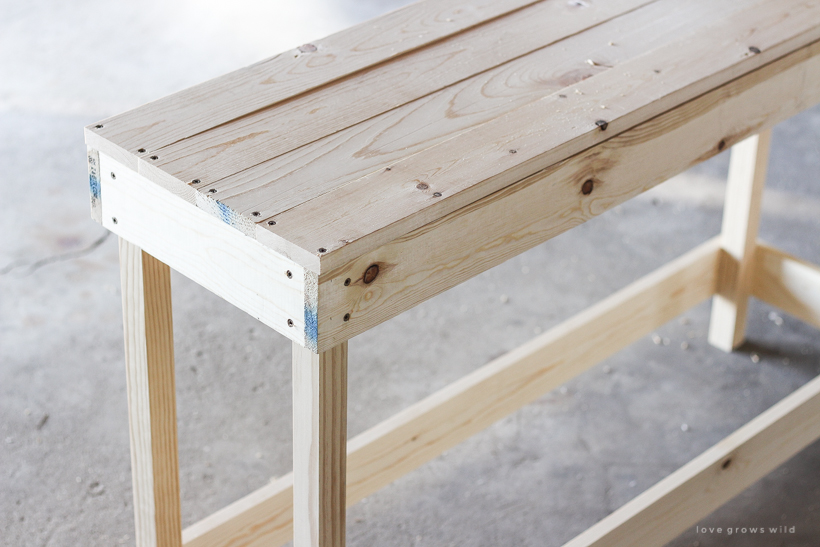
Attach the four 48″ top boards with screws going into the top side aprons.
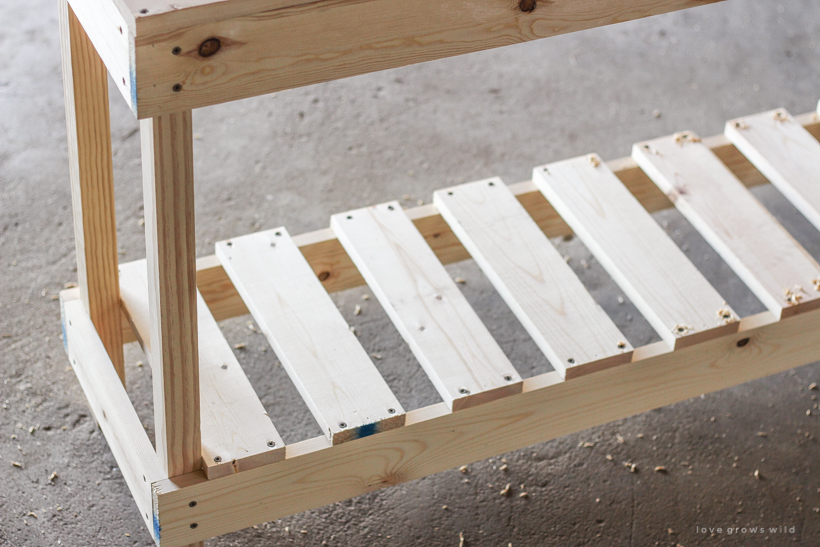
Then add the bottom shelf boards evenly spaced (about 2 1/8- 2 1/4″ between) and secure with screws going into the bottom front and back apron.
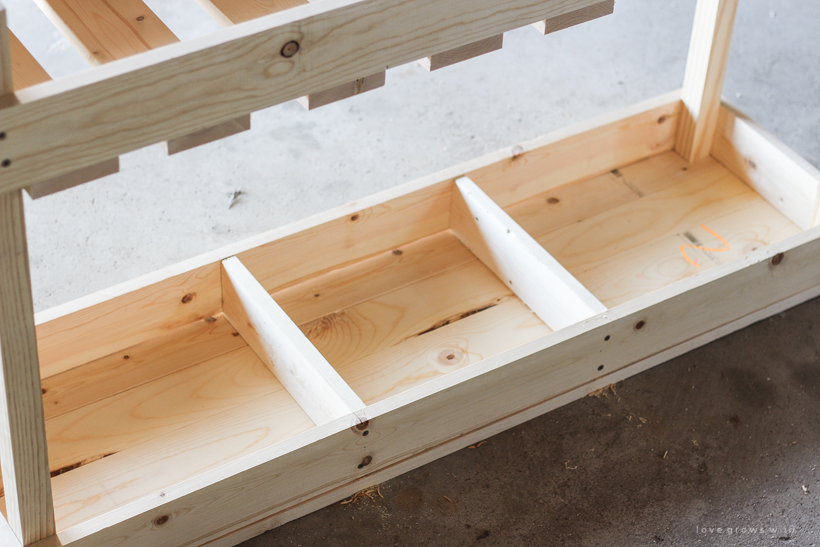
For added support, add two 12 1/2″ support pieces evenly spaced underneath the top shelf. Use screws going through the top front and back aprons to secure the support pieces.
- Tips: When building a project like this by myself, if I ever need help holding a board in place while I pre-drill a hole or screw two pieces together, I’ll use my brad nail gun to quickly add a few small nails to hold everything in place while I work. I like to use a countersink drill bit to pre-drill my holes for screws so that the head of the screw sits flush with the wood, and it also helps prevent the wood from splitting.
FINISH:
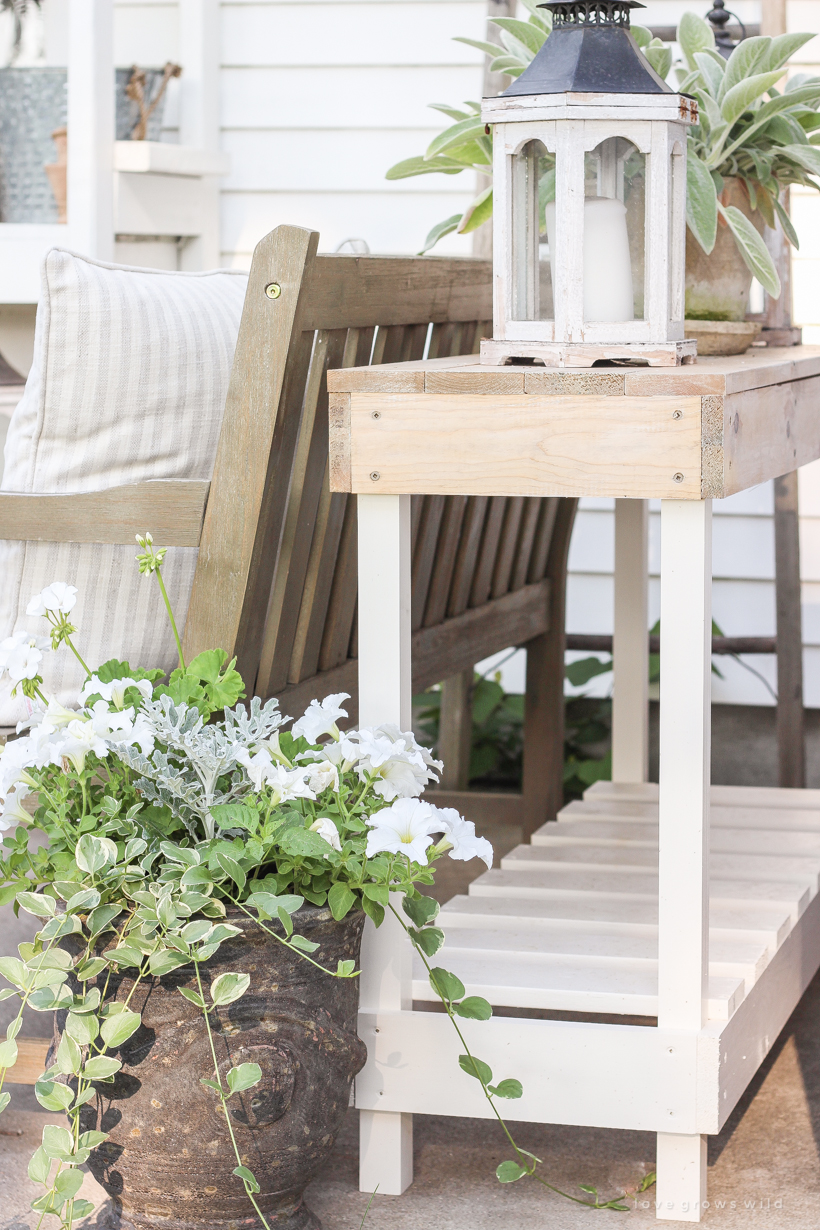
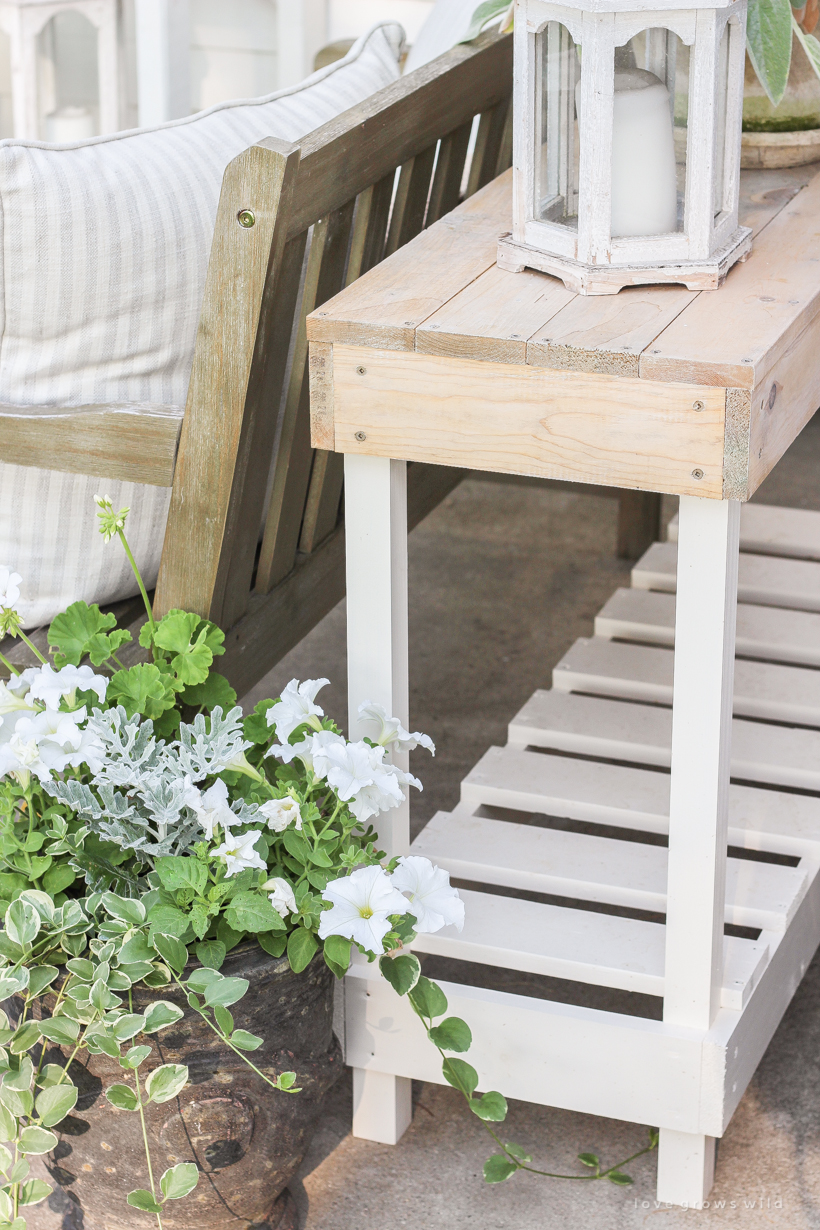
I used inexpensive pine to build the table, which is not a material necessarily suited for outdoor use, so I wanted to use a finish that would help protect the wood and make it last as long as possible. I already had a can of Cabot Semi-Transparent Deck & Siding Stain (mixed in the color Spanish Moss), which is water repellent, made for exterior use, and has UV protection as well. I used that on the top of the table because it will have the most moisture from rain and when I water plants, and on the bottom I used Rust-Oleum Ultra Cover Latex Satin paint in Heirloom White. The final step to waterproofing the table and making it durable for outdoor use was spraying Thompson’s Waterseal Waterproofing Wood Protector over the entire piece. It was quick and easy to apply in an aerosol can, and I feel like the table is holding up really well so far in the heat and rain we’ve had. I will most likely spray the table again at the beginning of spring next year just to make sure the finish stays nice, and I would recommend using it on any wood benches or outdoor furniture you have as well.
This table was really simple and inexpensive to build, and honestly it would make a gorgeous console table for indoors as well, maybe in an entryway or even behind a sofa. Right now I am loving these lanterns and potted lamb’s ear sitting here, but I can imagine all kinds of vintage pots and topiaries and pretty plants styled on the table too. It will be such a fun piece to decorate from season to season!
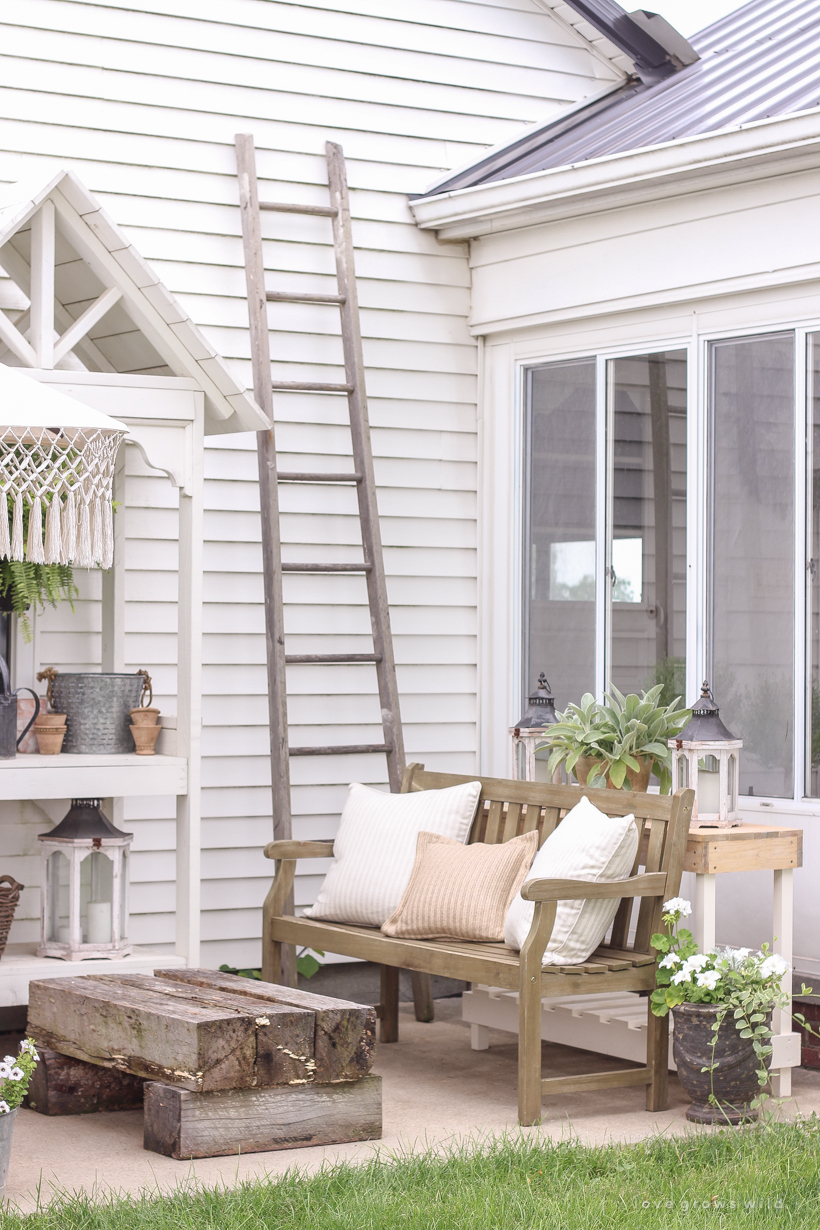
Thank you so much for your sweet comments on my patio, and I hope you found a little inspiration for your outdoor spaces this summer! If you build this table and share it, please tag me on Instagram so I can see your beautiful work! I love seeing what you guys make!
– SHOP THIS POST –

LET’S KEEP IN TOUCH!
Subscribe to Blog | Follow on Instagram
Follow on Pinterest | Follow on Facebook

This table is so pretty! You did such a good job on it! I wanna recreate it!! So what was your wood list? Like how many of each pieces of lumber did you need?
Hi Michaela! My vehicle can only haul 6 foot long boards, so I used 2 – 6ft 2 x 2 and 11 – 6ft 1 x 4. If you were using 8 foot boards, you would need 2 – 8ft 2 x 2 and 7 – 8ft 1 x 4.