Hi everyone! I shared this project awhile back at 52 Mantels, and I thought I’d share it here today in case you missed it! My kids love doing art projects with me, and they helped me create this Framed Modern Watercolor Art for their playroom makeover!
We’ve been busy this past month working on projects for their playroom, and I thought the boys would really enjoy creating some art to hang in their new space. I gave them some paint and paper and let them go to town creating their masterpieces!
I was going to simply frame their sweet paintings, but I decided to cut them into smaller pieces and create a fun herringbone pattern. Their artwork turned out super fun, modern, and very colorful!
Here’s how I made it:
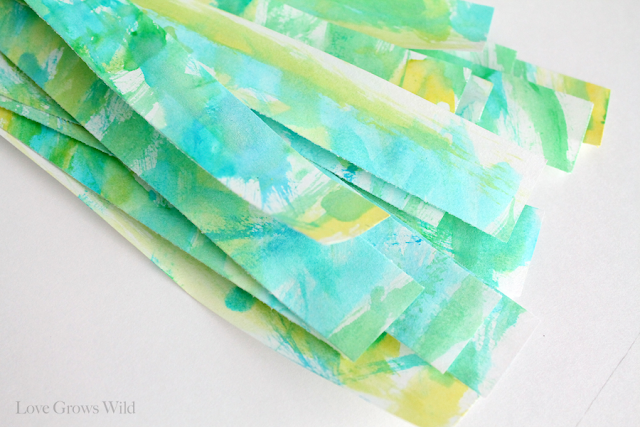
I started by cutting the kid’s paintings into strips. You’ll want to play around with scrap paper first because the size strips you cut will determine how your herringbone pattern looks. I cut mine into 3 inch by 1 inch strips.
Next I took a piece of white poster board and my frame mat and traced the inside edge of the mat onto the poster board with a pencil. It doesn’t matter whether you use a mat or not, you just need to have an outline of the visible area of the poster board when placed inside the frame.
*I recommend cutting out your outlined poster board now, since your outline will be covered with the paper strips later! I waited, and I think it may have been easier to cut it out before adding the paper!
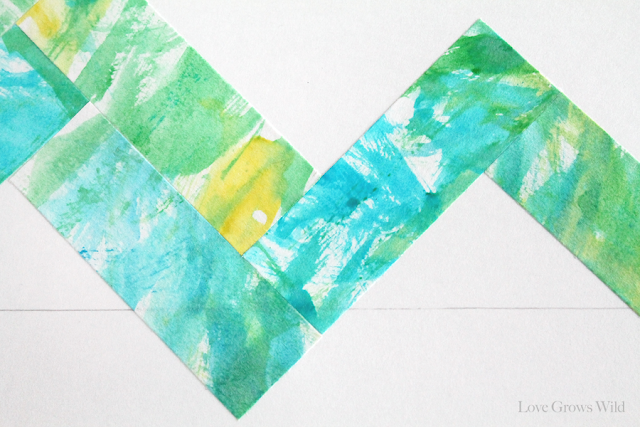
Then I started laying the paper strips onto the poster board in a herringbone pattern. I didn’t use any scientific formula for laying down the pattern, just eyeballed it. But you do want to make sure to completely cover the outlined area of the poster board, so no white will be showing when it is framed.
Don’t know what a herringbone pattern is? This will explain!
Once I had a row laid out the way I liked it, I used a thin layer of Mod Podge to glue it onto the poster board. {TIP} – Stagger the colors of your paper strips! You want them to look random and not see of blocks of color.
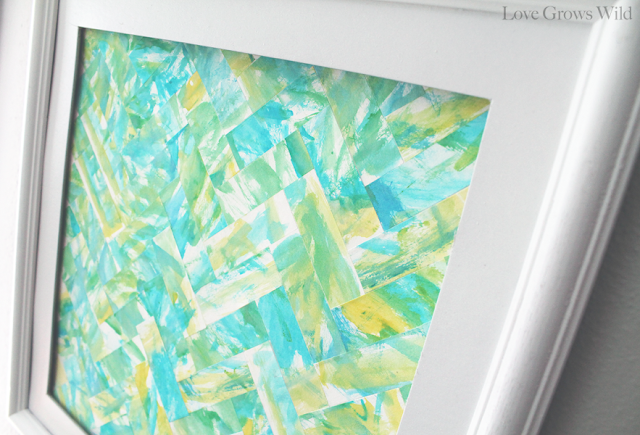
Once I had my poster board all filled up with paper strips, I cut out the square outline I drew earlier, and hung our new artwork in a white frame with a white mat.
I love the bright pop of color on our wall, and the boys are SO proud that they helped create it!
I hung the watercolor art right above the Baking Sheet Magnet Boards I created for the boys, which perfectly fills the small space between the window and door.
We’re getting closer to the big room reveal! Are you as excited as I am?? You can catch up on other projects from our playroom makeover below…
Want to see all the projects from our Playroom Makeover?
Let’s Keep In Touch!
P.S. I’m sharing this post at some awesome link parties… Check them out HERE!
This post has been sponsored by:
This post has been sponsored by:

The Weary Chef features weekly menus of tasty, quick dinners PLUS kid dinner ideas, bonus recipes, and Friday cocktails! Follow The Weary Chef on Facebook and Twitter to never miss a recipe!


This looks awesome and is such a great idea! I might even try it for over my bed…I’ve been looking for something just like this to put there without the $$$ price tag 🙂
Very creative. I love this. I think I would get lost with the herringbone pattern though. What other patterns would work here?
Hi Hilary! The herringbone pattern really was very easy! You could also do a simple stripe or even just place them randomly until the space is all covered!
Hope you have a wonderful day : )
Liz
This is super cool ! seriously awesome- pinning…xo
This is awesome! I love watercolors…. too much actually. Now I know what to do with all my left-over watercolor paper scraps. Thanks for the tutorial!
I love this! My son loves to paint and this masterpiece would be a great addition to my office. Thanks for sharing!
So pretty and great idea!
I would love if you link this tomorrow morning!
XOXO
Isabelle
http://lechateaudesfleurs.blogspot.com/
How fun is this!? Love it Liz!
Mackenzie 🙂
Visiting from the link party. =) LOVE LOVE LOVE! I am totally making one of these for my house! I am co-hosting {wow me} Wednesday and featured your project on my blog today!
You can find it at lebaroninteriors.blogspot.com. Thanks again.
Kayla
What a beautiful idea! Thanks for sharing it!!
Krista @thehappyhousie.com
What a fun piece of artwork! I bet they are proud it’s diplayed! I would love for you to come link up to my party and follow along! http://alivedinhome.blogspot.com/2013/04/get-social-sunday.html
What a fabulous idea! I love the colours. Also it’s great for the kids to see how they can contribute towards a bigger project like this!
I love this idea. The pop of color is great. And I love the magnets ( I think they are magnets?) underneath. That is such a cute idea!
Such a cute idea!! 🙂
I would love for you to join my Link Up this week!
http://www.pluckys-secondthought.com/pluckys-link-up-4/
Liz! I LOVE every single thing about this! I am totally going to do something like this with my girls! Plus, herringbone makes me really happy. I’ll be featuring this on my blog tomorrow!
http://www.sumossweetstuff.com
Thanks for linking up!
Sumo:)
This is such a cute project and I love how you got your kids involved!
I’m hosting a “Craft With What You’ve Got” party and the featured crafting supply this week is craft paints. This project would fit in perfectly! I’d love for you to link it up here.
Danielle at Framed Frosting
Very cool! I love framing my kids’ artwork — I have four of their creations hanging in my kitchen! I love their art more than any other art!
Simply stunning. I love the colours.
Thank you so much, Christina! I love them too. Those colors really pop against the gray walls and white frame!