• Home
  • MEET LIZ
  • contact
  • Blog
  • JOIN OUR COMMUNITY

Love Grows Wild

  • Home
  • SHOP MY POSTS
  • Our Home
    • bathroom
    • dining room
    • entryway
    • exterior
    • kids bedroom
    • kitchen
    • living room
    • master bedroom
    • office
    • playroom
  • Project Gallery
    • diy decor
    • decorating advice + inspiration
    • furniture makeover
    • woodworking
    • crafts
  • Seasonal
    • spring
    • summer
    • fall
    • winter
  • Recipes
    • appetizers/snacks
    • beverages
    • breakfast
    • dessert
    • meal ideas
    • side dishes
  • SHOP
    • Grow + Gather
    • Shop My Posts
    • My Amazon Store
    • My Book
Decorating and Home, Tutorials

How to Make Rope Letters

August 28, 2013

Pin
Share
Post
Email
Print
So if you’ve been following along with my kitchen makeover (and you are, right?), you know there’s been all kinds of DIY decor going up on my kitchen walls lately! A giant chalkboard, a plate wall, distressed wood signs, food photography worth drooling over… Lots of fun stuff! I recently shared an old wood shelf that I painted and hung in my kitchen for some shelf space and a place to hang my new apron… And by the way, I’ve hardly taken that thing off since I made it! I’m just so smitten with the masculine stripes coupled with the feminine ruffle on bottom! I put together a pretty display for my shelf of vintage finds, white dishes, and painted mason jars, but there was still a big, empty space above the shelf that needed something…

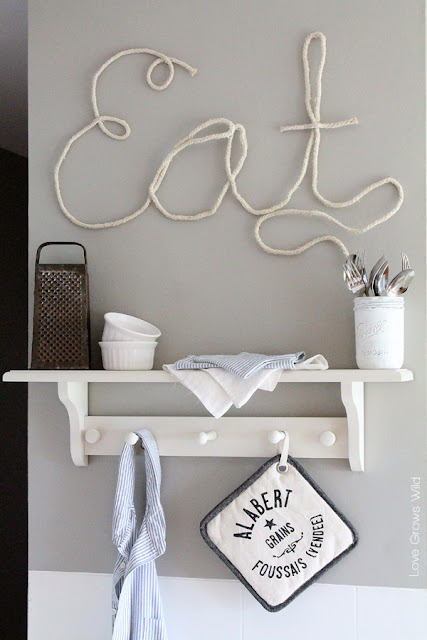
I brainstormed all kinds of ideas, but nothing really hit me. I wanted something different and unique that would totally catch your eye when you walk in the house. That’s when the light bulb finally went off, and I came up with these fun and fabulous rope letters!
How to Make Rope Letters for fun DIY home decor! Tutorial at LoveGrowsWild.com #rope #diy #decor

Aren’t those the cutest things you’ve ever seen? I was inspired by a photo from Green Wedding Shoes and knew these rope letters would be the perfect statement to hang over my kitchen shelf! This is a bit of a messy project, but it only takes a few simple supplies and is really easy!

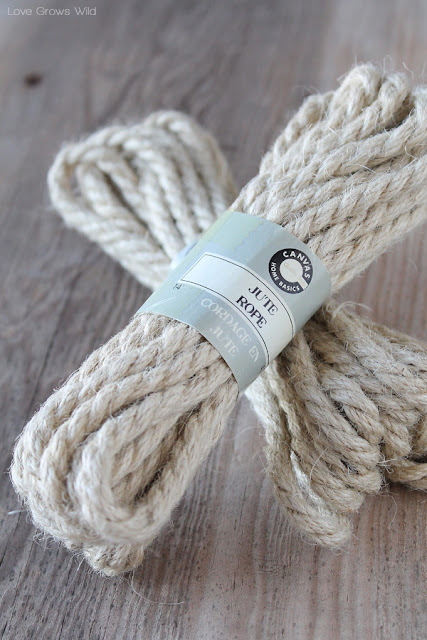
I started with a package of jute rope. I thought the light natural color would be perfect in my kitchen, but you can find it in other colors too!

How to Make Rope Letters for fun DIY home decor! Tutorial at LoveGrowsWild.com #rope #diy #decor
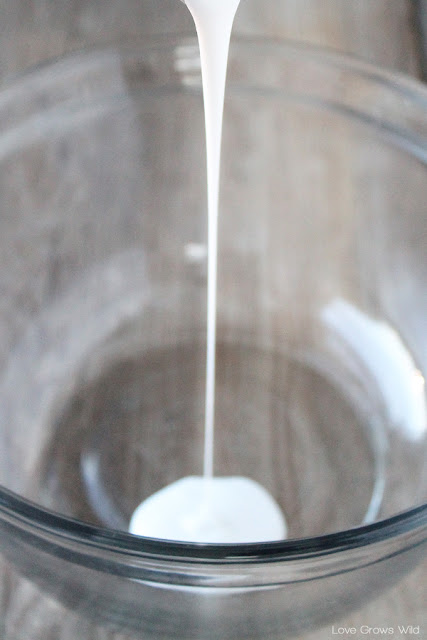
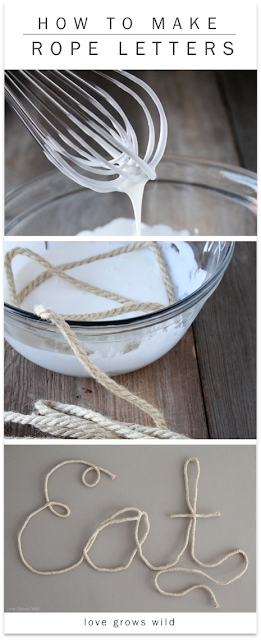
To shape the rope and hold it in place, I created a mixture of glue, cornstarch, and water. I used 4 ounces of Mod Podge because I already had it on hand, but you could also use regular white school glue. Just dump the glue into a bowl…

How to Make Rope Letters for fun DIY home decor! Tutorial at LoveGrowsWild.com #rope #diy #decor
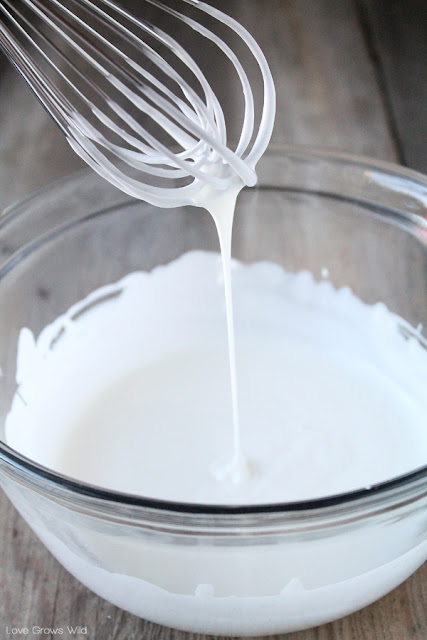
add 1/2 cup of cornstarch…

How to Make Rope Letters for fun DIY home decor! Tutorial at LoveGrowsWild.com #rope #diy #decor
and 1/4 cup of warm water. Whisk the mixture until it is completely smooth. Then go wash your whisk. You don’t want dried bits of glue in your next batch of pancakes. Your family will not be very impressed!

How to Make Rope Letters for fun DIY home decor! Tutorial at LoveGrowsWild.com #rope #diy #decor
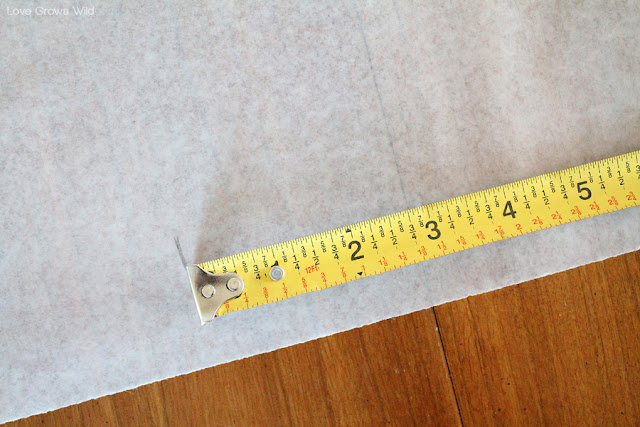
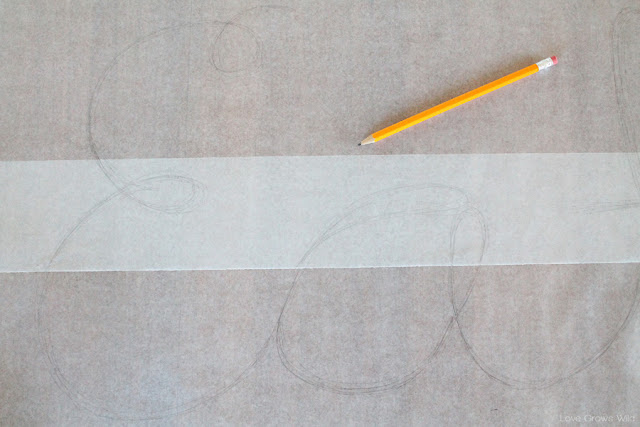
I measured the wall space where I wanted my letters to go so I knew exactly how big to make them. Then I laid down two large pieces of wax paper (I wanted my letters to be pretty large, so one piece wasn’t going to cut it). I measured out on my paper how big I wanted the letters and made pencil marks as a guide. 

How to Make Rope Letters for fun DIY home decor! Tutorial at LoveGrowsWild.com #rope #diy #decor

You’ll want to use a shorter word if you’re planning on hanging it on the wall so it doesn’t get flimsy in the middle. I chose EAT for my kitchen, because well… I think that says it all! I first sketched the word on scrap paper to find a design I liked. After I liked the way it looked, I drew my design on the wax paper with a pencil, making sure to stay within my guidelines. You’ll want to pay attention to how your letters will connect and bend. The rope won’t make perfect sharp angles, so allow for some loops and curls. Think about where you’ll hang the letters too!

How to Make Rope Letters for fun DIY home decor! Tutorial at LoveGrowsWild.com #rope #diy #decor
I took my rope and roughly placed it over the letters to get an estimate of how much rope I would need. Always cut more than you need, and you can trim any excess later! 
Now comes the messy party… dipping the rope! I dropped my rope into the glue mixture and made sure it was fully coated. 

How to Make Rope Letters for fun DIY home decor! Tutorial at LoveGrowsWild.com #rope #diy #decor
I let a bit of the excess glue drip off and placed it on the wax paper along my pencil marks. The rope is covered in white glue now, but don’t worry, it will dry clear! I had a bit of extra rope after my last letter, so I made a little embellishment underneath. I think it turned out really cute! And if your letters look like a 5 year old’s handwriting… It’s okay! They are supposed to look messy! Or “rustic” as I like to call it : )
If you are having trouble with parts of your letters not laying flat on the paper, you can place another sheet of wax paper on top and weigh it down with some books. Now you just need to let it dry! I let mine dry for a full 24 hours just to make sure they were completely set. 

How to Make Rope Letters for fun DIY home decor! Tutorial at LoveGrowsWild.com #rope #diy #decor
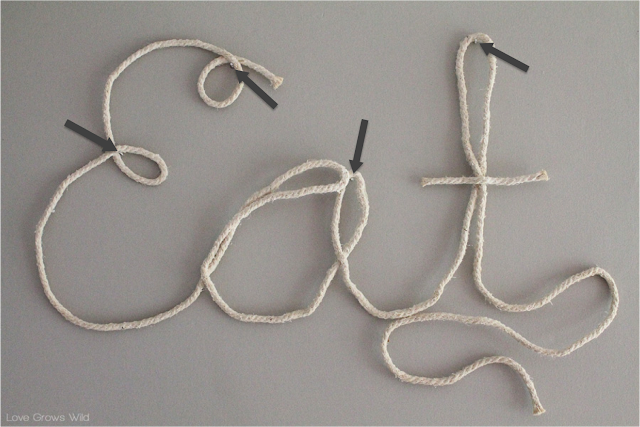
After everything was dry, I carefully removed the rope letters from the wax paper. I had a few of the connecting pieces break apart, so I just used a tiny bit of hot glue to hold them back in place. 
I held the letters up on my wall and made a pencil mark where I wanted my nails to go. You can see the four spots where I hung the rope here: 
How to Make Rope Letters for fun DIY home decor! Tutorial at LoveGrowsWild.com #rope #diy #decor
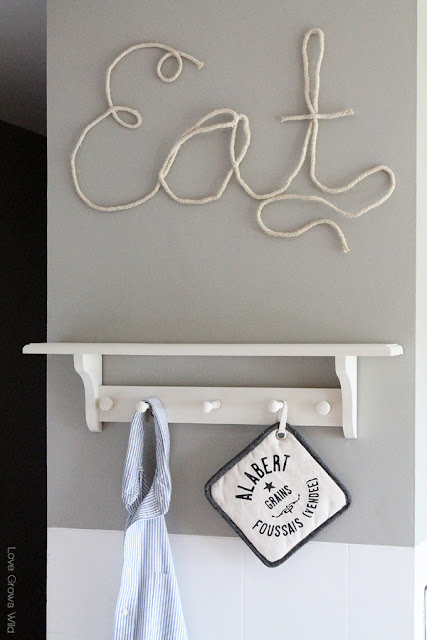
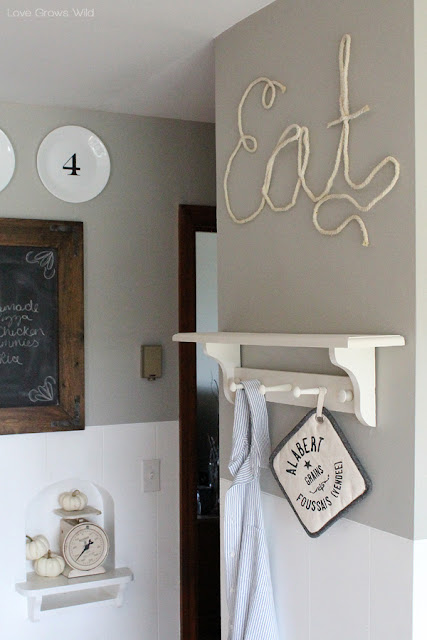
And that’s it! The rope is a great compliment to the decor in my kitchen, and it is such a fun, graphic piece of artwork! It fills the blank space above my kitchen shelf perfectly!
How to Make Rope Letters for fun DIY home decor! Tutorial at LoveGrowsWild.com #rope #diy #decor
And you could use this technique for all sorts of different things! I’m thinking about creating my boys’ names to hang on their bedroom wall and creating just a single letter monogram to hang on my front door. The possibilities are endless!

How to Make Rope Letters for fun DIY home decor! Tutorial at LoveGrowsWild.com #rope #diy #decor

How to Make Rope Letters for fun DIY home decor! Tutorial at LoveGrowsWild.com #rope #diy #decor

Do you love these rope letters as much as I do? They would be perfect in almost any decor!
What if I told you that you could get materials you needed for this project sent straight to your door for the same price or less than you could buy them at the store… Well you can!
I recently discovered the most amazing craft company, Craftistas, and they are working with me to create a bundle of products specifically designed for some of my upcoming projects! They have an amazing online store where you can purchase all kinds of fun craft items, but by using the Craftistas widget below, you can buy the exact jute rope and Mod Podge I used for my project! How cool is that?? All you’ll need to supply is the corn starch, wax paper, pencil, and water… which I’m willing to bet you already have!
And what’s even better is the super awesome girls at Craftistas are offering an exclusive 10% off discount to Love Grows Wild readers! That’s even MORE savings! Just use the widget below to select the items you need and enter the discount code craft13 at checkout!

Do you love the idea of getting all your project supplies delivered to your door? Would you like me to offer more of my projects like this? Tell me what you think!

And be sure to follow Craftistas on Facebook, Twitter, Pinterest, and Instagram too for fun updates!

Craftistas supplied me with the products for this project, but all thoughts and opinions are my own. 

Let’s Keep In Touch!

Subscribe to Blog | Browse my Shop | Follow on Facebook | Follow on Twitter Follow on Google+ | Follow on Pinterest | Follow on Instagram | Subscribe to Newsletter
P.S. I’m sharing this post at some awesome link parties… Check them out HERE!
Pin
Share
Post
Email
Print
Crafts DIY Decor
by Liz Fourez 
38 Comments

About Liz Fourez

View all posts by Liz Fourez

Related Posts

  • gallery wall artwork inspirationHow to Fill a Blank Wall with Art
  • Yarn Wrapped Christmas TreesYarn Wrapped Christmas Trees
  • Neutral Living RoomTone on Tone Woven Wall Art DIY
  • Are you curtains just a little too short? Home blogger Liz Fourez shares a few ways you can easily add extra length.How to Lengthen Curtains That Are Too Short
PREVIOUS: Time to Sparkle Link Party #24
NEXT: Easy DIY Kitchen Chalkboard

Comments

  1. Our Pinteresting Family says: August 28, 2013 at 1:46 pm

    It looks great! What a fun idea. ๐Ÿ™‚

    Reply
  2. Kelly || Old Blue Silo says: August 28, 2013 at 2:06 pm

    I love the idea of getting crafts supplies delivered to my door! I am almost an hour away from a Michaels or Hobby Lobby.

    This project is great! Been trying to come up with fishing/lodge ideas for my rustic bedroom and bathroom and rope may be perfect!

    Reply
  3. Susan D says: August 28, 2013 at 3:44 pm

    You are going to have the coolest kitchen ever!

    Reply
  4. meg mcilvaine says: August 28, 2013 at 4:15 pm

    Liz! This turned out so great! What a creative idea ๐Ÿ™‚

    Reply
  5. Lisa @ Mabey She Made It says: August 28, 2013 at 4:28 pm

    Love these, Liz! And I LOVE the Craftistas option. It’s such a great idea!

    Reply
  6. Ashleigh Pinkerton says: August 28, 2013 at 4:47 pm

    Yes! I love how this turned out – it goes with your kitchen makeover so well! I’m so honored that we get to work with you, Liz!

    -Ashleigh, Craftistas

    Reply
  7. cherished bliss says: August 29, 2013 at 12:50 am

    I love this liz! It turned out fabulous! I pinned and shared : )

    Reply
  8. Paula says: August 29, 2013 at 1:35 pm

    I really like this! You did a great job ๐Ÿ™‚ You are right, using different words/letters it has so many applications for different rooms. Pinning!

    Reply
  9. the cape on the corner says: August 29, 2013 at 3:20 pm

    oh em gee!!!! this is awesome!

    Reply
  10. Chels/Catz in the Kitchen says: August 29, 2013 at 7:19 pm

    This is very cool!!

    Reply
  11. Lolly Jane says: August 31, 2013 at 12:04 am

    Love this, girl. Super cute!

    Reply
  12. KElizabeth says: August 31, 2013 at 1:28 pm

    Wow! This is too stinking cute! I have to try this very soon! I’m here from the create an inspire link up. New follower now your blog is full of so much great stuff!
    Kallie @ But First, Coffee

    Reply
  13. Kylie Helm says: September 1, 2013 at 2:19 am

    These are fantastic!!!! I absolutely love them. I am so inspired to do this in our master bedroom. How creative are you!

    New follower from Absolutely Arkansas.

    Kylie
    absolutelyarkansas.blogspot.com

    Reply
  14. Abby says: September 3, 2013 at 1:52 pm

    This is really so cute! I love the texture on rope. You really came up with a nice twist to just plain old word art. I’m pinning this to try sometime! Thanks for sharing!

    Reply
  15. Tonia Larson says: September 4, 2013 at 1:47 am

    Awesome! It looks great on your wall!

    Reply
  16. Mackenzie says: September 4, 2013 at 5:04 pm

    VERY cute! I love this idea! So many fun ideas you could do with rope letters! Thanks for sharing!

    Reply
  17. Joan Hayes says: September 4, 2013 at 5:35 pm

    Love this! So easy and a great conversational (literally, hehe) piece. I think I see an Eat going up in my kitchen very soon. I’ve been wanting to redo one of my walls. Pinned!

    Reply
  18. Life With The Crust Cut Off says: September 4, 2013 at 8:25 pm

    This looks awesome!!! We would love it if you would link up at our linky party:
    http://www.lifewiththecrustcutoff.com/two-girls-and-a-party-link-up-32/
    Live every Wednesday to Sunday.
    Hosted by:
    http://www.lifewiththecrustcutoff.com/ Parrish @ Life with the Crust Cut Off
    http://thissillygirlslife.com/ Dana @ This Silly Girlโ€™s Life
    We hope to see you there!

    Reply
  19. Gracie Lathrop says: September 4, 2013 at 10:31 pm

    These are amazing!! I’m a sculptor and have used a similar technique for a table sculpture using 1 gallon of elmers glue and a table cloth, messy process but pretty rewarding ๐Ÿ™‚ Do you think you could share this on my link party.

    http://gracelangdon.blogspot.com/2013/09/making-monday-3.html

    ^if you don’t make it this week I would love for you to come over with anything you’d like in the future!!

    Reply
  20. Capturing Joy with Kristen Duke says: September 5, 2013 at 3:17 am

    Fabulous idea girl! The possibilities are endless with this – I can picture rope letters all over my house!

    Reply
  21. Ginger Bergemann says: September 5, 2013 at 11:37 pm

    I love this idea. I need to do some work in my kitchen – it’s so boring right now. Maybe after the bedroom project I’m working on. ๐Ÿ™‚

    If you’re interested, I’d love to have you share this at my Show & Tell party going on right now. http://www.gingerlymade.com/2013/09/show-tell-42.html

    Reply
  22. kristi dominguez says: September 7, 2013 at 2:00 am

    So super cute!! I just love this whole wall with your adorable shelves and everything you’ve done. Love that we’re “kitchen sisters” right now. Yours is incredible, girl!! ๐Ÿ™‚

    Reply
  23. Lyuba @ Will Cook For Smiles says: September 8, 2013 at 1:50 am

    Oooooo, that is so cool! I want one…and a bigger wall to put it on ๐Ÿ™‚

    Reply
  24. Trish - Mom On Timeout says: September 9, 2013 at 3:04 am

    I am SO doing this Liz! What a fabulous project!

    Reply
  25. Christine says: September 9, 2013 at 2:19 pm

    It’s beautiful Liz!!!!!!!!

    Reply
  26. Kayla Janachovsky says: September 9, 2013 at 6:57 pm

    This is so awesome. Great work! I can’t believe you made it!!

    Reply
  27. [email protected] says: September 10, 2013 at 3:46 am

    You are just too smart! I would of never tried that, and yours turned out so great! Your kitchen is looking awesome! ๐Ÿ™‚

    Reply
  28. Angela says: September 15, 2013 at 7:42 pm

    I love this! I was thinking too, that if you did something smaller, you could put the letters in matted frames. Such as a set of 3 – maybe SWEET, SAVORY, and EAT? Thanks for the great idea. I just found your blog, but will definitely be following.

    Reply
  29. Lucy @ Patina Paradise says: October 2, 2013 at 4:23 am

    A friend of mine wanted me to make a sign for her son’s room and I couldn’t find the right type of rope to use. Most of them were so rough! The jute rope you used will be perfect for the project. Thank you so much for the tutorial and link for buying it!

    Reply
  30. dena says: May 13, 2014 at 4:52 pm

    i love it! thanks!!! can’t wait to try it!! =)

    Reply
    • Liz Fourez says: May 13, 2014 at 10:22 pm

      Thank you, Dena! Have fun creating!

      Reply
  31. Stargazer says: September 13, 2014 at 10:52 am

    Sloppy and unattractive. My 9 year old daughter could do better. Cute idea if done right.

    Reply
    • Liz Fourez says: September 15, 2014 at 5:15 pm

      Thanks for the feedback. ๐Ÿ™‚

      Reply
  32. Mindy says: October 26, 2015 at 10:27 pm

    Love this! Quick question: What was the total dry time for this project, if you recall?

    Reply
    • Liz Fourez says: November 4, 2015 at 9:04 am

      Hmm… I don’t remember! I think I let mine dry for a full 24 hours before messing with it. I hope this helps!

      Reply
  33. Justmecvc says: November 15, 2015 at 12:08 pm

    Hey Liz, I LOVE all the awesome ideas you share. I pin lots of your ideas. Keep up the amazing projects!! These are GREAT ideas for all of us real, non-perfect, non-professional artist out here, who LOVE the real-life and non-perfect “sloppy, and unattractive” looks!! ;-P I can’t wait to try this. I am wondering though, if color could be added with either some food coloring, or paint? Have you tried adding color yet, or do you have a suggestion as to how to add colors to match different decors?

    Reply
    • Liz Fourez says: November 20, 2015 at 8:51 am

      I’m so happy to hear that!! Thank you for following along! Yes, I think you could add color to the glue mixture, but I don’t think it would be a bright, bold color… more of a pastel because of all the glue. You’ll have to experiment and let me know how it turns out!

      Reply
  34. Desiree @ The36thAvenue says: February 15, 2016 at 2:19 am

    I love this… Featuring you tomorrow!
    XO

    Reply

Leave Your Comments Cancel reply

Your email address will not be published. Required fields are marked *

Liz Fourez started Love Grows Wild in 2012 with a passion for interior design and homemaking and a dream to help others create a home they love.  From simple project tutorials, to holiday and entertaining ideas, to her journey renovating a 1940’s farmhouse, Liz demonstrates how to create a beautiful and inviting home with a handmade touch. She turned her signature cozy, neutral style into a best-selling book in 2016 and continues to inspire readers with her captivating photography and easy decorating ideas. Read more about Liz > > > >

LOOKING FOR SOMETHING?

FOLLOW ALONG

  • contact
  • MEET LIZ
  • advertise
  • privacy policy/disclosure
  • Blog

Copyright © 2025 · Prima Donna theme by Georgia Lou Studios

COPYRIGHT ยฉ 2017 ยท DESIGN + BRAND: BLISS AND TELL BRANDING COMPANY