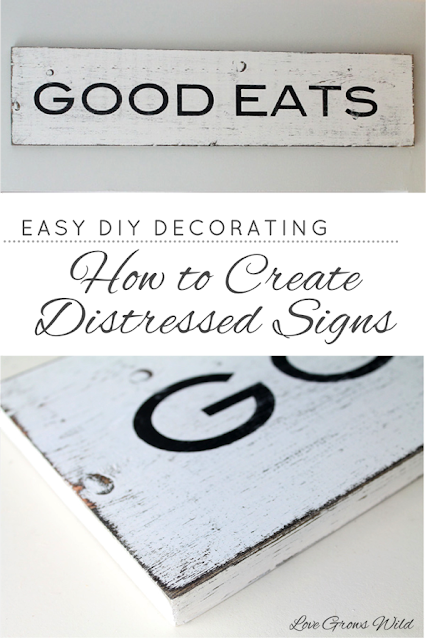
Decorating your home on a budget can be daunting, but with a little bit of DIY knowledge you can make your home look gorgeous without breaking the bank! Follow these easy DIY tips to create beautiful distressed signs for your home!
Ever since we moved into our new house last year, I have been a busy decorating bee. Now I’ll admit, there are times I come across a great sale, and I can’t help but purchase some gorgeous new things for our home (Hi, my name is Liz, and I’m addicted to Target and TJ Maxx). But for the MOST part, I prefer to create my own decor! #1 It’s cheaper and #2 I get a HUGE amount of satisfaction knowing that I created that all these special things for us! I mean honestly, is there anything sexier than a woman who knows how to use power tools? Sorry… I had to say it! But you know you feel the same way when you use a drill or saw : )
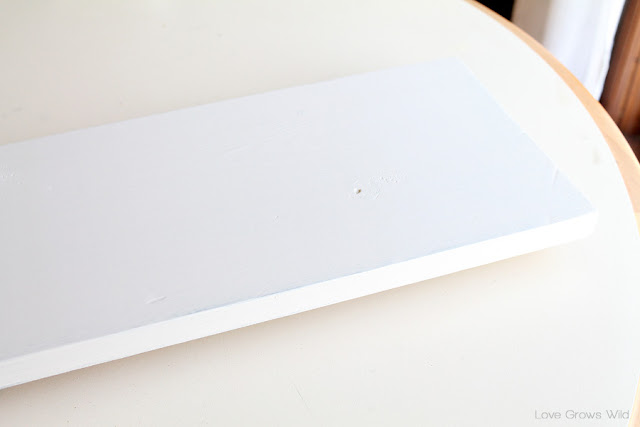
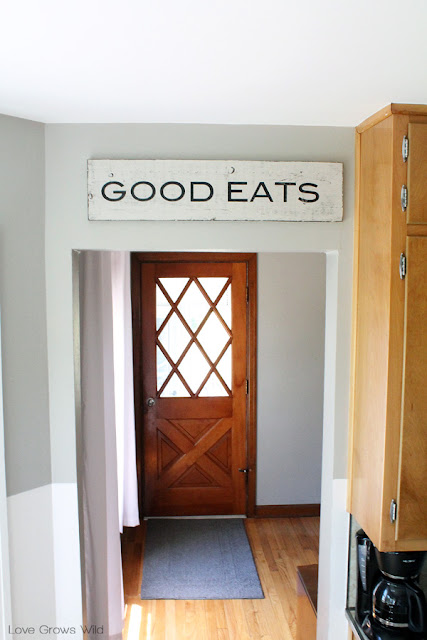
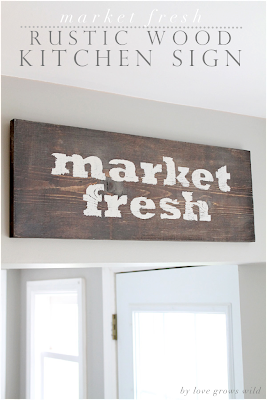
So anyway, I’ve developed a pretty big obsession with making signs for our house, and even though I’ve shown you a few already I thought I’d share my latest creation complete with all my tips and tricks! This sign I made for my kitchen, and I wanted the background to be creamy white but heavily distressed to look aged and rustic. I started with a standard board from the hardware store cut down to my desired dimensions. This sign is going over my kitchen doorway, so I cut it to 30″ x 7″.
TIP: If you don’t have a saw at home, the employees at your hardware store are usually more than happy to cut it for you! Just have your dimensions ready when you head to the store!
I gave the edges a light sanding to make it smooth and ready for paint. Make sure to thoroughly wipe down your board after sanding to remove any dust before you start painting! I like to use a slightly damp rag for this. When I distress a project, I like to paint in two steps: first a dark undercoat followed by a lighter topcoat. This allows you sand parts of the top layer off to reveal the beautiful hidden color underneath. For this particular sign, I used a dark walnut stain first and then my favorite heirloom white paint on top.
TIP: Make sure you sand in between coats to help the paint stick, especially when using paint on top of stain!
To learn my awesome tip on how to easily paint your sign without getting paint on the table, click here!
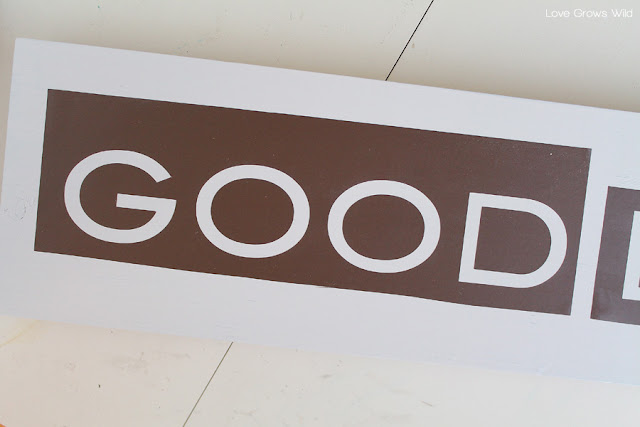
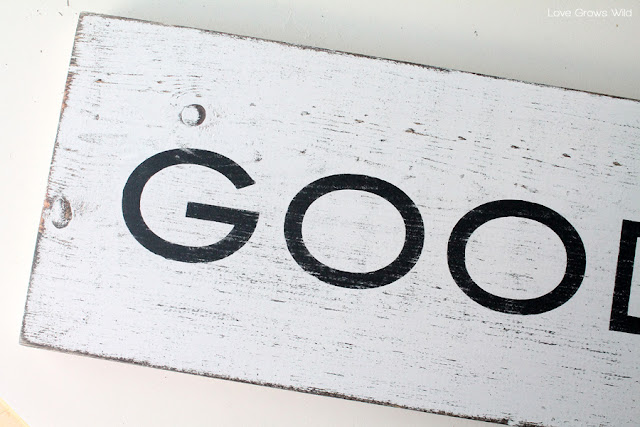
Once my sign was fully painted and dry, it was time to add some cute words. Since this is a kitchen sign, I thought a simple “Good Eats” would be appropriate! I like to use my Silhouette CAMEO cutting machine to create easy stencils for my signs, but there are many other ways you can do it too! You can paint your letters freehand, use store-bought letter stencils, trace using a pen transfer method, or transfer the letters with pencil shading, just to name a few! But hands-down the easiest method is to use a Silhouette machine and vinyl. You can see the full tutorial on how to create a stencil using Silhouette here, but basically I just type the words I want into the Silhouette software, cut the design on vinyl, peel off the letters, and stick the leftover outlines onto my board.
Psst! Before you apply your stencil, remember to sand again after your last coat of paint is dry and clean all the dust off!
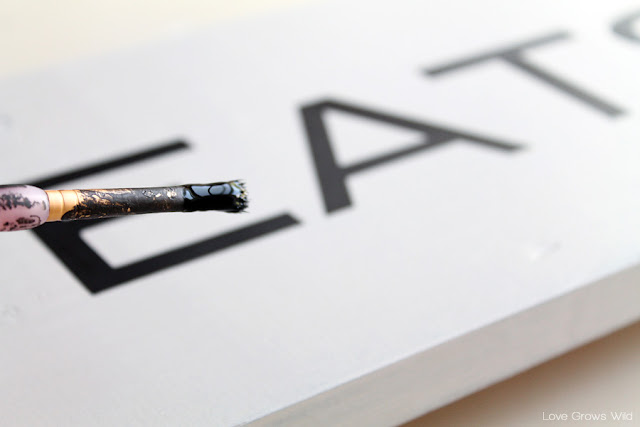
Then I painted over my vinyl with 2-3 coats of black acrylic craft paint.
TIP: If using a vinyl stencil, peel it off your board before the letter paint fully dries. Otherwise, it may pull up some of the paint with it!
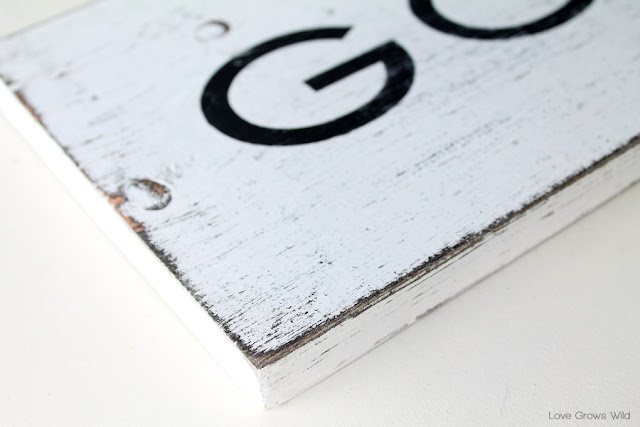
Now comes the fun part… Distressing!! I like to use my hand sander to distress quickly, but if you don’t have one OR you’re nervous about ruining your beautiful new sign, a piece of sandpaper will work just fine! I sand over the entire sign, focusing especially on the edges and corners where an old sign would naturally distress. If your board has interesting knots or marks on it, go ahead and sand those to highlight them as well. It will just add to the rustic quality of your sign!
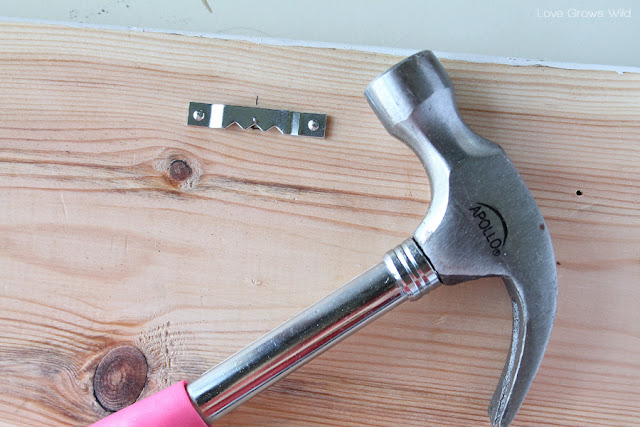
To hang the sign, I placed two sawtooth hangers (I found mine at Hobby Lobby) on the back of the board.
Then I hung it up in my kitchen!
Depending on what supplies you already have at home, signs like this can be super inexpensive to make. I already had a spare board in my garage and all the paint on hand, so I spent $0 on this sign!! I’d say that’s pretty awesome for something so cute! Wouldn’t you agree?
What’s your favorite DIY decorating tips? What stores do you shop at for cute home decor?
Check out other DIY home decor projects from Love Grows Wild:
Want to see more projects like this? Check out our Project Gallery!
Let’s Keep In Touch!
P.S. I’m sharing this post at some awesome link parties… Check them out HERE!






This is adorable! You make it look so easy, now I have to try this!
I love all of you signs…they look great. You should sell them!
So Gorgeous! I need to attempt this…. someday!
Oh this is beautiful Liz!! Thanks for sharing these great tips! I see some sign making in my future! 🙂
My readers would love to see this! I’d love it if you linked this up over at Living Well Spending Less for Thrifty Thursday this week! http://www.livingwellspendingless.com/category/thrifty-thursday/
Excellent Tips!
thanks! I love the idea of the Cameo Silhouette!
Awesome tutorial! I need to make more of these types of signs. I like the tip about sanding between coats. Really would’ve helped me while I was painting a shelf a while ago. Thanks for this post!
You’re so welcome, Nikki! I learn as I go, so I love sharing my best tips and tricks with readers! The sanding really does make a difference. Glad you could stop by!
This is so cute! Do you use permanent vinyl or vinyl that you can move around? I tried this once but had a lot of bleed under the vinyl with the top coat. Thank you for sharing!
Hi Lindsey! I use regular vinyl that can be easily removed, but I found the trick to no bleeding is sanding first before applying the vinyl. Sand your board (or whatever you’re using) and wipe away all the dust really well before applying the vinyl, and it should help prevent any bleeding. I hope this helps!
So I just made this over the course of the last few days as a Christmas gift (with a different phrase on the board). A few things:
For some reason, the stain-showing-through-the-paint really didn’t work for me. Maybe I should have done more coats of stain, but I used a super dark one and waited a whole day for it to dry, then painted and distressed but mostly when I sanded I must have taken off some of the stain too (I just did it by hand with some sandpaper!). So underneath it’s more of a light color, which is also fine, but I was hoping or the dark, rustic look that’s seen here. Also definitely recommend using a hand sander if you can, as it took me quite a while to just do it manually with sandpaper. Finally I recommend getting some sort of stencil; I put too much confidence in myself with hand-painting the letters and it was hard to get straight lines.
Overall these are good instructions and an awesome idea! I love the creativity and I think it makes a great gift. Thanks for the instructions!
I bet someone was very surprised with this handmade gift! Sometimes it helps using a less-course sandpaper to only remove the top layer of paint and leave the stain underneath. I’m sure your sign turned out just beautiful! Thanks for stopping by and sharing your tips!
What type of hand sander do you use for your sanding?
Hey Kim! The one I use is a Tool Shop brand hand sander, and it does a pretty good job. Hope this helps!
Probably a dumb question BUT I use vinyl (and LOVE it). If I were making a distressed sign would I distress the board before applying the vinyl or apply the vinyl and distress carefully around it? Thank you!!!
Not a dumb question at all! I would distress the board first and wipe all the dust off REALLY well. The vinyl won’t want to stick if the surface isn’t clean. I hope this helps! Have fun creating your signs! They’re so fun to make. 🙂
I was wondering, what paint finish did you use? Matte, semi-gloss or high gloss?
Hey Chris! I always prefer to use a matte paint when creating signs like this. It definitely adds more of a vintage, aged look! Hope this helps!
I saw you mentioned that you could use vinyl as well. I just made a sign similar to this by placing the vinyl directly on the stained wood then painting over it with an antique white paint. However, when i peeled the script letters, some of the paint had gotten where the vinyl did not stick well. Is there anything you recommend to get the extra paint off without removing the stain?
Hey Addison! Depending on how much paint bled underneath the vinyl, you may be able to chip it away with a razor blade without hurting the stained wood at all. I would try that first! Best of luck!
What font did you use? Love it <3
Hi Katrina! I believe the font I used is called Blair. Have fun making some signs! 🙂
Made a sign today, sanded, used dark walnut stain, then painted it twice, then sand papered it, then painted my words on it, then sanded it, BUT then the black paint that I used smeared somewhat and made the white paint somewhat darker, bummer … what kind of paint did you use, or what did I do wrong. the paint dried for like an hour. Do I maybe need to let it dry longer ? Or what did I do wrong ? :0(
What a bummer! I hate when that happens. 🙁 It could be the type of paint you used, but I’m not positive. I like to use craft store acrylic paint for the lettering because it sands pretty easily. The good part is that you can always paint over it and start again!
I used your basic Apple Barrel Acrylic Paint …. bummer I know. Maybe I’ll try letting it dry for 24 hours next time before sanding. ??
That might help! 🙂
Hi Liz!
What kind of wood did you use for this board? I’m excited to give this a try.
Thanks so much!
Charlotte
Hi Charlotte! I usually use pine 1x boards for my signs. Have fun creating! 🙂
How in the world do u keep the paint from leaking through? I’ve tried over and over with paint always seeping through. ugh!
Hi Kelly! I hate when that happens! What type of stencil are you using? Typically, as long as I make sure the press the edges really well to seal them to the board, I never have a problem with painting seeping underneath. Also, if you are painting over a stained board, sometimes the stain leaves a shiny, slick finish that the stencil has a hard time adhering to. Try sanding the board lightly before applying the stencil so it has a more matte surface to stick to. Just be sure to wipe away any dust first! I hope this helps! 🙂
Love this! What type of stain did you use?
Hi Shellie! I used Minwax Dark Walnut on this sign. 🙂
can you be more specific about the “standard board”
Hey Jennifer! I usually use pine/whitewood boards for my signs. There are different lumber qualities, and each store calls them something a little different, but you can buy “standard” boards that are less expensive but may have some knots/warping or “quality” or “select” boards that are more expensive but have less flaws. It all depends on the look you’re going for with your sign, but the standard boards are usually what I go with!
I have a couple questions…. Do you have a suggestion for the 2 following issues…
– When I use vinyl stencils 2 issues I have been having. Sometimes the vinyl will leave a sticky residue on the paint when I remove it. I use Silhouette vinyl. Is there a way to prevent this from happening?
– Also sometimes I have an issue when i put vinyl over paint and then go to peel it off it peels off the paint under the letters. I typically will use an acrylic paint for the base and then put a chalky paint finish over the vinyl and then when I peel it pulls up the acrylic paint. Any suggestions would be awesome.
Such a cute sign! What grit sandpaper did you use when sanding the board before applying the vinyl? And also, what grit did you use when using your tool shop hand sander for the final sand?
Thanks!
Hello,
Do you custom make distress signs for others?
Hello! I do not make signs to sell at this time… I’m sorry! 🙂
Great signs. What grit sandpaper do you use for the final sanding and distressing?