• Home
  • MEET LIZ
  • contact
  • Blog
  • JOIN OUR COMMUNITY

Love Grows Wild

  • Home
  • SHOP MY POSTS
  • Our Home
    • bathroom
    • dining room
    • entryway
    • exterior
    • kids bedroom
    • kitchen
    • living room
    • master bedroom
    • office
    • playroom
  • Project Gallery
    • diy decor
    • decorating advice + inspiration
    • furniture makeover
    • woodworking
    • crafts
  • Seasonal
    • spring
    • summer
    • fall
    • winter
  • Recipes
    • appetizers/snacks
    • beverages
    • breakfast
    • dessert
    • meal ideas
    • side dishes
  • SHOP
    • Grow + Gather
    • Shop My Posts
    • My Amazon Store
    • My Book
Decorating and Home, Tutorials

How to Create a DIY Family Sign with your Wedding Date

May 20, 2013

Pin
Share
Post
Email
Print
Follow this easy tutorial to learn how to create a DIY Family Sign personalized with your wedding date! Make one for your home as a sweet reminder of your special day and the love you share. These signs also make wonderful gifts for weddings and bridal showers!
Learn how to create a DIY Family Sign personalized with your wedding date! These signs also make great gifts for showers and weddings! Get the how-to at LoveGrowsWild.com #wedding #diy

Wedding season is upon us, and this year I have a very special family member getting married in July. My husband’s Aunt finally met her Prince Charming last year through their church, and though he has been married before and has three wonderful, amazing daughters (and two very cute grandchildren!), she has never been married and has waited a long time for this day. He is truly such a kind and loving man, and I am so grateful that they found each other!
When I got married, I received a gorgeous hand painted sign with our name and wedding date, and it is something I have cherished ever since. But every time I look at that beautiful sign I think, “I know I can make that myself!” And that’s exactly what I did for our Aunt and soon-to-be Uncle!
Making their sign was so simple with a little bit of paint and some help from my Silhouette CAMEO! Follow these easy instructions to create a gorgeous family sign of your own:
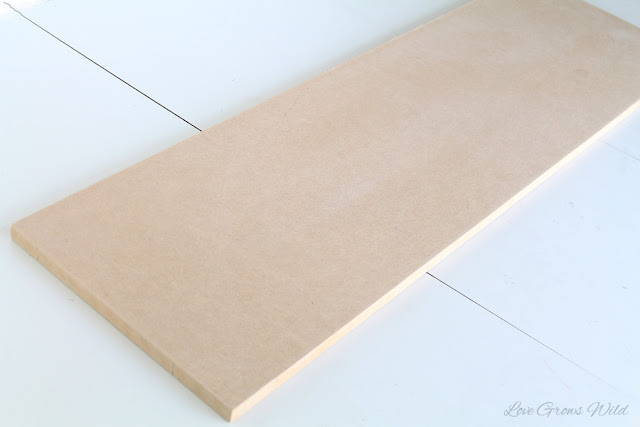
First you’ll need to choose the board for your sign. We have tons of scrap wood in our garage, so I grabbed this piece that was already cut to the size I wanted. Don’t you just love when projects are simple like that? Then sand the board to a smooth finish to get it ready for paint. 
Learn how to create a DIY Family Sign personalized with your wedding date! These signs also make great gifts for showers and weddings! Get the how-to at LoveGrowsWild.com #wedding #diy
I’ve painted many things in my lifetime, and this is one of the best tricks I’ve learned along the way:
When you’re doing a project that doesn’t require paint on both sides, gently hammer a few nails into the back of the board around the perimeter. The board will sit up off your work surface, and you can easily paint the edges without having your board get stuck to the table! I’m telling you, this tip is a KEEPER! I highly recommend pinning it for later! 

AWESOME PAINTING TIP! Learn how to easily paint around edges without getting paint on your table!
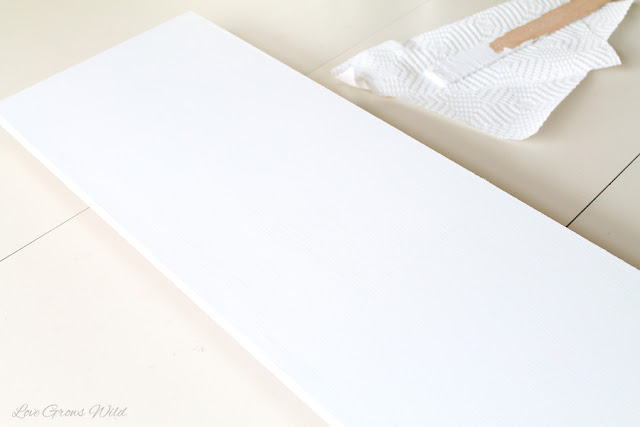
First paint your board with a primer. 
Learn how to create a DIY Family Sign personalized with your wedding date! These signs also make great gifts for showers and weddings! Get the how-to at LoveGrowsWild.com #wedding #diy

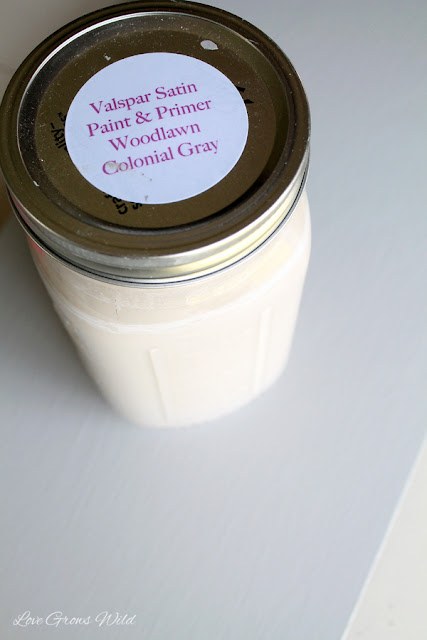
Then paint at least two coats of your desired paint color. I love this Woodlawn Colonial Gray from Valspar. Just about my whole house is painted in this color! P.S. you can check out my easy method for storing and organizing leftover paint here!

Learn how to create a DIY Family Sign personalized with your wedding date! These signs also make great gifts for showers and weddings! Get the how-to at LoveGrowsWild.com #wedding #diy

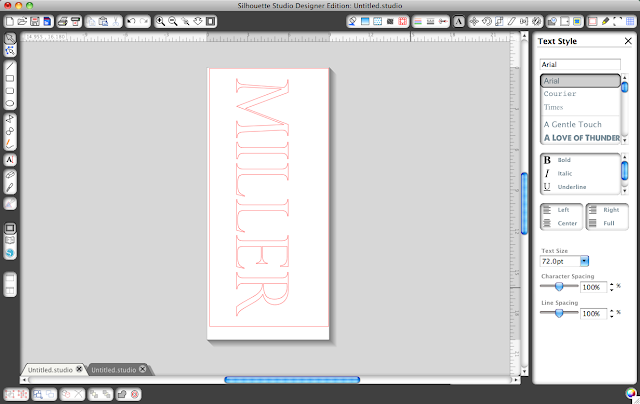
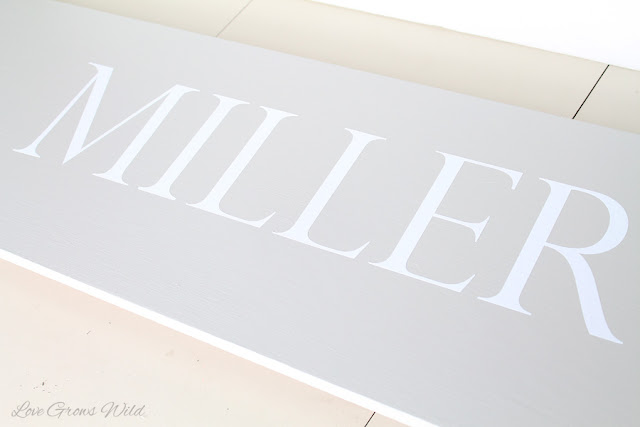
Once the paint is totally dry, it’s time to work on the lettering for your sign. I could have hand painted the letters (like I did here and here), but frankly I didn’t have the time or patience for that method so I opted to use vinyl letters cut with my Silhouette machine. It’s fast, easy, and looks much cleaner than painting everything by hand. Just open your Silhouette Studio software and add your last name in a large, traditional text. The little rulers on each side make it super easy to size the letters to fit your board. Once you’re happy with the way it looks, feed a roll of vinyl into the machine and watch it do all the hard work for you!

Psst! If you don’t have a Silhouette cutting machine yet, there’s a big sale coming up on Wednesday! Make sure to check back to get a discount code and see what other amazing things Silhouette can do! Seriously, it’s my absolute favorite crafting tool!

Learn how to create a DIY Family Sign personalized with your wedding date! These signs also make great gifts for showers and weddings! Get the how-to at LoveGrowsWild.com #wedding #diy
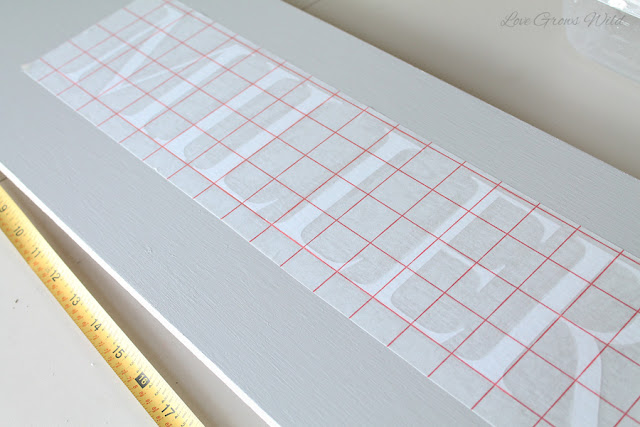
To easily transfer the cut letters to your sign, use a piece of transfer paper and place the letters in the center of your sign, slightly more towards the top. The grid lines on the transfer paper make it easy to keep the letters level. 

Learn how to create a DIY Family Sign personalized with your wedding date! These signs also make great gifts for showers and weddings! Get the how-to at LoveGrowsWild.com #wedding #diy

Peel away the transfer paper, and you have one part done! Only two more to go!

Learn how to create a DIY Family Sign personalized with your wedding date! These signs also make great gifts for showers and weddings! Get the how-to at LoveGrowsWild.com #wedding #diy

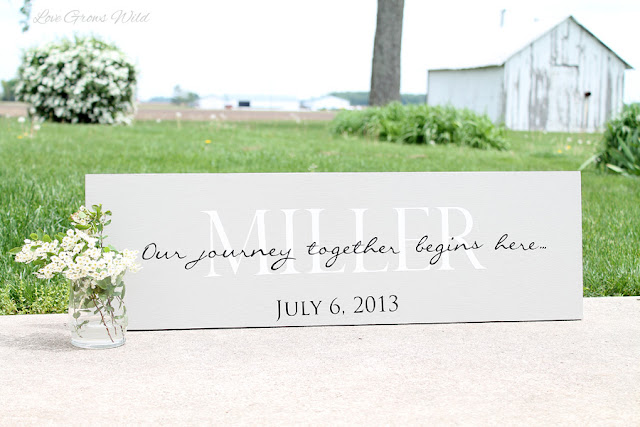
Next, create a second design in your Silhouette software with your wedding date and a special phrase. I chose “Our journey together begins here…” but my own wedding sign says “All because two people fell in love.” Choose something that will be special and meaningful to you!

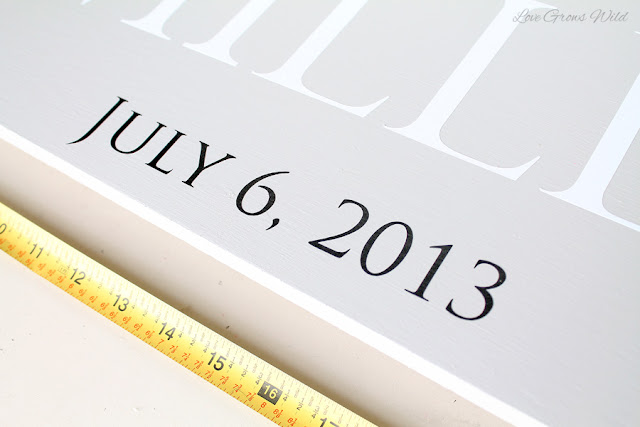
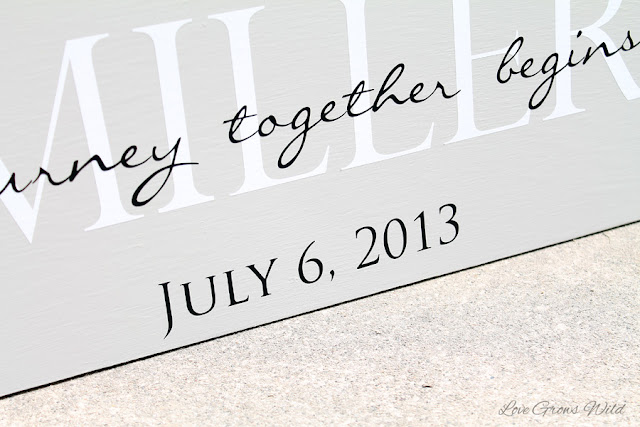
Cut your second design with a coordinating color of vinyl and use the same method to transfer the letters to the sign. Place the date centered on the bottom of the sign and the phrase centered on top of the name.

Learn how to create a DIY Family Sign personalized with your wedding date! These signs also make great gifts for showers and weddings! Get the how-to at LoveGrowsWild.com #wedding #diy

I chose white vinyl for the name so it would be light and fade into the background, and I used black vinyl for the rest of the letters so they would stand out. You can use classic colors like these or try playing around with the colors of your wedding! Just don’t forget a tape measure to help center your designs.

Learn how to create a DIY Family Sign personalized with your wedding date! These signs also make great gifts for showers and weddings! Get the how-to at LoveGrowsWild.com #wedding #diy
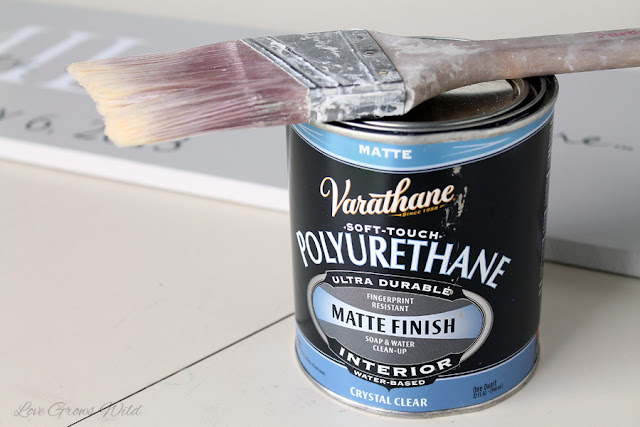
To ensure your sign will stay beautiful for a long time to come, I recommend sealing it with a few coats of polyurethane. I absolutely adore this matte poly from Varathane and have been using it on tons of projects lately. It dries crystal clear with a beautiful matte finish.
Learn how to create a DIY Family Sign personalized with your wedding date! These signs also make great gifts for showers and weddings! Get the how-to at LoveGrowsWild.com #wedding #diy
Once the polyurethane is dry you are ready to hang your sign! Add two sawtooth hangers to the back of the board and place it in a special spot in your home. Every time you walk past, it will bring back sweet memories and a smile to your face!
Learn how to create a DIY Family Sign personalized with your wedding date! These signs also make great gifts for showers and weddings! Get the how-to at LoveGrowsWild.com #wedding #diy

Learn how to create a DIY Family Sign personalized with your wedding date! These signs also make great gifts for showers and weddings! Get the how-to at LoveGrowsWild.com #wedding #diy

Learn how to create a DIY Family Sign personalized with your wedding date! These signs also make great gifts for showers and weddings! Get the how-to at LoveGrowsWild.com #wedding #diy
I love the way my sign turned out, and I hope it brings so much joy to my Aunt and her new husband as they begin their new life together! 

Let’s Keep In Touch!

Subscribe to Blog | Follow on Facebook | Follow on Twitter
Follow on Pinterest | Follow on Instagram | Subscribe to Newsletter
P.S. I’m sharing this post at some awesome link parties… Check them out HERE!

This post has been sponsored by:
The Weary Chef features weekly menus of tasty, quick dinners PLUS kid dinner ideas, bonus recipes, and Friday cocktails! Follow The Weary Chef on Facebook and Twitter to never miss a recipe!
Pin
Share
Post
Email
Print
DIY Decor
by Liz Fourez 
34 Comments

About Liz Fourez

View all posts by Liz Fourez

Related Posts

  • gallery wall artwork inspirationHow to Fill a Blank Wall with Art
  • Yarn Wrapped Christmas TreesYarn Wrapped Christmas Trees
  • Neutral Living RoomTone on Tone Woven Wall Art DIY
  • Are you curtains just a little too short? Home blogger Liz Fourez shares a few ways you can easily add extra length.How to Lengthen Curtains That Are Too Short
PREVIOUS: Crunchy Romaine Strawberry Salad
NEXT: Time to Sparkle Link Party #10

Comments

  1. ~Lindsey says: May 20, 2013 at 12:18 pm

    It’s very cute! I have a cricut…wish I had a silhouette!

    Reply
  2. Megan Vaughn says: May 20, 2013 at 12:22 pm

    Such a beautiful gift! Congratulations to your husband’s aunt! ๐Ÿ™‚

    Reply
  3. Chelsa says: May 20, 2013 at 4:39 pm

    love my silhouette! where did you get that poly?
    your sign turned out great!

    Reply
  4. Jamie Alanna says: May 20, 2013 at 11:55 pm

    Great job, Liz! I love that painting tip with the nails ๐Ÿ˜‰
    Jamie @ somuchbetterwithage.com

    Reply
  5. Shannah @ Just Us Four says: May 21, 2013 at 2:53 pm

    Beautiful! Great tip on the nails on the bottom to help paint the sides!

    Reply
  6. Krystie says: May 24, 2013 at 2:28 pm

    love the sign, I am putting on my to do list! thanks.

    Reply
  7. Carolyn says: May 27, 2013 at 2:40 am

    I just wanted to let you know that I featured your beautiful sign on homework. Thanks so much for sharing it on The Inspiration Board.

    carolyn
    homework &
    DETAILS

    Reply
  8. DesignedByBH says: May 28, 2013 at 4:33 pm

    I love the sign! ๐Ÿ™‚

    Reply
  9. Mackenzie says: May 29, 2013 at 7:01 pm

    This is SUCH an awesome wedding gift idea; LOVE IT Liz! Thanks! ๐Ÿ™‚

    Reply
  10. Jamie @ Huckleberry Love says: May 29, 2013 at 8:44 pm

    This is very cute and a great Tutorial! Thanks so much for sharing. ๐Ÿ™‚ I would love for you to come and link this up to our weekly party, http://www.huckleberrylove.com/2013/05/much-ado-about-monday-no-11.html

    Hope to see you there,
    Jamie
    http://www.huckleberrylove.com

    Reply
  11. Aimee Lane says: May 30, 2013 at 4:00 pm

    Your sign turned out awesome! I didn’t see it until just now or I would have featured you for sure! Share it again this week and I’ll catch it this time for sure!!! XO, Aimee

    Reply
  12. [email protected] says: June 1, 2013 at 4:45 am

    Your sign turned out soooooo good! Love it! ๐Ÿ™‚

    Reply
  13. [email protected] says: June 1, 2013 at 4:47 am

    You did such a great job! Love it! ๐Ÿ™‚

    Reply
  14. Karen H says: June 8, 2013 at 1:09 am

    I absolutely LOVE your sign. I just finished making my daughter the one that says the family name and Est. 2013. BUT….. I really think I like yours so much better!

    Would you mind telling us which fonts you used? I especially like the script font!

    Thank you so much!

    Reply
  15. Amanda says: June 12, 2013 at 12:16 pm

    What a beautiful and thoughtful gift! I love the way that you layered the text.

    Reply
  16. Anonymous says: June 29, 2013 at 1:44 am

    I love your sign as well! Could you share which fonts you used? Thanks!

    Reply
    • Liz Fourez says: July 2, 2013 at 11:38 am

      Thank you so much! I used either Perpetua Titling or Trojan Pro for the name (both are similar) and Callie Hand for the script font. I’m in love with that one! Have a great day : )

      Reply
  17. Mel@JunkinJunky says: September 26, 2013 at 12:26 am

    Hi Liz. I have admired this sign for a while now, well, since you posted it ๐Ÿ™‚ I pinned it with the intention of making it one day, and today was the day. I should have read the comments first so I knew which fonts you used, but I got close on the name and perfect on the scripty font. Thanks for the tutorial.

    Reply
  18. cmorrow says: December 30, 2013 at 7:40 pm

    Hi, The sign is beautiful! Perfect for wedding gifts, I was wondering if you could tell me what size of board and what size of lettering you used.
    Thank you,

    Reply
    • Liz Fourez says: January 6, 2014 at 7:56 am

      Thank you! The board size was about 30 inches x 10 inches, (guessing since I gave it away as a gift!) and the fonts were Callie Hand for the script and either Perpetua Titling or Trojan Pro for the name and date. Thanks so much for stopping by!

      Reply
  19. Carmen Anaya says: April 30, 2014 at 3:19 pm

    Thank You for sharing I am going to make one for my neices wedding. I can’t wait to make it. So simple and yet classy looking.

    Reply
    • Liz Fourez says: April 30, 2014 at 11:46 pm

      How sweet! I bet she will love it!

      Reply
  20. Callie says: May 9, 2014 at 10:32 am

    Hi! I love this sign!! I am
    Making it for a friends wedding and my husband thought the polyurethane might do something funky to the vinyl? You haven’t had a bad experience with it on vinyl? Thanks!!

    Reply
    • Liz Fourez says: May 12, 2014 at 9:45 pm

      How sweet! I bet they will love that! I’ve used it to seal several signs over vinyl and haven’t run into any major issues. You’ll want to use a light touch so that they vinyl doesn’t move, but other than that, you should be good to go!

      Reply
  21. kim says: October 23, 2014 at 8:11 pm

    Beautiful!!!! I am trying so hard to make signs and need help. I’ve been making stencils and using paint to make them. They take forever, I have a silhouette cameo that I make the stencils out of and want to use it to cut the vinyl. What kind of transfer paper do you use? thank you so much:)

    Reply
    • Liz Fourez says: October 24, 2014 at 11:12 pm

      Hey Kim! I’ve used transfer paper that Silhouette makes as well as brands sold at Hobby Lobby. Both work just fine in my opinion! Have fun makes some signs! It’s one of my favorite DIY’s to do. ๐Ÿ™‚

      Reply
  22. Sarah says: December 6, 2014 at 2:49 am

    Will the sealant cause the vinyl to peal? I’ve heard so many mixed info.

    Reply
    • Liz Fourez says: December 8, 2014 at 10:42 pm

      Hey Sarah! I haven’t had any issues with the sealant causing the vinyl to peel so far.

      Readers: Have any of you run into that problem?

      Reply
  23. connie says: April 9, 2015 at 6:52 pm

    Love the sign! I have a cricut machine. Would love to make this. Do you know if i can get the same fonts you used? Thank you!

    Reply
    • Liz Fourez says: April 13, 2015 at 3:06 pm

      The script font was Callie Hand and the other was either Perpetua Titling or Trojan Pro. I’m not sure how the Cricut machine works since I don’t have one, but with Silhouette, if the font is on your computer, you’re able to use it in the Silhouette software. I hope this helps!

      Reply
  24. JUDY LOHMAN says: September 26, 2015 at 6:11 am

    What are the measurements of your sign? Love it!

    Reply
  25. kelly says: October 10, 2015 at 12:36 pm

    I am trying to paint a sign like this for a friend and you can see all my brush strokes. I was wondering how you got your finish to look so smooth? Thanks

    Reply
    • Liz Fourez says: October 19, 2015 at 11:36 am

      Hi Kelly! Using a foam roller instead of a paintbrush helps with brush strokes! ๐Ÿ™‚

      Reply
  26. Katuie says: January 7, 2016 at 4:10 am

    Hi, I was wondering if you can suggest what to do if you’d like to use the sign in a table. Is there a way to create an easel on the back or something.? Thanks for sharing!

    Reply

Leave Your Comments Cancel reply

Your email address will not be published. Required fields are marked *

Liz Fourez started Love Grows Wild in 2012 with a passion for interior design and homemaking and a dream to help others create a home they love.  From simple project tutorials, to holiday and entertaining ideas, to her journey renovating a 1940’s farmhouse, Liz demonstrates how to create a beautiful and inviting home with a handmade touch. She turned her signature cozy, neutral style into a best-selling book in 2016 and continues to inspire readers with her captivating photography and easy decorating ideas. Read more about Liz > > > >

LOOKING FOR SOMETHING?

FOLLOW ALONG

  • contact
  • MEET LIZ
  • advertise
  • privacy policy/disclosure
  • Blog

Copyright © 2025 · Prima Donna theme by Georgia Lou Studios

COPYRIGHT ยฉ 2017 ยท DESIGN + BRAND: BLISS AND TELL BRANDING COMPANY