
Make a big impact this Fall with a GIANT Distressed Sign!


It may be 97 degrees here in good old Indiana today, but I just can’t take it anymore! Ever since I planted some pretty yellow mums in a galvanized bucket by my front door I’ve been wanting to dress my breezeway up for Fall! You may remember the original makeover my patio got a month or so ago and how much of a difference a little paint and fabric made! I kept the patio furniture and area rug neutral colors so it would be easy to change up the decor for each new season. To make the transition to Autumn, all I need to do is switch out the pillow covers and add a few Fall accessories!
I’ve been a little obsessed with making distressed signs lately (have you check out this one and this one from my kitchen makeover?), so of course I wanted to make one for my patio too! I spotted this extra big sign from Priscilla’s on Pinterest one day and knew something like this would fit perfectly next to my front door!
I did a really great detailed post a few months back about how to create distressed signs, so I’m just going to give you the basic run down of how I created this new sign for my patio. If you want to see all my tips and tricks for creating perfect distressed signs, you can check that post out here!
I first picked up a 6 foot 1 x 12 from the hardware store.

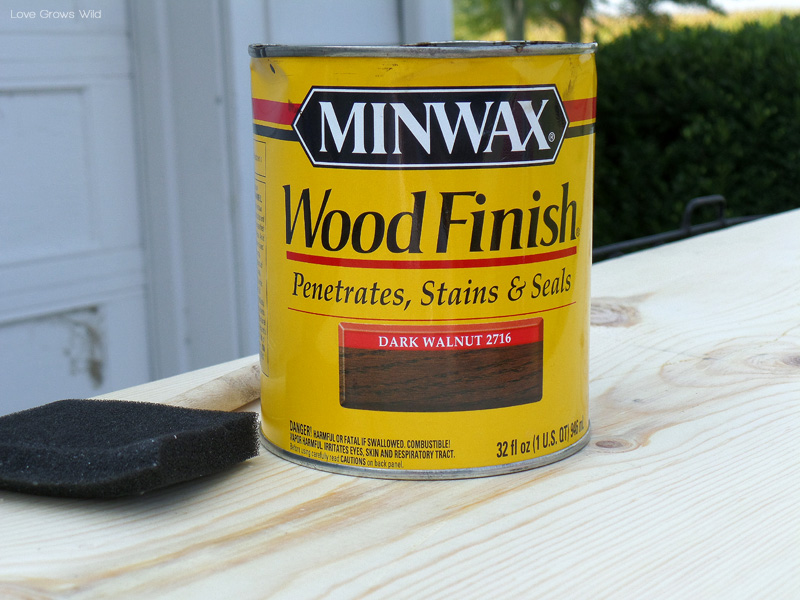
I wanted to create a gorgeous distressed finish on the sign with creamy white paint on top and dark wood stain underneath. I’ve used this Minwax Dark Walnut stain on quite a few projects, and I just love the color! So I first applied a layer of dark walnut to each side of the board using a foam brush. I’m NOT a big fan of cleaning stain out of brushes, so I usually stock up on inexpensive foam brushes and just pitch them when I’m done!
After letting the stain set for about 15-20 minutes, I wiped away any stain that hadn’t soaked into the wood yet. Then I gave the side I wanted as the front of my sign a light sanding to prep it for paint. Paint won’t want to stick very well to the stain if you don’t sand first!
After sanding the board, I wiped away all the dust to get it ready for paint. I wanted to leave the letters on my sign the dark wood, so I applied vinyl letters I created using my Silhouette CAMEO. Using a cutting machine like the Silhouette is such an easy way to create custom lettering like this! I use mine ALL the time! (Psst! There’s a big Silhouette sale going on through 9/13! You’re welcome!)

I just stuck the letters on my board and painted over them in my favorite white paint, Heirloom Lace. I applied two coats and removed the vinyl letters as soon as I finished my second coat. It’s better to take them off when your paint is still wet, versus letting the paint dry around the vinyl! Once the paint was all dry (which didn’t take long in this crazy heat), I took my palm sander to the sign! I sanded over the entire board, focusing especially on the corners and edges. I sanded and sanded until I was happy with the amount of “distress” I created on the board. And my hand was numb. And the sun went down. It was a rough day. (Get it?? Rough… sanding… OH Liz, you need sleep!) All that gorgeous walnut stain peeks through behind the white and makes the sign look like it has been around for ages! I just cannot get enough of making these lovely signs!

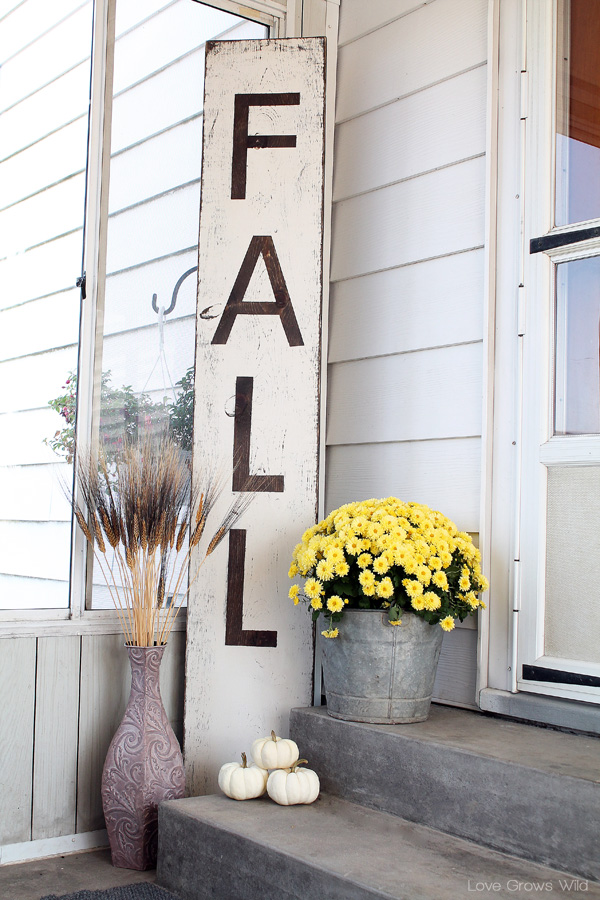
I plopped my extra tall Fall sign in it’s new home by my front door along with some yellow mums and white pumpkins. I LOVE the impact this large sign makes, and it creates such a fun focal point when you walk into my breezeway! It definitely feels more warm and cozy in there now!
 ra
ra 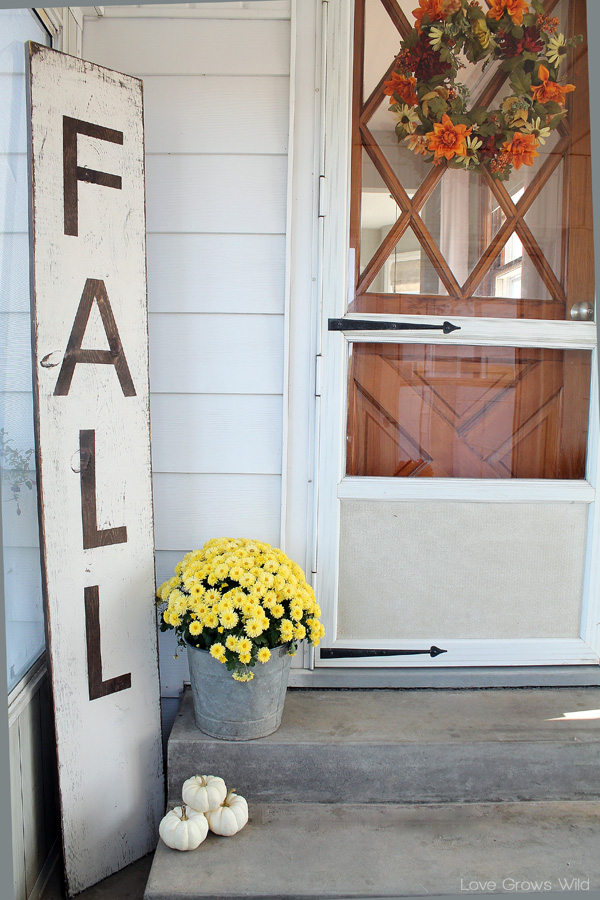
Now I just need some new pillow covers for my chairs and a few more Fall accessories, and my patio will be officially ready for Fall!
So what do you think about my new Fall sign? Where would you put a tall sign like this in your home? What colors would you use? I’d love to hear what you think!
Check out more wood projects from Love Grows Wild:


Let’s Keep In Touch!
P.S. I’m sharing this post at some awesome link parties… Check them out HERE!

I love it! I definitely to make some kind of sign for fall!
I LOVE this!!! I want to make one now, too. 🙂
I think it is funny that the fall sign is by your stairs.
Oooh I want one of these!!! This is awesome Liz, Pinning and making one 🙂 xo
This is adorable! It has been hot. Ugh. I am chilling inside, AC on 70 with coffee and things like broccoli cheese soup in a state of denial. I haven’t made my annual mum purchase yet because I want it to cool off!
Love your porch. So cozy 🙂
I love Hilary’s comment:) Your sign is wonderful, I love how large you made it!
this is SO cute. i need one asap
http://www.handmadeintheheartland.com
i really love all your signs. i can’t wait to make one for fall now:)
I LOVE this sign!
I love how you made a brand new sign look rustic! Beautiful!
Love this sign 🙂
LOVE it I just made a sign copy cat of pinterest. Sent to my daughter in Texas. I love how it came out. Your sign is wonderful You did a great job. Thanks for posting. I am currently making a subway sign for Thanksgiving. So I will be working on that this weekend. Andi
This adds such a nice touch to your porch. I love that a sign of that size makes such a statement. Nice job!
Ok, so this is exactly what I want for my cupcake sign above my cupboards….but probably not quite so big. Want to make me one???? 😉 LOL!
I am in love with wooden signs! Awesome job! http://churchstreetdesigns.blogspot.com/
I am really smitten over this sign and your cozy porch area! -Pinned!
I love this sign! Just pinnedd it.
GORGEOUS! Featuring this today on my FB page – thanks for linking it up at the {what’s shakin’} link party, Liz!
I love this Fall sign! It’s so cute and simple–thanks for sharing how you did it! I’m stopping by from Get Schooled Saturday (#13 How To Put A Label On A Photo) Have a great weekend!
I absolutely love this Liz!!!! Its perfect on your porch.
Amazingness. Seriously….amazingness.
I wanted to invite you to the Friday Flash Blog Party, the best linky in town! I hope you’ll join us and link up. Who knows. You may just get highlighted!
The party goes on ALL weekend.
Jennifer @ The Jenny Evolution
http://www.thejennyevolution.com
Love your Fall Sign!! Would love for you to share at Simple & Sweet Fridays. So Creative!!
Hugs,
Jody
That looks gorgeous!! I will have to make one of these signs soon, I love the distressed look!
I love this sign…so simple but pretty…I would want one for every season!
I love it…. It’s gorgeous…. Great job!
This looks amazing!! I love it!!
I would love to invite you to link it up at our new party Lovely Ladies Linky where you link up once and get seen on 6 blogs!!
Link up starts Wednesdays!
http://www.lifewiththecrustcutoff.com/lovely-ladies-linky-link-up-2/
Hope to see you there 🙂
Parrish @ Life With The Crust Cut Off
This is just awesome, I totally love it!!! Great job!
Featuring YOU today over on my blog! Thank you so much for linking up to {wow me} wednesday!
Ginger @ GingerSnapCrafts.com
I love all your signs but have a quick question. I swear every time I attempt to make a sign with a vinyl stencil my letters bleed, most of the time too bad to even play it off as “rustic” or “distressed”. Have any tips on how to avoid that? I make sure my vinyl is rubbed down really well but it doesn’t seem to help at all!
I’ve honestly never had an issue with the paint bleeding under the vinyl, but I’ve only tried it on wood so far though. My only suggestion would be to sand the piece a bit first so that the vinyl has something to cling to. For example, some glossy paints or stains have a really slick surface, so maybe the vinyl isn’t sticking very well. Try sanding first and wiping away all the dust VERY well. Also, maybe the brand of vinyl makes a difference? I usually use the Silhouette brand vinyl with no problems. I hope this helps!
This is so great! Would you mind sharing font and rough size you did? Thanks a ton!
Hey Haley! I don’t remember the exact font and size I used… I apologize!
I pinned this tutorial back when you first posted it and I’m so glad I did. My husband made me a “Welcome” sign over the weekend similar to this and I’m so thankful that you put the wood measurements down. When we were searching at Lowes for the right piece of wood, I was trying to describe what size I wanted it to be and I’ve pinned a few “signs” like this but you were the only one who put measurements down! So while I didn’t distress our sigh (we might still do that) and my husband painted the letters for a more personal, rustic touch, it did turn out beautiful with the help of this post. Thanks so much!
IMG_8413.jpg
Would it be possible to take measurements of your letters? That would save me a lot of time guessing and trying to figure it out myself. I just bought a cricut and this project has been on the top of my list! Thank you ever so much!!