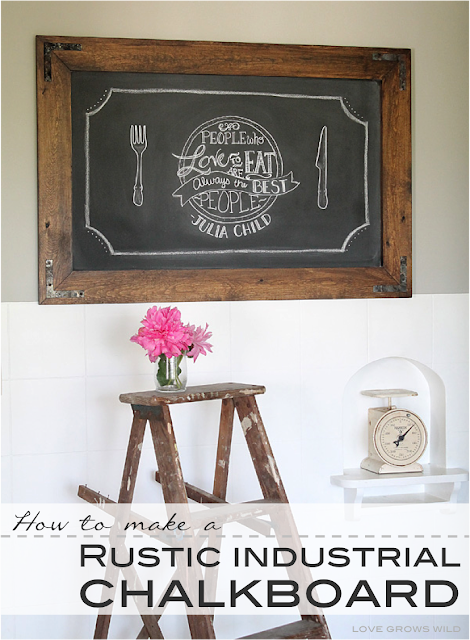
This project combines two of my very favorite things: rustic home decor and chalkboard art! See how I made this DIY Rustic Industrial Chalkboard for my kitchen and learn how you can make one too!
So this is the story of a chalkboard that almost didn’t happen… Let me explain. I’ve had this vision of a big beautiful chalkboard in my kitchen for a long time now, and I finally got motivated enough to tackle the project. I was digging through our garage one day and found some really cool old lumber that I thought would be perfect to build a frame for the chalkboard! It would naturally have the rustic look I wanted, and HELLO… it was free! I was so excited to get started on the frame, until I tried cutting the boards and realized that I had picked the strongest, most solid piece of tongue and groove old lumber on Earth! This stuff was seriously like cutting through steel! After struggling with my jigsaw for two hours and unsuccessfully trying to piece together uneven mitered corners… I gave up!
My poor unfinished frame sat in the garage for weeks before my sweet husband took pity on me and decided it was time to upgrade to a miter saw for our 2nd wedding anniversary. Eek!! (Who knew I would be more excited about this than he was??) We set up our big, beautiful new chop saw, and I felt the urge to tackle my chalkboard once again. But this time, I made life much easier on myself!
Here’s how I made my Rustic Industrial Chalkboard:
Supplies needed:
– chalkboard cut to 24″ x 38″ (or make your own with chalkboard paint)
– 12 foot 1 x 4 board
– 2 D-ring hangers
– 4 L bracket corner braces
Supplies on hand:
– jigsaw, miter saw, sandpaper, screws, drill, paint brush, wood stain, polyurethane
I picked up a 2′ x 4′ chalkboard from Menards in the lumber section and cut it down to the size I wanted for my kitchen with my jigsaw (24″ x 38″). I had originally planned on making one myself with some chalkboard paint, but at $9.97 for a chalkboard already finished, I thought it was totally worth it to save a step! A can of chalkboard paint would have cost me about the same.
Then I moved on to attempt #2 at making a frame. THIS time, I picked up a 12 foot 1 x 4 board from the store and had them cut it into 4 pieces to fit around my chalkboard. Sidenote: I was actually really nervous the first time I picked out lumber by myself, but the nice employees at the store always help me out and cut whatever I need! They just look at me kind of strange when I tell them what my crazy project plan is : ) I added 2″ to each side of my chalkboard measurements to get the dimensions for my frame (28″ x 42″). This size would give me just enough room to attach the chalkboard to the back of the frame.
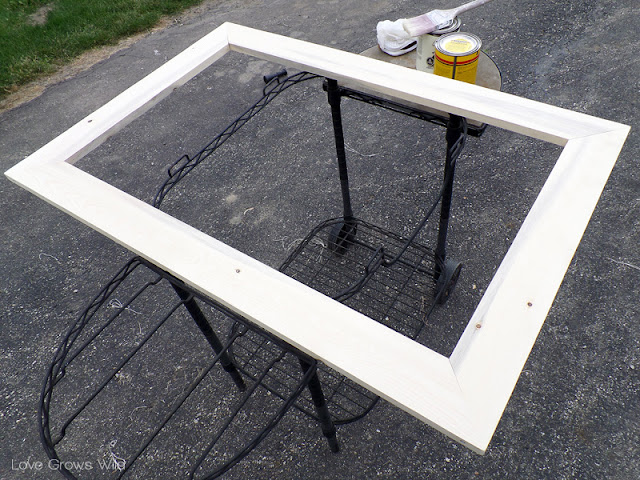
Once I got home, I used my beautiful new miter saw for the first time and made 45 degree cuts on the ends of all the boards to create a frame. THIS time, they lined up perfectly! I put a screw in each corner to hold it together and sanded the whole piece down to get ready for stain. Do you like my fancy painting stand? Yeah, it used to hold our old grill. This is one piece of junk I’m actually grateful my husband kept. It comes in handy!
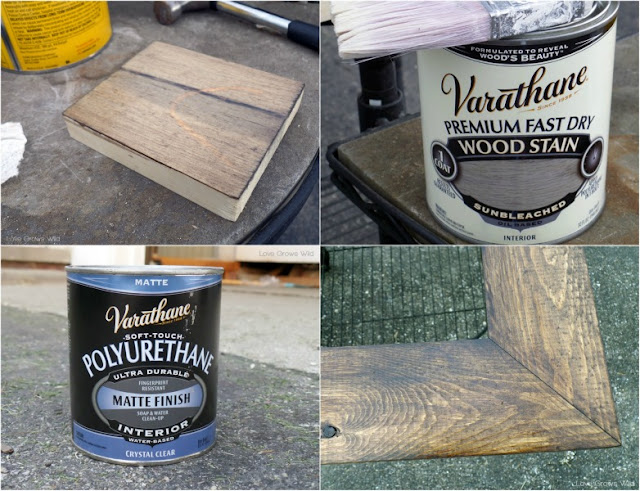
I wanted to give the wood frame a really weathered, rustic look, so I tested out a few different staining methods to see which I liked best. I always recommend practicing on a scrap piece of wood first, so you don’t ruin your whole project if it doesn’t turn out! The top left corner below shows one of my practice stain attempts. I ended up first applying a stain from Varathane called Sunbleached. It has a beautiful gray color, but on my light pine wood it didn’t show up very well. So I switched to my favorite Dark Walnut stain and applied a nice thick coat with a rag. I let it sit for about 10 minutes and rubbed away any excess stain with a clean rag. The result was a gorgeous, rich color that still had a lot of the wood grain showing through. Exactly what I wanted!
To make the frame look aged, I rubbed some extra stain in the corners and edges to give them a slightly darker appearance. The key is to not over-think it! Just apply the stain haphazardly until it looks right to you. After about an hour, the stain was dry, and I applied a coat of polyurethane to the frame. I love love love this Matte Finish poly from Varathane because it dries perfectly clear and non-shiny. Great for rustic pieces like this! (And no, I’m not paid by Varathane, I just really like using these products!)
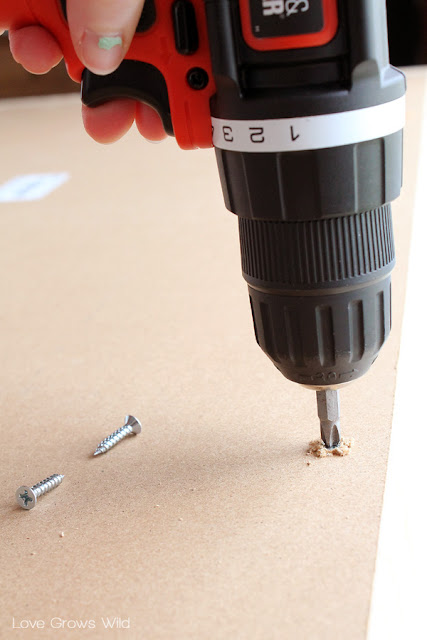
After letting the frame dry overnight, it was time to attach the chalkboard! I used about 10 small screws to secure the chalkboard to the back of the frame…
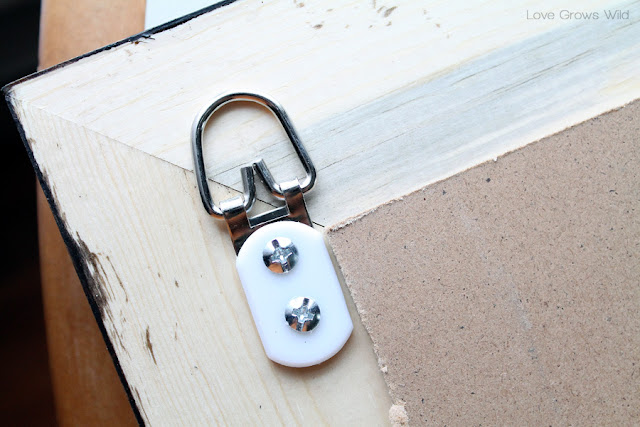
and attached a D-ring hanger to the top corners.
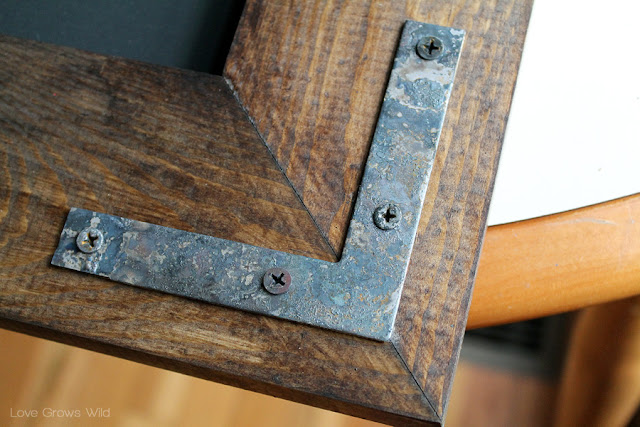
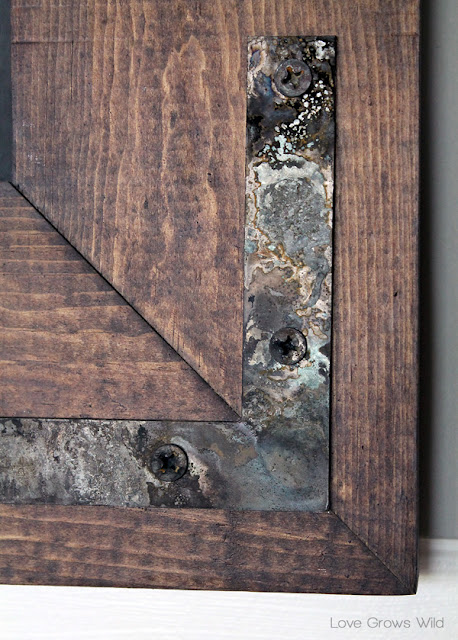
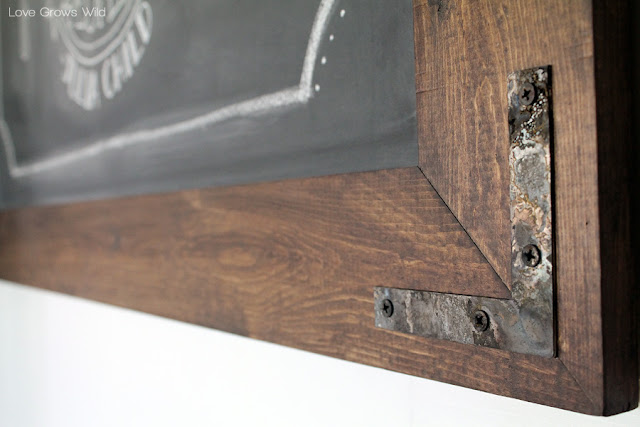
To give the chalkboard a more industrial feel, I added an L bracket to each corner of the frame. Would you believe me if I told you this was a brand new silver bracket I picked up from the store? Well… IT IS! I used a SUPER cool aging technique on the brackets, and I have a tutorial to share with you later this week! I’m so giddy how gorgeous these turned out that I can hardly contain myself! But I’ll just keep you in suspense for now : ) From shiny silver to aged patina in one step…
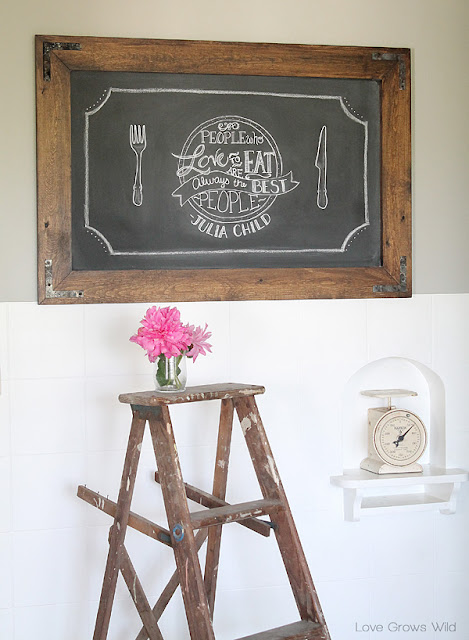
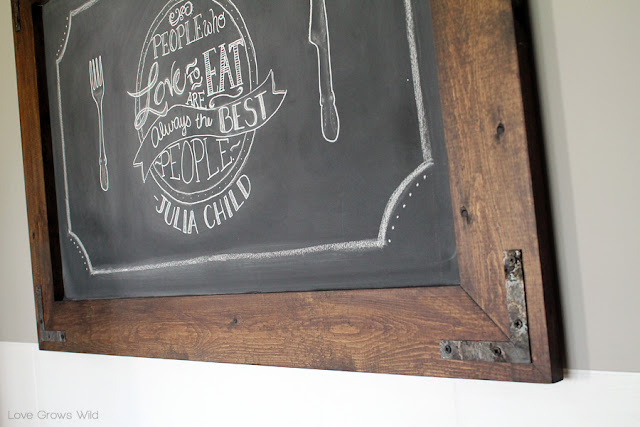
My new chalkboard was all finished and ready to be hung in the kitchen at last! I seasoned the chalkboard really well by rubbing the side of a piece of chalk all over the board until it was completely covered, then wiped it all away with a dry rag. Otherwise the first mark you make will be permanent if you don’t season your board first! After playing with some fun chalk art designs, my new chalkboard is ready for its big debut! Can you tell how excited I am about this??
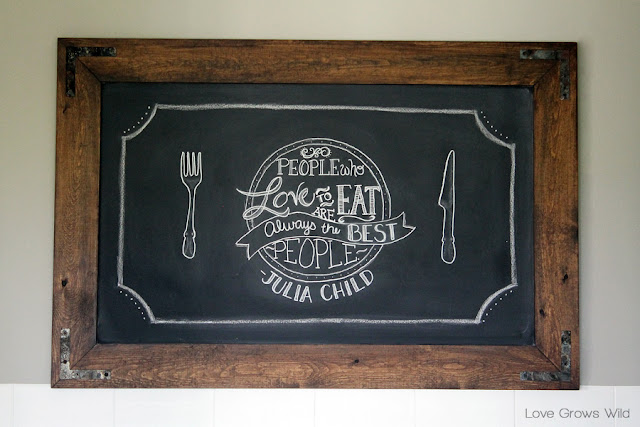
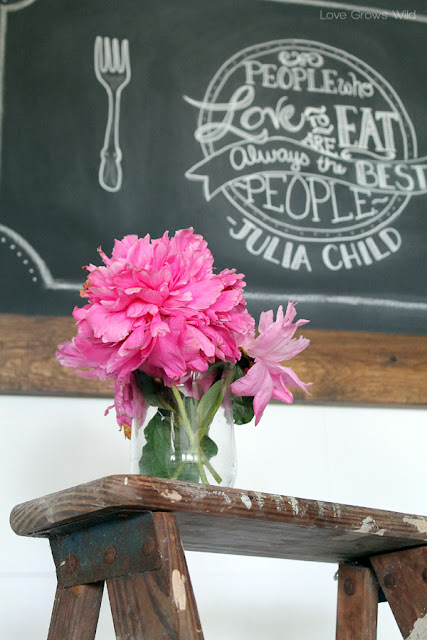
As a newbie to real chalkboard art (check out my easy vinyl chalk art!), I found some awesome inspiration from the Etsy shop, Lily and Val, and I drew this by hand from looking at one of their cute prints. Not bad for my first time, right??
And how gorgeous is the patina on the these brackets? It adds the perfect rustic touch to the frame! Shiny silver hardware just would not have done this piece justice!
A close-up of my handiwork…
I’ve decided that chalkboard art is just like the doodling we all did in our notebooks in high school, but more grown up! This just gives me an excuse to sit and doodle for an hour, and I love it!
I am ridiculously in love with my new rustic industrial chalkboard, and you can expect a whole lot of fun chalkboard art coming your way! I’m already itching to switch it up again, and it has only been a few days! Everyone should have one of these gorgeous chalkboards in their home, so I wanted to share with you the cost breakdown so you can make one too:
chalkboard – $9.97
12 foot 1′ x 4′ board – $4.81
2 D-ring hangers – $2.98
4 L bracket corner braces – $3.97
TOTAL COST: $21.73
Not bad for a big, beautiful DIY chalkboard!
So tell me… Do you love the chalkboard art trend? Do you have chalkboards in your home? I’d love to hear your thoughts!
Let’s Keep In Touch!
P.S. I’m sharing this post at some awesome link parties… Check them out HERE!





Liz it is absolutely gorgeous!! Not only do you have a very cool piece of art for your kitchen for a crazy little bit of money, you have to be so proud that you are creating it yourself!
This is a wonderful tutorial! Your chalkboard turned out fabulous!!! AND your saying is ADORABLE!~ Thanks for sharing at TUTORIALS TIPS AND TIDBITS!
Liz I love this project SO much! Pinned 🙂
xo, Tanya
This is fantastic! I love anything vintage or that looks vintage. It would be a pleasure to have you join my weekly link party and share this. http://thelifeofjenniferdawn.blogspot.com/2013/06/a-little-bird-told-me-link-party-46.html
So very cool! The coloring is perfect and I love the aged brackets on the front. Great project. 🙂
Kelly
What a fun Paint Project! I love this Idea!
Come over to my blog and link up at my Paint Party!
http://startathome.blogspot.com/2013/06/paint-party-and-giveaway.html
Brooke Start at Home
I will follow on my way out!
I’m in love with it too!! It’s just gorgeous! Love how you styled it too.
Jamie @Better With Age
Beautiful!
It turned out absolutely gorgeous!!! We have a DIY chalkboard in our kitchen too…now I am wishing I had snapped pics while my hubby and I made it. Ok, save me some of that stain…I have a photo board that needs painted/stained and I am loving that dark rustic color 🙂
I love the rustic look of this! Now its on my project list! 🙂 Angela at sunnysweetlife.blogspot.com
Your chalkboard turned out wonderful! Love the rustic frame and your handiwork with the chalkboard writing! Very Nice!
Thanks for sharing,
Suzanne
Pieced Pastimes
PS-Would love to have you link this up to Saturday Sparks. Links open till Friday.
This turned out gorgeous! It definitely looks authentic – the stain was the perfect choic! Great job on free-handing the chalk art! It looks amazing!
Absolutely gorgeous – love everything about it – the aged wood – and the hardware is just perfect!
XOX
This seriously turned out amazing!!!!!!!!!!! I want one in my house now! Pinned!
This is absolutely beautiful! I love, love, love the metal rustic corners. But I am over the moon about chalk – board from Menards!! This is the first I’ve heard of this so I will be heading over there really soon.
I’m visiting today from CRAFT. I hope you get the chance to visit my blog, linkup and leave a comment, too!
~ Megin of VMG206
Link Up Sat thru Friday @ DIY Showcase Link Party
oh. my. word … this is GORGEOUS!! I have a huge chalkboard in my kitchen, but am the WORST chalkboard artist. Can you come to my house and doodle for me?? 🙂
By the way, I’m giving away a copy of Handmade Walls E-book on my blog right now if you or your followers are interested in entering to win! It has tons of ideas on how to create custom art and frames for your walls. Love it!
http://www.theturquoisehome.com/2013/06/yay-for-500-likes-on-facebook-handmade.html
It turned out so beautiful Liz! What an awesome project! Pinned!
Gorgeous Liz!!!! Love this!
Love the patina…looking forward to the tutorial.
Karen @ annumography
I love this!!! I have been wanting to make frames for my boys’ star wars posters, so this just inspired me!!! I am your newest follower!
Therena @ littlebitofpaint.blogspot.com
Oh my gosh. PLEASE come decorate my house!
This looks awesome!!! We would love it if you would link up at our linky party:
http://www.lifewiththecrustcutoff.com/two-girls-and-a-party-linky-party-20/
Live every Wednesday to Sunday.
Hosted by:
http://www.lifewiththecrustcutoff.com/ Parrish @ Life with the Crust Cut Off
http://thissillygirlslife.com/ Dana @ This Silly Girl’s Life
We hope to see you there!
Beautiful I love this idea! Can’t wait to read more about how to did it!
Thanks for linking to Take-A-Look Tuesday over at Sugar Bee Crafts – you were featured today!
–Mandy, http://www.SugarBeeCrafts.com
Oh good grief, Liz!! I love EVERYTHING about this piece. So awesome. The L brackets are what just make it super amazing!!
Love it! We recently painted a whole wall with chalk board paint, so much fun! I actually posted one of the things I doodled this week.. it’s the last picture in this post http://annekesikkema.blogspot.com/2013/06/binnenkijken-in-onze-cottage.html
I think it is gorgeous!!
LOVE, YOUR CHALKBOARD AND I WOULD LOVE TO FEAURE IT, IF THAT WOULD BE OK PLEASE LET ME KNOW,
LAUREN
I’m totally doing this!
Love it!! And, your chalkboard art is amazing!
Hi Liz! I love your chalkboard so much. I came across it a couple weeks ago and I was so inspired to create a frame like it. I shared that frame on my blog today: http://www.makinghomebase.com/diy-rustic-frame-map/
Fabulous!!!!
Kelly
I am obsessed with frames, chalkboard paint, and metal brackets and you just combined all of them! Love this! Pinned 🙂
~Katie @ Upcycled Treasures
Not sure if you caught the feature, you can see it here,
lauren
and thanks again for letting me show your work!
http://westfurniturerevival.blogspot.com/2013/06/revival-monday-117.html
Beautiful! I’ve wanted one for my kitchen for a long time – some day I will have one!
Love it! But you had me so excited to buy a chalkboard tonight at Menards for a project I’m working on, and ours doesn’t carry them. Ugh!
Where do you buy your Varathane products at?
Thanks,
Lisa
Hi Lisa! I purchased the Varathane products from my local Menards. I can always find them there!
Found your site through a pinterest link to your photo clipboards. I’ve been on the hunt for a chalkboard like this with no success and now I see I can make it myself! I’ve even got some old barn wood that will work perfectly. Thanks for the great tutorial.
That’s wonderful, Abby! I’m so glad you found this tutorial! I bet your barn wood is going to look incredible with this!
How do you age the L straps?
Hi Lori! You can find the aging process I used here:
https://lovegrowswild.com/2013/06/how-to-instantly-age-new-hardware/
I hope this helps! Thanks for stopping by!
Liz,
You mentioned the screws for putting the 1×4 together could you let me know if you went in from the side with the screws or just how you did that step. I love the frame and you have inspired me to get this done for my wife!!
Paul, that is so sweet! Your wife is going to be so surprised! And yes, I just went in from the sides with the screws. What a great hubby you are!
Liz,
Thank you for the great frame, I made the chalk board ( wife loved it! ) and then moved on and made an American flag out of old rusted corrugated metal and the frame is perfect!!!
Paul, that is amazing! I bet your wife was so excited to receive your handmade gifts! The American flag sounds just beautiful. Thanks so much for sharing!
Love it so so much! Am not a tool gal not to mention have no idea how to use them. Can I buy one from you??
Thank you, Amy! I promise if I can learn how to use tools, so can you! I have a very helpful husband who has shown me some tips and tricks along the way, but now that I’ve overcome my fear of using the bigger tools, I can make all kinds of neat things! You can do this, Amy! 😉
Ha!! My husband with tools?? He doesn’t know how to swing a hammer! I guess I can always try. I am so not creative. I am a much better purchaser:)
Nice work!
Amy
Haha, I love it! I’m a pretty good purchaser too… probably too good! Thanks for stopping by!
This is so great! One of my New Year goals is to put a big chalkboard up for me to write ideas/plans/schedules/reminders on. One of those tools to help me achieve a few other organizational goals. Love this idea!
That’s a fantastic resolution, Tara! Getting organized always makes me feel better, I’m so much more productive. Thanks for stopping by!
I love this sooo much! I have been planning a chalkboard in my head for a few weeks and this is very close to what I had planned. I’m so happy to find out I can buy a chalkboard at Menards. That makes it even easier!
Yes, I love the chalkboards you can find at Menards! I know it’s easy enough to paint one yourself, but I’m all for saving myself some time whenever I can. Best of luck with your project, and I think you’re going to love it!
Are your L brackets 4″ in size?
Thanks in advance.
You nailed it! The brackets are 4″. I hope you love this project as much as I do!
Thanks. After I sent the message I noticed you specifed 4″ on the bracket ageing how to. Now I have to see if I can accomplish adding age to the brackets without using a torch. Maybe the stove may work in a slower forrm.
I loved this so much I made two of them! 🙂 And used one as the centerpiece of my kitchen command center. Thanks so much for sharing. I love your blog!
If you would like to see it, my command center post is here: http://www.farmoreprecious.com/8/post/2014/02/kitchen-command-center.html
Thanks again! 🙂
Rachel, you did an AWESOME job!! That chalkboard looks perfect in your command center, and I just love that fresh eggs sign you made. Perfection! Thank you so much for sharing this!
Liz, I am going to attempt this. Very, very cute. 🙂 Miss ya girl and I enjoy your site!!! 🙂 -Nicole R
Nicole!! I miss you like crazy, girl! We seriously need to figure out a time we can all spend together this summer. And you can totally tackle this chalkboard! I bet it will look gorgeous in your house!
Absolutely gorgeous!!
Thanks, Michelle!!
This looks awesome! I have an old fame this would look great in. How thick is the MDF chalkboard, do you think it would fit in a normal picture frame where the glass once was and the back would go on?
Hmm… that’s a good question! It’s about 1/4″ thick, so as long as it wasn’t a very small, thin frame, it should work. You’ll have to let me know how yours turns out!
Thanks for this tutorial! It’s gorgeous! I finally got around to making one of my own. http://redeemingsimpleliving.com/2014/08/21/new-desk-work-space-revealed/. I love all of your tutorials and decor and look forward to seeing more!
Wow… your space looks amazing, Katie! Fantastic job!! Thanks for sharing with us. 🙂
I love this project, great look! But I can’t find where to age the metal brackets? They look awesome and I’ve been looking for a technique. Can you point me in the right direction?
Of course! https://lovegrowswild.com/2013/06/how-to-instantly-age-new-hardware/
Have fun creating!
I absolutely LOVE this and am SO grateful that you posted it to inspire us all! THANK YOU for all the time and energy you put into this site!! xoxo Allie
Sweet comments like yours absolutely make my day. Thank you so much, Allie!!
Wow, this is gorgeous! I am really impressed! Could you explain, when you say you added a screw to the corner, where/how you did that? I can’t see any evidence of it in the front or back, so you are more clever than I have been when trying to make frames! I would think if you went in from a 90 degree angle in the side, the screw would have to be like 3 inches long and would probably split the wood. If you went in diagonally, you must have a kreg jig, right? I dunno; I would love to know how you did it! 🙂
Hey Jenn! I’m so happy you love this project! It’s one of my personal favorites. 🙂 So those are great questions. I added screws on the sides of the boards, about an inch – inch and a half from the corners of the frame. I made sure to use long enough screws that would penetrate through both boards, holding them together. Does that make sense? Some things like this are hard to explain! Using clamps to hold the boards together while pre-drilling the holes would definitely help with splitting the boards. And yes, the chalkboard is just slightly larger than the opening of the frame to leave space for attaching with screws. I hope all this helps! You’re going to love having this chalkboard in your home!
This chalkboard turned out super cute! I too, love Varathane for sealing! There is hardly any smell to it. I can use it in the house during the winter and it dries tough! Great for painted furniture pieces.
Yes! Varathane is AMAZING! I’m so glad to hear that another person loves it as much as I do.
Your chalkboard is super! I’m slightly envious of your doodling abilities. Did you use regular chalk, a chalk marker, voodoo on the actual words?
Haha, I wish I had magic chalk art voodoo! For this drawing, I think I printed the design out on paper, shaded the back of the paper with chalk, placed it on the chalkboard and traced over the front of the design with a ballpoint pen. It sounds kind of complicated, but it’s actually a really easy way to get awesome chalk art!
Did you use a marker or actual chalk?
Actual chalk! I can never get those markers to work right. 🙂
Hi there
I noticed the brackets came out a greenish colour after firing but scrolling down further they looked a brownish tinge which is much nicer than the green. What did u do to get them the lovely brownish colour? Thank you