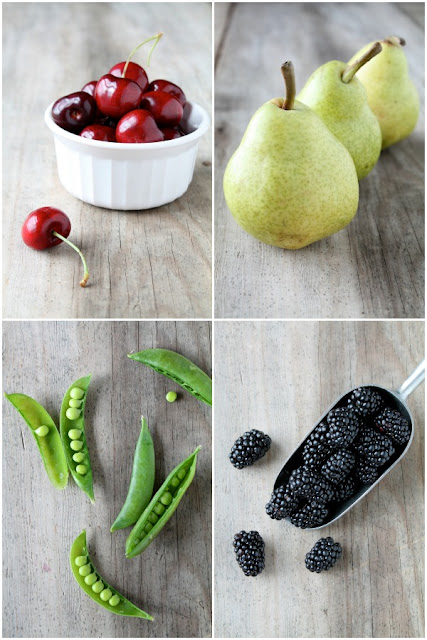
And here they are with the food photos added! I originally planned to make the photos black and white, but the color of the foods were so vibrant and gorgeous against the neutral background, I just had to leave them natural! Which photo is your favorite? I can’t decide between the beautiful color of the cherries, the shape of the pears, or the texture of the blackberries! And those little peas and so cute too! Okay, they are all my favorites!
Let’s Keep In Touch!




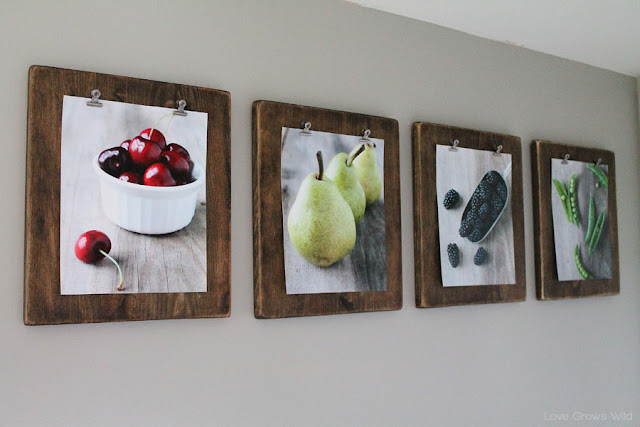
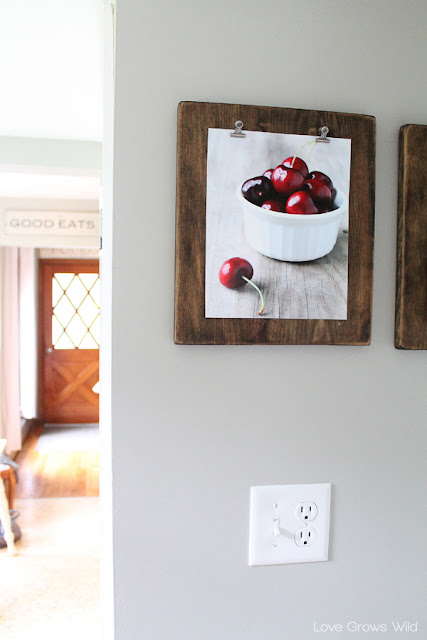

There are so many great tips in this post!!! I think your photography of the food is amazing and I love how you set up everything for the photo shoot. I also love how aged the wood looks that you used for the clipboards….I never would have guessed that it was new wood used for the project. Amazing job! This is definitely one of my favorite posts of the week!
Jamie | andersonandgrant.blogspot.com
Liz, these are so cool! Love the dark walnut stain and the clips!!!
Oh my goodness, those photos are stunning!!! Just BEAUTIFUL!!!! And I love the clipboard idea!!!! I love the rustic chic look you created! Just beautiful! 🙂
That his is such a great project! Your photos are incredible and literally pop off the boards!
You should set up an Etsy shop and sell them! You can just sell the files and not worry about having to print and ship them.
Thank you so much, Susan! Your sweet encouragement has helped me make the decision to open up a shop! If you’re interested, I’d love for you to stop by! http://www.etsy.com/shop/LoveGrowsWild
Have a wonderful day : )
Love it! Beautiful photography and awesome display idea.
This is such a great idea. I’d love to try this for my kitchen.
Found you through the Six Sisters Stuff link party. I totally love your clipboard frames. You could sell these. I’m not very handy when it comes to woodworking and neither is my husband. I love your photography. As a fairly new blogger myself, I can totally relate to the whole learning process. Your blog looks great! I’ll be following along on bloglovin.
Gorgeous, Liz!
Those are so cool! I pinned these to use in my next house 🙂
These are absolutely amazing Liz!! I am in love with the way you displayed them, but I am even MORE in love with the photos themselves!! You are an AMAZING photographer. I love food photography. It’s such a cooperative model 🙂
Love love love these!! 😉 And I am in love with these pictures!! Absolutely gorgeous!!
i. love. these. Seriously so pretty. Your photography is awesome! Thx so much for sharing.
These are lovely. I love the photos and the clip boards…really unique and professional looking. Well done.
So i just found your blog from making things cuter, and you’ve got a new reader here! these are sooo cute and the photography is gorgeous! good for you!
http://www.handmadeintheheartland.com
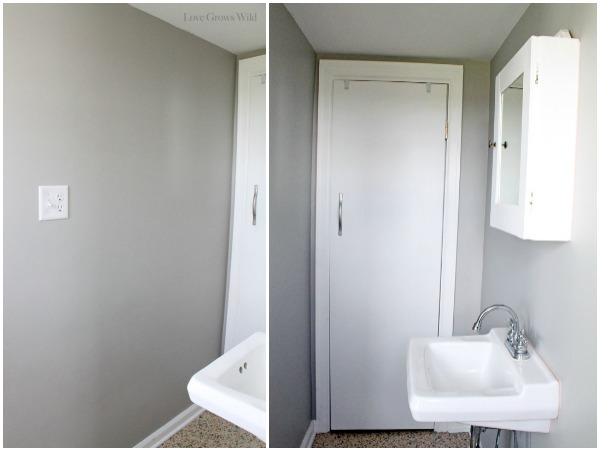
Such a great idea! I will be doing this. Do you know the wall color you chose? I LOVE that grey tone!
Hi Valerie! Thank you! The wall color is Woodlawn Colonial Gray by Valspar, and I absolutely LOVE it! It’s gray but has a lot of warmth to it so it doesn’t feel cold. My whole house is painted in it! Thank so much for stopping by : )
This project is on my to do list. Can you share the wall color? I am moving and love the color you have chosen
Absolutely love this project!!
Love the pictures and the photo clipboards! Your photography is amazing!! I can’t wait to make them. Are you considering sharing (or selling) files for the pictures? I would love to have them!
Hi Sharon! Thank you so much for your sweet comment! I just opened up a shop to sell the photos, and I would love for you to stop by sometime! http://www.etsy.com/shop/LoveGrowsWild
I hope you have a wonderful weekend! : )
I love these! Any chance you’d be willing to share your photos? Not for profit of course… just for my home??
Awesome original idea! They look gorgeous with your photos in them!!!
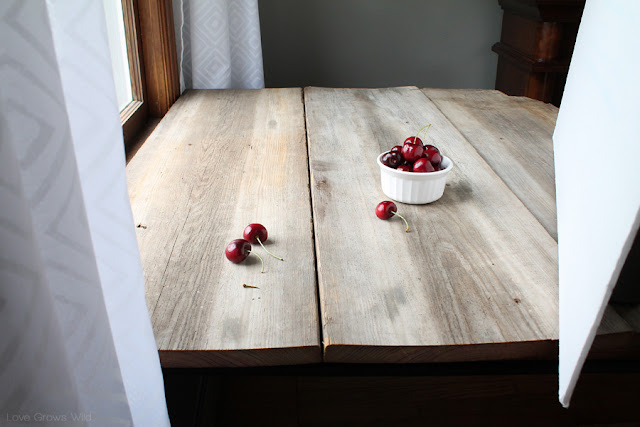
Thanks for sharing your photo set up as well as how to make the clip boards. What is the best way to hang them on the wall?
Hi Jessica! I just picked up a package of sawtooth hangers from the framing section at Hobby Lobby and hammered one into the back of each board. Then I hung them on the wall with a simple nail. Thanks for asking! Hope you have a wonderful day!
I am seeing this project everywhere, and I have to tell you – I LOVE it! Such a great idea, and so easy to change with the seasons!
Love this idea. Totally inspired. Featuring in my weekly wows on friday.
Man these are just too cute! gotta do this!!!
LOVE these! i saw it at under the table- pinned it!
I am actually obsessed with these!! 🙂 Funds are too low to buy anything else for projects at the minute, but I’ll definitely make something like this sometime! 🙂 Thank you for sharing!
This is a great project! I love that you can switch out the pictures, because I always change my mind about decor. And the photography is beautiful 🙂
I’m so in love with this idea Liz. I may have to copy it!
I am so in love with these Liz! They turned out fantastic and your photos are amazing. Thanks for sharing this at the Pinworthy Projects Party. I featured it on my Facebook page 🙂
Love these!!! So awesome and the pictures are beautiful!!!
Your photography is so gorgeous, I love everything about this.Great job!
I love your photos, the boards – and how you shared exactly what you did! I can do this – thanks for the inspiration!
Holy crap, these are fabulous!
i really love these. you are so creative. could you sell us those photos so we can use them in our kitchens? seriously, loving the idea!
The photos are gorgeous and the boards are such a great idea.
These are lovely! And your food photos are great. I’d love to do something like this to display my kiddos art work 😉
Your photos are gorgeous and I especially love the rustic frames…. they are awesome!
Thanks for the tips!
Susan
Love, love, love these! I featured you on my Friday’s Five Features. Stop by and feel free to link up other projects! http://diy-vintage-chic.blogspot.com/2013/08/fridays-five-features-no-3.html
I’d also like to know if photos are available. Beautiful!
Hi Jeannie! Yes, the photos are now available at Love Grows Wild – The Shop! You can purchase your favorite photo or all four as a bundle. And I’m offering a 15% discount right now to celebrate the grand opening of The Shop! Just click here and use code NOWOPEN – http://www.etsy.com/shop/LoveGrowsWild
Liz,
When are you starting your photography classes because I think you have it down pat! 🙂 Beautiful pictures and I love the dark wood on the clipboards…the overall transformation is stunning. Thanks for linking up at the Inspiration Gallery!
~Sarah
Love these frames and the use of the clips. Makes it so versatile and easy to change the images and rotate more photography!! Working on this project this weekend. 🙂
Just surfing around a little and… Wow! Thank you for posting this, it looks wonderful.
Do they make padded clips? Love this look…I have some old barn wood I want to try this idea with!!! Love your site!!!
Thank you so very much! Yes, I did see some adorable padded clips in the scrapbook section of Hobby Lobby that look just slightly different. They just weren’t the color I was wanting. Best of luck with the project! I’m sure they will look beautiful with your old barn wood!
Brilliant! I have made our laundry room our “art gallery,” a special place to display a rotating selection of the many (many!) works of art the girls make at school. This would be such an elegant way to do that!
I really like the frames along with the beautiful images, truly inspiring..
Love this idea and your pictures turned out great. What’s so appealing about this project is that you can change out the pictures for the seasons. With Fall fast approaching, you could take pictures of cranberries, oranges, pumpkins, nuts, etc. Thanks for being so clever!
Jane
Love these and your photography is beautiful! What setting do you use your camera on?
Came over from Whipperberry. I love this idea. I’m definitely going to have to make these myself. Being able to change out the pictures is great. I’m always changing mine out. Thanks for sharing your idea.
I just wanted to let you know that I featured your wonderful project on homework. Thanks so much for sharing it on The Inspiration Board. Have a great weekend!
carolyn
homework &
DETAILS
I’m so impressed that you took the photos and ma de those gorgeous clipboards! They are stunning!
What a great way to bring in a fresh new look to any room! Your pictures are beautiful too!
What a great way to instantly refresh any room with beautiful photos, and yours are just as beautiful!
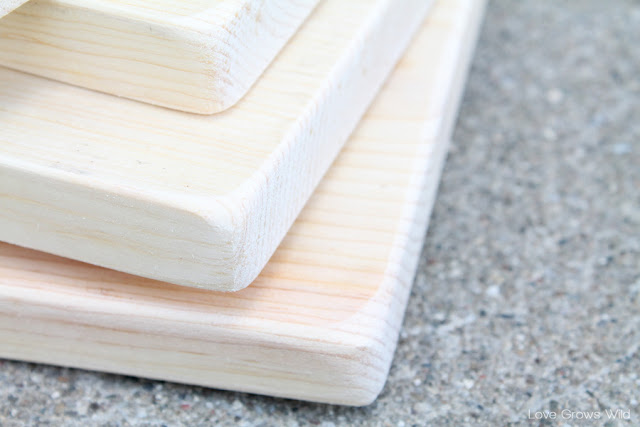
These are absolutely AWESOME, Liz! Perfect for your beautiful photos. And I go weak in the knees for well-sanded, rounded corners!!
I cannot wait to make these for my baby’s nursery! They are so simple and timeless…plus when she gets older and starts making her own art, I can switch out the old ones for the new ones. Thanks for sharing!
I can’t wait to make these for my baby’s nursery! They are so simple and timeless…plus when she starts making her own art, I can switch out the old ones with the new ones. Thanks so much for sharing!
This is so great!! I love this! I always want to buy cute prints that aren’t very expensive, but I don’t because framing will cost so much. What a fantastic solution, I will be doing this 🙂
The photos are absolutely gorgeous, Liz! Congrats on your new shop! 🙂
I just found your blog and am loving so many of your projects!! I’m looking forward to following you. Thanks for sharing. 🙂
Rachel @ Maison de Pax
I just found these on pinterest and I am so Excited! I have been looking for a way to display my children’s artwork and these frames would be perfect. They are adorable and would make it very easy to swap their artwork often. Thanks for the idea. I love it!
I love those boards as decor! Perfect color and everything. Then I needed a little bit of decor for my kitchen I got one of these decor jars and I still love it so much!
Holy cow I just saw that this was pinned 35k times! Not surprising though because it’s freaking awesome and I just pinned it 🙂
~Katie @ Upcycled Treasures
I just made these and they came out great! Some tips for others:
* The price may be a bit higher than what is cited here. The board cost almost $15, the wax was around $10 and the stain was around $5. In total it probably cost me closer to $9-10/board; still totally worth it it, but more than expected unless you have some of the materials around the house.
* A palm sander works great, but don’t sand against the grain, thinking it will make it look “distressed.” It just looks defaced. In fact, I would only lightly sand the faces and mostly just focus on rounding the edges and corners. The stain does a good enough job making it look old.
* The sawtooth hangers I got came with pins to attach them – I don’t know if they make some with screws, but I’d feel a lot better if it were held with screws.
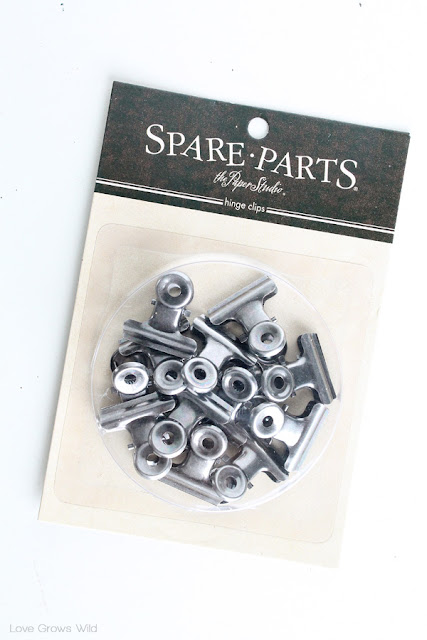
* I’m not sure I’d trust superglue alone to hold the clips on. I used superglue but also got some metal thumbtacks. If you have nails you can get them under and push them down securely. They match perfectly! I’m considering getting some black cloth/padding to put on the inside of the clips so they don’t scrape the photos.
* Also, get the quick-drying stain and plan on giving it at least an hour or two to dry. Don’t rush that part!
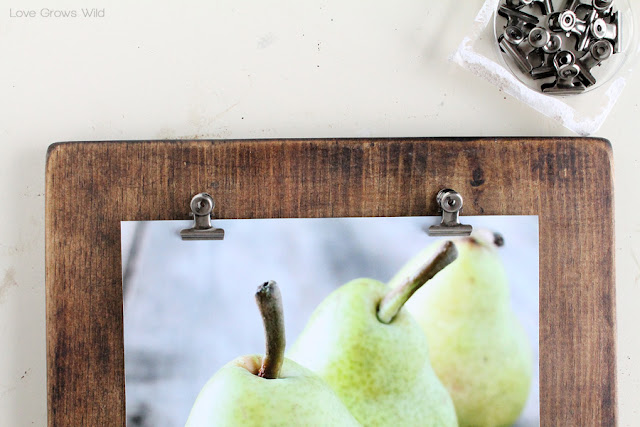
* I put the clips 3 1/4″ from the sides and 5/8″ from the top. That looks like a good spot for them. I put the hanger on the back 3″ from the top.
That’s all, thanks for the great idea!
I LOVE this! I’m trying to come up with a way to incorporate this in my house.
DJ @ heheheplusshe.blogspot.com
These are great! How do they look if you put the photo horizontal?
Thank you so much! The dimensions I used for the board wouldn’t quite fit an 8×10 horizontally, but if you used a smaller photo they would still look great. Or you could put the clips on the long side if you want to hang all your photos horizontal. Thanks for stopping by : )
What a cute project! I love it so much that I decided to feature it in our roundup of rustic fall crafts! Check it out here: http://www.favecraftsblog.com/rustic-fall-crafts/
Have a great day!
Liz are the final measurements of the board 12″ x 13 “? Thanks
Hi Kim! 1 x 12 boards actually only measure about 11 1/4″, so the final dimensions were 11 1/4″ x 13″. It still doesn’t make sense to me why a 1 x 12 can’t just measure 12″, but that’s the way it goes I guess : )
wow this is awesome! what kind of wood did you use?
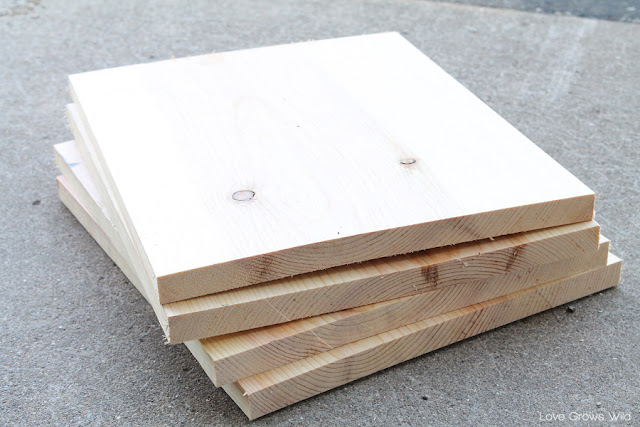
Thanks so much, Jenny! I used regular pine boards from the hardware store.
Hey! What an awesome and crafty idea!! I blog about tips for displaying printed Instagram photos and this idea is awesome because people can do this with any of their favorite photos! What a neat idea!!! Thank you for sharing and for the inspiration!
Absolutely LOVE these photos! I’ve started playing around with food photos but so far am having limited success. However staging them in front of a window as you do is simply brilliant!! Just out of curiosity… what direction does your window face? Do you typically shot in with the morning light or evening light? Thanks!
Have a wonderful day!!
The windows I typically use face West, and I try to take my photos between 11-1pm. That’s what I’ve found to work best so far!
Lovely. I am anxious to put these together for my granddaughter’s artwork. Do you have any problems with the corners of the photos curling?
Hi Karla! These would be perfect for grandkid’s artwork! Depending on what paper/photo paper I use, some of them do start to curl, so I just stick a little glue dot in each bottom corner on the back side of the photo. You can find the glue dots next to other adhesive/glues in the craft store, and I use them for all sorts of things. They tack things in place without being super permanent, so whenever you’re ready to switch out the photos, you can pull them right off. I hope this helps!
hello and good morning! i would like to compliment you on your fresh ideas, especially the mint scrub which i am headed out to get the ingredients! i LOVE your photo clipboard idea; your food photography is gorgeous and professional! happy holidays and keep up the stellar job!
Hello Jenny! I am so glad you enjoy what I share here, and I definitely appreciate your sweet comment! I’ve fallen in love with food photography and love the challenge of learning something new with it. And I think you’re going to really like that scrub! I use mine probably once a week! Thanks for stopping by, and hope to see you again soon!
I LOVE this idea! My husband is a professional photographer and wants to display about 12 of his photos in one arrangement on the wall. I’ve been trying to convince him to display them in a way that incorporates some of our salvaged materials. This might be just the ticket. Thanks!
That’s a wonderful idea, Kim! I bet your wall will look amazing with his photography on boards like these! Thanks so much for stopping by!
Lovely project!!! What is the size of the photos you used in your project? Thanks.
Hi Regina! I printed 8 x 10’s for my clipboards. Thanks so much for stopping by!
I will be doing a wall in my living room for my son’s artwork and wanted a way to display them. I have been looking for something like this for a while now and these are beautiful and seem like a very simple thing to make! Thank you for this tutorial! My son is only 2, but his artwork, aka a few splotches of color on a Curious George coloring page, get hung on the fridge, where everyone can see, but now I can make these in an afternoon and get ‘his’ wall going 🙂
That is such a cute idea, Deborah! I bet your little guy’s artwork will look amazing hung up on boards like these! Gotta love those first adorable “drawings” from our babies. 😉
Brava! Splendida idea!
Wowwwwwwwwwwwwww I am preparing my pantry too, so I think this could be a good (and cheap) idea to decorate it with. Absolutely in love! 🙂
Thanks so much, Blanca! I bet they would look beautiful in your pantry too! Have fun with your project!
Hi! Love your site! Found it from Pinterest! Question, that gray wall is perfect. What brand and color is that paint? Thanks!!
Hey Jen, I’m so glad you found me! Welcome! The wall color is Woodlawn Colonial Gray by Valspar. I just love it!
Oh my goodness. I am flipping out at how cute these are 🙂 You seriously did a great job! Do you mind if I feature/link to this tutorial on my blog? Thanks so much!
Thank you, Ashley! You are too sweet. You are certainly welcome to link to my tutorial, and thank you for asking!
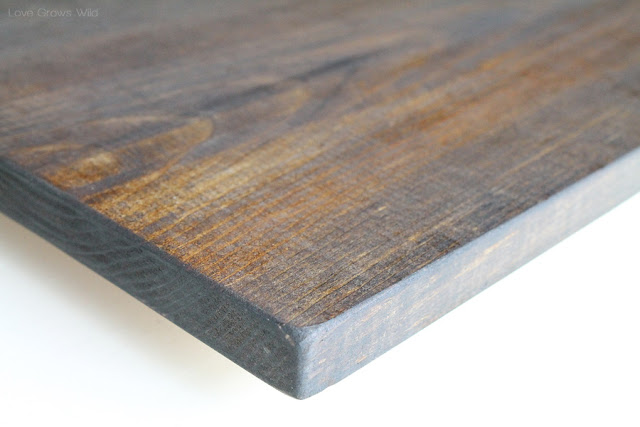
Love these! What stain did you use on the wood?
Thanks Caitlin! I used Minwax dark walnut. I use that for just about everything! Love that color.
Thanks for this great idea! These were the perfect inspiration to hang some pictures in a different way in my hallway. I love your blog and your pictures. I will be reading again for sure!
I’m so happy to hear that, Summer! I bet your hallway looks just beautiful. Thanks for sharing!
Love everything about this project. I have done one food photography project (ice cream – which is difficult to work with) and I was surprised how fun it is!
Way to challenge yourself, Lyndi! Ice cream is a tough thing to shoot! Food photography is lots of fun though. Thanks for stopping by!
These are next on my DIY list, and I’m planning to make them for gifts too! 🙂 I am curious, what are the size of the clips? They look like 1/2 inch, but I can’t quite tell. I’m seeing a lot of 1 inch clips for sale. Thanks for the inspiration!!
Hi Hannah! You’re right, these would make awesome gifts! The size of the clips really don’t matter much. The 1″ ones should be just fine!
This is awesome! I’ve been meaning to do something like this for the longest time–and you explained the process so well. And the boards look so perfectly distressed! I’m going to try this method for food photography backgrounds! 🙂
This would be gorgeous for photo backgrounds! Great eye, Laura! Thanks so much for stopping by! 🙂
A fun and useful project. I am in love with the simplicity and vintage touch. I am using this for a women’s retreat project. If the boards are already cut, how long would this project take from sanding to drying and glue drying? Also, I read an above suggestion of using a thumb tac. Have you tried the glue and tac method yet? Thank you.
Hi Heather! The sanding and staining will only take about 15-20 minutes (it goes quickly with small pieces of wood), and but you’ll want to let the stain and glue dry for a few hours. I haven’t tried using a thumb tac, but I’ve had readers tell me that it works great! Hope this helps!
What a great idea. Can’t wait to try this. I was just looking at getting some photos done on boards at Costco ($17.99 per 8×10). This is so much better because you can change up the print without spending a fortune.
Exactly! That’s why I love these clipboards so much! Especially when you decide to redecorate every few months like I tend to do. 🙂 Have fun creating them!
LOVE, will be doing that in the next few days, BUT what did you do with the back of the wood to hang up onto the wall?
Hey Johnny! I used some sawtooth hangers that I purchased from the framing section of the craft store (also sold at hardware stores) on the back of the wood. Just hammer in two little nails, and you’re ready to hang them on the wall! Hope you enjoy them as much as I still do!
I really like this idea. I am wondering, how did you hang them up? Did you install a bracket on the back of each clip board?
Hey Kelly! I used some sawtooth hangers that I purchased from the framing section of the craft store (also sold at hardware stores) on the back of the wood. Just hammer in two little nails, and you’re ready to hang them on the wall! Hope you enjoy them as much as I still do!
I cannot wait to do this for my new house!!!!!!!!
Congrats on the new place, Sue! I think you’ll love the clipboards!
I love the emphasis on creation and connection. Christmas presents show love, appreciation and celebration. How great is it that you can get the same things by making presents with your loved one ;).
This is such a wonderful idea! I’m so indecisive about which pictures to display. This definitely makes it easier haha
Me too! So glad you like my clipboards! 🙂
What a great idea! I just had 5 pictures printed to give out as presents forgetting about the cost of framing all of them when I stumbled upon your Photo Clipboard. A family member has the wood and tools so the cost saving is making me very happy and the gift all the more special! Thank you!
That is wonderful, Jessica! I’m so glad this all worked out for you. I bet everyone will just love their gifts. Hope you had a Merry Christmas!
I was wondering if you remember what kind of wood you used. I used the dark walnut stain also on fir (I think)but don’t like end result.The contrast of the grain almost gave it a stripy look and the wider grain really soaked up the stain making the color really dark almost black in some areas .
I know that seems picky but I like the more even color and finer grained look of your wood boards.
Hi Maxine! I used pine for my photo boards. If you don’t like the strong grain contrast, you might want to try using a pre-stain wood conditioner like Minwax before applying the stain. That will help it have a more even appearance. I hope this helps!
Thanks Liz I appreciate your help I will give it a try. I am glad you knew what I was talking about. It sounded a little crazy.
Lol, not at all! I tend to like the rustic, hard contrast look, but for a smoother, more even finish, I really think you’ll like using the conditioner. Let me know how it turns out!
Love these! Excited to try this in my hallway with some of our wedding photos!
That would be gorgeous! Best of luck, Chanelle! 🙂
Beautiful! I’m always looking for new creative ways to display photo prints of my favourite pictures, which is how I stumbled across this post 🙂 Thanks for the idea, I’m off print photos right now!
Love, love. love these!!! Made some of my own and gave you the credit on my blog!
http://www.reaganistadesigns.com/2015/03/diy-photo-clipboards.html
What is the color you used for the gray wall? It sets off the photos and framing beautifully.
Thank you!
Thank you, Maria! It is called Woodlawn Colonial Gray from Valspar.
These are gorgeous, cant wait to make them when I move to my new house. I am also in love with your paint color, can you share what it is??!
Of course! It’s Woodlawn Colonial Gray by Valspar. We just love it!
Fabulous idea…how did you attach them to the wall?
Hey Leanne! I added sawtooth hangers to the back of the clipboards and hung them on the wall with nails. You can find a package of the sawtooth hangers for just a few dollars!
Love, love, love these! I am definitely going to make a couple of these for my Dad. I took some pictures of him out at his farm and didn’t know how to give them to him. These are perfect. Thank you for the great idea!
Howdy! I just saw your post via Pinterest, and I have actually made picture frames very similar to these except mine were not hanging.
I also got those same clips from Hobby Lobby, but I could not get them to stay on the wood. They would stay at first, but when I would go to clip the picture they would snap off. I tried super glue and hott glue. Suggestions?
As long as I was careful when opening the clips, super glue worked fine for me. Maybe try a different brand of super glue and letting it dry for a day!
Wow!
Great clipboards. I loved it. Keep it up.
I made these for my bathroom and had to make 8 more for family & friends! However, I used a matte sealant. What kind of Minwax paste did you use, clear or dark? I’m making anothing project using this same concept and would like to use the minwax paste you listed above?
Thanks!
Hi Laura! I’m so glad everyone loved the project you did! I believe I used the original Minwax paste for these clipboards, but if you want a darker, more rustic look, try the dark wax. Enjoy!
Do you have any issues with the photo paper curling? Do you recommend a certain print paper?
I used little adhesive dots from the scrapbook section of the craft store to keep the corners from curling. Works like a charm!
What stain/brand did you use? I love it!
Hey Kelsey! I used Minwax Dark Walnut for this project!
Hey Liz, I am having a really hard time rounding the corners.. at the rate it has been going, it seems like it will take hours. How exactly did you do it and what did you use?? Thanks!
Hey Amber! I like to use an electric palm sander to make jobs like this much quicker. You can pick one up for not a lot of money, and I use it all the time on wood projects to round corners, smooth edges, and distress paint! 🙂
How did you hang those boards on the wall? What did you use?