This is a sponsored post for Silhouette.
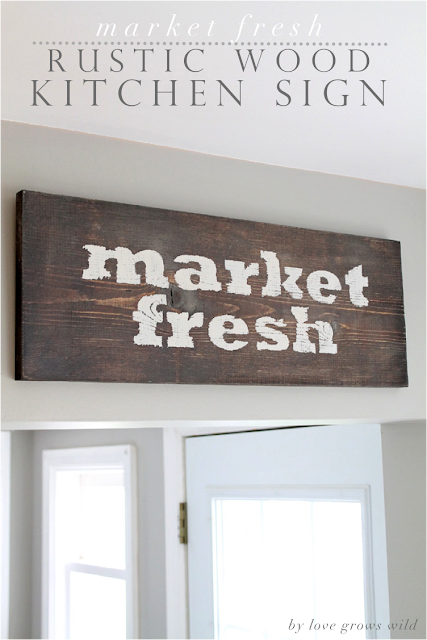
Looking for inexpensive artwork for your kitchen? Do you love the rustic, vintage look? Then this easy DIY project is for you! Learn how to make a Market Fresh Rustic Wood Sign for your kitchen to add some character and style to your space!
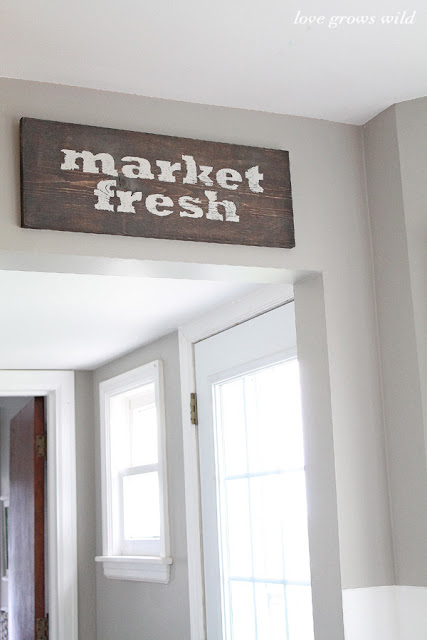
As promised, today I’m sharing how I made this cute rustic sign for my kitchen! I’m falling more and more in love with my kitchen with each step of this makeover, and this sign was a project I had been wanting to do forever! The bottom level of our home is a little bit of a maze, and I actually have three entrances to my kitchen. There is a couple feet of space above each doorway, and I’ve had visions in my head of rustic wood signs hanging in those spots ever since we moved in. A whole year later, and I finally decided it was time to get crackin’. Better late than never!
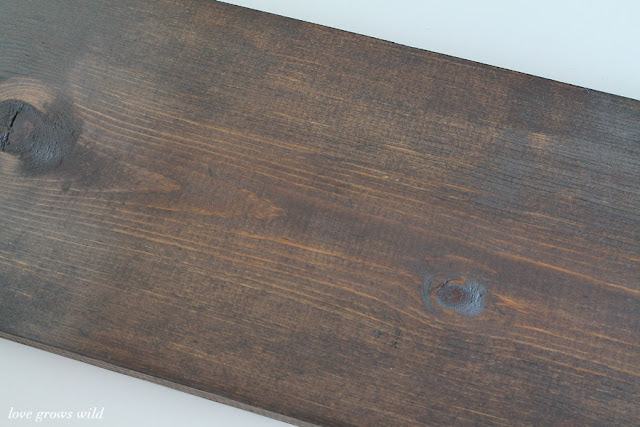
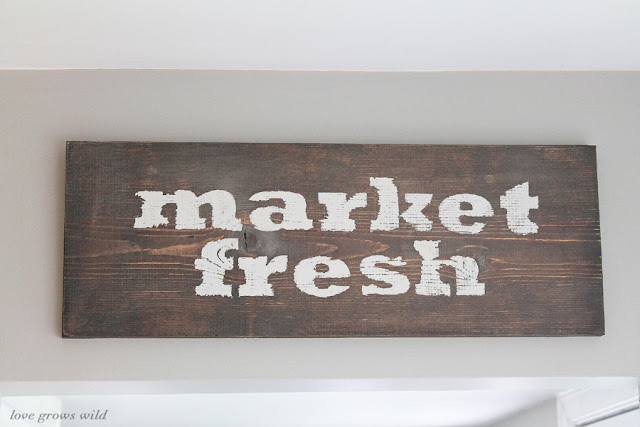
I started by digging through the scrap wood pile in our garage and found a good size board that would fit perfectly above the door. I sanded it all down and wiped it clean with a damp towel. I wanted to showcase the beautiful woodgrain of the board and make it look old and rustic, so I used the same technique as I did for my kitchen chalkboard. I started with a coat of Varathane Sun-bleached stain, and once that was dry I added a light coat of dark walnut stain on top. I let it sit for about 10 minutes and wiped away all the remaining stain. The result is beautiful, rustic wood with a nice gray-brown color. I just love it!
I thought the words “market fresh” would be cute for the kitchen, so I used my Silhouette CAMEO and the Silhouette Studio Designer Edition software to create a stencil for the words. I love the Designer Edition software because it has great rulers and guidelines to help me size my projects. All I had to do was measure my board to see how big I wanted the letters and then create my design in the software by using the text tool. You can use any of the fonts on your computer (I’m a total font addict!) and easily resize the letters to fit your sign perfectly. The handy guides make it so easy!
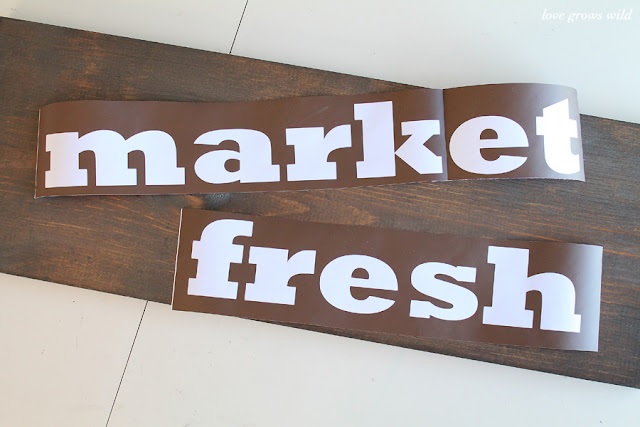
Instead of applying the vinyl letters to my board, I used the outline of the design to create a stencil. I used some scrap brown vinyl I had (since I’m going to paint the letters on, I didn’t care what color the vinyl was) and peeled the letters off of the sheet.
Then I carefully lined up my stencils in the center of the board and pressed them in place firmly, to create a good seal to paint over.
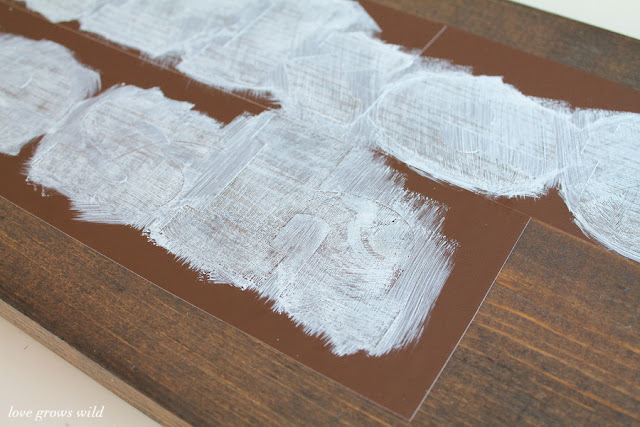
Now here’s where I messed up… sort of. I should have sanded the wood again before I applied the vinyl, because the slick surface of the stain didn’t allow the paint to stick very well. But I didn’t want to start over from square one since I had already started painting, so I just went with it. I applied a few coats of white paint (the same color I used on my kitchen table), letting it dry between each coat.
As expected, when I tried to pull up the vinyl stencil the paint wanted to pull up with it, and I was left with not so pretty letters. I seriously wanted to cry at first, but then I thought, “Duh… I wanted it to be rustic and not perfect anyway!” Don’t you just love when your screw-ups turn out for the better? I wish that would happen more often!
I lightly sanded over the letters until they were smooth and distressed. I honestly was so glad for my mistake, because it made the sign look even better!
I added two sawtooth hangers on the back of the sign and hung it up in my kitchen over one of the doorways. It fills the space perfectly and is the first thing you see when you walk into our home. It makes such an inviting welcome!
I have two more signs to make for the other doorways… What should I put on them? Hmm… decisions, decisions!
My Silhouette machine makes creating signs like this super easy, and the upgraded Designer Edition software really makes a difference! Right now you can get an amazing deal on a Silhouette machine bundled with the Designer Edition software OR if you already have a Silhouette, you can get the software for half price!
Click here to check out all the details and get an exclusive promo code for your discount! You can also find some great information on the difference between the basic and upgraded software along with some video tutorials. If you’ve been considering purchasing a Silhouette, I HIGHLY recommend taking advantage of this sale! The promotion runs from July 1 – July 10.
Let’s Keep In Touch!
P.S. I’m sharing this post at some awesome link parties… Check them out HERE!







Love your sign!! I’ve been wanting to make one for our outdoor space but I’ve never stained anything before and am so nervous!!
Selene @ Restoration Beauty
Liz your sign is awesome!! I love how sometimes what we think is a mistake ends up making it even better 🙂
xo, Tanya
twelveOeight
I love this sign! It looks so simple to make and just looks fabulous hanging above your doorway. Pinning this!
Stopping by from Mom On Timeout. Have a fabulous weekend!
Julie @ This Gal Cooks
Hey Liz, I wanted to tell you that I am so excited to be co-hosting the upcoming giveaway with you and all the other fabulous bloggers. You are amazing at everything and the graphics are perfect. It is going to be so much fun!!!
Oh, this is so cute!! I love that your mess-up made the project turn out even better:0
I love how it turned out Liz – rustic and gorgeous! Pinned!
This looks so fabulous! The rustic look is perfect…
Ooh it’s so preeetttttyyyy! Great job on the sign! Every time I see an awesome Silhouette project like this I’m so envious. Guess I’d better start saving my pennies so I can buy one! 😉 I popped over from Lil’ Luna–thanks so much for sharing!
~Abby =)
Yes girl, save your pennies!! It is SO worth it! I’m in a serious love affair with my Silhouette : )
I’ve been wanting to make a sign like this for my kitchen also!! Love the vintage and rustic feel! Great job 🙂
This is beautiful! I’ve always liked those kind of signs 🙂
I love your sign and it fits perfectly above the door. Julia
So, so pretty! I would love love love a silhouette… might be about time to invest:) I’ve made three diy reclaimed wood signs lately and this would have saved me a ton of work!
LOVE your farm house look! http://www.sewsweetvintage.com/2013/07/vintage-swimwear.html
I love making signs to hang around. They add such a neat personal touch. Love yours a lot!
i love this too much! what a great idea
I love that you didn’t use the lettering and painted instead. It makes it look so much more authentic. I really love this sign, great job!
Thanks for linking up to the Inspiration Gallery this week!
Mandy @ The Hankful House Blog
Love it!! Handmade signs are the best!
Gorgeous!!
I love the stain you used for this it gives off a great finish!
http://www.istaistaista.blogspot.com
Love this sign! Thanks for linkin’ it up at Monday Funday!
love it Liz! i need to use my silhouette more… 😉 thanks for sharing at Create & Inspire! xo
Love this! I’m always looking for fun kitchen projects for when ours is ready to start decorating. Pinning!
I am in love with all of your crafts! this one is excellent! I just finished the rustic chalkboard you made.
Cute! I love making signs too but don’t have the vinyl cutter/Silhouette so I just print the words out and then transfer by pressing hard with a pencil or colour the back of the wording. In my kitchen I currently have a BAKERY sign above the doorway. I have enjoyed seeing your kitchen projects and I’m now following on GFC.
Love love love it !
Have you ever found that the vinyl leaves a sticky residue? I am trying to make my own signs too, but my vinyl comes off so sticky, when I sand, the sanded stuff sticks where the vinyl was and looks yucky…
I honestly have not come across that problem as of yet (fingers crossed!). I usually use the Silhouette brand vinyl, and maybe the brand makes a difference. Sorry I couldn’t be more help! Thanks for stopping by : )
I’ve had the same problem!
I use Silhouette brand vinyl, and the sticky residue makes it difficult to sand. The sanded residue sticks in the letters and makes a real mess. I’d love to know how to avoid this!
Wow!!! What a beautiful sign, You are always done awesome job, I appreciate it, Keep up the good work…
Great idea and very simple. What font is that?
Thank you! I believe the font was Rockwell Extra Bold.
Thanks! I like the shapes of the letters in lowercase. It has a genuine old world feel about it. I recently made a kitchen sign for my fiancée and this inspires me to make more. I don’t use the Silhouette but rather, just print the letters on my laser printer and trace them. This works well for me and no sticky residue to deal with. Thanks for this tutorial.
The print and trace method works fantastic too! Have fun creating some beautiful new signs!
Hi Liz, can I ask what the name of that font is? Great sign!
Hey Jyl! I believe it was Rockwell Extra Bold. 🙂
Do you put anything on the sign once its all done? Like a wax or some type of clear coat?
Hey Cara! I like to use paste wax for finishing wood pieces. You can use a clear/natural wax or a dark wax for a more rustic look!
Hi Liz! I am really interested in getting involved in sign making. I noticed you talk about the silhouette CAMEO a lot in your posts. Do you feel like that is the best option for stensils?
Also, would you recommend any specific type of glue for projects that require more than one piece of wood?
Hey Kate! I usually use Titebond wood glue. I think it works pretty well!
It is a HUGE help when you’re making signs and a lot of other projects as well. Cricut is another cutting machine brand, but I have not tried it so I can’t speak to how it works vs. the Silhouette. I’ve had my CAMEO for a few years now, and I still use it frequently! Here’s a link to the starter kit I purchased: http://amzn.to/1McSYMA