Want a unique piece of decor that will add tons of character to a room? Learn how to build your own ladder with this simple, step-by-step tutorial!
I am SO excited to show you guys this project!! I have been pretty proud of some of my past DIY builds, but for some reason this one tops my list… I built a ladder. And not just any ladder, but a rustic, decorative, hold-my-pretty-towels kind of ladder!
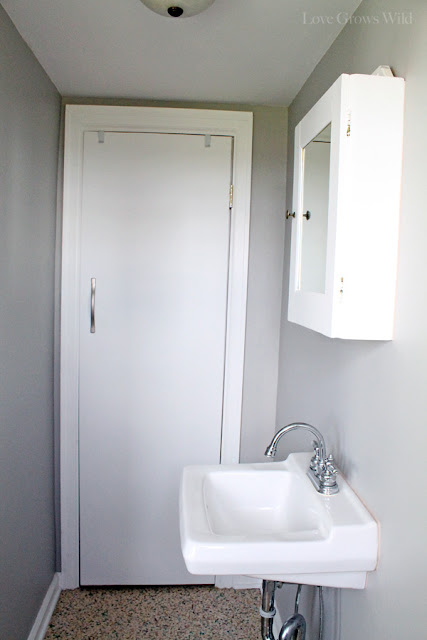
Remember my little pantry area:
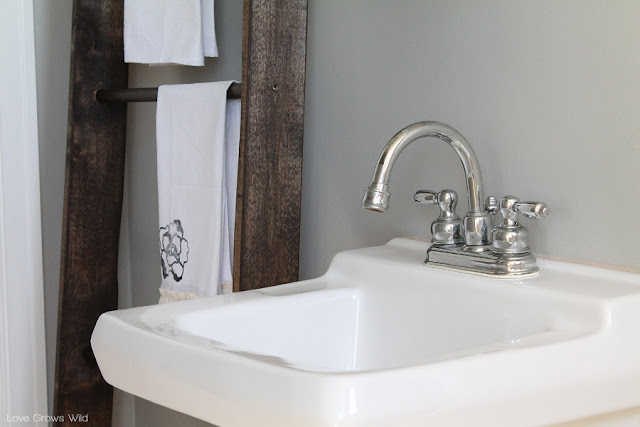
Next to our pantry we have this cute little wash sink, and I’ve never really known what to do with it. There’s not a lot of space, so my decorating options are pretty limited. Right now we don’t have anywhere to keep towels by the sink, so instead of hanging a boring towel bar on the wall, I decided to build a ladder to hang our towels! How cool is that?? It takes up very little space and adds a ton of character. I just love it!
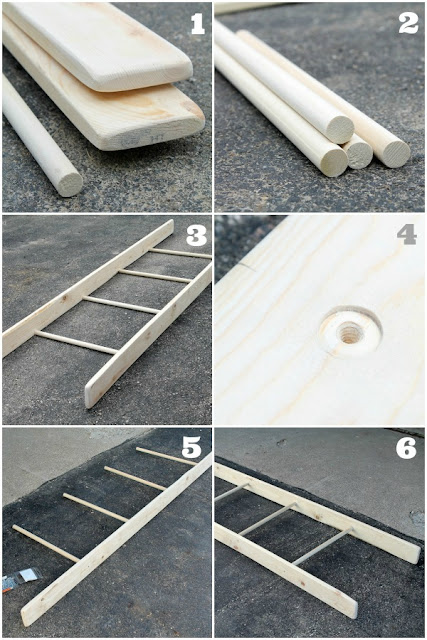
Here’s how I made my ladder:
1) I picked up 2 – 6 foot 1 x 4 boards from the hardware store and one 6 foot 3/4″ dowel rod. I sanded down all edges of the boards to give them a worn, rustic look.
2) I cut the dowel rod into 4 – 18″ pieces.
3) I laid all the pieces out to find the spacing I wanted for the ladder rungs and marked where each rung would go on the 1 x 4’s. I ended up spacing mine 14 1/2 inches apart.
4) Using a 3/4″ paddle bit, I drilled a shallow round in the 1 x 4’s for each of my rungs. *You only need to make a small groove for the dowel rod to set in.
5) I drilled long screws into one of the boards, securing the dowel rods in place.
6) Then I lined up the second board and screwed the other side of each dowel rod in place.
– Check out the stunning ladder tutorial I was inspired by from Jen of Tatertots and Jello! –
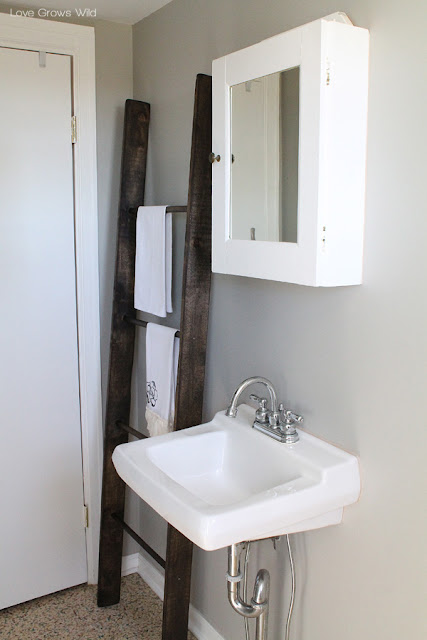
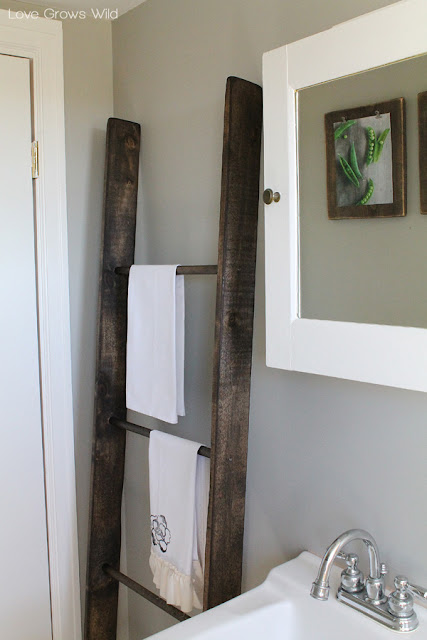
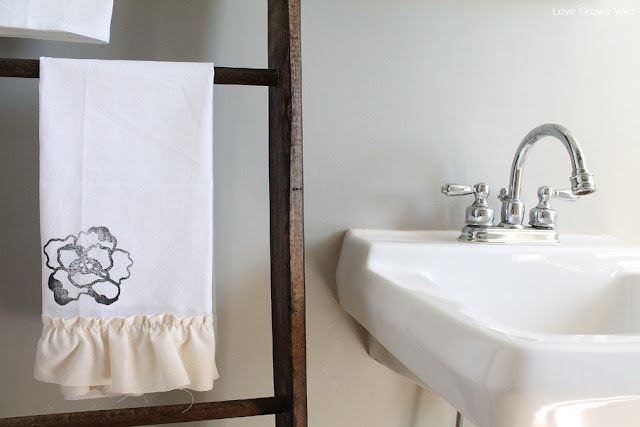
I wiped the ladder down really well and stained it with my favorite dark walnut stain. After it was dry, I applied a coat of paste finishing wax. And here’s how it looks next to my cute little sink:
I am so smitten with this new addition to my pantry/kitchen makeover, and I love the charm it brings to the space! These shabby chic tea towels I created look stunning hanging from the ladder rungs. You can find the tutorial for the tea towels here!
UPDATE: See this ladder used as blanket storage in our living room! Click here.
So what do you think? Do you like unique storage ideas like this? What creative storage ideas do you use in your home?
Check out more unique decor ideas:



That’s so awesome! I’d never thought to MAKE a ladder–I’ve been keeping my eyes open for an old one, but this is fabulous!
I have always wanted a ladder like this, it turned out wonderful Liz!! xo
You are very talented 🙂
I have a ladder in my barn inspired bathroom to hold towels. It was the very first thing I moved in! I found it in an old building and displayed photos on it at my wedding so it’s kind of special to me!
Nicely done! Love the stain color. It goes great with your gray walls.
This looks so great with the grey walls! Good job. I’d love if you’d link up to The DIY’ers! http://homecomingmn.blogspot.com/2013/09/the-diyers-29.html
My sister has a ladder in her bathroom and I love how it looks! Thanks for the great tutorial!
Love this Liz! I have been looking everywhere for one – guess I might just have to build my own! 🙂
Ah! I’ve never liked a tutorial better than Jen’s before- until now! This is uh-mazing! I need one, you’ve made it sound irresistibly easy!
I am really gonna follow the instruction those have been provided by you to me to make a DIY ladder at home. I really love the DIY stuff and quite excited to get this one created here.
You seriously amaze me at the stuff you do! This is way too cute and is perfect for that little corner!!!
I need one now! Such a great tutorial, too! 🙂
This is too cute! I’d love it if you’d link this up to my blog hop party, DIY Weekend:
http://mrandmrswinslett.blogspot.com/2013/09/diy-weekend-919.html
Thank you!
Miranda @ Mr. and Mrs. Winslett
I love it! I had an old ladder that I kept wanting to use, and finally came up where I could use it–to “frame” some pictures (you can see the post at my blog, if you’d like). That’s an invitation :). I like how you’re using yours, and think it’s awesome that you built it yourself! Wow! I’m glad I found mine made, LOL! ~Zuni
What a great idea for hanging towels; love it!
What a clever idea to use a ladder as towel holder! You did an amazing job with this ladder too!
It looks just fabulous Liz! I would be pretty proud of myself too 🙂
I love the look of ladders but had never thought of making one! This one looks great – thanks for the tutorial!
I love the look of ladders but never thought of making one myself! This turned out great – thanks for the tutorial!
Could you be any more AWESOME? I love this. I had an antique ladder that I used as a pot rack at our previous home…the buyers asked that we leave it and I’ve missed it ever since! I would have never thought to build one! How smart is this?!? Great job, friend!!
My husband was just brainstorming making a ladder that starts wide and gets skinnier on top. I’ll have to show him yours and see if he can modify it. Looks great!
pinning! i love the multi-purpose uses of a ladder in the house. soo gorgeous and cheap! you are fabulous!
I love this! Thank you so much for the tutorial.
I love how the dark wood looks with the white pieces and the grey walls. Beautiful!
Oh MY. I have been looking for a wooden ladder forever, and I never thought to make one!! Genius!! I would be so happy if you shared this on my weekend linky party!
I just got done building this … and while I love the way it looks, I have not stained it yet as none of my test samples are coming out correctly. I wanted to ask you … what kind of wood did you use for this?? I am using red oak … please advise! thanks!
Hey Ronny! I used pine boards, so the red oak will definitely change the look of the stain. What color stain are you using?
same as yours… the dark walnut
any advice as to what stain would be appropriate to re-create on red oak? I like the red oak as it’s very hard and a nice type of wood
You might try adding a more gray-based stain to counteract some of the warmth in red oak… maybe Classic Gray from Minwax? Here’s the Minwax stain color guide that might help: http://www.minwax.com/wood-products/stains-color-guide/
I haven’t worked with red oak before, so I’m not sure the best advice to give!
hey! LOVE this tutorial!! My hubby and I followed your tutorial and made this for my moms Mother’s Day gift! I have a question about the stain and drying time- Matt (hubby) stained it yesterday around 5:30pm and today (around 6pm) the stain is still not completely dry in some spots- so here’s my question(s) hehe
-how long did yours take to dry before you did the finishing wax?
-Will the finishing wax help to seal in areas that are still not completely dry or should I wait before doing this step?
-And how long after doing wax was it ready to put blankets on?
The wood I’m using is poplar board – not sure if that makes a difference but figured I’d mention just incase:)
Thank you so much for this tutorial it was so easy to follow and can’t wait for finished product!
Leah
Awe, what a sweet Mother’s Day gift! I am sure she LOVED it! I’ve run into issues like this with stain in the past, so here’s a few tips/ideas for you:
When applying the stain, let the stain set for about 5-15 minutes (depending on how dark you want the color to be), then wipe away any remaining stain that hasn’t soaked in yet with an old rag. I think the spots you’re describing that look still wet probably just needed a little wipe down. I usually let the stain dry for a couple hours, then come back with a finishing wax. The wax will definitely help seal in any of those trouble areas. I hope this helps!!
Your mom is one lucky lady getting a handmade gift like this!
Hi Liz,
I just came across this project- this is exactly what I’ve been looking for! When you sanded down the edges of the boards, did you use an electric sander or just sheets of paper? I don’t have an electric sander, so I’m curious if I should look in to getting one for this project.
Thanks!
Hey Kaley! I have an electric sander, which is a HUGE help with larger projects like this. Sheets of sandpaper are fine for smaller projects, but if you use them a lot for projects I would definitely invest in a palm sander. You can find some that are relatively inexpensive and well worth the investment!
Hello,
I wanted to know how many coats of the dark walnut stain was used on the ladder, and also which Minwax Paste Finishing Wax was used? I have 2 containers of the Minwax, one is Natural and the other is Special Dark. Thanks!
Hi Veronica! I only used one coat of the dark walnut stain, and the amount of time you leave it on really determines how dark it will be. I believe I used the natural finishing wax, but dark would be pretty too! It just depends how dark you would like the finish to be! 🙂
Hi Liz,
Can you tell me what kind of screws we’re used? We’re having trouble with the screws not going all the way through the dowel, causing the screw to show in between. Then the screw top keeps getting stripped. Any suggestions?
Thank you!!