
 You know those 3 dimensional metal stars you see everywhere in country decor? If you look down your street, you’ll probably see at least one hung on the outside of your neighbor’s homes …unless you live somewhere outside of the Midwest, in which case you may have no idea what I’m talking about!
 This is my patriotic metal star that has sat in a box for probably 4 years:
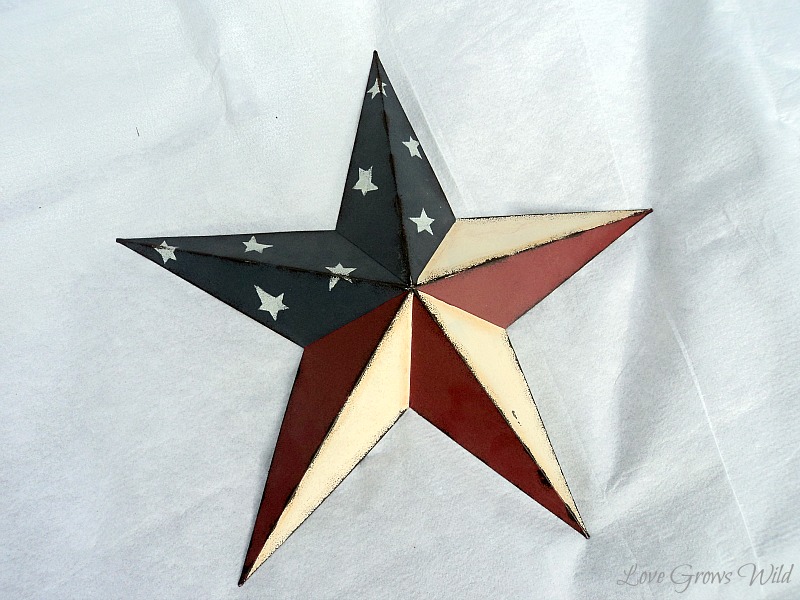
It’s an adorable little star, but when 4th of July comes around every year I rarely have the motivation to dig through my decor storage to get it out. Rather than pitching it, I thought I’d give it a makeover! I had been brainstorming ideas for awhile, and after a big thunderstorm this Summer and lots of branches down in my yard, this is what I came up with:

I covered the star in branches from my yard! It cost me not a penny to makeover, and it looks fabulous with all my decor!
Here’s how you can make your own:
– PAINT –
Start by spray painting the star. Ideally you’ll want to use a color that will match your branches more closely, but white was all I had at the time. Not a big deal, since it will all be covered anyway!
– COLLECT BRANCHES –
Gather branches from your yard in various sizes. You’ll want to look for the straightest branches possible.

– MEASURE & TRIM –
Measure the longest edge of your star and cut your branches into sections about that size. Hand pruners or loppers would work best for cutting the branches, however I used the first tools I could find in the garage that could do the job. I’m an excited DIY’er!

– GLUE –
Hot glue the branches onto the star, starting with the biggest branches first and trimming as necessary. Vary the shape and color of the branches to give it lots of interest and dimension!

Now go back and fill in any gaps between the branches with smaller branches. This process takes a lot of time and patience to find the right size and shape branches needed, so grab a cup of coffee and turn on some music while you work!

When you’re all finished, this is how it should look:

It’s a perfect neutral decor accent and adds SO much texture and dimension!

I’ve used it all over my home…


I love this chic makeover on a country classic!
Now please excuse me while I go clean the giant mess of branches and trimmings scattered across my craft room… I won’t even show you what my floor looks like!


Such a beautiful star! It looks like a great addition to your space. I found your project next to mine at 52 Mantles. 🙂 Megan
Such a cute star and so clever! Thanks for sharing. I love it!
This is genius! What a great idea! Found you through The 36th Ave. link up! Newest follower!
-April Hoff
housebyhoff.blogspot.com
Great idea for the star. I’m from Texas and these stars are everywhere, considering that we are the Lone Star State. They come in all sizes and are used in and on almost everything. They are almost as common as chips and salsa here. I wish all the states displayed them. This is a wonderful sign for our country. Thanks for sharing your ideas.
insanely wowed. seriously a “why didn’t I think of that” moment 🙂 really love this and really the whole scene you shared today. I really love the yarn balls on the long plate too.. hmmm you’ve got me thinking!! 🙂
I love this star. It would look great on my mantle right now. I love using elements of nature to decorate. I just started a new blog hop and would love for you to come over and link up your post or any social media. http://designeddecor.com/talkin-about-thursday-2/
DeDe@DesignedDecor
I love this star! What a great way to redo something that you weren’t using. I found you through the LLR linky party. Can’t wait to see more of your posts!
This is great! I love using nature in decorating so this is perfect…. now if only I had a star to try this on!
L.O.V.E. it! I just pinned it! I have 2 stars in red for the holidays that need a makeover….:))))
OH my goodness, I am sort of obsessed with this! What a creative way to make this star over, you gave it such a new look. I want to make one!
What a beautiful makeover on your star! I love how versatile it is!
That is the cutest Liz!! I just love it. If there’s one thing I have plenty of it’s branches and twigs…lol. I’m hosting a giveaway at my blog. If you get the chance, stop on by! I’d love to have you.
I love this so much! I love any twig/branch decor, and I’m in love with star decor too, so I think I need to find a star so I can make my own. Hm.. Maybe I’ll make one out of cardboard… thanks for the inspiration!
Cute makeover! I have stars that I can now makeover too! Found you through Tater Tots and Jello…
Susan @ Rustic ReDiscovered
Um, yes! I Love it. I have a big shopping bag of sticks in my workshop at the ready because I love working with them….now I need to find an ugly old star to makeover:)
xxx
Kim
awww…Liz…what a great idea! Love unique ideas like these! just wanted to let you know that we featured you at The Inspiration Gallery…thank you so much for sharing with us….xo http://www.craftberrybush.com/2013/01/linky-party-17-features.html
This looks so professional!. It’s really impressive. The twig design could be used in so many different ways.
What a beautiful idea. This must have been a lot of work. I am not particularly crafty but would love to try to make this. Saw your Star and spaghetti sauce on Flamingo Toes. Would love for you to share on Thursdays Treasures. http://fooddonelight.com/thursdays-treasures-week-68/
Love, love, love it!!
Neat idea, I have one and today would have been the day to search for the branches since it was warm here. I guess it will have to wait for another warm day in a couple months! I’m your newest follower btw!
This is so pretty Liz!! And yes, there are a lot of those stars here in the North West too 🙂 But not as awesome as yours!
xoxo, Tanya
twelveOeight
Great, great idea! Thanks for sharing at Pinworthy Projects!
Love it! I wish I had an old metal star hanging around. I found you from I should be mopping Monday.
What a neat transformation! It looks fantastic.
KC
O my gosh that is so nice!!!! U have a great blog.
I am stopping by today from Mop It Up Mondays Blog Hop!
Nothing against the red, white and blue….. but I love the new rustic look 🙂
So nice, really love stars and the natural look is sooo fine. Thank you for the tutorial, have a great day
Great job Liz!! The star is amazing! You’ll be able to use it in so many different decors!
Thanks so much for sharing this at The DIY Dreamer… From Dream To Reality!
I love the texture this piece adds! Well done!
Allison
seriously Liz! Can I buy one for you to make me??? Love everything that you do girl!! Pinned!
Alyssa again…. still too lazy to sign into my google acct! Lol
Love this so much!!!
This is fantastic, Liz! I have an old rustic start that is crying out for this kind of upcycle!!
Such a beautiful idea! Love it!
You gave it such character!!! I have a sparkly purple one that I bought for $1 just to be able to do something to, but hadn’t had any real thoughts. This is perfect! Maybe I’ll try it in one of my hubby’s grains or straw. Thank you for the inspiration!