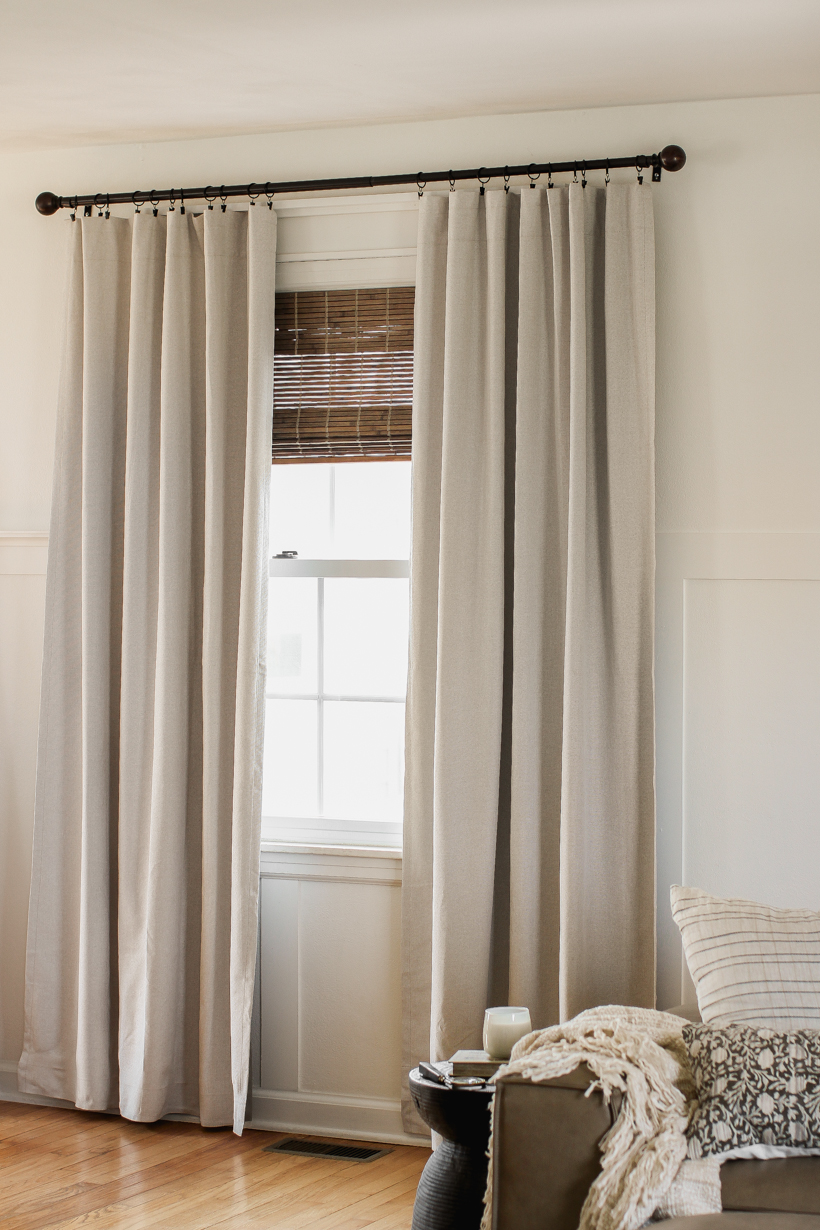
This week I ordered a new set of curtains for the two windows between the entry/dining room and the living room. The length I needed was almost right in the middle of two options: 84″ or 96″. In an attempt to avoid having to hem the curtains, I went with the shorter option hoping that it would be close enough… I should have known better. 🤦🏼♀️
But my mistake is your gain because today I’m sharing with you a few methods for adding length to curtains that are too short!

Here is a link for the blackout thermal insulated curtains.
I suppose I should start by defining what “too short” may look like and where you ideally want your curtains to end.
HOW LONG SHOULD CURTAINS BE?
The most common preference is to have the bottom of your curtain just barely touching the floor, or hovering just slightly above. For a more dramatic look, you can also have the curtains a few inches longer so they puddle on the floor. Here is a more in depth guide for hanging curtains that is really helpful.
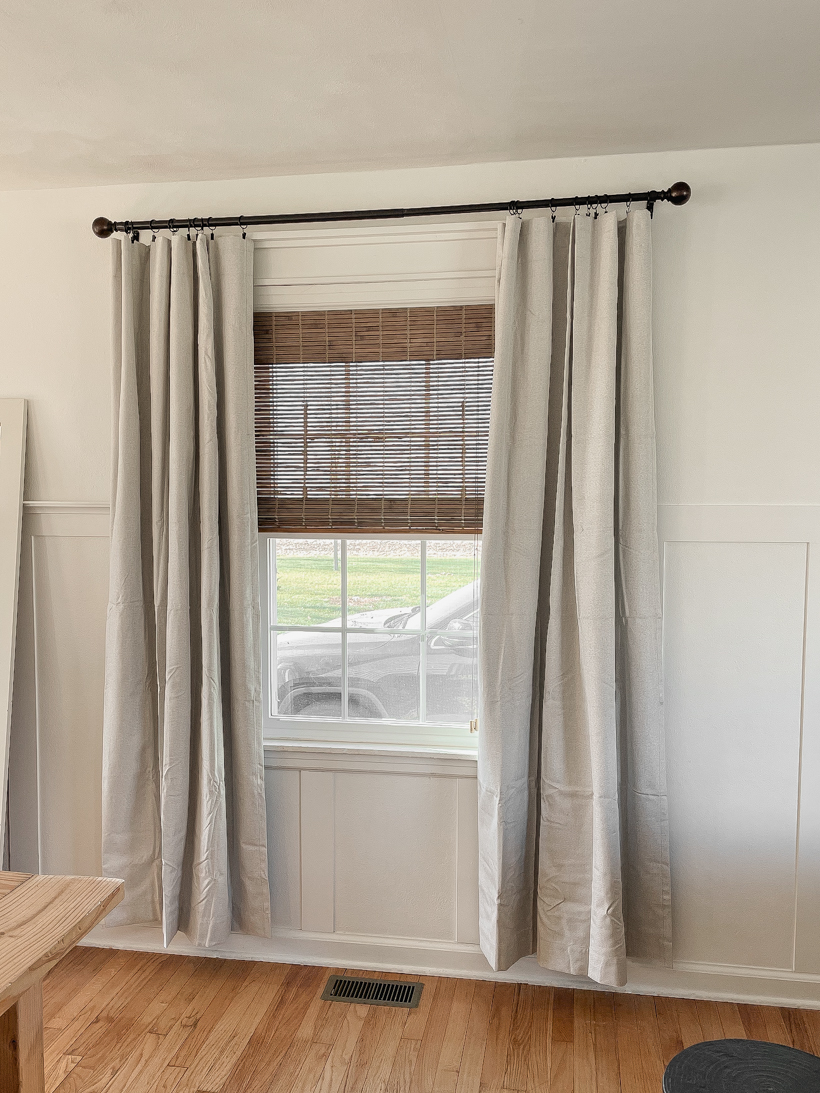
In the photo below you can see what the new curtains looked like when I first hung them up. They were more than several inches above the floor, landing even above the top of the baseboards. Your eye stops at the bottom of the curtain instead of extending all the way down to the floor, which makes not just the curtain, but also the ceiling and window look short.
OPTIONS FOR ADDING CURTAIN LENGTH:
1. The easiest way to add length is to hang the curtain from rings instead of using the rod pocket/grommets/etc. This will drop the curtain a few inches, which is perfect if your curtains are just a tad too short.
– The curtains I ordered already came with curtain rings, which is fantastic. But even using them, the length was still too short.
2. Another option is to sew a piece of fabric trim to the bottom of the curtain to reach your desired length.
– I was trying to avoid having to get out my sewing machine in the first place, so this wasn’t the ideal option.
3. The last method, and the one I ended up going with, is to let down the hem on the bottom of the curtain, which typically gives you several more inches of length to work with. This requires a few steps, but none of them are very difficult.
HERE IS HOW I LENGTHENED MINE:
SUPPLIES:
seam ripper
scissors
iron-on adhesive
iron
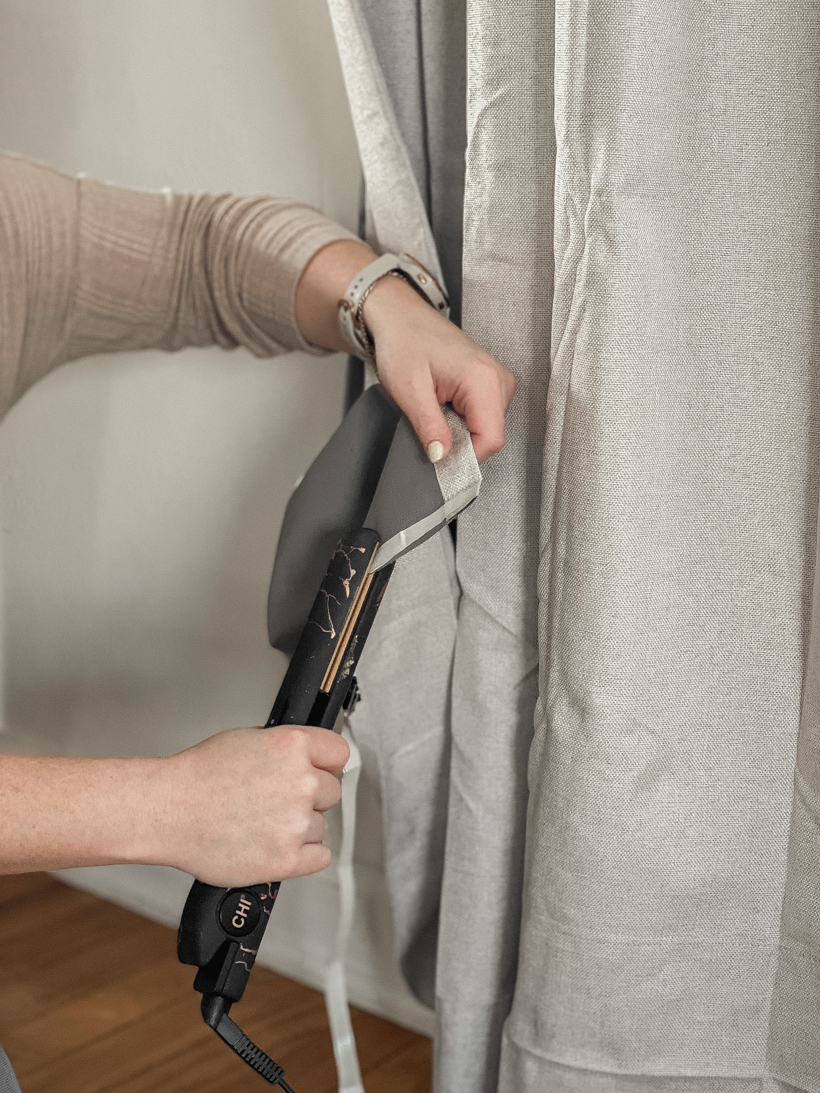
I used my hair straightener for convenience instead of an iron. If you prefer to sew the new hem yourself, you could do that as well instead of using the iron-on adhesive.
STEP 1:
Locate the hemmed portion of fabric on the bottom of the curtain.
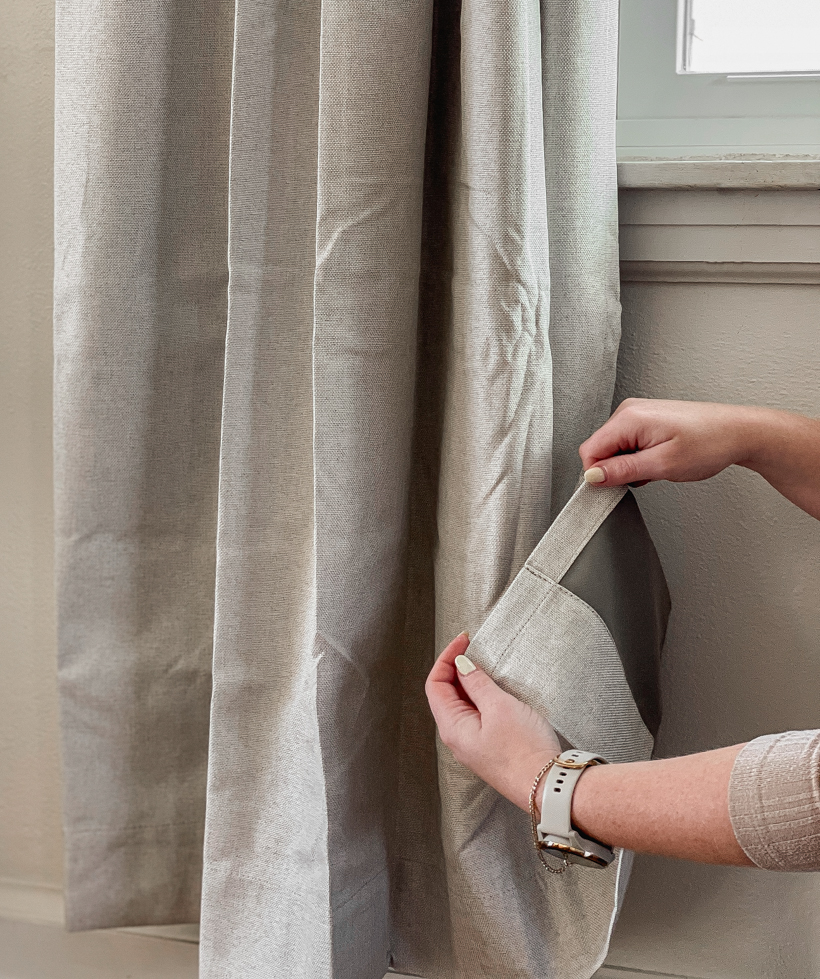
STEP 2:
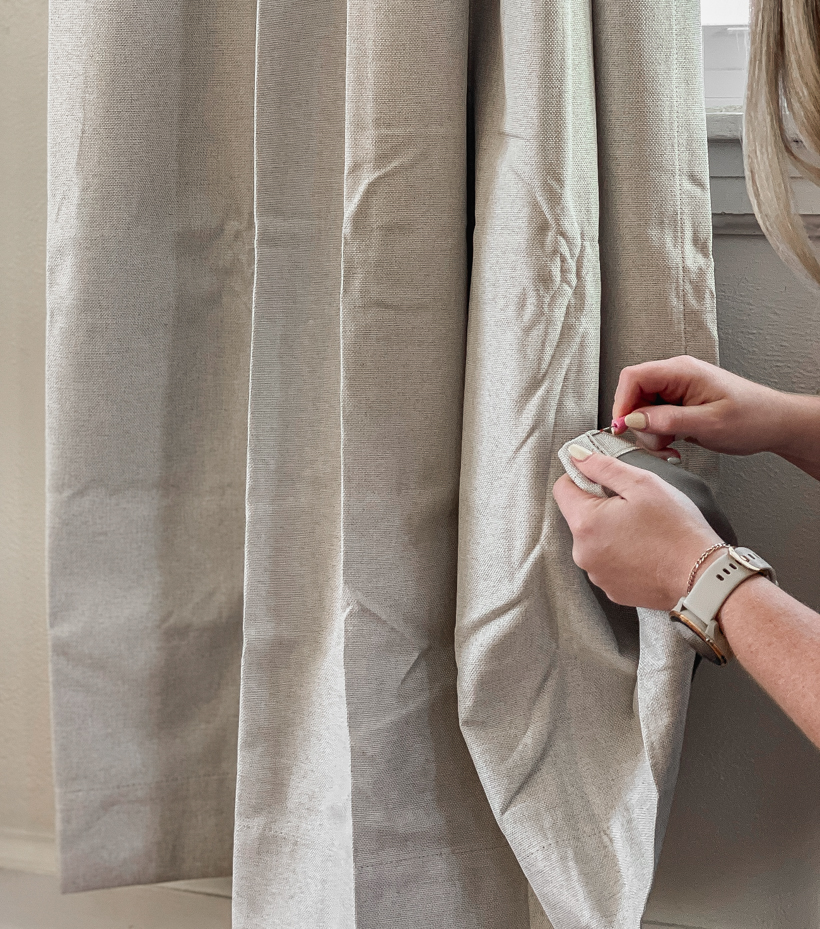
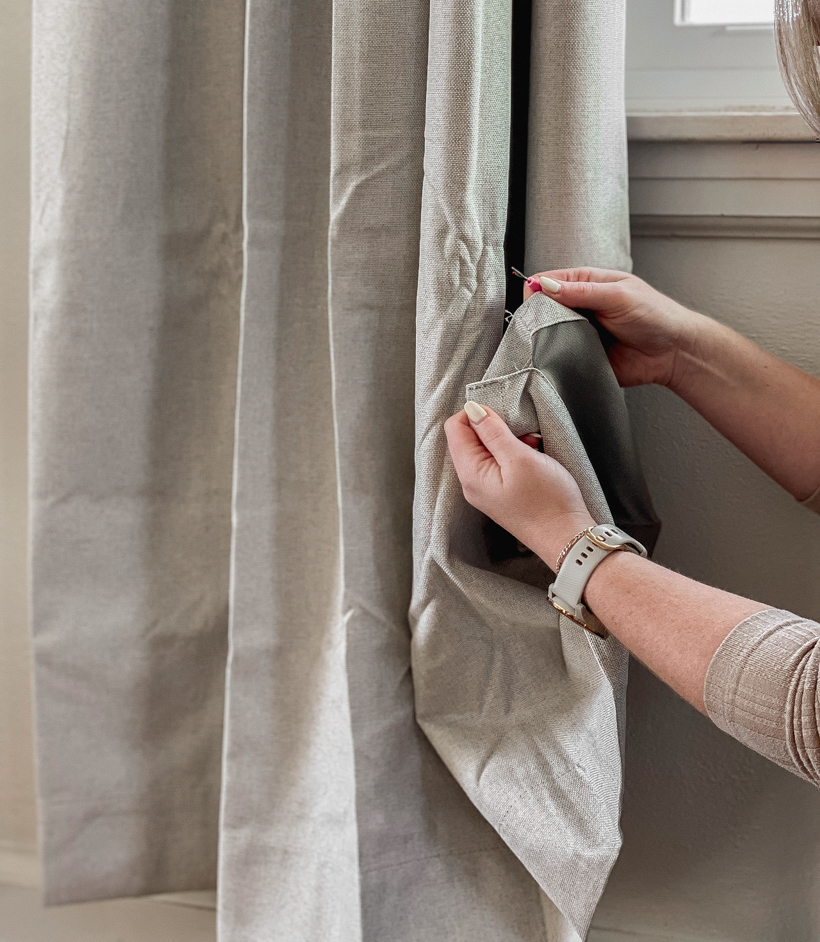
Use a seam ripper to carefully remove the hem stitches. Stick the pointed metal tip under the first stitch and gently push the tool until the thread reaches the blade in the curve, cutting the stitch. The backstitches on the ends of the curtain are usually the hardest to remove. Be careful to only grab the stitch thread and not poke a hole in the fabric.
STEP 3:
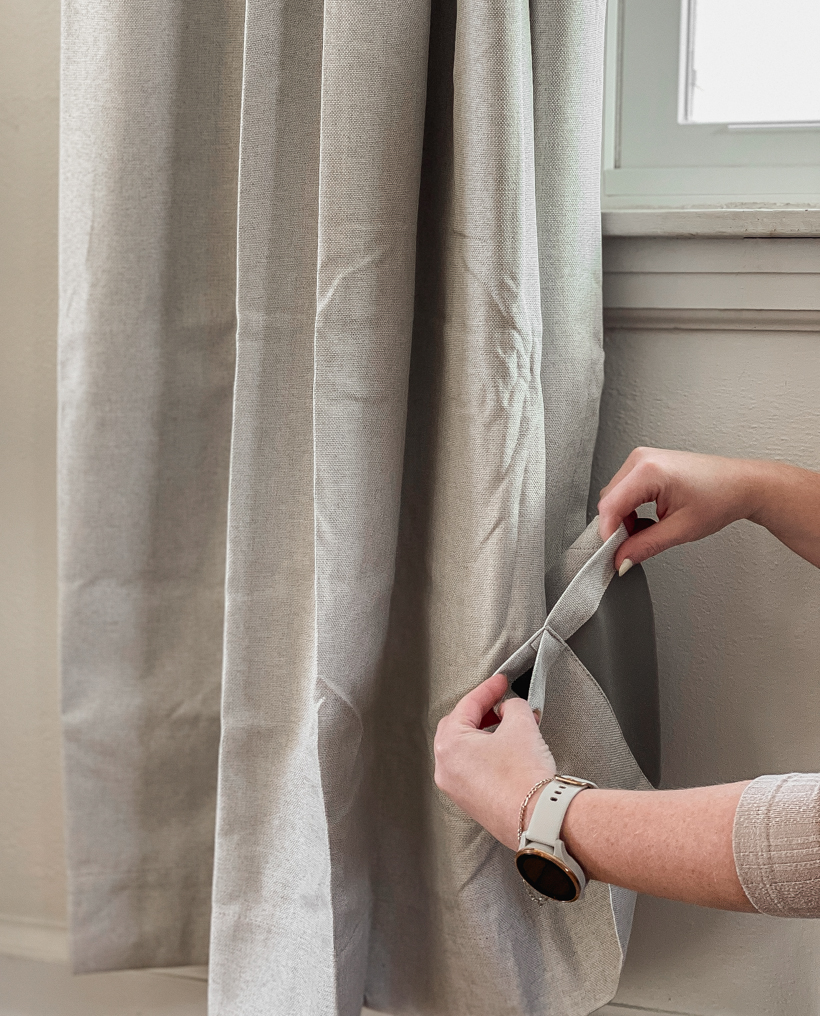
Continue cutting the stitches across the bottom of the curtain until the entire hem is removed, and pull out any loose threads.
STEP 4:
Now that you’ve let down the extra fabric length, you will need to re-hem the bottom of the curtain to give it a finished edge. You can either use a sewing machine or iron-on hem adhesive.
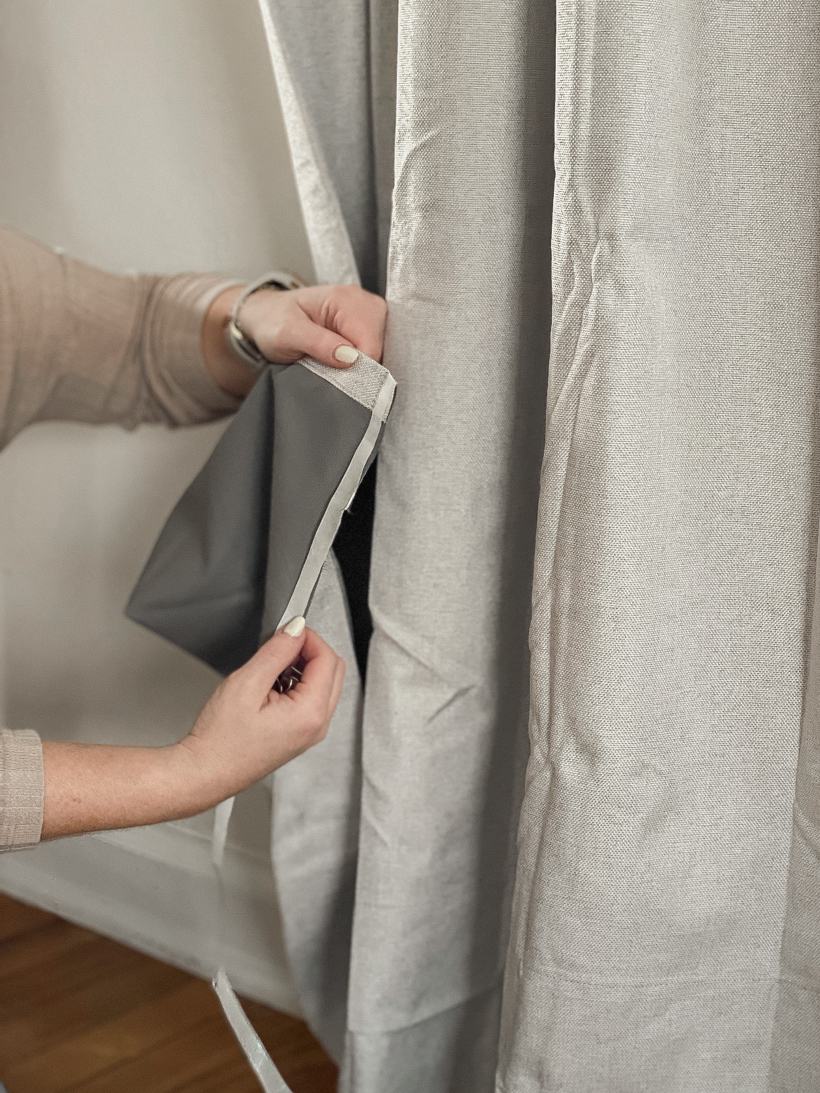
Preheat an iron on medium heat (no steam) or high heat for thicker fabrics – like this curtain. Place the adhesive tape along the bottom edge of the curtain with the paper liner facing up (adhesive side down).
STEP 5:
Place and hold the iron on the paper liner for two seconds or until the tape adheres to the curtain. Again, thicker fabrics like this curtain will require more time under higher heat. Allow the tape to cool.
STEP 6:
Remove the paper liner and fold the fabric up, sandwiching the adhesive between two layers of fabric. Press and hold the iron on the fabric for 8+ seconds until that section is bonded. Allow to cool completely.
Note: you are able to wash the curtains with iron-on adhesive on delicate cycle warm and tumble dry in low heat.
I still have a few small wrinkles to get out and need to “train” the folds to lay nicely. Have you heard of training your curtains? I can explain that in a future post if that would be helpful – just let me know in the comments. But the length on these curtains is much better now! I wish I could have gotten another inch – inch and a half out of them, but this will do just fine.
I hope you never have to run into this problem in your home, but if you do end up with curtains that are too short, I hope this post is helpful! Be sure to save it for future reference! Let me know if you have any questions.
SOURCES
curtains + curtain rings | bamboo roman shade
curtain rod | black drum side table
brown leather sofa | woven throw blanket
oversized beige pillow | block print lumbar pillow
book storage box | spectacle magnifying glasses
CLICK IMAGES BELOW TO SHOP:
As always, I sincerely appreciate you shopping through the links I share, which allows me to make a small commission from your purchase while your purchase price stays the same. When you use my affiliate links, I’m better able to create content for this blog as well as support my family, and I thank you from the bottom of my heart for supporting what I do!




Hi Liz. Thank you for posting this. I ran into this problem a couple of years ago. I bought curtains on sale from a well known company that doesn’t give reviews on their products. I ordered a long length because I was going to put up new rods higher than the old ones. The curtains were overly long but I was going to use clips so I knew I would be able to work it out. Directions said to wash in warm water and dry on low. Since they are cotton I washed them in cold water and hung them to dry. They ended up being six inches shorter off the floor! They shrank eight inches. I measured each one before I washed them. A couple were a couple of inches off before washing. I let down the hem and the top of the curtain had extra material for sliding the rod through if you chose to use them that way. Since I was using clips I didn’t need it and it gave me the extra length that I needed. They ‘kiss’ the floor now. I just bought new curtains for a couple of bedrooms that are too long so I am going to use the tape you suggested. Thanks again for all of the great posts! Love the decorating ideas.