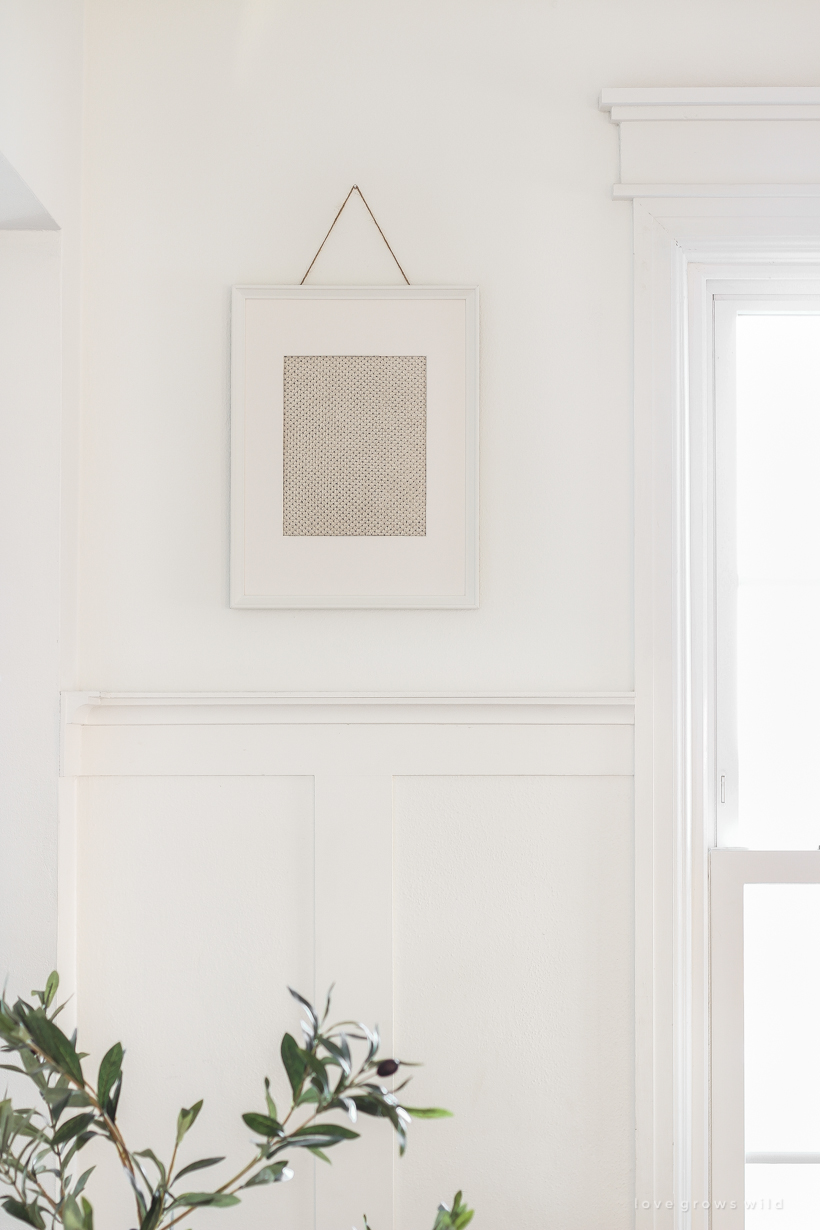
I’m currently working on sprucing up several spaces in our house at the moment, and one of them is the entryway. It’s been awhile since I’ve updated anything in here, and I’m excited to breathe some new life into this space. One of the first things I wanted to do was add some interest to this wall around the big window…
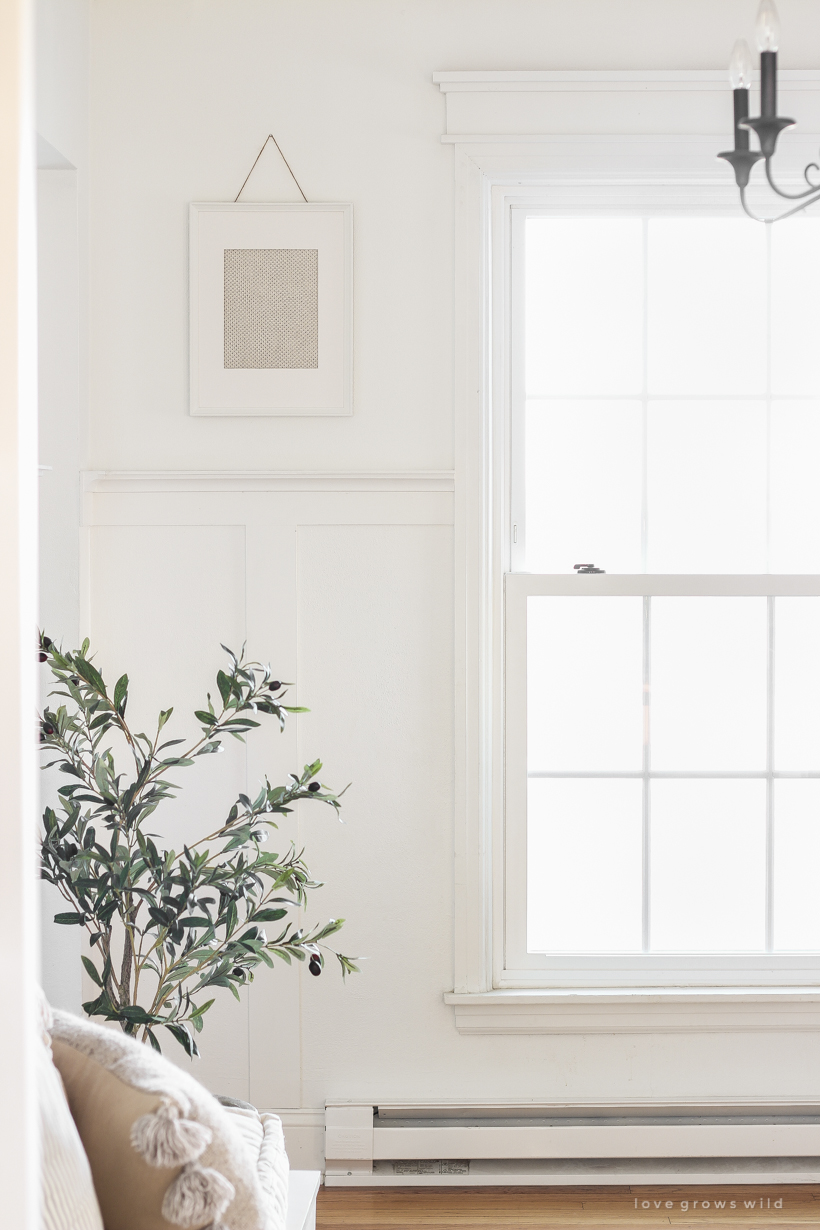
Ideally I would love to add curtains here to soften up the space and add some warmth and texture to all the white. But we have a baseboard heater under the window, preventing me from having a floor length curtain, and the main door we use to come in the house is just to the right of this window, so you’d basically be walking right into a curtain if I put one here. I’m working on some alternative window treatment ideas, but for now I wanted to add some artwork to either side of the window to help cozy this view up.

Most of the artwork I have in the house is either a landscape painting, a botanical print, or a handmade sign, and I wanted to do something different here. I kept thinking about wanting the softness of curtains in this space, and the idea hit me… fabric. Just get some scrap pieces of fabric and frame them!
This is such an inexpensive way to add framed art in your home because you only need such a tiny piece of fabric, and there are endless options for the type of fabric, color, pattern, and texture you can use. You could do a grouping of different framed fabrics in a cohesive color palette for a more collected, layered look or a whole wall of frames with the same fabric for a really beautiful minimalist look.
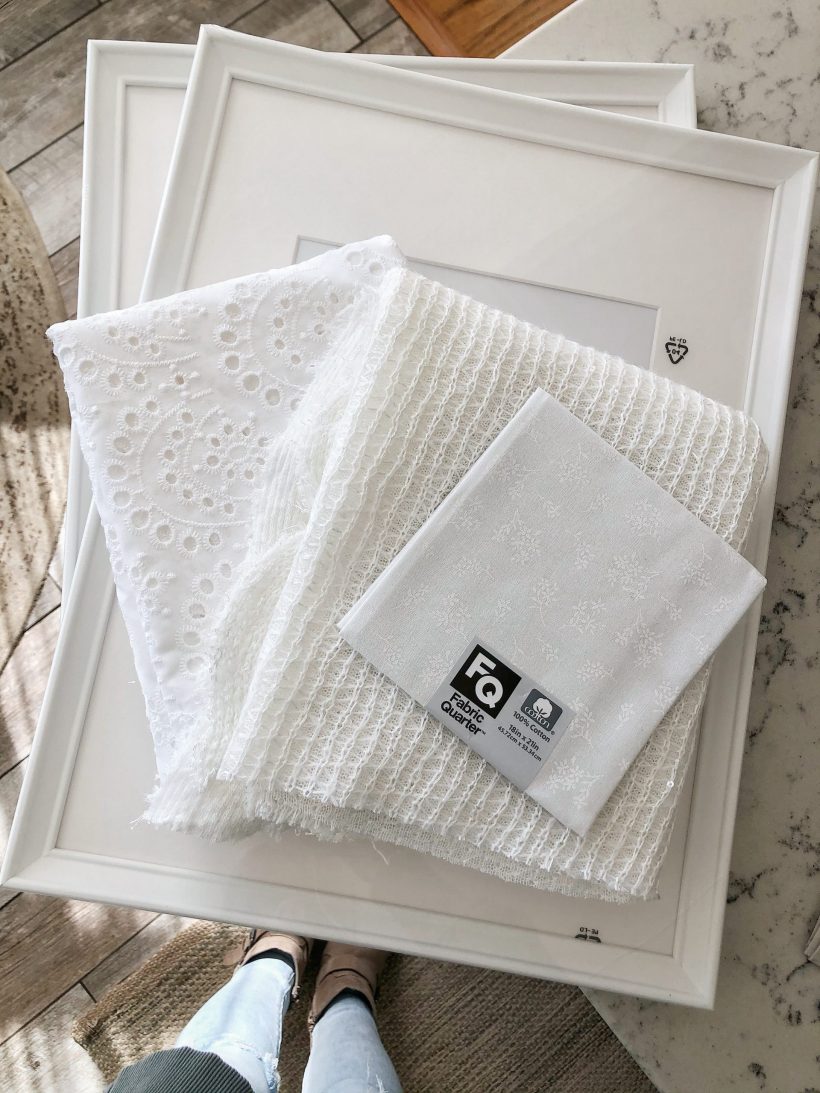
I went to the fabric store and picked out several different white fabric options and brought them home to see which I liked best. Here are my tips for selecting a fabric that will look great framed:
SELECTING FABRIC TO FRAME:
- texture, texture texture. The more the better! Look for fabrics that will have the most dimension once you put it behind glass.
- subtle pattern + soft colors. Something with a soft, subtle pattern will add interest to the framed art without being too busy and bold.
- check the clearance section to score a great deal on fabric since you only need such a small piece.
- look through the precut fabric quarters that are usually only a few dollars and is enough fabric to frame two 8 x 10’s
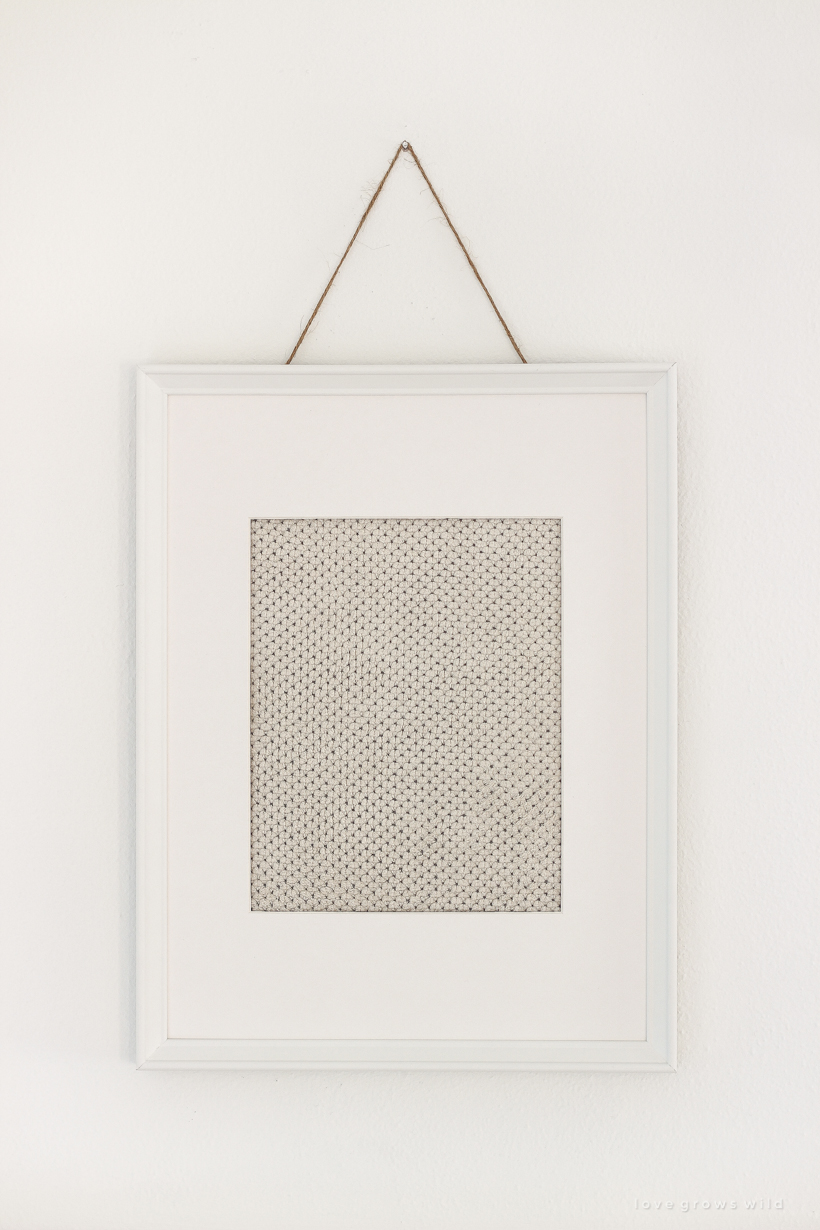
You can see in the photo above the first three fabric options I brought home. If you follow me on Instagram and watched my stories, I took you along on my shopping trip and shared other fabrics I found that I loved! I ended up framing the middle fabric because it has such a pretty texture, but the white fabric in a white frame with a white mat ended up looking so washed out and boring against the white wall. For once in my life… it was too much white. 😂
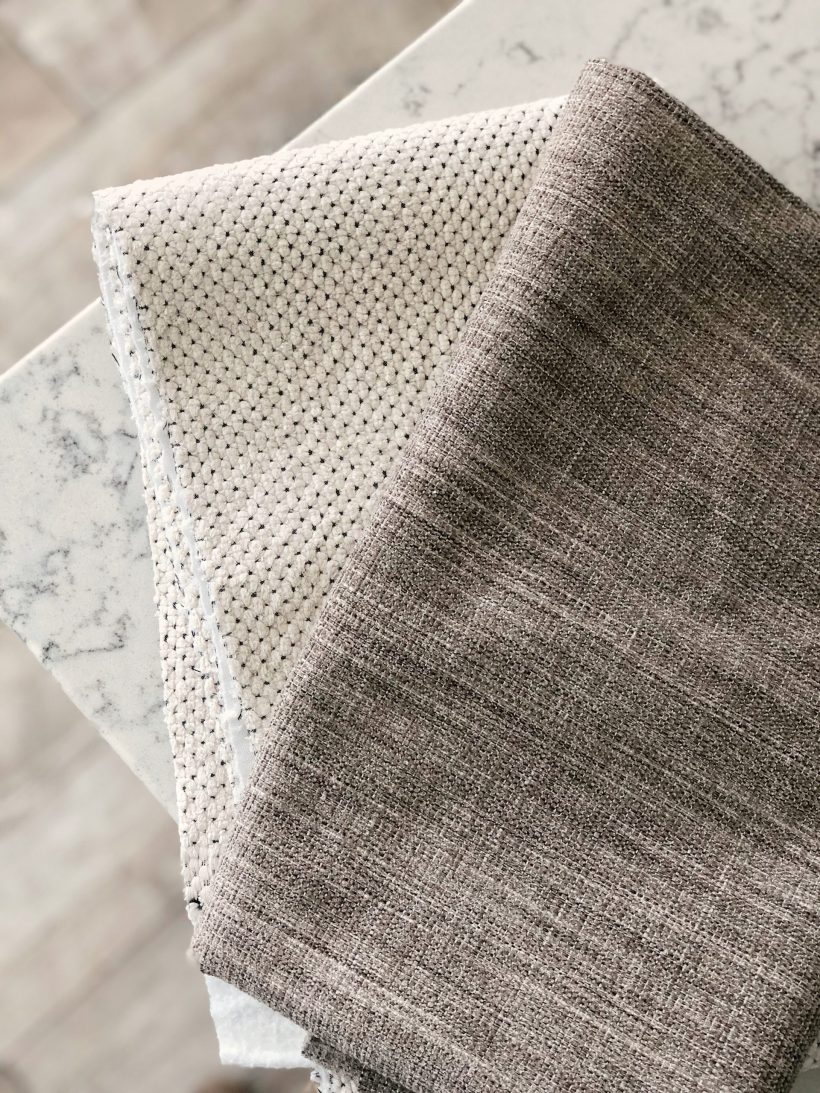
I ended up going back to the fabric store and picking out two more options… one with a ton of soft, cozy texture and a darker cream color with black threading and the other a deeper muddy textured taupe. I loved asking you guys to vote on all these fabrics on Instagram and seeing which you loved most!
The winner ended up being the textured cream fabric I found in the clearance section, and it cost me $4.50 in fabric for two 16 x 20 frames matted to 8 x 10. You can’t beat that price for artwork!
These frames I got from IKEA, and I added the twine to add a little bit of extra interest. Actually, if I’m being completely honest, there was already a nail in the wall here, and it is a pain in the you know what to add nails to these very old plaster farmhouse walls… so I added the twine to get the correct height I needed for the frame without having to add another nail hole. 😂 But I like the added detail, so it worked out in the end anyway.
And while we’re being honest, after I took these pictures I’m still feeling like it’s a little too much white, so don’t be surprised if these frames switch to wood in the future. I wanted to really take you guys along for the design process on this and show you that it usually takes a few tries to get things just right. Two trips to the fabric store, issues with hanging the frames in my rock solid plaster walls, and possibly another trip to the store to purchase different frames. I don’t always (or ever actually) get things right on the first try, and I wanted you guys to see that! But I wanted to share this idea for super simple and affordable wall art, and I hope you are inspired to go pick out some fabrics and try this yourself.
P.S. a little photography tip…
remove the glass from your frames before photographing to eliminate any kind of glare.
Let me know if this post was helpful for you! Thanks for stopping by today, friend. xoxo Liz


I luv the framed fabric with the twine hanger… clever !! I enjoy your Instagram and blog accounts.
ThaNk YoU.
We are slowllly updating… and going WHITE (mostly)…! So bright So airy. 🤍linda of no.cal.
Nice! Another option might be an organic wall hanging for subtle texture and color. Maybe macrame? Or Century Clay (etsy shop) makes really lovely clay wall hangings, some with organic elements.
Liz,
Your style is beautiful & I just love these!! Thanks for sharing with all of us, your joy and inspiration brighten my day
I love every post you do. You sweet, sweet young Lady.
Fabric on your window glass might be an interesting feature. I think fabric startch was once used for lace years ago. The fabric piece like what you put in your frame might work.
Or perhaps a pleated roll up shade placed at the bottom sill to pull up.
Love this idea!
Something that I’ve done in the past is to use canvas stretcher bars to create a frame that I wrap fabric around like the blank canvases that you can buy. I usually use a print that’s on the bold side. I’ve done large ones in groups of three that fill a wall and single small ones.
Hi Liz!
What a great idea! You are so right about the endless possibilities
Thank you so much for this genius idea!