• Home
  • MEET LIZ
  • contact
  • Blog
  • JOIN OUR COMMUNITY

Love Grows Wild

  • Home
  • SHOP MY POSTS
  • Our Home
    • bathroom
    • dining room
    • entryway
    • exterior
    • kids bedroom
    • kitchen
    • living room
    • master bedroom
    • office
    • playroom
  • Project Gallery
    • diy decor
    • decorating advice + inspiration
    • furniture makeover
    • woodworking
    • crafts
  • Seasonal
    • spring
    • summer
    • fall
    • winter
  • Recipes
    • appetizers/snacks
    • beverages
    • breakfast
    • dessert
    • meal ideas
    • side dishes
  • SHOP
    • Grow + Gather
    • Shop My Posts
    • My Amazon Store
    • My Book
Decorating and Home, Tutorials

Easy Up-cycled Wall Art Trio

August 9, 2013

Pin
Share
Post
Email
Print
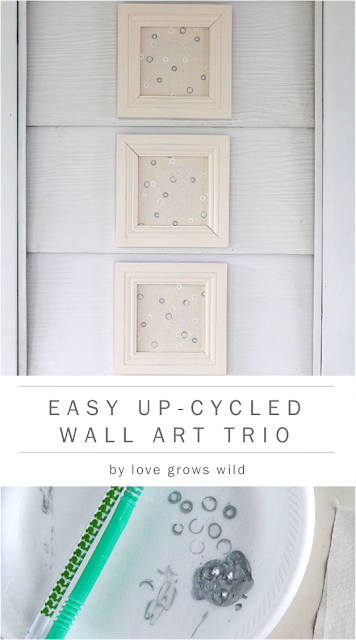
Do you have any out-of-date decor? Easily transform that old artwork into some new! Check out the cute DIY framed art I made for my patio! Yes, even outdoor spaces need decorating too!
Easily transform old artwork into something new! Check out this super cute DIY artwork from LoveGrowsWild.com #diy #art #decor

Okay, let’s take a survey! How many of you have a designated place in your house for unused decor? You know, off-season wreaths, candles and vases you aren’t using, holiday decor… where do you keep it all? I have a tiny hall closet upstairs that I store all that stuff in, and quite frankly, it’s a little full. Okay, A LOT full. I have so many pieces that are either Goodwill finds or hand-me-downs that just don’t match my decor but have tons of makeover potential! The problem is, I rarely find time to dig through my piles of treasure and make these pieces pretty again. So I have one very small, very full closet. Please tell me I’m not the only one! Or at least nod your head and make me feel better!

In an effort to a) save some money and b) clean out my closet, I found these gems while looking for wall art to add to my patio makeover. Did you see my new patio?? I’m in love!! The breezeway is mostly windows, but I have one small vertical wall space that I thought this little art trio would fit perfectly in. These little frames are cute on their own, but just my style anymore. So I started brainstorming ways to give them a fresh update!
Easily transform old artwork into something new! Check out this super cute DIY artwork from LoveGrowsWild.com #diy #art #decor

Here’s what I came up with:
I wanted to change the design inside the frames, but I also wanted to be able to change it seasonally if the need arises. So instead of just painting over the design, I decided to cover it in fabric. I didn’t want a bold, patterned fabric that would grab your eye, I just wanted something that would fill the space and flow nicely with the decor. I have a bunch of muslin cloth left over from other projects, so I cut squares of it just large enough to wrap around the frame’s insert. I did iron the fabric, but muslin is just a beast to get totally smooth, so I left it as is. It will just add some texture, right? : )

Easily transform old artwork into something new! Check out this super cute DIY artwork from LoveGrowsWild.com #diy #art #decor
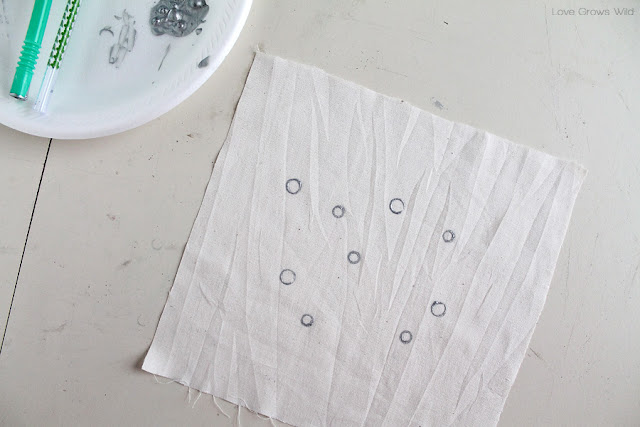
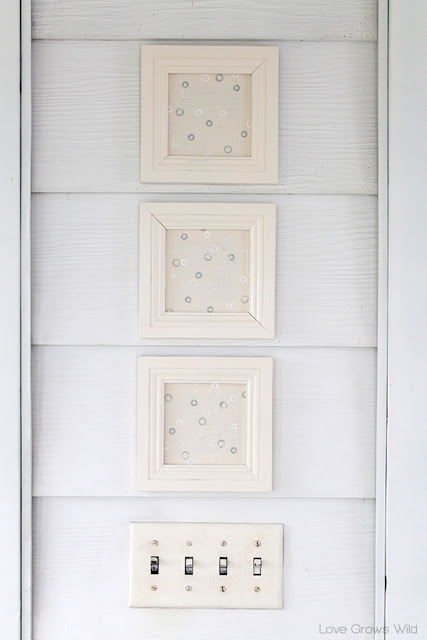
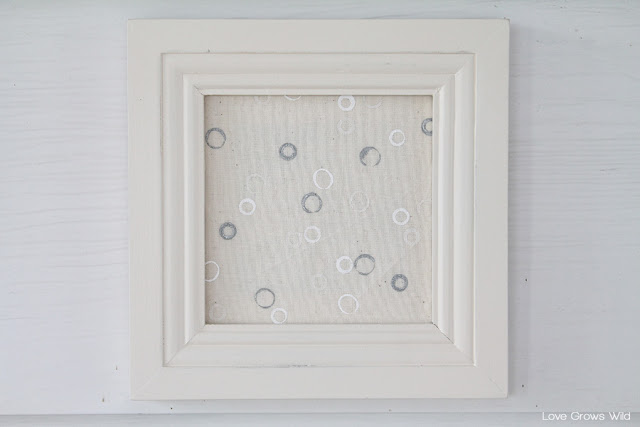
Now onto the fun part! I sat and stared at the fabric squares for quite awhile before inspiration came to me. After digging through some of my paint supplies, I came up with the idea to stamp little patterns onto the fabric with paint. My original thought was polka dots, but I thought that still might be too bold for what I wanted, so I settled on circles instead! And what could I use to get perfect little circles? STRAWS! I snagged two plastic straws in different sizes from my kiddo’s collection (you don’t think he’ll miss them, do you?) and picked out my paint colors. I went with  metallic silver, flat white, and ivory pearl craft paint. I started with one color and randomly stamped the paint onto the fabric.

Easily transform old artwork into something new! Check out this super cute DIY artwork from LoveGrowsWild.com #diy #art #decor

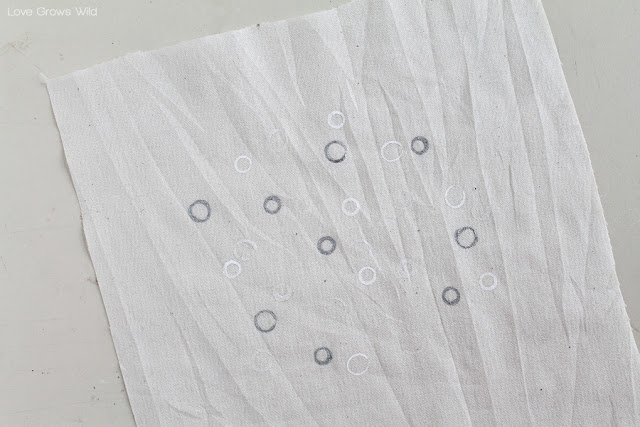
Then I repeated the process with the other two colors until my fabric was full of cute little circles. Don’t worry about filling the entire square, just enough to cover what will show in the frame.

Easily transform old artwork into something new! Check out this super cute DIY artwork from LoveGrowsWild.com #diy #art #decor

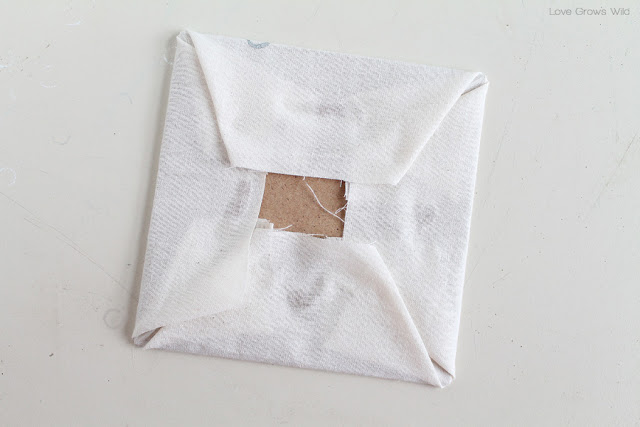
The previous artwork was printed on the frame’s backing, so I painted over the old art with a little bit of white spray paint so it wouldn’t show through the fabric. Once that was dry, I laid the backing onto the center of the wrong side of my fabric.

Easily transform old artwork into something new! Check out this super cute DIY artwork from LoveGrowsWild.com #diy #art #decor

Then I wrapped the edges of the fabric behind the backing and secured them with a little bit of hot glue. Since the frame didn’t have a separate backing, the hot glue will hold the fabric in place but can still be easily removed if I feel like switching out the fabric. Which knowing me will likely happen at some point!

Easily transform old artwork into something new! Check out this super cute DIY artwork from LoveGrowsWild.com #diy #art #decor
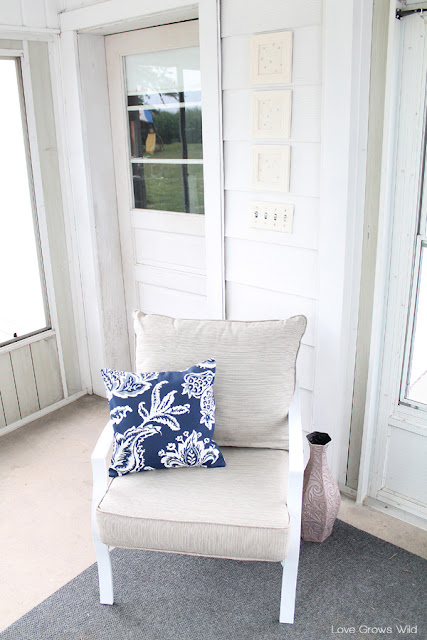
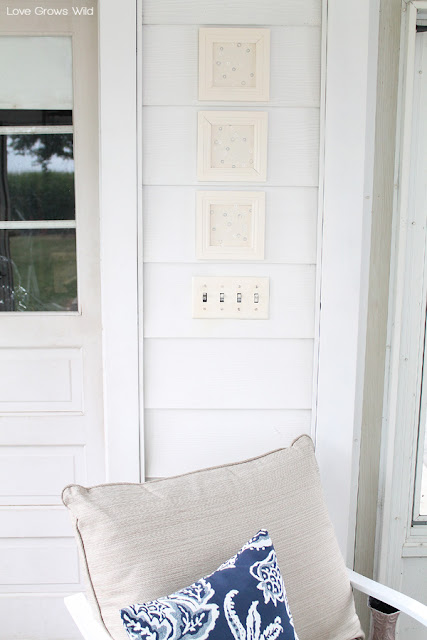
Then I placed my new artwork back in the frame and hung it up in my breezeway!

Easily transform old artwork into something new! Check out this super cute DIY artwork from LoveGrowsWild.com #diy #art #decor
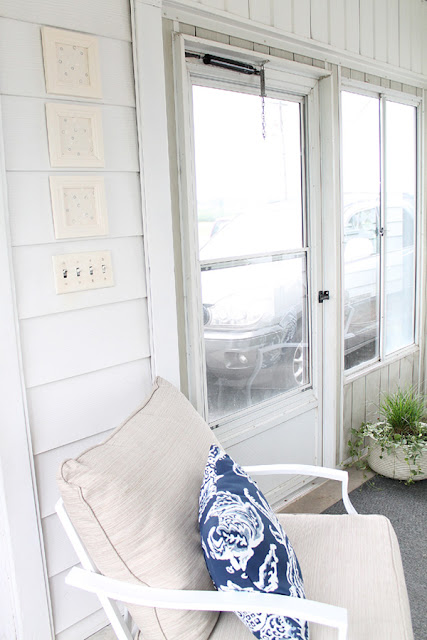
It fits perfectly on this little wall and makes the space feel like another room of my house! Adding things like artwork, lighting, rugs, and decor help outdoor spaces feel cozy and inviting. 

Easily transform old artwork into something new! Check out this super cute DIY artwork from LoveGrowsWild.com #diy #art #decor
I love how the ivory color of the frames slightly contrasts against the white siding and warms the space up a bit. You notice the art, but it doesn’t steal the show. It lets those gorgeous blue pillows I made be the star!

Easily transform old artwork into something new! Check out this super cute DIY artwork from LoveGrowsWild.com #diy #art #decor

Easily transform old artwork into something new! Check out this super cute DIY artwork from LoveGrowsWild.com #diy #art #decor

Easily transform old artwork into something new! Check out this super cute DIY artwork from LoveGrowsWild.com #diy #art #decor
The silver and pearl paint gives off a little bit of shimmer in the sunlight that is just gorgeous! And I can’t get enough of those cute little circles! 

Easily transform old artwork into something new! Check out this super cute DIY artwork from LoveGrowsWild.com #diy #art #decor


Let’s recap:
I cleaned something out of my overflowing closet.
I added some super cute DIY artwork to my breezeway.
It cost me NOTHING to make!

Yep, I’d say this was a total win! Don’t you?
Be on the lookout for more decor makeovers from my junk treasure closet coming soon!
What treasures do you have waiting for a makeover?

Let’s Keep In Touch!

Subscribe to Blog | Follow on Facebook | Follow on Twitter | Follow on Google+
Follow on Pinterest | Follow on Instagram | Subscribe to Newsletter
P.S. I’m sharing this post at some awesome link parties… Check them out HERE!    
Pin
Share
Post
Email
Print
Crafts DIY Decor
by Liz Fourez 
18 Comments

About Liz Fourez

View all posts by Liz Fourez

Related Posts

  • gallery wall artwork inspirationHow to Fill a Blank Wall with Art
  • Yarn Wrapped Christmas TreesYarn Wrapped Christmas Trees
  • Neutral Living RoomTone on Tone Woven Wall Art DIY
  • Are you curtains just a little too short? Home blogger Liz Fourez shares a few ways you can easily add extra length.How to Lengthen Curtains That Are Too Short
PREVIOUS: Back to School Shopping with Kohl’s
NEXT: Big Announcement! Love Grows Wild The Shop now open!

Comments

  1. Yvonne Urra-Bazain says: August 9, 2013 at 3:40 pm

    Those are darling. 🙂

    Reply
  2. Ali says: August 10, 2013 at 1:31 am

    They are so pretty! Great job.

    Reply
  3. Alexis Middleton says: August 11, 2013 at 5:26 am

    Lovely!

    Reply
  4. Toodie says: August 12, 2013 at 1:43 pm

    I agree; total win!

    Reply
  5. lisa at Mabey She Made It says: August 13, 2013 at 3:22 pm

    These are really great! I never decorate outside, and I totally should. Thanks for the inspiration!

    Reply
  6. Jocelyn says: August 13, 2013 at 5:53 pm

    I love how easy and adorable these are! Go you for upcycling what you already had! I really should clean out my closets too!!!

    Reply
  7. Rita says: August 14, 2013 at 2:07 am

    lovely project!

    http://ferrytaleshome.blogspot.com

    Reply
  8. SWEET HAUTE for Sweet Haute says: August 14, 2013 at 3:36 pm

    Excellent idea, this really caught my eye….I wanted to invite you to share this at my linky party going on now. Hope to see you there…

    Christina at
    SWEET HAUTE
    http://sweethaute.blogspot.com/
    Thursday SWEET HAUTE Share Linky Party

    Reply
  9. Tammy N says: August 15, 2013 at 1:03 am

    Wow! A whole new look with only a few supplies. Great idea!

    Reply
  10. [email protected] says: August 15, 2013 at 2:32 am

    You are so smart! Annnnd these turned out adorable. Love your patio! 🙂

    Reply
  11. Trish - Mom On Timeout says: August 16, 2013 at 3:08 pm

    They look absolutely lovely Liz! What a fantastic idea!

    Reply
  12. Sande Sivani says: August 16, 2013 at 4:28 pm

    Terrific and clever up-cycle project!! The gang over at My Personal Accent, would like to invite you to link-up this post at our new Blog Strut Peacock Style Link Party. Share as many of your creative ideas, recipes, and any other family friendly content as you like. We will be pinning every submission we receive. If you have a giveaway or contest you’d like to promote, feel free to post it on our giveaway page. Come on over and show us what you’ve got! http://www.mypersonalaccent.com/the-blog-strut-peacock-style-6/

    Reply
  13. Becca Diestelkamp-Woodham says: August 16, 2013 at 5:06 pm

    Looks great. Very simple, clean and modern. Stop by my Friday’s Five Features and link up this post (and others)! http://diy-vintage-chic.blogspot.com/2013/08/fridays-five-features-no-4.html

    Reply
  14. Mackenzie says: August 16, 2013 at 6:10 pm

    What a cute simple art project; love how it turned out Liz!

    Reply
  15. Lyuba @ Will Cook For Smiles says: August 17, 2013 at 10:52 pm

    That is so pretty! Looks very elegant!

    Reply
  16. kristi dominguez says: August 18, 2013 at 2:12 am

    So pretty, Liz! Love that the print is on fabric.

    Reply
  17. Capturing Joy with Kristen Duke says: August 19, 2013 at 2:08 am

    Great idea! This is a really great idea for an outdoor space and I love that it cost you nothing!

    Reply
  18. Capturing Joy with Kristen Duke says: August 19, 2013 at 2:09 am

    Great idea! I love this idea for an outdoor space and especially love that it cost you nothing!

    Reply

Leave Your Comments Cancel reply

Your email address will not be published. Required fields are marked *

Liz Fourez started Love Grows Wild in 2012 with a passion for interior design and homemaking and a dream to help others create a home they love.  From simple project tutorials, to holiday and entertaining ideas, to her journey renovating a 1940’s farmhouse, Liz demonstrates how to create a beautiful and inviting home with a handmade touch. She turned her signature cozy, neutral style into a best-selling book in 2016 and continues to inspire readers with her captivating photography and easy decorating ideas. Read more about Liz > > > >

LOOKING FOR SOMETHING?

FOLLOW ALONG

  • contact
  • MEET LIZ
  • advertise
  • privacy policy/disclosure
  • Blog

Copyright © 2025 · Prima Donna theme by Georgia Lou Studios

COPYRIGHT © 2017 · DESIGN + BRAND: BLISS AND TELL BRANDING COMPANY