• Home
  • MEET LIZ
  • contact
  • Blog
  • JOIN OUR COMMUNITY

Love Grows Wild

  • Home
  • SHOP MY POSTS
  • Our Home
    • bathroom
    • dining room
    • entryway
    • exterior
    • kids bedroom
    • kitchen
    • living room
    • master bedroom
    • office
    • playroom
  • Project Gallery
    • diy decor
    • decorating advice + inspiration
    • furniture makeover
    • woodworking
    • crafts
  • Seasonal
    • spring
    • summer
    • fall
    • winter
  • Recipes
    • appetizers/snacks
    • beverages
    • breakfast
    • dessert
    • meal ideas
    • side dishes
  • SHOP
    • Grow + Gather
    • Shop My Posts
    • My Amazon Store
    • My Book
Decorating and Home, Tutorials

Decorative Tray Makeover and Kitchen Updates!

June 28, 2013

Pin
Share
Post
Email
Print
Decorating with trays can add lots of personality to your space, as well as keep things neat and organized! Learn how I created this multi-color wood plank tray with the tutorial below, and check out some of our kitchen makeover updates! 
LoveGrowsWild.com | Learn how to take a simple wood tray from plain and boring to fun and fabulous with this easy tutorial!

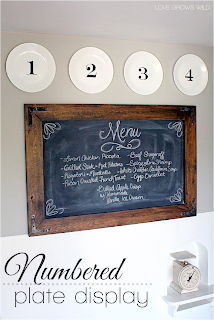
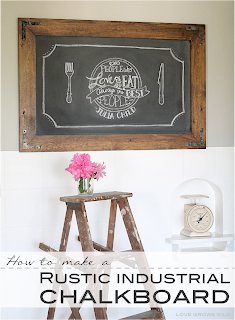
I have kitchen updates to share with you today!! But first let me give you a little run down on how the kitchen makeover is going so far. I filled the big blank wall in my kitchen with a beautiful, rustic DIY chalkboard and added a numbered plate display on top to complete the look. That wall has completely set the tone for the rest of the kitchen, and I’m so excited to get the rest of it done! I started working on the opposite end of my kitchen, where I have three big windows that let in tons of gorgeous light. It is the perfect little space for a small table and two chairs, but like most furniture in my house, all I have is a random hodgepodge of hand-me-downs that are in dire need of a makeover! But I’m totally okay with that of course because #1 I love free furniture and #2 I love makeovers!
I started with a small table that my in-laws used for their dining room table when they were first married. It’s a great little table, but I wasn’t digging the brown or the tabletop with fold-down sides. The extra table space was great (especially with how messy of a cook I am), but food was constantly getting stuck in the crevices where it folds (eww), and I didn’t like the way the table looked with the sides folded down. Solution? Take those suckers off! I grabbed my pink screwdriver, loosened the hardware underneath the table, and took those yucky, food-crusted table ends off. Phew! Much better already. Then I painted my sweet little table in Heirloom Lace, which may be my new favorite shade of white. This process… well, was a PROCESS. To properly sand, prime, paint, and seal a kitchen table that will see lots of wear and tear is definitely not a 1 day project. It took every ounce of patience I had to leave buckets of paint everywhere in my kitchen as I painted, sanded, painted, sanded, painted… you get the picture. It took multiple coats of each step, and I made sure to carefully follow the drying time guidelines because the LAST thing I wanted after all that hard work was to see any of my beautiful, Heirloom Lace paint chip off. I would probably die. Or at least cry. Or maybe eat some pie. Okay, I’m done : )
I could probably do an entire post on the process of painting my table, but I figured you wouldn’t be overly thrilled with a post called “I painted a table white.” Would you? So instead I’ll just show you the before and after as my little kitchen table left the dark side to enter the light: 
White Table Makeover
Isn’t she just cute? I love her curvy legs! Now, do you notice anything else different about the two pictures?
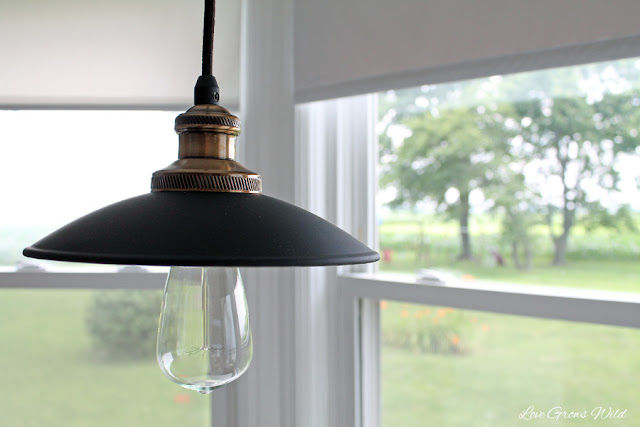
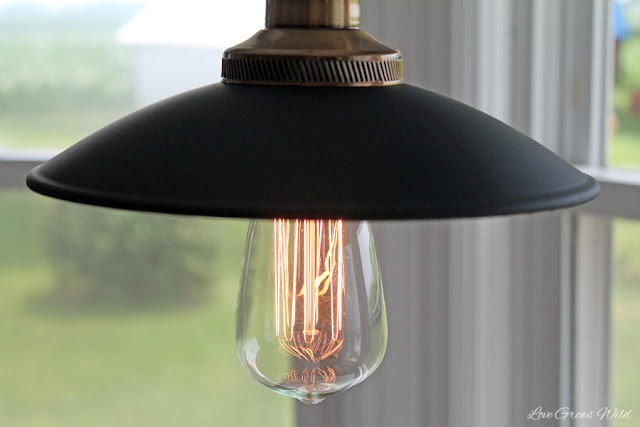
The ceiling fan is gone!! It wasn’t a horribly ugly fan, but it looked totally out of place right next to the main light in the kitchen. And to be honest, unless I burned something in the oven, we didn’t ever use it.  And even then, I would just open the windows. Ever since we moved into the house, I wanted to replace the fan with a pendant light that would hang down and add some brightness right over the table to create a cozy sitting area. I found the most gorgeous Edison-style Allen & Roth pendant light at Lowe’s and knew if would be perfect over my table!
Rustic Edison-style Pendant Light
I love the details on the top and the rustic look of the Edison bulb! What do you think? 

Rustic Edison-style Pendant Light
Okay, SO now that I’ve showed you my table and lighting updates, I thought my pretty white table could use some decorating. I love, love, love using decorative trays all over my house, and I think I have one in almost every room. They are perfect to corral miscellaneous items and make them look pretty, neat, and organized. I had this plain tray that I picked up from Michael’s a few years ago, and it’s been through the wringer with multiple makeovers already. I spray painted it white and Mod Podged some bright, bold scrapbook paper on the bottom, but I hated how it looked. Have you ever tried un-podging something? Not easy. I ended up sanding the tray down as much as I could, but eventually got tired and just spray painted over it. Not the best look in the world. I don’t think I had enough coffee that day. 
LoveGrowsWild.com | Learn how to take a simple wood tray from plain and boring to fun and fabulous with this easy tutorial!
So I thought this would be the perfect time for (yet another) tray makeover! Here’s what I did: 
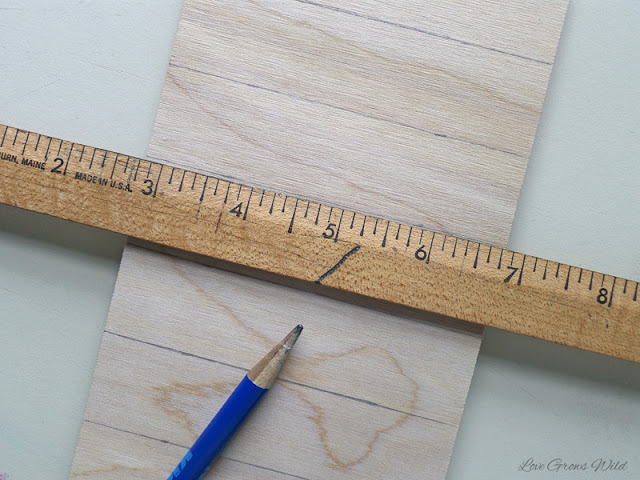
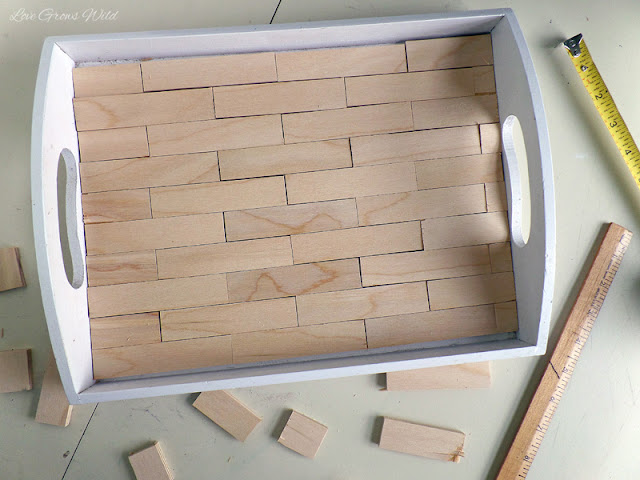
I found some 4″ x 36″ plywood planks at Hobby Lobby for $5.99 each and used my 40% off mobile coupon. I just love that app! I brought two of the planks home and measured out 1″ sections all across the board. 
LoveGrowsWild.com | Learn how to take a simple wood tray from plain and boring to fun and fabulous with this easy tutorial!

I used our new miter saw (swoon) to make quick work of cutting each section, making sure to be VERY careful with my fingers once I got close to the end.

LoveGrowsWild.com | Learn how to take a simple wood tray from plain and boring to fun and fabulous with this easy tutorial!

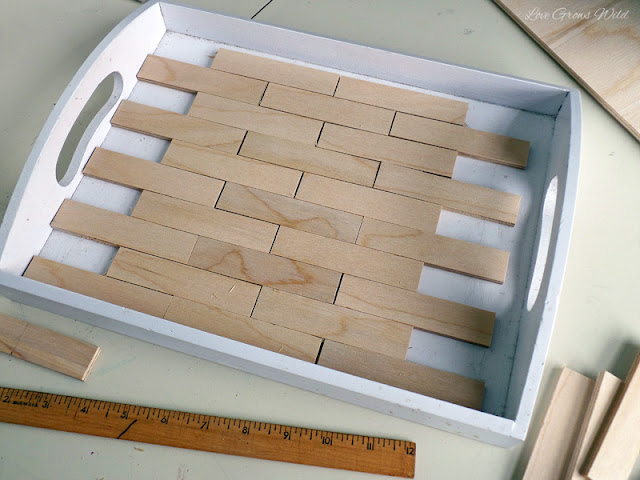
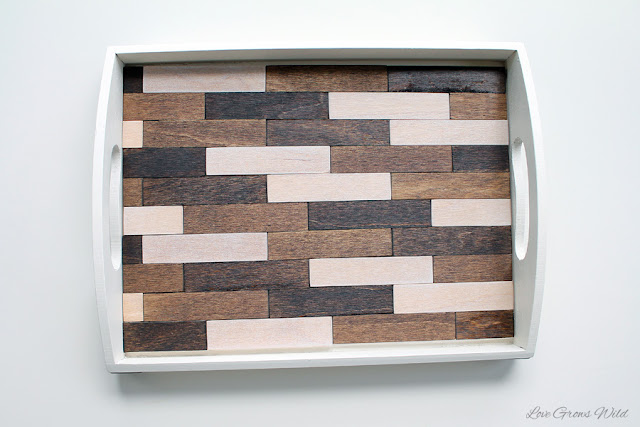
Then I laid my wood pieces in the tray in a brick pattern. (Better Homes & Gardens tells me it is called “running bond”) I started the first row flush against one side of the tray, then started the next row halfway down the first piece (2″ down in this case). I measured the rest of the pieces I needed to complete the pattern and made the cuts. I needed 5 – 2″ pieces, 5 – 2 3/4″ pieces, and 5 – 3/4″ pieces.

LoveGrowsWild.com | Learn how to take a simple wood tray from plain and boring to fun and fabulous with this easy tutorial!

LoveGrowsWild.com | Learn how to take a simple wood tray from plain and boring to fun and fabulous with this easy tutorial!

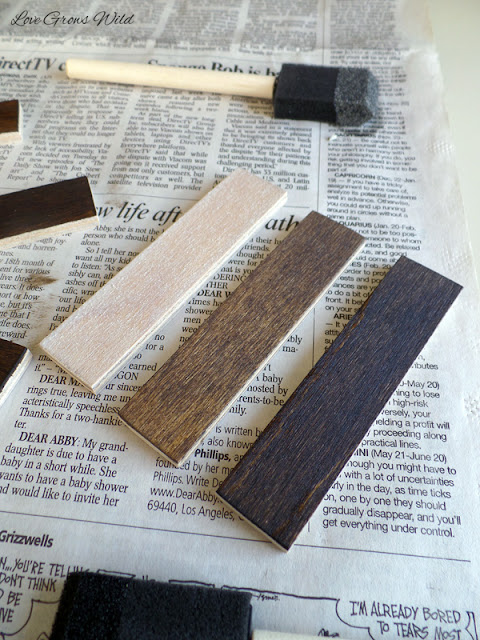
Next it was time for the fun part, staining! Rather than staining them all one uniform color, I decided to do various shades to create some interest. I took each wood piece out of the tray one at a time and wrote a number 1, 2, or 3 on the back with a pencil. I sorted the pieces by number and sanded down all the rough edges.

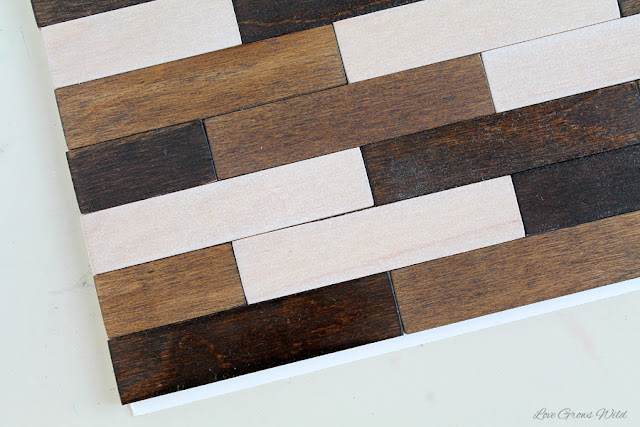
Instead of purchasing three new stain colors, I decided to use what I had: a dark walnut stain and a light gray stain called Sun-bleached. The first group I gave a good coat of dark walnut and let it sit until it dried. It created a gorgeous, deep brown color. For the second group, I did one coat of Sun-bleached, and once that dried I added a light coat of dark walnut on top. I only let it sit for just a second and wiped it off with a paper towel. It created a lighter wood with gray undertones. For the third group, I applied the Sun-bleached stain in multiple coats, since it is such a light stain on light wood.

P.S. I found it easiest to use small foam brushes for this project!

LoveGrowsWild.com | Learn how to take a simple wood tray from plain and boring to fun and fabulous with this easy tutorial!

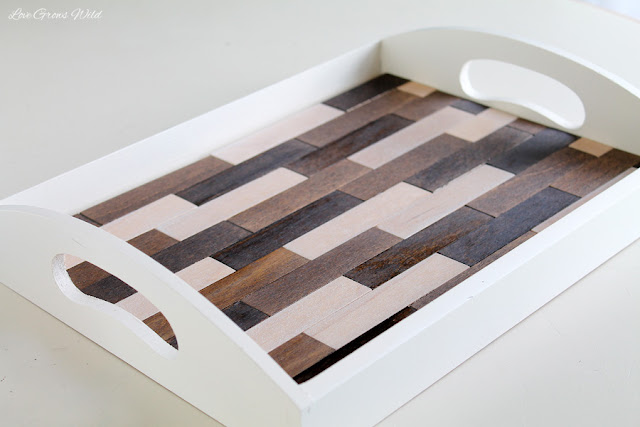
Instead of glueing the wood pieces directly to the tray, I decided to glue them to a piece of poster board I cut to fit inside the tray. Let’s face it, I’m a compulsive re-decorater, and you never know when the mood will strike again to switch things up. This will also make it easier to clean if something gets spilled!

LoveGrowsWild.com | Learn how to take a simple wood tray from plain and boring to fun and fabulous with this easy tutorial!

LoveGrowsWild.com | Learn how to take a simple wood tray from plain and boring to fun and fabulous with this easy tutorial!
Don’t you just love it?? 
LoveGrowsWild.com | Learn how to take a simple wood tray from plain and boring to fun and fabulous with this easy tutorial!
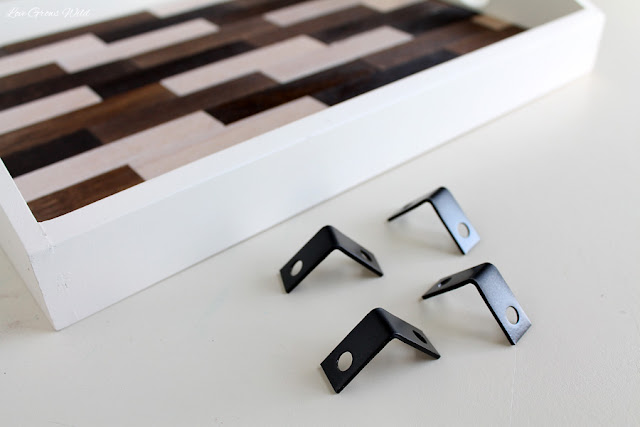
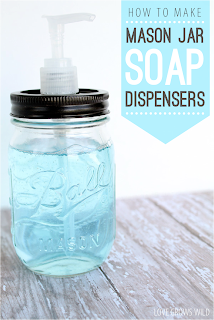
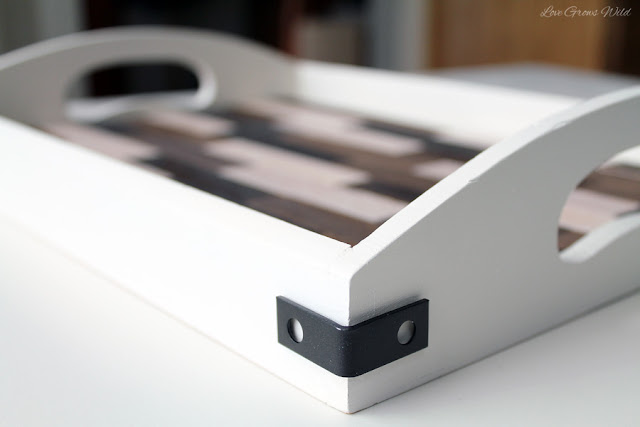
I thought it would be fun to play off the rustic hardware I added to my kitchen chalkboard and attach some small corner braces to the corners of my tray. This time, I decided to simplify things and spray paint the hardware in a gorgeous Oil-Rubbed Bronze. I used that paint on my mason jar soap dispensers, and I just love it! 
LoveGrowsWild.com | Learn how to take a simple wood tray from plain and boring to fun and fabulous with this easy tutorial!

Even the smallest screws I could find were too big for the tray, so I decided to just hot glue them onto the corners. Simple, easy, and quick!

LoveGrowsWild.com | Learn how to take a simple wood tray from plain and boring to fun and fabulous with this easy tutorial!
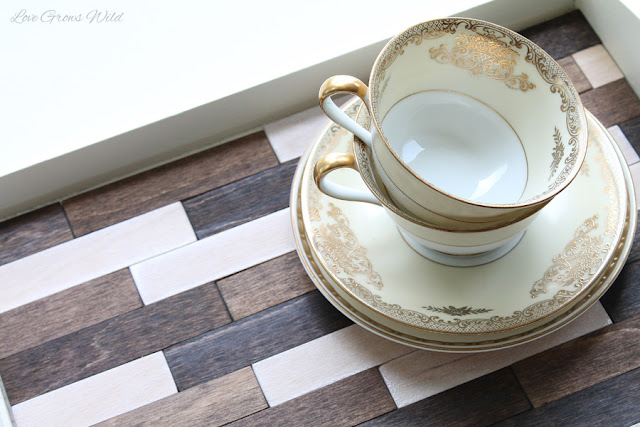
And now I have a gorgeous piece of art sitting on my newly-painted table! It’s almost too pretty to set anything on it : )
LoveGrowsWild.com | Learn how to take a simple wood tray from plain and boring to fun and fabulous with this easy tutorial!

LoveGrowsWild.com | Learn how to take a simple wood tray from plain and boring to fun and fabulous with this easy tutorial!

LoveGrowsWild.com | Learn how to take a simple wood tray from plain and boring to fun and fabulous with this easy tutorial!

I’ve always said that I pictured my husband and I drinking coffee at this table and looking out the window to our family farm as we grow old together. And now we’re finally getting there : )

LoveGrowsWild.com | Learn how to take a simple wood tray from plain and boring to fun and fabulous with this easy tutorial!

So tell me what you think! Do you like the table white? What about the pendant light versus ceiling fan? What colors would you have chosen for the tray? 
Other projects from our kitchen makeover: 
LoveGrowsWild.com | Numbered Plate Display
Numbered Plate Display

LoveGrowsWild.com | DIY Rustic Industrial Chalkboard
Rustic Industrial Chalkboard

LoveGrowsWild.com | DIY Mason Jar Soap Dispensers
Mason Jar Soap Dispenser

Let’s Keep In Touch!
Subscribe to Blog | Follow on Facebook | Follow on Twitter | Follow on Google+
Follow on Pinterest | Follow on Instagram | Subscribe to Newsletter
P.S. I’m sharing this post at some awesome link parties… Check them out HERE!
Pin
Share
Post
Email
Print
DIY Decor
by Liz Fourez 
20 Comments

About Liz Fourez

View all posts by Liz Fourez

Related Posts

  • gallery wall artwork inspirationHow to Fill a Blank Wall with Art
  • Yarn Wrapped Christmas TreesYarn Wrapped Christmas Trees
  • Neutral Living RoomTone on Tone Woven Wall Art DIY
  • Are you curtains just a little too short? Home blogger Liz Fourez shares a few ways you can easily add extra length.How to Lengthen Curtains That Are Too Short
PREVIOUS: Fajita-Style Quesadillas
NEXT: Roasted Strawberry Topping

Comments

  1. Laura @ The Experimental Home says: June 28, 2013 at 3:33 pm

    I love that you made the tray to be easily changed. Gorgeous tray, inspiring foresight!

    Reply
  2. Lisa Longley says: June 28, 2013 at 5:37 pm

    I love it all Liz!! The table is gorgeous, the light looks magazine perfect there, and I am totally in awe of your talent with the tray! Awesome job!

    Reply
  3. Elizabeth F says: June 29, 2013 at 12:25 am

    Looks so good! I love the tray makeover. I love seeing how your kitchen is coming along.

    Reply
  4. marty (A Stroll Thru Life) says: June 29, 2013 at 2:42 pm

    What a fabulous makeover. Great tutorial too. I would love for you to link up to my Inspire Me party that will be live Monday evening. http://www.astrollthrulife.net. Hope to see you there. Hugs, Marty

    Reply
  5. Heather Whoneedsacape says: June 30, 2013 at 3:13 am

    So crafty! WOW – really looks nice! Saw you at Shaken together life!

    We would love it if you came over to Who Needs a Cape and linked up to our Super Sunday Party! It’s going on now! http://whoneedsacape.com/2013/06/super-sunday-party-4/

    Reply
  6. Our Pinteresting Family says: July 1, 2013 at 12:45 pm

    Your tray came out gorgeous! ๐Ÿ™‚

    Reply
  7. Kate says: July 1, 2013 at 6:37 pm

    amazing! the tray turned out beautifully

    Reply
  8. Ashleys Dandelion Wishes says: July 3, 2013 at 1:54 am

    I love this project! I love the pattern that you made with the wood! I would love it if you would come and link this up at my link party
    Dandelion Wishes Wednesday. I’m also pinning this ๐Ÿ™‚

    Reply
  9. Lyuba @ Will Cook For Smiles says: July 4, 2013 at 8:28 pm

    Girl, I love this project! It looks amazing!

    Reply
  10. srpprcrftr says: July 4, 2013 at 9:21 pm

    So like your little table, the white is great for using different center pieces and whatever else you decide to put on your table.
    Really smart to put the wood pieces for the tray on something so you can take it off if needed. That’s what I would have done also as I’m a changer at minutes notice, if that. I have a problem with commitment I guess.
    As much as I like ceiling fans (we live in western CO and it’s been in triple digits lately, no air conditioning, just a swamp cooler in front of mobile home) I think you were so right to take fan down to replace with that gorgeous light. The bulb is awesome, did you buy that at Lowe’s also? Somehow it didn’t look right with fan/light so close together before.
    Think with other projects hanging with wood the tray is perfect for the setting it’s in and love those brackets on each corner. Happy 4th.

    Reply
    • Liz Fourez says: July 10, 2013 at 1:17 pm

      Thank you so much! I got the light at Lowe’s and the bulb came with it. But I have seen those bulbs at Lowe’s before too!

      Reply
  11. Angela Conley says: July 5, 2013 at 3:56 am

    Wonderful job! I don’t think any other colors would look as great as yours do on the tray. It matches your space perfectly. And the Edison style pendant is so cool—very different and rustic.

    Reply
  12. [email protected] says: July 6, 2013 at 8:15 pm

    You are so smart to glue the wood to poster board!!! ๐Ÿ™‚ Love your new light, too!

    Reply
  13. deebi27 says: July 7, 2013 at 2:35 am

    The tray is fabulous! And your decision to put on posted board double fabulous. I would love to see the table, but the picture spot is empty ๐Ÿ™
    Thanks for the great wedding gift idea!

    Reply
  14. Roeshel says: July 7, 2013 at 6:39 pm

    You already know I love every little decorative DIY you’ve been working on for your kitchen. ๐Ÿ™‚ The table looks great (LOVE that light) and the tray is gorgeous! I’m including a link back in this week’s highlights. Thanks for sharing your creativity, Liz!

    Reply
  15. Christine says: July 9, 2013 at 10:35 am

    Congrats!! You have been featured at The DIY Dreamer!! YAY! Come on over and grab your featured button, you deserve it ๐Ÿ™‚
    http://thediydreamer.com/from-dream-to-reality/creations-features-74/

    Reply
  16. Emily Morgenstern says: July 10, 2013 at 3:15 pm

    I love this project!! And, that light?? Amazing!

    I featured you this week: http://www.52mantels.com/2013/07/diy-home-decor.html

    Reply
  17. Trish - Mom On Timeout says: July 10, 2013 at 9:54 pm

    Your room looks fabulous Liza and this tray is just GORGEOUS! Pinned and featuring tonight!

    Reply
  18. redesignedbym says: July 15, 2013 at 5:30 am

    I’ve been wanting to do a tray just like this! So jealous you beat me to it. ๐Ÿ˜‰ I love your version and especially love that you made it so the design could be changed out. I am the same with with changing my mind! Well done! ~M.

    http://redesignedbym.wordpress.com/

    Reply
  19. Kishore says: August 22, 2013 at 1:22 pm

    very simple but beautiful makeover

    Reply

Leave Your Comments Cancel reply

Your email address will not be published. Required fields are marked *

Liz Fourez started Love Grows Wild in 2012 with a passion for interior design and homemaking and a dream to help others create a home they love.  From simple project tutorials, to holiday and entertaining ideas, to her journey renovating a 1940’s farmhouse, Liz demonstrates how to create a beautiful and inviting home with a handmade touch. She turned her signature cozy, neutral style into a best-selling book in 2016 and continues to inspire readers with her captivating photography and easy decorating ideas. Read more about Liz > > > >

LOOKING FOR SOMETHING?

FOLLOW ALONG

  • contact
  • MEET LIZ
  • advertise
  • privacy policy/disclosure
  • Blog

Copyright © 2025 · Prima Donna theme by Georgia Lou Studios

COPYRIGHT ยฉ 2017 ยท DESIGN + BRAND: BLISS AND TELL BRANDING COMPANY